This site is supported by our readers. We may earn a commission, at no cost to you, if you purchase through links.

You spot the bird, raise your camera, and press the shutter—but the image shows a distant blur against a messy background. Turning good bird sightings into sharp, compelling photos requires more than luck. Modern mirrorless cameras with fast autofocus can lock onto a bird’s eye in milliseconds, and telephoto lenses bring faraway subjects close enough to see individual feathers.
But gear alone won’t get you there. You also need the right settings to freeze wing beats, composition techniques that isolate your subject, and fieldcraft that lets you approach without spooking your quarry.
Master these fundamentals, and you’ll transform fleeting encounters into images that capture the beauty and behavior of wild birds.
Table Of Contents
- Key Takeaways
- Essential Camera Gear for Bird Photography
- Optimal Camera Settings for Bird Photos
- Best Times and Locations to Photograph Birds
- Approaching Birds Without Disturbance
- Composing Striking and Dynamic Bird Photos
- Post-Processing Tips for Bird Photography
- Top Cameras and Lenses for Bird Photography
- Supporting Bird Conservation Through Photography
- Frequently Asked Questions (FAQs)
- What camera settings are best for bird photography?
- What shutter speed is best for bird photography?
- How do I photograph birds in heavy rain?
- What are the best camera bags for birding?
- How do I clean my telephoto lens safely?
- Should I shoot in RAW or JPEG format?
- How do I photograph nocturnal or night birds?
- Conclusion
Key Takeaways
- Fast shutter speeds of 1/2000 second or higher freeze wing motion, while telephoto lenses of 300mm+ bring distant birds close enough to capture sharp feather detail.
- Dawn and dusk golden hour lighting delivers warm tones and low contrast that reveal plumage texture better than harsh midday sun, while wind drops and birds become most active.
- Approaching birds requires camouflage, slow movements under 70 centimeters per step, and downwind positioning at 10-30 meters to avoid spooking subjects before you get the shot.
- Rule of thirds composition with sharp eye focus and clean backgrounds transforms snapshots into compelling images that create emotional connections with viewers.
Essential Camera Gear for Bird Photography
The right camera gear can make or break your bird photography experience. You don’t need the most expensive setup, but certain features will help you capture sharp, stunning shots consistently.
Long lenses and quiet shutters help you stay far enough back to respect wildlife boundaries while still getting professional results, a key part of ethical bird photography practices.
Let’s look at the essential equipment that’ll set you up for success in the field.
A solid pair of binoculars and a reliable field guide are your starting point—check out these optical equipment reviews to find gear that fits your budget and birding style.
Choosing Between DSLR and Mirrorless Cameras
You’ll face a real decision between DSLR and mirrorless camera equipment. Each system brings unique strengths to bird photography. Here’s what you need to weigh:
For beginners working within tight financial constraints, DSLRs typically deliver superior value in budget bird photography setups compared to their mirrorless counterparts.
- Sensor size in mirrorless bodies delivers higher resolution and stronger low-light performance than entry-level DSLRs
- Autofocus speed improves with mirrorless on-sensor tracking that locks onto bird eyes using AI detection
- Camera weight drops with mirrorless designs, making long field sessions more comfortable
- Burst mode and image stabilization pair well in modern mirrorless camera settings for sharp flight shots
Photographers interested in lens variety and performance differences can benefit from reviewing a detailed mirrorless vs DSLR comparison.
Importance of Telephoto Lenses (300mm+)
Your camera body won’t matter if you don’t pair it with telephoto lenses of 300mm or longer. That focal length brings distant birds into sharp detail and gives you the reach you need for flight shots.
These focal lengths also help you work with natural light in bird photography, since you can maintain distance while capturing well-lit subjects during golden hour.
A telephoto zoom with solid optical quality and lens stabilization helps you freeze motion without camera shake. Proper camera balance and camera settings for bird photography techniques complete the setup.
To understand more about the benefits and types of telephoto lenses, you can explore this overview of telephoto lens applications and benefits.
Weather Sealing and Durability
Bird photography takes you into rain, wind, and salt spray, so weather proofing your camera equipment for bird photography isn’t optional. Look for bodies with silicone sealant materials around doors and ports.
Pair that protection with shooting during golden hour when soft light reduces the need for extreme exposure adjustments that can reveal dust on your sensor.
Rugged design with magnesium alloy casings protects internal electronics during durability tests.
Quality moisture control keeps sensors safe when you’re shooting through morning fog or coastal mist with your telephoto lenses and optimized camera settings.
Benefits of High-Speed Continuous Shooting
Once your gear can handle the elements, you need burst mode to capture split-second moments. High-speed continuous shooting at 10 to 20 frames per second freezes rapid wing movements when paired with fast shutter speeds of 1/2000 second or faster.
Subject tracking with bird-detection autofocus locks onto eyes across the entire sequence, giving you multiple framing options and peak action shots you’d miss with single frames.
Optimal Camera Settings for Bird Photos

Getting your camera settings right can make the difference between a blurry mess and a sharp, stunning shot. Birds move fast and don’t wait for you to fumble with dials, so you need to nail the basics before you even raise your camera.
Here are the key settings that’ll help you freeze motion and capture the details that bring your bird photos to life.
Fast Shutter Speeds to Freeze Motion
Freezing a bird mid-flight requires shutter speeds that work faster than the blink of an eye. You’ll want to shoot at 1/1000 second or faster to capture sharp wing movements and halt motion blur.
- Start at 1/2000 second for small songbirds with rapid wingbeats
- Push to 1/4000 second for raptors diving or banking sharply
- Use high speed bursts to capture peak action moments
- Enable shutter priority mode for consistent freeze frame techniques
Aperture and Depth of Field Choices
Your aperture control shapes how much of the frame stays sharp from foreground to background. A setting of f/5.6 to f/8 offers sweet-spot sharpness while keeping your bird in focus and melting distracting backgrounds.
Wide apertures like f/4 create shallow depth of field for striking subject isolation.
Focal length and distance to your subject also affect field management, so adjust based on the scene.
ISO Settings for Low Noise
Keeping ISO at base levels—usually 100 or 200 delivers the cleanest shots when light allows. In bright conditions, low ISO preserves tonal range and color accuracy for sharp feather detail.
Auto ISO with a ceiling of 800 or 1600 prevents excessive noise during low light shooting. Exposure compensation and proper camera calibration help you maintain brightness without pushing ISO higher.
Noise reduction in post works best when you’ve kept ISO optimization in mind from the start.
Using Autofocus and Tracking Modes
Continuous autofocus keeps moving birds crisp as they dart across your frame. Your camera settings determine whether you nail sharp shots or watch moments blur away.
- AF C mode locks onto birds and adjusts focus continuously while you track their movement.
- Eye detection prioritizes the bird’s eyes for intimate, sharp portraits during close encounters.
- Zone AF covers broader areas when birds move unpredictably through branches or open sky.
- Back button focus separates focus control from shutter speed for faster reactions.
- Burst shooting paired with tracking captures multiple frames as birds shift position mid-flight.
Best Times and Locations to Photograph Birds

Location and timing can make or break your bird photography. The right spot at the right hour gives you better light, more active subjects, and clearer shots.
Here’s how to find where birds gather and when they’re most cooperative.
Scouting for Bird Hotspots
Finding the right spots takes more detective work than most beginners realize. Use eBird Explore to identify hotspots by species, filtering for wetlands, woodlands, or edge habitats where birds concentrate. Check regional birding guides and park inventories to compare density.
Map perch heights and flight paths in a simple notebook. Listen for vocalizations before visual confirmation—your ears often lead you to the best frames.
Benefits of Dawn and Dusk Lighting
Soft lighting at dawn and dusk transforms bird photography. Golden hour delivers warm tones that enrich plumage without oversaturation, while low contrast preserves eye detail and feather texture. Gentle shadows reveal dimensionality across wings and beaks.
These photography tips matter because atmospheric haze clears and wind drops, stabilizing perches. Your wildlife photography composition improves when rim lighting highlights contours against simplified backgrounds during outdoor photography sessions.
Identifying Bird Habitats and Perches
Once you’ve nailed the light, look for habitat features that draw species in. Aquatic habitats like ponds attract waterfowl to shoreline perches, while forest edges pull passerines into midstory saplings. Grasslands offer fence-line bird perches for silhouettes.
Understanding bird behavior and habitat ties—feeding grounds, nesting sites, migration patterns—lets you predict where avian behavior and habitat overlap, giving you reliable shooting locations.
Approaching Birds Without Disturbance

Getting close to birds without spooking them is where patience meets skill. You need to think like a hunter—moving with purpose but without pressure.
Here are three core techniques that will help you earn their trust and capture the shot.
Using Camouflage and Natural Cover
To master wildlife stealth and natural concealment, blend into your surroundings with local vegetation—leaves, branches, and grasses—draped over yourself and your gear. This field craft skill breaks up your outline at eye level.
Position behind rocks or logs to create a simple bird blind. Camouflage techniques like matching earth tones to your habitat make bird photography less intrusive while honoring bird behavior and habitat.
Quiet Movements and Patience
Once you’ve picked your cover, silence becomes your best ally. A slow approach cuts bird startle by 40 percent, letting you nail silent observation without chasing shots.
Patient waiting means:
- Moving softly at 60 to 70 centimeters per step
- Pausing 5 to 15 minutes for birds to return
- Breathing steadily to keep posture calm
- Adjusting gear between visits, not during
- Blending clothing with terrain colors
These stealth techniques honor bird behavior while sharpening your wildlife photography tips.
Techniques for Getting Closer Safely
Beyond patience, your camera techniques need smart pathfinding. Scout routes early to map zigzag angles that cut direct sight lines. Wind direction matters—approach downwind so scent and movement cues stay hidden.
Keep your camera ready but avoid jerky lens raises. A slow approach respecting a safe distance of 10 to 30 meters honors bird behavior while boosting your wildlife photography tips with quiet gear and camouflage tips.
Composing Striking and Dynamic Bird Photos
Getting the shot is one thing—making it unforgettable is another. The way you frame your subject can transform a simple bird photo into something that stops people mid-scroll.
Here are four composition strategies that’ll give your images real impact.
Applying The Rule of Thirds

Grid placement transforms your bird photography with minimal effort. Position your subject along the vertical or horizontal lines, not dead center. This camera technique instantly creates balanced image composition.
Align the bird’s head at one of the four intersecting points for maximum impact. Place horizon lines on the top or bottom third in nature photography. Leave negative space where the bird faces to show vigorous movement and direction.
Focusing on The Bird’s Eyes

Sharp eye focus separates amateur snapshots from professional bird photography. The bird’s eye draws viewers in and creates an emotional connection with your subject.
Sharp eye focus creates the emotional connection that separates professional bird photography from amateur snapshots
- Select single-point autofocus modes to lock onto the eye instead of relying on wide-area detection
- Enable eye tracking features in modern mirrorless cameras for automatic focus on avian eye anatomy
- Position your focal points directly over the nearest eye when shooting profile or angled poses
- Test autofocus sensitivity on perched subjects before attempting challenging flight photography techniques
- Monitor shutter speed above 1/1000 second to preserve eye detail and leverage exceptional bird vision clarity
Creating Simple, Clean Backgrounds

A distraction-free backdrop transforms bird photography by isolating your subject from visual clutter. Use natural frames like distant foliage or open sky to keep compositions simple. Position yourself to increase bird-background distance for smooth background blur through depth control.
Shoot during soft morning light for even illumination. Neutral tones work best—they let vibrant plumage stand out without competing colors or busy patterns affecting your outdoor photography techniques.
Capturing Birds in Action or Flight

Flight photography demands anticipation and fast reflexes. Track the bird’s flight patterns before you shoot—watch how they launch, turn, and land. Set your shutter speed to at least 1/2000th to freeze wing movement during aerial photography. Use continuous autofocus and follow their path with smooth panning.
Action shots reward patience—study bird behavior, position yourself along predictable routes, and fire in bursts when they take off.
Post-Processing Tips for Bird Photography

Getting the shot is just the beginning of your journey. The right post-processing techniques can transform a good bird photo into something truly special.
Let’s walk through the essential editing steps that’ll bring out the best in your images without losing their natural beauty.
Enhancing Color and Detail
Your camera captured the moment, but post-processing brings your bird photography to life. Start with color grading to separate your subject from the background—lift blues and greens subtly while keeping feather detail intact. Use saturation control to boost muted tones without oversaturating.
Apply noise reduction carefully to smooth color noise from high ISO settings, then use image sharpening to highlight fine plumage and eye details.
Cropping for Better Composition
Cropping transforms good bird photography into great shots by removing distractions and directing attention where it belongs. Use strategic cropping to tighten the image framing around your subject, removing empty space while applying the rule of thirds for balance.
Adjust aspect ratio to fit birds in flight without clipping wings. Leave negative space in front of your bird’s gaze to create movement and energy during image editing.
Sharpening and Noise Reduction
After cropping, sharpening tools and noise reduction bring your bird photos to life through careful image editing. Apply edge enhancement to highlight feather detail while using luminance and color noise reduction to smooth grain from high ISO shots.
Balance these postprocessing techniques in your digital photography workflow—too much sharpening creates halos, while aggressive noise reduction sacrifices image clarity and detail preservation. Photography equipment alone can’t fix everything; proper image editing for bird photography requires restraint.
Avoiding Over-Editing for Natural Results
Finding the right balance in image editing for bird photography means your digital photography stays true to the scene. Keep natural color intact with subtle edits—gentle exposure adjustments and minimal sharpening preserve authentic texture better than heavy postprocessing.
Compare your work against the original file to ensure photography techniques improve rather than transform. That’s how you maintain the wild beauty you captured.
Top Cameras and Lenses for Bird Photography
The right gear makes a real difference when you’re tracking fast-moving birds in the field. A few cameras and lenses stand out in 2026 for their speed, autofocus, and reach.
Here’s what experienced bird photographers are using to capture sharp, detailed shots.
1. Nikon Z8 Mirrorless Camera
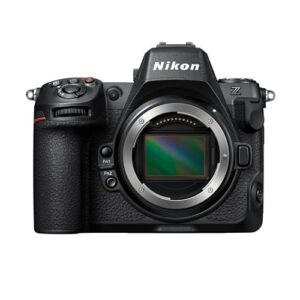
Speed meets precision in the Nikon Z8, a mirrorless powerhouse built for bird shooters. You’ll capture 20 frames per second in RAW with full autofocus tracking. The 45.7 megapixel sensor delivers sharp detail in feathers and plumage.
Subject detection locks onto birds automatically, while eye autofocus keeps focus where it matters. The weather-sealed body manages rain and cold without hesitation.
At 1.8 pounds, it won’t wear you down during long waits. Pre-release capture grabs moments before you press the shutter.
| Best For | Wildlife and bird photographers who need lightning-fast autofocus and high-speed shooting to capture split-second moments in the field. |
|---|---|
| Sensor Resolution | 45.7MP |
| Mount Type | Nikon Z |
| Video Capability | 8K/60p |
| Weight | 1.8 lbs |
| Target User | Professional |
| Price Range | $3,496.95 |
| Additional Features |
|
- 20 fps continuous shooting with full autofocus tracking keeps up with fast-moving birds and wildlife
- Advanced subject detection and eye autofocus automatically lock onto birds for sharp, perfectly focused shots
- Weather-sealed body at just 1.8 pounds combines durability with portability for all-day shooting
- High price point at $3,496.95 puts it out of reach for hobbyists and budget-conscious photographers
- Battery life falls short during extended shooting sessions, especially with intensive autofocus use
- Video recording can overheat in warm weather, limiting its usefulness for hybrid photo/video work
2. Nikon Z 600mm Telephoto Lens
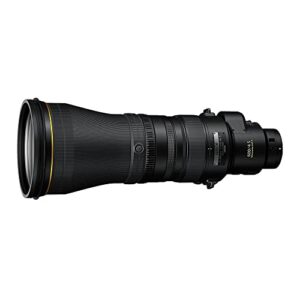
The Z 600mm f/6.3 VR S pairs beautifully with the Z8 body. At 3.1 pounds, you can shoot handheld without a tripod on most outings. The built-in vibration reduction gives you several stops of stabilization for sharper images at slower shutter speeds.
Phase Fresnel optics keep chromatic aberration low while maintaining edge-to-edge sharpness. Weather sealing protects against moisture and dust during long field sessions. The silent autofocus motor won’t spook nervous birds at close range.
| Best For | Professional wildlife and sports photographers who need super-telephoto reach in a relatively lightweight package and shoot with Nikon Z-mount cameras. |
|---|---|
| Sensor Resolution | N/A (Lens) |
| Mount Type | Nikon Z |
| Video Capability | N/A (Lens) |
| Weight | Lightweight design |
| Target User | Professional |
| Price Range | $14,696.95 |
| Additional Features |
|
- Incredibly lightweight at 3.1 pounds, making handheld shooting practical for extended periods
- Built-in 1.4x teleconverter extends reach to 840mm without carrying extra gear
- Silent autofocus motor is perfect for wildlife photography where noise can disturb subjects
- Expensive at nearly $15,000, putting it out of reach for hobbyists and budget-conscious photographers
- Only compatible with Nikon Z-mount cameras, limiting its use to that specific system
- Despite weight reduction, still requires careful handling and may benefit from monopod support for longer sessions
3. Canon EOS R1 Mirrorless Camera
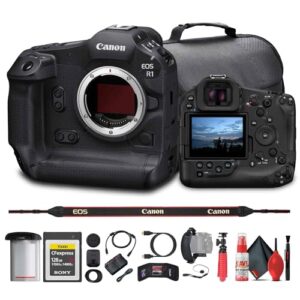
Canon’s R1 pushes mirrorless performance to elite levels with a 24MP stacked sensor and DIGIC X processor. You’ll capture birds in flight at blistering frame rates while Dual Pixel Intelligent AF locks onto animal eyes with AI-driven precision. Pre-capture shooting grabs moments before you press the shutter—perfect for unpredictable takeoffs.
The body manages 6K RAW video and features weather-sealed construction for harsh field conditions. At $6,399.95, it’s a serious investment that delivers professional-grade speed and tracking when every split-second counts.
| Best For | Professional sports and wildlife photographers who need lightning-fast autofocus and high frame rates to capture split-second action in challenging conditions. |
|---|---|
| Sensor Resolution | 24MP |
| Mount Type | Canon RF |
| Video Capability | 6K/60 Raw |
| Weight | Professional weight |
| Target User | Professional |
| Price Range | $6,399.95 |
| Additional Features |
|
- Stacked sensor with AI-powered Dual Pixel AF locks onto fast-moving subjects with exceptional accuracy, especially for tracking animals and athletes
- Pre-capture shooting records moments before you press the shutter, so you never miss unexpected action like a bird taking flight
- Weather-sealed body handles 6K RAW video recording, making it versatile enough for both high-end photography and professional videography work
- $6,399.95 price tag puts it out of reach for hobbyists and most amateur photographers
- Only works with Canon RF lenses, limiting your lens options and requiring investment in a new system if switching brands
- High-resolution files eat up storage quickly, requiring expensive CFexpress cards and significant hard drive space
4. Sony Alpha a1 II Mirrorless Camera
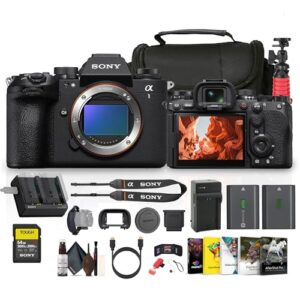
Sony’s a1 II combines a 50.1MP stacked sensor with blazing 30 fps continuous shooting to freeze every feather detail. You’ll track fast-moving subjects with AI-powered autofocus that locks onto bird eyes across the frame. The 8.5-stop image stabilization keeps telephoto shots sharp when handholding long lenses at dawn.
At $7,106, this flagship delivers 8K video and professional-grade performance for serious wildlife work. Its high-resolution sensor captures intricate plumage while maintaining excellent low-light capability during early morning shoots.
| Best For | Professional wildlife, sports, and action photographers who need the fastest autofocus and burst speeds to capture split-second moments with maximum detail. |
|---|---|
| Sensor Resolution | 50MP |
| Mount Type | Sony E |
| Video Capability | 8K/30p |
| Weight | Professional weight |
| Target User | Professional |
| Price Range | $7,106.00 |
| Additional Features |
|
- 30 fps continuous shooting with 50MP resolution freezes fast action without missing critical moments
- AI-powered autofocus with subject recognition locks onto bird eyes and maintains tracking across the entire frame
- 8.5-stop image stabilization enables sharp handheld telephoto shots in challenging lighting conditions
- $7,106 price point puts it out of reach for hobbyists and emerging photographers
- 50MP files create massive storage demands and require powerful computers for efficient editing
- Requires investment in high-quality lenses and CFexpress Type A cards to fully utilize the camera’s capabilities
Supporting Bird Conservation Through Photography

Bird photography isn’t just about getting great shots—it’s also a powerful way to protect the species you love. Your images can inspire others to care about birds and their habitats while you practice responsible fieldwork.
Here’s how you can turn your passion into meaningful conservation action.
Raising Awareness With Your Photos
Your bird photography can spark real conservation impact when you share it strategically. Post images on social platforms with hashtags that guide viewers toward wildlife conservation organizations and awareness campaigns.
Pair photos with brief captions explaining threats birds face and actions people can take. Partner with local groups to boost conservation efforts through visual storytelling.
Track engagement to see which conservation photography drives community engagement and donations.
Ethical Wildlife Photography Practices
Responsible wildlife photography puts bird welfare first, ensuring your passion aids conservation rather than harms it. Keep at least 25 yards between you and most birds—roughly two school buses—to avoid causing stress or flushing.
- Watch for warning signs: alarm calls, freezing, or repeated glances mean you’re too close
- Skip call playback and baiting: these tactics disrupt feeding and breeding behavior
- Respect nests from a distance: use long lenses instead of approaching active nests
Getting Involved With Conservation Organizations
You can turn your lens into a conservation tool by partnering with groups like Audubon. Volunteer photography roles let you document habitat projects and community engagement events.
Join citizen science platforms such as eBird to submit images that track migration patterns. Conservation partners often need storytelling projects—photo essays that highlight conservation efforts.
Reach out to local organizations to explore how your conservation photography aids their work.
Frequently Asked Questions (FAQs)
What camera settings are best for bird photography?
When kingfishers dive, you’ll need shutter speeds around 1/2500 or faster to freeze their motion. Set aperture to f/3, enable continuous autofocus, and use burst mode for sharp results.
What shutter speed is best for bird photography?
You need a fast shutter speed of at least 1/2000 second to freeze bird motion in flight. For perched subjects, 1/800 second works well.
Adjust camera settings based on available light and your subject’s movement.
How do I photograph birds in heavy rain?
When storms roll in, your camera equipment for bird photography needs serious waterproofing. Use a weather-sealed body with a rain cover, lens hood, and microfiber cloth to protect your outdoor photography tips investment in wet conditions.
What are the best camera bags for birding?
Look for weather sealing and padded dividers in your camera bag. Choose backpack designs with quick-access panels for fast lens changes. Verify compartments fit telephoto lenses up to 600mm comfortably.
How do I clean my telephoto lens safely?
Don’t let fear of damaging your telephoto lens keep you from maintaining it.
Use a blower for dust, wipe gently with microfiber, and apply alcohol-free cleaning fluid to cloth—never directly on glass.
Should I shoot in RAW or JPEG format?
Shoot in RAW for maximum editing flexibility and image quality in bird photography. RAW benefits include extended tonal range and detail retrieval, though JPEG limitations like smaller file size offer faster workflows when post-processing isn’t essential.
How do I photograph nocturnal or night birds?
Capturing night birds isn’t for the faint of heart. Push your ISO to 1600-6400, open your aperture to f/8-f/4, and mount your tripod.
Use moonlight photography techniques with a silent approach for nocturnal behavior shots.
Conclusion
You don’t need the most expensive gear to start seeing results. Even with a modest telephoto lens and practice, you’ll notice sharper images and more engaging compositions.
The tips for capturing better bird photos with cameras covered here—settings, fieldcraft, timing, and composition—work together to turn ordinary sightings into striking photographs.
Each outing teaches you something new about light, behavior, and patience. Keep shooting, stay respectful of wildlife, and watch your skills grow with every frame.
- https://www.inaturalist.org/
- https://merlin.allaboutbirds.org/?utm_source=adgrant&utm_medium=cpc&utm_campaign=merlin&utm_content=merlinbirdguide&gad_source=1&gclid=Cj0KCQiAuqKqBhDxARIsAFZELmICRIjMAd1zyq_-OW1NUHyIGIG7knosKOVnz16-LbKs30q5TgiQh1kaAvFZEALw_wcB
- https://smallsensorphotography.com/cropping-bird-photographs
- https://www.allaboutbirds.org/news/tips-for-great-bird-photos-dont-crop-too-closely/
- https://www.edinz.com/2014/11/bird-photography-tips-cropping/