This site is supported by our readers. We may earn a commission, at no cost to you, if you purchase through links.

Most photographers can nail a portrait of a perched cardinal, but the moment that bird launches into the air, sharp focus becomes a gamble. Photographing birds in flight demands precision timing, split-second decisions, and camera settings that contradict everything you learned shooting stationary subjects.
Your autofocus hunts, your shutter speed freezes the wings but underexposes the body, or worse—you track perfectly but capture nothing but sky because the bird dipped at the last microsecond. The gap between wanting the shot and getting the shot comes down to mastering a specific combination of shutter speeds (1/1250 minimum), aperture selection for background separation, and autofocus modes that predict erratic movement.
Once you dial in these technical foundations and learn to read flight patterns before they happen, you’ll transform frustrating misses into frame-worthy captures.
Table Of Contents
- Key Takeaways
- Essential Camera Settings for Birds in Flight
- Techniques for Capturing Birds in Motion
- Composing Impactful Flight Photos
- Best Locations and Timing for Flight Photography
- Top Equipment for Photographing Birds in Flight
- Frequently Asked Questions (FAQs)
- What shutter speed is needed for birds flying?
- What is the best focal length for birds in flight?
- What ISO should I use for shooting birds?
- What is the best AF mode for bird photography?
- What camera settings are best for birds in flight?
- How to get pictures of birds in flight?
- What AF mode should I use for bird photography?
- How many focus points for birds in flight?
- How do weather conditions affect bird flight photography?
- What are the best times of day for photographing birds?
- Conclusion
Key Takeaways
- You need a minimum shutter speed of 1/1250 second (pushing to 1/2000+ for fast species), an aperture between f/5.6 and f/8 for sharp focus with background separation, and continuous autofocus with tracking modes that predict erratic movement patterns.
- Master the panning technique by matching your camera’s lateral motion to the bird’s flight path while maintaining smooth follow-through after pressing the shutter, transforming background blur into intentional motion emphasis rather than accidental camera shake.
- Position yourself where birds fly into headwinds and against clean backgrounds like open sky or distant water, leaving three times more space ahead of the bird than behind to create visual flow that pulls viewers into the frame.
- Success comes from reading flight patterns before they happen—scout productive sites where multiple habitats converge, arrive during golden hours when species follow predictable commute routes, and anticipate takeoff cues instead of reacting to motion you’ve already missed.
Essential Camera Settings for Birds in Flight
Nailing your camera settings is the difference between a blurred mess and a tack-sharp raptor frozen mid-strike.
For a deeper dive into shutter speed, ISO, and aperture adjustments that lock in crisp detail, check out these essential tips for capturing better bird photos with cameras.
You’ll need to balance three core elements—shutter speed, aperture, and ISO—while configuring your autofocus system to track erratic flight paths.
Let’s break down each setting so you can shoot with confidence instead of guesswork.
Choosing The Right Shutter Speed
Start with 1/1250 second to freeze action and eliminate motion blur—your baseline for sharp birds in flight photography. If wings still streak, push to 1/2000 second in bright conditions.
When tracking slower species or panning deliberately, you can drop to 1/500 second, though faster shutter speed control remains your safety net. Shutter priority mode lets you lock speed while autofocus tracks movement.
Understanding how shutter speed affects image exposure can help you achieve the desired sharpness or motion blur in your photographs.
Ideal Aperture and Depth of Field
Set your aperture between f/5.6 and f/8 for sharp heads and bodies while keeping backgrounds softly blurred.
Wider settings like f/4 create bokeh effects that isolate the bird, but depth of field shrinks fast—miss focus by inches and you’ll catch tail feathers instead of eyes. Longer focal lengths (400mm plus) naturally compress depth perception, so aperture control becomes your primary field management tool when autofocus locks on.
To better understand how aperture controls depth of field, consider how both the f-number and lens focal length influence the zone of focus in your images.
Adjusting ISO for Lighting Conditions
Once aperture locks depth of field, ISO becomes your sensor sensitivity lever across changing lighting conditions—bright daylight starts at ISO 100 to 400, overcast skies push 800, dawn or dusk often demand 1600 or higher.
Auto ISO modes let you maintain shutter speed while the camera adjusts exposure, though high ISO techniques introduce noise that softens detail, so balance range management against motion blur for clean flight shots.
Autofocus Modes and Focus Points
Sensor sensitivity won’t save you if your autofocus system can’t lock onto a fast-moving subject—modern cameras offer AI Servo (or continuous AF) to track motion, paired with focus point modes that determine where the camera hunts for sharpness. Here’s what you need to configure:
- AI Servo or continuous autofocus modes predict subject motion from prior frames
- Single point AF delivers highest accuracy when you know exactly where the bird will appear
- Flexible area autofocus shifts between clustered points as the subject moves across the frame
- Eye detection prioritizes the bird’s eye for real-time sharpness (many bodies support animal AF with updated firmware)
- Zone AF groups multiple points into a larger region, forgiving when you can’t precisely center the subject
Toggle between single point for perched takeoffs and adaptive or zone tracking for erratic flight paths.
Custom Shooting Modes for Quick Access
Mode configuration lets you store entire camera settings under a single dial position—Auto Focus method, Exposure Presets, Shutter Speeds, metering, and drive mode—then recall everything in one click. Map Custom Buttons to jump between Av Mode for perched subjects and Tv Mode for action, or build a Custom Shooting Mode that pairs back-button focus with high-speed continuous drive.
Here’s how to organize User Settings for fast switching:
| Mode Preset | Best For |
|---|---|
| Mode 1: High-speed burst, AI Servo, f/8 | Fast erratic flight |
| Mode 2: Single-point AF, f/5.6, +1 EV comp | Backlit takeoffs |
| Mode 3: Zone AF, mechanical shutter, ISO auto | Low-light action |
| Mode 4: Center point, 1/2000 s, highlight priority | Bright sky silhouettes |
Rename each Camera Settings profile in-menu so you recognize it instantly during a feeding frenzy.
If you’re still deciding which gear to invest in, check out the best bird cameras for backyard bird watching to find one that fits your setup.
Techniques for Capturing Birds in Motion
Getting sharp images of birds in flight isn’t about luck—it’s about smooth technique. You’ll need to master smooth panning motions, decide when to freeze or blur wing movement, and figure out whether to shoot handheld or supported.
The following techniques will help you track birds with precision and capture the action you’re after.
Mastering The Panning Technique

Panning isn’t about spinning wildly and hoping for magic—it’s a disciplined dance where your camera settings and smooth panning motion work together.
Panning is a disciplined dance between smooth motion and camera settings, not wild spinning and wishful thinking
Match your panning speed to the bird’s lateral movement, keeping your subject sharp while the background dissolves into motion blur. Use continuous autofocus with back-button focus tracking, then follow through after you press the shutter for that buttery-smooth finish every rebellious shooter craves.
Freezing Vs. Blurring Wing Motion

You control wing behavior with shutter speed—crank it to 1/1000 second or faster to freeze individual feathers mid-flap, or drop down to 1/60–1/125 second to blur them into streaks of motion.
Pair your fast shutter settings with continuous autofocus tracking the bird’s body, then use panning to intensify blur effect techniques or keep everything locked sharp for motion freeze methods that capture every wingbeat.
Handheld Vs. Tripod Shooting Tips

You’ll gain freedom with handheld photography when you master camera grip and stability techniques—tuck your elbows, breathe between bursts, and rotate from the torso for smooth panning methods that track birds in flight.
Tripods with quality tripod heads eliminate shake for telephoto lenses, but they lock you to one spot; toggle lens stabilization off on tripods to prevent micro-vibration conflicts that blur shutter speed precision.
Practicing With Different Bird Types

Start with large birds, slow-flying birds—herons and pelicans give you time to track wing movement and hone your flight pattern analysis before tackling faster species.
Once you’re locking focus consistently, move to medium birds like ducks where wing beats demand sharper reflexes and higher shutter speeds for feather detail capture.
Small passerines test your limits: their erratic species behavior and rapid bursts separate casual shooters from those who’ve mastered birds in flight photography through relentless practice.
Composing Impactful Flight Photos

You’ve nailed the technical side—now it’s time to make your flight shots visually compelling. Composition separates snapshots from images that stop viewers in their tracks, and the rules shift when your subject is airborne and moving fast.
Here’s how to frame birds in flight so every shot feels intentional, energetic, and alive.
Positioning for Clean Backgrounds
Your choice of background angles transforms cluttered chaos into clean lines that let the bird own the frame. Position yourself so a simple landscape—open sky, distant water, or uniform foliage—sits behind your subject, then use depth control through aperture (f/8 works well) to blur distractions into visual isolation. Birds in flight photography techniques demand this discipline: photographing birds against mess kills composition, while camera settings paired with smart positioning deliver keeper shots.
- Scout angles where sky or distant terrain provides neutral backdrops
- Shoot slightly elevated to eliminate ground clutter from your frame
- Keep the bird three to five feet from the background for separation
- Use overcast light to minimize harsh shadows that complicate clean backgrounds
Framing and Leaving Space in Flight Direction
Once your background’s clean, framing demands you master lead room techniques and flight direction space management.
Leave more room ahead of the bird than behind—three times as much works for most shots—so your subject flies into the frame, not out of it.
This motion emphasis through bird placement transforms static composition into kinetic storytelling, a cornerstone of birds in flight photography techniques that separates keepers from deletes.
Using The Rule of Thirds in Flight Shots
Place your bird near a power point where gridlines intersect—this grid placement naturally pulls the eye to the head while emphasizing flight paths and bird orientation. Align the subject along the left or right vertical third, keeping space ahead for motion direction.
When background contrast is strong, position the horizon on the upper or lower line to achieve visual balance, transforming your birds in flight photography tips into professional image composition that draws the viewer’s eye through deliberate camera settings for bird photography.
Balancing Dramatic Cropping and Subject Isolation
Tight cropping techniques emphasize wing details and speed, but you’ll need background control to prevent clutter from competing with your subject framing.
Clip wing tips or tail feathers deliberately to heighten drama while maintaining image balance through negative space in the flight direction.
Fast shutter speed preserves feather sharpness, and clean composition ensures visual flow guides viewers straight to your bird without distraction—these photography techniques transform ordinary shots into powerful bird photography.
Best Locations and Timing for Flight Photography

Finding the right place at the right time can make or break your flight photography session, no matter how dialed-in your camera settings are. Where birds fly, how they move, and when they’re most active all depend on location-specific factors you can learn to predict and exploit.
Here’s how to scout productive sites, read the conditions, and position yourself for consistent success.
Identifying Productive Birding Sites
You want productive birding locations that concentrate species where multiple habitats converge—think wetlands edged by riparian corridors or open shorelines flanked by woodlots. Habitat analysis reveals the sweet spots for wildlife photography:
- Mixed microhabitats (reeds, cattails, open water) within short distances draw diverse flocking birds year round
- Established trails and observation overlooks at public reserves offer site accessibility while minimizing disturbance
- Migration corridors near coastal estuaries or inland lakes spike during spring and fall, aligning bird migration windows with weather patterns
Location scouting improves when you prioritize sites with documented hotspot notes in local birding guides.
Observing Bird Behavior and Flight Patterns
Reading flock behavior reveals flight patterns before you even raise your camera—murmuration synchronization happens through wing position shifts visible within 50 meters.
Track wingbeat frequency to distinguish species: swallows hit 15-30 Hz, while raptors cruise at 2.5 Hz.
During bird migration windows, watch experienced adults lead juveniles along terrain features, and anticipate foraging routes by studying tide lines and prey movement for wildlife photography techniques that actually deliver keepers.
Utilizing Wind and Light Direction
Wind patterns dictate flight paths, so position yourself where birds turn into headwinds—you’ll gain time to track them with better shutter timing.
Light angles between 15 and 45 degrees from behind you highlight wing detail without harsh shadows, critical for wildlife photography.
Watch atmospheric effects like mist or dust to adjust camera settings for birds in flight, using faster shutter speed (1/2000+) when lighting conditions shift unpredictably.
Scouting and Timing for Optimal Conditions
Before dawn, site reconnaissance reveals golden hours when your target species commute along predictable corridors—that’s when lighting conditions align with bird behavior.
Seasonal timing matters:
- Scout birding locations after migratory pulses for peak activity
- Plan sessions when vegetation allows clear sightlines
- Monitor weather forecasting for post-front flight bursts
- Track light patterns across different times
- Map flight pathways between roosts and feeding zones
Photography tips: arrive early, stay flexible.
Top Equipment for Photographing Birds in Flight
The right gear separates a frustrating day in the field from a portfolio full of sharp, perfectly timed flight shots. You don’t need every piece of equipment on the market, but a few well-chosen tools will dramatically improve your success rate and reduce the physical strain of long sessions.
Here are four pieces of equipment that consistently deliver results when photographing birds in motion.
1. Manfrotto Long Lens Monopod Bracket
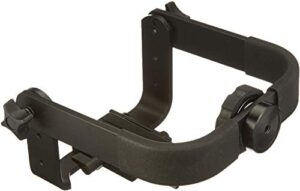
Balancing a 600mm lens on a monopod isn’t a gamble when you’re using the Manfrotto 393. This friction-based bracket (with a 3/8 inch female thread) lets you pan smoothly while tracking birds across the sky, and the three-step height adjustment helps you nail the center of gravity for lenses from 400mm upward.
Two rubber grips protect your glass during tilts, and the quick release plate means you can detach your rig in seconds when the light shifts or the flock moves.
| Best For | Wildlife and bird photographers using super telephoto lenses (400mm+) who need stable tracking shots on a monopod without the bulk of a full tripod setup. |
|---|---|
| Weight | 0.062 ounces |
| Brand | Generic/Manfrotto-style |
| Price Range | Budget |
| Primary Use | Support/Stability |
| Video Capability | N/A |
| Target User | Wildlife/Bird Photographers |
| Additional Features |
|
- Friction base lets you pan smoothly while keeping vertical support, perfect for following moving subjects like birds in flight
- Three height settings help you balance different lens sizes and find the sweet spot for your specific setup
- Rubber grips and protectors keep your expensive glass safe from scratches during adjustments
- Requires a tripod head with 3/8 inch threading (you’ll need an adapter if yours is 1/4 inch only)
- Adds noticeable weight and size to your bag compared to using a monopod alone
- Design is more functional than sleek, so it won’t win any beauty contests
2. Nikon Z8 Mirrorless Camera
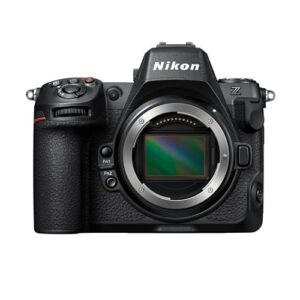
You need a body that won’t quit when an osprey dives or a heron bolts at 120 frames per second. The Z8’s 45.7MP stacked sensor and EXPEED 7 processor handle rapid bursts without choking, and the 493-point phase detection autofocus locks onto eyes (even through reeds or spray).
Internal 8K60 recording captures every feather detail if you pivot to video, while weather sealing protects your investment during misty mornings near shorelines or swamps.
| Best For | Wildlife and sports photographers who need blazing autofocus and high-speed shooting to freeze fast action like diving birds or sprinting athletes. |
|---|---|
| Weight | 1.8 pounds |
| Brand | Nikon |
| Price Range | $3,496.95 |
| Primary Use | Hybrid Photo/Video |
| Video Capability | 8K/60p, 4K/120p |
| Target User | Professional Photographers |
| Additional Features |
|
- 120 fps burst mode with 493-point eye-tracking autofocus means you’ll never miss the decisive moment
- Internal 8K60 and 4K120 video recording gives you serious flexibility to switch between stills and cinema-quality footage
- Weather-sealed body stands up to rain, mist, and dust so you can shoot in tough outdoor conditions
- $3,500 price tag puts it out of reach for hobbyists or beginners
- Battery drains faster than you’d expect during extended shoots, especially with video
- Overheats when recording long 8K clips in hot weather, which can stop your shoot mid-session
3. Nikon Z 600mm Telephoto Lens
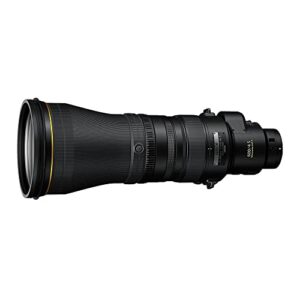
A 600 mm focal length puts you at the edge of action without flushing the flock. The Z 600mm f/4 TC VR S weighs 550 g less than its F-mount predecessor and ships with a built-in 1.4× teleconverter, giving you 840 mm reach at f/5.6 when a hawk circles higher.
Vibration Reduction delivers up to 5.5 stops of compensation, so you can handhold during short bursts when a tripod collar slows you down. ED and Super ED glass elements tame chromatic aberration, and the Nano Crystal Coat cuts flare when you shoot into morning skies.
| Best For | Professional wildlife and sports photographers who need serious telephoto reach and can justify the premium price for a lighter, more versatile super-telephoto prime. |
|---|---|
| Weight | 550g lighter than F-mount |
| Brand | Nikon |
| Price Range | $14,696.95 |
| Primary Use | Telephoto Photography |
| Video Capability | N/A (Lens) |
| Target User | Professional Photographers |
| Additional Features |
|
- Built-in 1.4× teleconverter extends reach to 840mm without carrying extra glass
- 14.5% lighter than the F-mount version makes it easier to handhold and move around
- Excellent optical quality with ED glass and up to 5.5 stops of VR for sharp shots in challenging conditions
- Nearly $15,000 price tag puts it out of reach for most hobbyists
- Only works with Nikon Z-mount bodies, limiting your camera options
- Still a heavy lens despite the weight savings, so you’ll likely want a tripod for longer sessions
4. Canon EOS R1 Mirrorless Camera
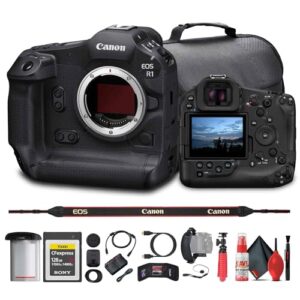
Canon’s EOS R1 pairs a 24.2 MP stacked sensor with Dual Pixel AF that locks onto bird eyes mid-flight, tracking erratic swallows through reeds and kingfishers over glare. You’ll capture 40 frames per second with zero rolling shutter, and the 9.44 million-dot EVF shows every wingtip in sharp relief.
Shoot 6K 60p RAW when a heron lifts off or 4K 120p for slow-motion wing analysis—weather sealing and active cooling keep the body working through humid dawns and saltwater spray.
| Best For | Professional wildlife and sports photographers who need fast, reliable autofocus and high frame rates to capture unpredictable action in challenging conditions. |
|---|---|
| Weight | Not specified |
| Brand | Canon |
| Price Range | $6,399.95 |
| Primary Use | Action/Sports Photography |
| Video Capability | 6K 60 Raw, 4K 120 |
| Target User | Professional Photographers |
| Additional Features |
|
- 40 fps burst shooting with zero rolling shutter lets you freeze split-second moments like a bird taking flight
- Advanced Dual Pixel AF tracks subjects through complex backgrounds and challenging light with exceptional accuracy
- 6K 60p RAW and 4K 120p recording give you cinema-quality video with flexibility for slow-motion analysis
- $6,400 price tag puts it out of reach for hobbyists and emerging photographers
- Canon RF mount limits your lens options compared to more universal systems
- High-resolution files eat through storage quickly, requiring investment in fast, high-capacity cards and drives
Frequently Asked Questions (FAQs)
What shutter speed is needed for birds flying?
You’ll want speeds of 1/2000s or faster to freeze wing motion cleanly. Small, fast birds demand 1/3200s to 1/8000s, while larger species freeze well at 1/2000s in decent light.
What is the best focal length for birds in flight?
A 400 to 600 mm range on full frame cameras delivers tack-sharp flight shots without sacrificing your shooting distance, though crop sensors effectively turbocharge that reach by 5x for small, fast-moving species.
What ISO should I use for shooting birds?
Start with ISO 400 on bright days, then push to 800–1600 in overcast light or shadows to maintain fast shutter speeds around 1/2000s without sacrificing sharpness or introducing excessive noise.
What is the best AF mode for bird photography?
Like choosing the right lens for a distant raptor, continuous autofocus with subject tracking locks onto moving birds and maintains sharp focus as they shift speed or direction through your frame.
What camera settings are best for birds in flight?
Set your shutter to 1/2000–1/3200 for freezing wings, use f/6–f/8 to balance sharpness and isolation, enable AF-C with wide tracking, and rely on Auto ISO capped near 6400 for adapting light.
How to get pictures of birds in flight?
You’ll need the right gear, proper settings, and smart positioning.
Master panning to track movement smoothly, choose clean backgrounds, and time your shots when birds fly predictably near feeding or nesting areas.
What AF mode should I use for bird photography?
When tracking a hawk across an open sky, AI Servo continuous focus constantly updates as the bird shifts position, letting you maintain sharp eyes and head detail through every turn and dive.
How many focus points for birds in flight?
A small cluster of nine to twenty-one focus points provides reliable tracking for most mid-sized birds, while wide-area coverage with bird detection works better for fast, erratic fliers.
How do weather conditions affect bird flight photography?
Weather directly shapes your flight shots—bright sun demands faster shutters and careful exposure, overcast skies soften harsh shadows, while wind alters trajectories and forces you to adjust focus speed mid-sequence.
What are the best times of day for photographing birds?
Early morning delivers your best chance—birds hunt actively in the first two hours after sunrise, while soft light flatters plumage and reduces harsh shadows that ruin flight shots.
Conclusion
Photographing birds in flight isn’t a lottery—it’s pattern recognition wrapped in milliseconds. Once you stop chasing random shots and start reading takeoff cues, wind shifts, and predictable flight corridors, your keeper rate climbs exponentially.
The settings become muscle memory (1/1250, wide open, AI servo locked), the panning feels instinctive, and suddenly you’re not hoping for sharp wings—you’re expecting them. Master the anticipation, and the chaos transforms into calculated opportunity.