This site is supported by our readers. We may earn a commission, at no cost to you, if you purchase through links.
Master your settings by using a fast shutter speed to freeze motion and a wide aperture for blurred backgrounds.
Birds are busiest during golden hours, so timing your shoots is key.
Approach slowly, stay quiet, and use natural covers—patience is your best friend here.
Don’t forget to experiment with composition, like framing shots with branches or catching birds mid-flight.
With practice, you’ll turn ordinary moments into stunning images full of life and movement.
Table Of Contents
- Key Takeaways
- Essential Bird Photography Gear
- Mastering Camera Settings
- Bird Photography Techniques
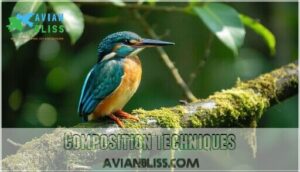
- Composition Techniques
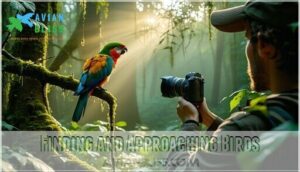
- Finding and Approaching Birds
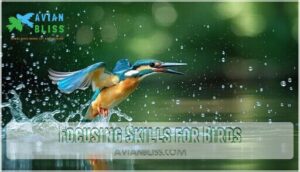
- Focusing Skills for Birds
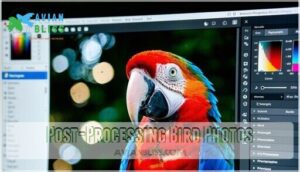
- Post-Processing Bird Photos
- Capturing Stunning Bird Images
- Frequently Asked Questions (FAQs)
- What camera settings are best for bird photography?
- What is the rule of birds photography?
- How do you get sharp pictures in bird photography?
- What is the best beginner camera for bird photography?
- How to get started with bird photography?
- How can I photograph birds in flight?
- What are the best times for bird photography?
- How do I keep birds comfortable during shoots?
- What are ethical practices in bird photography?
- How can I improve my bird identification skills?
- Conclusion
Key Takeaways
- Practice patience and approach birds quietly to avoid scaring them off and capture natural behaviors.
- Use a fast shutter speed (1/1000s or faster) and continuous autofocus for sharp shots, especially for birds in flight.
- Shoot during golden hours to take advantage of soft, warm light that adds depth and highlights vibrant feather details.
- Focus on composition by framing birds with natural elements like branches or creating eye-catching backgrounds with wide apertures.
Essential Bird Photography Gear
To capture stunning bird images, you’ll need the right gear that balances performance and practicality.
A reliable camera, a telephoto lens of at least 300mm, and a solid tripod are essential to guarantee sharp, detailed shots.
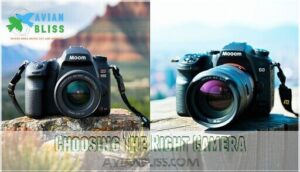
Choosing The Right Camera
When choosing your bird photography camera, weigh DSLR vs mirrorless systems.
DSLRs offer dependability, while mirrorless shines with subject-tracking features.
Sensor size matters—crop frames stretch focal lengths, critical for distant birds.
Don’t fall for the megapixel myth; 20 is plenty!
Chasing megapixels won’t make you a better photographer—20 is all you need to capture stunning bird images!
Beginner photographers, explore used cameras for budget-friendly options.
Consider the benefits of each before deciding.
Remember, bird photography equipment evolves, but mastering technique beats pricey gear every time!
Selecting The Perfect Lens
Finding the right lens elevates your bird photography.
A telephoto lens with 400mm+ is a must for precision and distance. Here’s what to keep in mind:
- Focal Length: Longer lenses capture birds without disturbing them.
- Image Stabilization: Reduces blur during handheld shots.
- Prime vs Zoom: Zoom offers flexibility; prime delivers clarity.
- Teleconverters: Boost reach economically—perfect for beginner photographers.
Many factors influence the best lens selection.
Additional Essential Accessories
You’ve got your camera and lens ready, but don’t overlook the extras.
A sturdy tripod with smooth tripod heads guarantees steady shots.
Camera bags protect gear on tough trails, while rain covers shield against sudden weather changes.
Add a remote shutter to avoid vibrations and cleaning supplies for lens care.
For stable and sharp images, consider specialized tripods.
Smart photography accessories elevate beginner birding experiences, making them a crucial investment.
Mastering Camera Settings
Getting your camera settings right is the key to capturing sharp and well-exposed bird photos.
By understanding how shutter speed, aperture, and ISO work together, you’ll be ready for crisp shots, whether your subject is perched or in mid-flight.
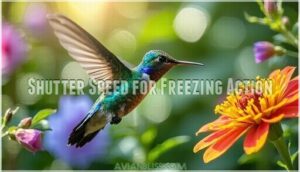
Shutter Speed for Freezing Action
Shutter speed is everything when freezing wings while photographing birds in flight.
Stick to 1/1000 seconds or faster to avoid motion blur.
Shutter Priority mode makes this beginner-friendly by adjusting settings automatically.
Lighting impacts your choice; bright conditions are ideal.
One of the common beginner mistakes is shooting too slow, so don’t hesitate to test faster speeds!
Employing continuous autofocus settings can also help maintain focus on moving subjects, using continuous autofocus settings can be very helpful, especially in bright conditions with fast speeds.
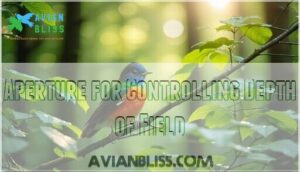
Aperture for Controlling Depth of Field
Aperture is key to controlling depth of field in bird photography.
Use a wide aperture (like f/4 or f/5.6) for:
- Background Blur: Create smooth, dreamy backdrops.
- Selective Focus: Highlight feather details.
- Subject Isolation: Make the bird stand out.
Experiment with your lens’s aperture sweet spot for sharpness; it’s a game-changer!
ISO for Balancing Light Sensitivity and Noise
In bird photography, ISO sensitivity is like your camera’s vision in the dark—useful but tricky.
Crank it up for low-light performance, but watch that noise threshold; too much, and your crisp shot turns into a grainy mess.
Beginners, start with ISO invariance—find your camera’s sweet spot to balance dynamic range and detail.
Experiment with varied camera settings wisely!
Autofocus for Keeping Birds Sharp
Crisp focus is the heartbeat of great bird shots.
Mastering autofocus isn’t that hard with a few tricks:
- Use AF point selection to lock on subjects precisely.
- Enable Focus Tracking for smooth bird motion capture.
- Switch to Continuous AF Mode for flying birds.
- Try Back-Button Focus to separate focus from shutter clicks.
Stay sharp, always!
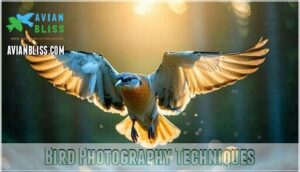
Bird Photography Techniques
To capture sharp, stunning images of birds, you’ll need to master a few key techniques that keep both motion and lighting in check.
By focusing on timing, settings, and tracking skills, you can turn fleeting moments into unforgettable photos.
Shooting During Golden Hours
Golden hour offers a magical touch to bird photography with warm light and soft shadows.
Golden hour transforms bird photography with golden hues and gentle shadows, creating enchanting, mood-filled moments for breathtaking shots.
It brings out golden details in feathers while enhancing colors.
Pay attention to bird behavior as lighting changes.
Experiment with composition tips like framing or adding habitat elements.
For beginners, this time gives forgiving photography lighting, perfect for capturing enchanting, mood-filled shots.
Using Fast Shutter Speeds
Fast shutter speeds are your go-to for freezing motion and avoiding blur in action photography. Birds in flight can be tricky, but quick settings help.
Set shutter speeds above 1/1000s and adjust for lighting conditions. Use Shutter Priority mode for control.
Try these:
- 1/2500s for fast flyers.
- 1/1000s for perched birds.
- Bright daylight needs lower ISO.
- Continuous shooting mode captures bursts.
- Observe movements closely.
Employing Aperture Priority Mode
Using aperture priority simplifies controlling depth and background blur, ensuring sharp birds and soft surroundings.
Start with a low aperture (like f/4.0 or f/5.6) for action shots or increase it for detailed environments.
Adjust ISO as light changes—bright mornings or golden hours make this easier, and practice consistently; this is one of the best bird photography tips for beginners mastering camera settings.
Practicing Focusing Skills
Focus your camera skills with these bird photography tips for beginners.
Master back-button focus to separate focusing from shutter control.
Use subject tracking modes like AI Servo for flying birds, paired with AF point selection for precision.
Practice stabilizing techniques to keep shots steady.
Experiment with focus limiter usage and manual focus peaking to tackle challenging scenarios confidently.
Composition Techniques
Great bird photography starts with thoughtful composition, where each element in your frame contributes to the story.
By using techniques like natural framing, filling the frame, and incorporating the bird’s environment, you’ll create images that feel balanced and engaging.
Using Natural Elements as Frames
Framing context with natural elements adds depth and storytelling to bird photography.
Branches, leaves, or blooming flowers offer habitat details while balancing the background.
At eye level, you create intimacy and perspective enhancement, drawing viewers into the bird’s world.
This simple photography composition trick transforms images, giving beginners a creative edge in natural light photography without overcomplicating bird photography techniques for beginners.
Capturing Birds in Flight
Photographing birds in flight takes patience and practice, but it’s rewarding.
Learn flight patterns to anticipate movement and capture striking wing positions.
Use burst shooting and a panning technique for sharp images.
Autofocus modes keep birds sharp while background blur simplifies the scene.
Master these bird photography tips and tricks, and you’ll elevate your bird photography techniques for beginners.
Filling The Frame
Filling the frame transforms your shots from average to impactful.
It’s about subject isolation and drawing attention to every feather and detail.
Simplicity in the background helps the bird shine.
Cropping power is your ally if the bird’s distant.
These photography tips guarantee your bird stands out, making bird photography for beginners more rewarding with maximum impact in every shot, ensuring your bird photography experience is more rewarding.
Telling a Story Through Composition
To elevate bird photography composition, think of your shots as stories. Let the habitat context guide the frame, highlighting bird interactions and their environment.
Create an implied narrative by using these techniques:
- Show connections, like birds feeding or nesting.
- Evoke mystery by using shadows, light, or partial framing.
- Add emotional impact with weather or dramatic skies.
Finding and Approaching Birds
You’ll capture better bird photos by knowing where to find them and how to approach without scaring them off.
Start by researching local habitats and migration patterns, then move slowly and stay quiet to blend into their environment.
Researching Bird Habitats and Migration Patterns
Understanding bird behavior starts with researching habitats and migration patterns.
Look for clues like seasonal abundance and migration triggers, such as changing daylight or food availability.
Study how birds adapt behaviorally to environments, exploring bird species’ habitat identification helps you predict where they’ll perch or forage.
It’s not just photography—it’s connecting with nature’s rhythm while appreciating conservation impacts.
Locating Bird Hotspots and Photography Spots
Spotting the best bird photography locations means finding rich birding hotspots.
Use tools like eBird to explore local birding groups and conservation areas tackling seasonal migration patterns.
Focus on these tips:
- Search bird hotspots through online birding forums.
- Visit habitats with diverse ecosystems.
- Plan trips to areas during migratory seasons.
- Discover new birding locations nearby.
Joining Bird Photography Workshops or Tours
Joining bird photography workshops or tours connects you with experts and enthusiasts while enhancing your skills.
Workshop benefits include personalized guidance for your skill level, while tour logistics simplify location choices.
These experiences provide access to premium bird photography resources and help navigate cost considerations.
Plus, you’ll join a bird photography community keen to share techniques and learn alongside you.
Practicing Patience and Persistence
Bird photography for beginners often means facing long waits, missed shots, weather challenges, and traveling to remote locations.
It’s all part of the practice, and learning patience shapes better photographers—embrace those pauses and focus on subtle bird behaviors.
Remember, even the perfect shot comes with persistence, and think of it as nature’s way of teaching you to slow down and observe.
To improve your birding skills, consider using compact field guides.
Focusing Skills for Birds
Sharp focus can make or break your bird photos, especially when your subject is in motion.
By practicing focus-tracking techniques and using tools like continuous autofocus, you’ll capture crisp, stunning bird images with confidence.
Tracking Moving Objects
Capturing moving birds feels like a game of patience and precision.
Use the panning technique to track their flight smoothly. Set your camera to continuous autofocus modes and try burst shooting for sharp frames.
Predictive focus helps when birds change direction unexpectedly. Subject anticipation—like knowing their landing spots—turns chaos into a focused, enjoyable challenge.
Bird photography thrives on these skills.
Practicing Focus-Tracking Skills
Focus-tracking skills are your secret weapon in bird photography.
Practice staying in sync with a bird’s movement using these focusing techniques:
- Panning technique: Track birds smoothly for sharp shots.
- Burst shooting: Capture multiple frames to freeze motion.
- Predictive focus: Anticipate where birds move next.
- AF area modes: Experiment with dynamic settings to improve subject acquisition.
Nail those action shots!
Using Continuous Autofocus
Continuous autofocus mode is a game-changer in bird photography. It keeps your lens locked on moving subjects, ensuring sharp shots.
Combine AF tracking modes with smart focus point selection for precise subject acquisition. Customizing AF settings suited to bird photography enhances results, especially with compatible lenses.
Mastering this bird photography technique turns fleeting moments into perfectly focused masterpieces.
Mastering Back-Button Focus
If continuous autofocus feels clunky, try back-button focus (BBF).
It splits focus from the shutter button, giving you full control. Beginners can quickly adapt with practice.
Here’s how to maximize BBF:
- Assign autofocus to a back button.
- Lock focus for recomposing shots.
- Track birds mid-flight.
- Customize BBF settings.
- Troubleshoot misfocus calmly.
Your bird photography evolves instantly!
Post-Processing Bird Photos
Editing your bird photos is just as important as capturing them. With thoughtful adjustments, you can highlight details, reduce distractions, and bring your images to life.
Basic Adjustments and Editing
Editing bird photos starts by adjusting exposure for balance and clarity.
Cropping techniques can focus on the bird while removing distractions.
Use sharpening details sparingly to maintain a natural look.
Noise reduction helps soften grain from high ISO settings.
Finally, color correction guarantees accurate tones, enhancing feathers’ vibrancy.
Reliable post processing software like Lightroom or Photoshop plugins simplifies image editing.
Advanced Techniques and Software Options
Once basic edits are covered, take your bird photography further with RAW processing and plugin integration.
Photoshop plugins like Nik Software and advanced tools such as Topaz DeNoise AI or Sharpen AI offer selective editing, AI noise reduction, and advanced sharpening.
These tools let you refine motion-blurred shots and handle tricky lighting, bringing unparalleled detail and clarity to your images effortlessly.
Removing Distractions and Noise
Distractions like cluttered backgrounds or unwanted objects can derail your bird photography.
Use Background Blur to soften distracting elements. Cloning Tools help erase small intrusions.
Noise Reduction software like Topaz DeNoise AI minimizes grain, keeping details sharp.
Detail Recovery and Selective Editing refine your shot, ensuring clarity without over-editing.
Remember to apply selective sharpening techniques to avoid artifacts in the background.
These beginner tips transform your photos into clean, professional-quality images.
Capturing Stunning Bird Images
You can capture stunning bird images by experimenting with reflections, dramatic silhouettes, and seasonal details that highlight the bird’s environment.
Paying attention to lighting, weather, and unique perspectives will help bring your bird photos to life.
Using Reflections and Silhouettes
Playing with reflections and silhouettes adds magic to bird photography.
Use Water Reflections for dreamy, mirror-like effects. Experiment with Silhouette Lighting during sunsets for striking bird outlines.
Try Abstract Silhouettes by backlighting to create creative compositions bursting with drama. Embrace these bird photography techniques to craft compositions full of mood and mystery—a game-changer for beginners!
Conveying Time of Day and Weather
In bird photography, capturing the golden hour adds a magical glow to your shots, highlighting soft shadows and warm tones.
Cloudy effects create a moody atmosphere, offering even lighting for delicate details.
Pay attention to light direction—backlight emphasizes silhouettes, while side light adds depth.
Weather mood often transforms your photos, so embrace elements like mist or rain for unique bird photography lighting.
Showcasing Seasonal Changes
Seasonal changes add depth and variety to your bird photography.
Capture migratory patterns and look for vibrant breeding plumage in spring.
In winter, highlight birds’ survival adaptations.
Autumn colors make stunning backdrops, while nesting season offers intimate moments.
Explore bird photography locations at the right time and tweak your bird photography settings for each season to ensure happy shooting.
Creating a Portfolio of Bird Photography
A great bird photography portfolio starts with a clear theme that reflects your style or favorite species.
Curate images carefully, sequencing them for a natural flow. Showcase your best bird photography examples online or create prints for depth.
Engage with the bird photography community for beginners to get feedback. A sturdy tripod helps minimize camera shake issues when using telephoto lenses.
These bird photography tips elevate both skill and presentation, providing a solid foundation for improvement, and are essential for bird photography success.
Frequently Asked Questions (FAQs)
What camera settings are best for bird photography?
Capturing birds isn’t magic; it’s mastering settings.
Use Aperture Priority (f/6-7), ISO 600, and a shutter speed of 1/1000s or faster.
Switch to AI Servo Autofocus for tracking movement and Continuous Drive Mode for bursts.
What is the rule of birds photography?
Think of bird photography as blending patience, skill, and timing.
Follow ethical practices, stay at eye level, compose using the rule of thirds, and focus on lighting.
Always prioritize the bird’s welfare over the shot.
How do you get sharp pictures in bird photography?
Don’t worry if you’re frustrated with blurry shots; it’s common.
Use fast shutter speeds (1/1000s or more), focus on the bird’s eye, stabilize your camera, and practice tracking to guarantee sharp images every time.
What is the best beginner camera for bird photography?
The Canon EOS R50 or Nikon Z50 are solid beginner picks.
Both offer fast autofocus, high burst rates, and great image quality.
Pair them with a 200-400mm lens for capturing detailed bird shots effectively.
How to get started with bird photography?
Start with a basic DSLR, a 400mm lens, and a comfy pair of shoes.
Practice patience, learn bird behavior, and shoot during golden hours.
Respect nature—don’t trade ethics for a perfect shot.
How can I photograph birds in flight?
Use a fast shutter speed (1/2000s or more), continuous autofocus, and burst mode for sharp shots.
Track the bird’s movement steadily, keeping it in the center, and shoot with the sun behind you for ideal lighting.
What are the best times for bird photography?
Around 75% of bird species are most active during golden hours—just after sunrise or before sunset.
This soft light highlights vivid feathers and reduces shadows, giving you stunning shots.
Plus, mornings offer fresher, quieter surroundings, making them ideal for capturing stunning shots.
How do I keep birds comfortable during shoots?
Stay quiet and move slowly near birds to avoid startling them.
Keep a respectful distance, use camouflage or blinds if needed, and never disrupt their nesting or feeding.
Respect their space, and nature will reward you.
What are ethical practices in bird photography?
Respect birds by keeping a safe distance, avoiding nests, and minimizing noise.
Don’t disrupt natural behaviors for a photo.
Use camo or blinds if necessary, and always prioritize the bird’s well-being over the perfect shot.
How can I improve my bird identification skills?
Did you know there are over 10,000 bird species globally?
Improve your ID skills by studying local field guides, observing behaviors, and tracking calls.
Join birding groups—learning alongside others keeps it enjoyable and rewarding!
Conclusion
Think of bird photography as a treasure hunt—you’re capturing nature’s gems with patience, skill, and the right gear.
By mastering techniques like shooting during golden hours, perfecting your camera settings, and experimenting with composition, you’ll elevate your craft in no time.
Remember, the best bird photography tips for beginners center on practice and persistence.
With each shot, you’ll sharpen your abilities and uncover the beauty of birds in their natural element.
Now, grab your camera and start exploring!

