This site is supported by our readers. We may earn a commission, at no cost to you, if you purchase through links.
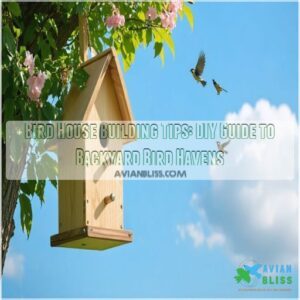
Cut your wood pieces precisely; nobody likes a wonky birdhouse! A sloped roof, ventilation holes, and proper drainage will keep birds comfy and dry.
Skip the perch—it’s like an open invitation for predators. Mount securely, adjust the height for your feathered friends, and keep it clean. Ready to build homes that make birds sing?
Table Of Contents
- Key Takeaways
- Choosing Birdhouse Materials
- Birdhouse Design Considerations
- Cutting Wood Pieces
- Assembling Birdhouse Walls
- Attaching Roof and Hardware
- Finishing Birdhouse Exterior
- Installing Birdhouse
- Maintaining Birdhouse
- Attracting Birds
- Birdhouse Plans
- Frequently Asked Questions (FAQs)
- What is a good DIY Birdhouse plan?
- How do you set up a birdhouse?
- How do you hang a birdhouse?
- Can you build a birdhouse if you’re a beginner?
- How do you make a birdhouse unique?
- What is a good birdhouse for a bird house?
- What not to do when building a birdhouse?
- How to build a bird house for beginners?
- How do I attract birds to my new birdhouse?
- Do birdhouses need ventilation holes?
- Conclusion
Key Takeaways
- Use untreated cedar or pine for durability and safety, and secure your birdhouse with galvanized screws and waterproof wood glue.
- Skip the perch to keep predators away, and always include ventilation holes and proper drainage for a comfortable bird environment.
- Place the birdhouse 5–10 feet high, away from harsh winds and predators, and ensure it’s facing morning sunlight.
- Clean regularly, remove debris after nesting, and use predator-proof poles or baffles to keep it safe and inviting.
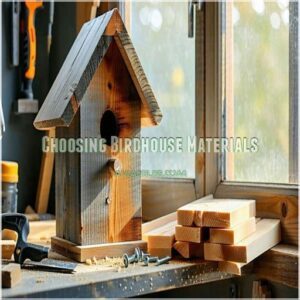
Choosing Birdhouse Materials
When building a birdhouse, your choice of materials can make or break your feathered friends’ new home.
Choose untreated cedar or pine, galvanized screws, and wood glue to create a durable, safe shelter that’ll have birds chirping with joy.
Selecting Untreated Wood
When building a bird house, choosing the right wood can make or break your feathered friends’ new home.
Your go-to materials should focus on untreated, natural wood options that’ll stand up to the elements:
- Cedar: Nature’s moisture-resistant champion
- Pine: Budget-friendly and lightweight
- Cypress: Durable wood with excellent grain patterns
Select wood that’ll keep your winged tenants safe and dry.
Using Galvanized Screws
After choosing your untreated wood, grab those galvanized screws – they’re your secret weapon against rust and decay.
These exterior wood screws aren’t just any fasteners; they’re tough cookies that’ll keep your birdhouse standing strong through rain, wind, and whatever Mother Nature throws its way.
For the best results, consider using galvanized wood screws with a durable coating. Opt for 1 1/4-inch lengths with weather-resistant metal coatings.
Applying Wood Glue
Just nailed those galvanized screws? Now let’s lock your birdhouse together with wood glue.
Pick a waterproof, exterior-grade adhesive that can handle outdoor challenges. Apply glue sparingly to mating surfaces, spreading evenly with a small brush or stick. Clamp pieces tightly, wiping away excess.
Let it set for at least 30 minutes before handling – your birdhouse’s strength depends on a solid bond.
When selecting materials, consider using bird house building materials that are naturally resistant to decay and insects for a longer-lasting birdhouse.
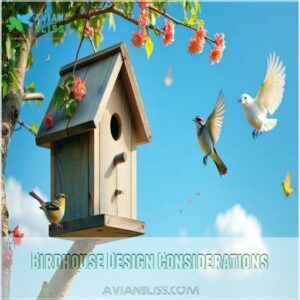
Birdhouse Design Considerations
When building a birdhouse, you’ll want to focus on creating a safe, comfortable home for your feathered friends.
Your design choices will impact the birds’ comfort and survival, so consider factors like entrance hole size, roof slope, and materials that protect against predators and harsh weather.
Web Design Evolution
When diving into web design evolution, you’ll discover a landscape that’s constantly shifting like a bird’s migration pattern.
Digital trends have transformed online platforms through key innovations:
- Static to dynamic interfaces
- Skeuomorphic to flat design
- Desktop-centric to multi-device experiences
- Manual updates to automated systems
- Generic layouts to personalized interactions
Web accessibility and user experience now drive design choices, making every pixel count.
Responsive Layouts Matter
Every birdhouse deserves a responsive design that adapts seamlessly to different environments. Your bird sanctuary should flex like a chameleon, responding to various backyard landscapes with ease.
| Feature | Benefit | Impact | Flexibility |
|---|---|---|---|
| Adaptive Sizing | Fits Multiple Spaces | Maximizes Attraction | High |
| Flexible Grids | Accommodates Different Birds | Increases Occupancy | Medium |
| Screen-Friendly | Works in Various Lighting | Enhances Visibility | High |
| Modular Construction | Easy Customization | Boosts User Control | Very High |
User experience trumps rigid blueprints – create a birdhouse that’s as dynamic as nature itself, with a focus on Adaptive Sizing and Flexible Grids to maximize attraction and increase occupancy, ultimately enhancing the overall bird sanctuary.
Mobile-First User Experience
Building your birdhouse demands a mobile-first mindset, just like smart design flows from compact spaces outward. User experience starts with understanding how tiny details impact the entire project.
Consider these mobile optimization strategies for your bird house construction:
- Prioritize compact, streamlined design
- Create adaptable building plans
- Test each component’s functionality
- Minimize material waste
- Implement touch-friendly assembly techniques
When designing, researching best bird house designs is vital for attracting the desired bird species. Your bird house plans become a blueprint for precision and efficiency.
Minimalist Design Trends
Just like mobile designs strip away clutter, your minimalist birdhouse can follow suit.
Clean lines and basic shapes create a sleek sanctuary that birds will love. Stick to neutral colors and simple forms that blend seamlessly into your backyard.
Minimal ornament doesn’t mean boring—it means purposeful design that lets function shine through your DIY birdhouse project.
Cutting Wood Pieces
You’ll need precision and patience when cutting wood pieces for your birdhouse, as accurate measurements are essential to creating a sturdy home for your feathered friends.
Grab your measuring tape, mark your board carefully, and get ready to transform a simple piece of pine or cedar into a custom birdhouse that’ll make your backyard wildlife proud.
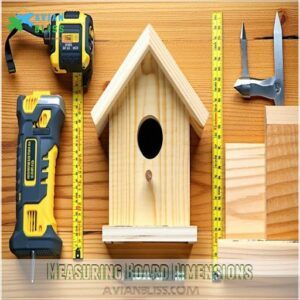
Measuring Board Dimensions
After exploring web design principles, let’s nail down your board measurement skills for the perfect birdhouse.
Precision is your best friend when cutting wood.
Here are five board measurement tips to keep your project on track:
- Use a reliable tape measure
- Mark measurements twice
- Check measurements before cutting
- Use a sharp pencil for accuracy
- Invest in a quality carpenter’s square
Measure smart, cut once!
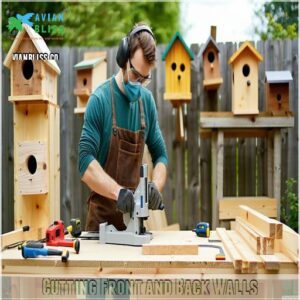
Cutting Front and Back Walls
When crafting your birdhouse, precision in cutting front and back walls can make or break your project. Here’s a quick guide to mastering those vital cuts:
| Measurement Tip | Key Action |
|---|---|
| Mark Carefully | Use sharp pencil |
| Measure Twice | Verify dimensions |
| Check Wood Grain | Follow natural lines |
| Protect Workspace | Use stable surface |
| Safety First | Wear protective gear |
To achieve accurate cuts, use high-quality Miter Saw components.
Grab your miter saw and let’s transform that board into bird-friendly walls.
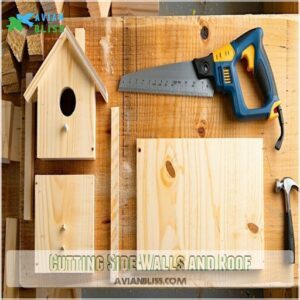
Cutting Side Walls and Roof
Grab your miter saw or handsaw and get ready to craft those side walls with precision.
Measure twice, cut once—this old woodworker’s wisdom saves you headaches during birdhouse construction.
Cut two identical side pieces at 9 inches by 6 inches, ensuring perfect wall frames.
For the roof, slice a 7½-inch by 6-inch panel with clean, straight edges using your cutting tools.
Assembling Birdhouse Walls
Now’s your moment to transform those carefully cut wood pieces into a sturdy birdhouse frame that’ll become a cozy haven for your feathered friends.
You’ll attach side boards, secure the front and back panels, and connect the floor with precision and care, creating a solid foundation for your backyard bird sanctuary.
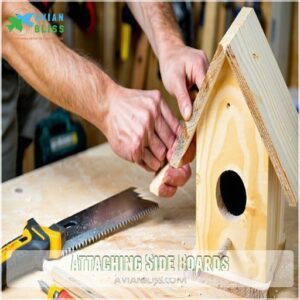
Attaching Side Boards
Getting those side panels aligned is key for wall frame stability in birdhouse construction.
Apply wood glue to the edges of the untreated wood, ensuring a snug fit.
Hold each piece steady and use secure fastening techniques with wood screws for lasting durability.
A handsaw’s precision helps the sides fit flush—no wobbles here, just solid birdhouse tips.
For a simple bird house design, consider using a one-board construction method to create a cozy backyard haven.
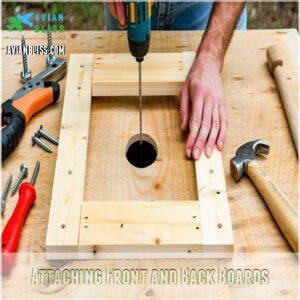
Attaching Front and Back Boards
Align the front board with the frame, ensuring precise panel fitting for a smooth finish.
Pre-drill small holes to ease screw placement and prevent splitting. Attach the exterior wood screws securely at each corner, checking the board alignment as you go.
Repeat with the backboard, keeping the structure sturdy. By now, your birdhouse building skills are shaping up nicely!
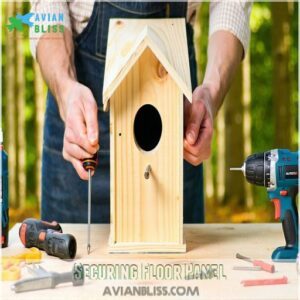
Securing Floor Panel
Locking down the floor panel is where your birdhouse gains its stability. Here’s how:
- Pre-drill holes to avoid splitting wood during screw placement.
- Apply wood glue along the edges for added floorboard rigidity.
- Secure fastening with exterior wood screws to hold the panel tight.
Strong and snug? Your birdhouse is ready for its feathery tenants!
Attaching Roof and Hardware
Attaching the roof and hardware guarantees your birdhouse is sturdy and ready for the outdoors.
With a few screws, a hinge, and a hook, you’ll lock in durability while keeping it bird-friendly and easy to clean.
Placing Roof Board
Once the walls are secure, it’s time to position the roof board. Make sure the roof overlap is even on all sides for proper weatherproofing.
Double-check the roof alignment to keep everything snug and tidy. For accurate measurements, consider using a Roofing Tape to guarantee precise fits.
Use these quick references:
| Task | Tools Needed | Pro Tip | Outcome |
|---|---|---|---|
| Measure Overlap | Tape Measure | Verify equal edges | Better fit |
| Adjust Placement | Hands & Patience | Center carefully | Neat birdhouse |
| Check Alignment | Straight Edge | Verify snug fits | No gaps |
| Final Touch | Sandpaper | Smooth edges for safety | Polished roof |
Securing Roof With Screws
Use a wood drill bit to pre-drill holes for your galvanized screws—this stops the untreated wood from splitting.
Screw placement matters! Position screws evenly along the roof edges for stability. Tighten firmly, but don’t overdo it, or you’ll strip the wood.
For extra weatherproofing, add roof sealant along the seams. It’s simple birdhouse building done right.
Installing Hinge and Hook
For a proper latch system, center the hinge where the door meets the side wall, ensuring smooth door alignment.
Pick small, durable hinge types to avoid bulk.
Position the hook and eye latch near the bottom for secure hook placement.
Use screws that match your bird house materials for stability, fitting seamlessly with different birdhouse designs.
Keep it snug yet functional!
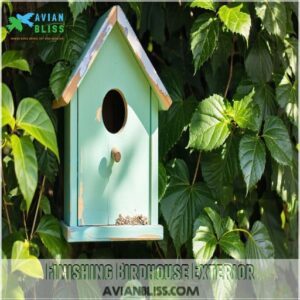
Finishing Birdhouse Exterior
Finishing the birdhouse’s exterior makes it look good and also protects it from weather damage.
Sand rough edges, add ventilation holes, and choose a durable outdoor paint or stain to keep it bird-friendly and long-lasting.
Painting or Staining Wood
Painting or staining wood isn’t just about looks—it’s about protection too. Stick to outdoor paint or safe, non-toxic options like milk paint.
Natural colors or camouflaging colors work best, keeping predators away.
Try light brush techniques for smooth coverage, and avoid painting untreated wood inside the birdhouse—it helps chicks grip!
Always remove stains or wood glue before painting for a clean finish.
For a successful birdhouse project, consider visiting a birdhouse guide to learn more about the process.
Applying Fine-Grit Sandpaper
Once you’ve painted the wood, grab some fine-grit sandpaper to perfect the edges.
Use smooth, circular motions for edge finishing and to catch any rough spots.
This step isn’t just about sanding wood; it’s about showcasing your woodworking skills.
Surface preparation with proper sandpaper techniques guarantees your birdhouse feels and ready, like a cozy nest, for its feathered visitors.
Adding Ventilation Holes
After sanding smoothly, think about breathing room creation for your feathered friends. Ventilation holes are key to air flow management and moisture control.
Place holes near the roofline for better circulation:
- Use a 1/4-inch drill bit for proper ventilation hole size.
- Drill 2-4 holes evenly spaced.
- Avoid over-drilling; it weakens the structure.
- Angle holes downward to keep rain out.
- Remove debris after drilling to guarantee smooth airflow.
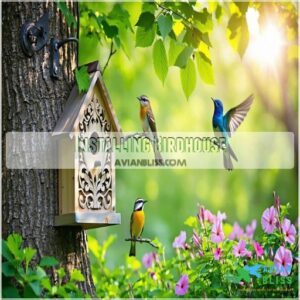
Installing Birdhouse
Installing your birdhouse in the right spot can make all the difference in attracting feathered visitors.
Mount it securely, keep it steady, and adjust the height based on the type of birds you want to welcome.
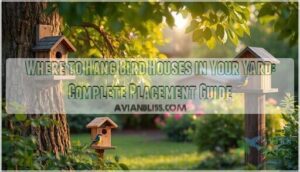
Selecting Ideal Location
Pick a spot that balances accessibility for birds and your viewing pleasure.
Location factors matter—place the birdhouse where sunlight exposure hits during mornings but avoids harsh afternoon heat.
Shield it from windy weather and predators.
Consider bird species and terrain analysis to guide placement.
Proper birdhouse orientation guarantees safety, so face it away from prevailing winds for comfort, ensuring proper birdhouse orientation is key.
Mounting on Pole or Building
Mounting your birdhouse can make or break its success.
Attach it securely to a wood or metal pole for stable placement, ensuring weather resistance and stability.
Prefer a building? Use brackets or screws for a solid connection.
A birdhouse pole adds flexibility, while proper mounting height keeps predators out of the picture.
Focus on secure fastening for worry-free bird watching.
Adjusting Height for Birds
Getting the height just right makes your backyard birdhouses inviting.
Different birds have nesting preferences:
- Bluebird or swallow? Go 5–10 feet high on a birdhouse pole in open spaces.
- Chickadees or wrens? Stick to 4–8 feet high in thickets.
- Robin? Place lower, near shrubs.
Remember, predator avoidance and environmental factors matter most in birdhouse placement!
Maintaining Birdhouse
Keeping your birdhouse clean and well-maintained guarantees it stays safe and inviting for feathered guests.
Check it regularly for debris, damage, or unwelcome pests to keep your backyard haven in top shape.
Cleaning Regularly
Cleaning your birdhouse isn’t just about keeping it tidy—it’s about protecting its feathered visitors. Debris removal, nest sanitizing, and feather cleanup prevent pests from moving in and bacteria from building up.
Use these simple birdhouse maintenance tips:
| Task | Tool Needed | How Often |
|---|---|---|
| Debris Removal | Soft brush | After nesting ends |
| Nest Sanitizing | White vinegar | Every few months |
| Pest Control | Mild detergent | As needed |
Following bird house cleaning tips is essential for maintaining a safe and healthy environment. Routine birdhouse upkeeping boosts safety and extends its life—keeping it welcoming season after season, which is crucial for the feathered visitors and overall birdhouse maintenance.
Monitoring Bird Activity
Once your birdhouse is clean, keep an eye on what’s happening inside and around it. Watching bird behavior can give you insights into nesting habits, feeding patterns, or even migration trends.
Tracking bird species also helps improve your birdhouse building but also supports bird conservation efforts.
- Observe nesting activity: Note when birds build nests and lay eggs.
- Watch feeding patterns: See what they eat or bring back for their young.
- Track species: Identify which birds visit and adapt to their preferences.
Attracting Birds
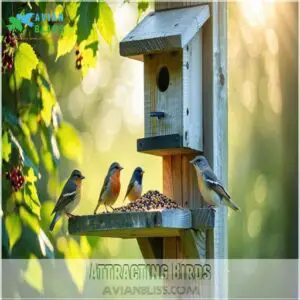
To attract birds to your backyard, place birdseed near the birdhouse and choose a mix that suits the species you want to see.
Adding a baffled pole keeps predators away and helps create a safe, welcoming environment.
Using Birdseed
Choosing the right birdseed types is key to attracting feathered visitors.
Sunflower seeds work wonders for most species, while nyjer seed tempts finches.
Store your seed in a cool, dry place to keep it fresh.
Pay attention to bird preferences and feeding habits—messy seeds will be ignored.
High-quality seed guarantees healthier birds, complementing your birdhouse or bird feeder plans perfectly!
Using organic birdseed blends can also support the local ecosystem and promote biodiversity in your backyard.
Installing Baffled Pole
Keep predators like squirrels and snakes away with a baffle—a simple guard for your birdhouse pole.
Use sturdy materials like metal poles for durability or wood poles for easier setup. Popular baffle designs include dome and cone shapes.
For top predator control, position the baffle about four feet high. These Pole Installation Tips make a predator-free environment achievable for birdhouse building enthusiasts.
Observing Bird Species
Spend time watching bird behavior around your birdhouse.
Note species identification through feather patterns, nesting habits, or migration routes.
For cavity-nesting birds like bluebirds, adjust placement on a wood pole to encourage use.
Each bird habitat is unique, so tweak bird house designs to suit visitors.
Observing their routines helps fine-tune your birdhouse for happy, returning guests.
Birdhouse Plans
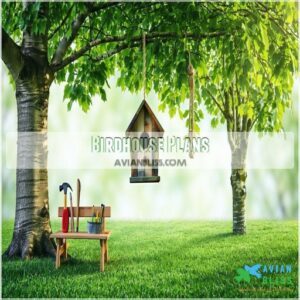
Choosing the right birdhouse plan makes building easier and guarantees your feathered visitors feel at home.
Whether you’re after something simple or looking to challenge your skills, there’s a plan for everyone.
Simple Birdhouse Plans
If you’re ready to jump into bird house building, simple birdhouse plans are perfect for beginners.
They offer straightforward DIY designs that use easy-to-find materials like cedar or pine.
Whether you prefer pre-cut birdhouse kits or crafting your own from scratch, these plans simplify wood selection and assembly.
Start small, and you’ll have feathered neighbors in no time!
Unique Birdhouse Designs
Unique birdhouse designs add flair to your birdhouse projects and showcase creativity.
Consider these ideas:
- Eco-Friendly Designs: Use sustainable wood or recycled materials.
- Modern Birdhouses: Clean lines with minimalist charm.
- Themed Houses: Fairy-tale castles or rustic barns.
- Customized Interiors: Perches and ledges inside.
- Ornate Details: Carved trims or decorative accents.
Get inspired for your next DIY birdhouse plans!
Advanced Birdhouse Plans
Take your birdhouse skills up a notch with advanced plans featuring custom designs, luxury materials, and top-tier birdhouse architecture.
Think premium construction like multi-level homes or gazebos with ornate roofs.
These birdhouse blueprints explore advanced features like ventilation panels and birdhouse guards.
Ready to wow your backyard birds? Explore DIY birdhouse plans that master both function and flair in birdhouse design.
Frequently Asked Questions (FAQs)
What is a good DIY Birdhouse plan?
Go for a beginner-friendly birdhouse plan using untreated cedar or pine.
Cut pieces precisely, drill a 1-3 inch entrance hole, and slope the roof for weatherproofing.
Pre-paint everything, then assemble with screws and wood glue.
How do you set up a birdhouse?
Home, sweet home starts with placement.
Mount your birdhouse 5–10 feet up in sunlight, shield it from harsh winds, and keep it steady.
Avoid predator access by securing it on a baffled pole.
How do you hang a birdhouse?
Hang a birdhouse on a sturdy pole, wall, or tree at the right height for your chosen bird species.
Keep it stable to avoid swaying, facing morning sunlight, and shielded from harsh weather.
Can you build a birdhouse if you’re a beginner?
Think of it like assembling a puzzle—building a birdhouse as a beginner is simple with clear plans and basic tools.
Start small, cut precise pieces, and enjoy creating a cozy, bird-friendly space.
How do you make a birdhouse unique?
Customize the shape, like an A-frame or mid-century vibe, or paint it with bold colors and patterns.
Add accents like a tiny porch or flower box, and you’ll have a standout birdhouse.
What is a good birdhouse for a bird house?
A good birdhouse has a sturdy build, a predator-proof design, and easy access for cleaning.
Use untreated wood like cedar, add ventilation holes, and make certain the entrance suits the species you’re attracting—birds will love it!
What not to do when building a birdhouse?
Don’t use treated wood—it’s toxic for birds.
Skip nails; screws hold better.
Avoid overly large entrances, which attract predators.
Don’t paint the inside. And please, don’t neglect drainage or ventilation—nobody likes a soggy home!
How to build a bird house for beginners?
Think of your birdhouse as a cozy retreat.
Start with untreated wood, cut pieces precisely, and use screws, not nails.
Pre-drill holes, sand edges, and paint it.
Add a sloped roof and secure placement.
How do I attract birds to my new birdhouse?
Place your birdhouse in a sunny spot, add birdseed nearby, and keep it predator-free with a baffled pole.
Make certain it’s at the right height for your target birds—bluebirds love open fields; chickadees prefer thickets.
Do birdhouses need ventilation holes?
Just like windows bring fresh air to a home, ventilation holes keep your birdhouse breathable, reducing heat and moisture buildup.
Without them, it’s like building a sauna—birds won’t appreciate the hospitality!
Conclusion
Building a birdhouse is like crafting a tiny haven where nature feels at home.
By using untreated cedar or pine, galvanized screws, and good design, you’ve got the tools to make it safe and inviting.
Pay attention to details like ventilation, proper drainage, and predator prevention—birds notice!
Stick with these bird house building tips, and your backyard will soon be buzzing with happy, chirping guests.
Keep it clean, maintain it well, and enjoy the feathered company.
