This site is supported by our readers. We may earn a commission, at no cost to you, if you purchase through links.
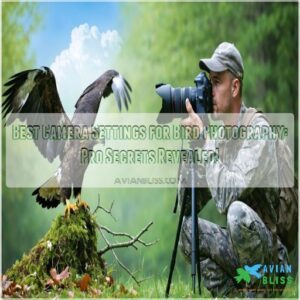
Pair this with fast shutter speeds (1/1000 sec or faster) to freeze flight, or experiment with slower speeds for creative motion blur.
Continuous autofocus locks onto fast-moving birds, while back-button focus gives you more control.
Adjust ISO based on lighting—lower for sunny days, higher for low light. Burst mode is your best friend for action shots.
Want sharper images? Camera stabilization is a secret weapon.
Table Of Contents
- Key Takeaways
- Camera Modes Explained
- Aperture Settings Guide
- Shutter Speed Techniques
- ISO Settings Optimization
- Focus Modes Compared
- Bird Photography Tips
- Camera Settings Scenarios
- Advanced Camera Settings
- Frequently Asked Questions (FAQs)
- What are the best bird photography camera settings?
- What is the best aperture for bird photography?
- How to take a bird photo on a camera?
- How do I know if my camera is good for bird photography?
- What is the best ISO setting for bird photography?
- How to capture birds in flight with a camera?
- What is the best setting for bird photography?
- What ISO is best for bird photography?
- How to set up a camera for bird photography?
- How do you get sharp pictures in bird photography?
- Conclusion
Key Takeaways
- Use Aperture Priority mode with a wide aperture (like f/5.6) to blur backgrounds and make the bird stand out.
- Set a fast shutter speed (1/1000 or higher) to freeze motion and capture sharp details in flight.
- Adjust ISO based on lighting, starting at ISO 800 for balance between clarity and minimal noise.
- Enable continuous autofocus and burst mode to track quick movements and capture multiple sharp shots.
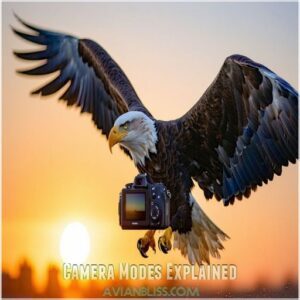
Camera Modes Explained
You’ll want to master your camera’s modes to capture those jaw-dropping bird shots that’ll make your friends jealous.
Whether you’re a beginner or a seasoned photographer, understanding Aperture Priority, Shutter Priority, and Manual modes will reveal your potential to freeze stunning avian moments with razor-sharp precision.
Aperture Priority Mode
If you’re serious about bird photography, Aperture Priority mode is your secret weapon for nailing those perfect shots.
Here’s why it rocks:
- Gives you direct control over depth of field
- Lets you manage bird portrait aesthetics
- Simplifies complex camera settings while maintaining creative control
Master your camera’s aperture priority mode, and you’ll transform blurry snapshots into gallery-worthy bird photography that’ll make wildlife enthusiasts drool.
Shutter Priority Mode
When bird photographers need precise shutter control, Shutter Priority mode becomes their secret weapon.
This camera setting lets you lock in your desired speed while the camera automatically adjusts aperture, giving you the power to freeze wing beats or create dramatic motion blur.
Understanding telephoto lens capabilities is also essential for capturing high-quality images.
It’s perfect for capturing those split-second bird moments with surgical precision and minimal technical fuss.
Manual Mode
Shifting gears from Shutter Priority, Manual Mode hands you the photographer’s steering wheel.
You’ll master camera settings with full control, adjusting shutter speed, aperture, and ISO precisely. It’s like being a camera ninja – challenging at first, but ultimately giving you the power to capture bird photography magic.
Custom settings become your secret weapon for stunning shots. To achieve ideal results, understanding bird photography techniques is essential for capturing breathtaking images.
Aperture Settings Guide
Mastering your camera’s aperture settings transforms ordinary bird photography shots into stunning wildlife art.
You’ll discover the magic of bird photography by understanding how aperture controls depth of field. This is your secret weapon for creating breathtaking images, whether you’re aiming to isolate a vibrant hummingbird or capture an entire flock in crisp detail.
Wide Aperture Benefits
After mastering camera modes, let’s discover the magic of wide apertures in bird photography. A wide aperture is your secret weapon for creating stunning images that pop.
Here’s why you’ll fall in love:
- Subject isolation that makes birds stand out
- Creamy background blur that screams professional
- Bokeh effect that transforms ordinary scenes
- Low-light performance that captures elusive moments
Understanding bird identification guide is important for capturing the perfect shot. Your lens becomes a paintbrush of creativity.
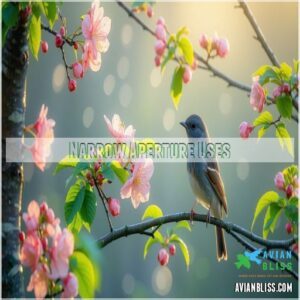
Narrow Aperture Uses
Want to capture more than just a bird?
Narrow apertures like f/11 are your secret weapon for environmental portraits.
They bring stunning habitat details into sharp focus, giving your shots a landscape context that tells a bigger story.
In aperture priority mode, you’ll snag increased depth and crisp details that showcase your feathered subject’s entire world.
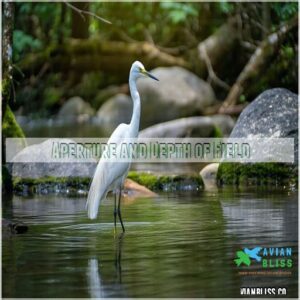
Aperture and Depth of Field
When you narrow down your aperture, you’re playing field manager for your bird photo’s visual story.
Sharp focus becomes your paintbrush, controlling exactly what pops and what blurs.
Understanding Camera Aperture settings is essential for capturing stunning images.
In aperture priority mode, you’ll craft depth of field like a pro – bringing stunning image clarity to life while keeping your subject razor-sharp against a dreamy, soft background.
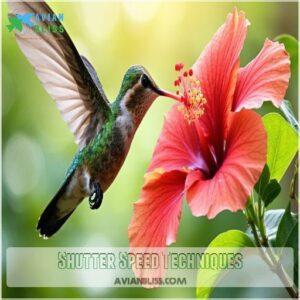
Shutter Speed Techniques
Want to turn your blurry bird photos into razor-sharp masterpieces? Master your camera’s shutter speed, and you’ll freeze feathered friends mid-flight, capturing every intricate detail with professional precision.
Fast Shutter Speeds
Capturing crisp bird shots demands lightning-fast shutter speeds. After mastering aperture’s depth of field, it’s time to freeze feathered friends mid-flight with razor-sharp precision.
Investing in the right Bird Photography equipment can substantially enhance your bird photography experience.
- Lock in 1/1000 second for wing-stopping clarity
- Eliminate motion blur with rapid exposures
- Choose camera modes supporting high-speed capture
- Match lens focal length to shutter technique
Your camera becomes a time-freezing magic wand, transforming split-second bird moments into gallery-worthy memories.
Slow Shutter Speeds
Sometimes, slow shutter speeds become your artistic ally in bird photography, transforming ordinary shots into mesmerizing motion blur compositions.
By deliberately slowing down your camera’s shutter, you’ll release creative blur techniques that paint dynamic movement and capture the essence of avian grace.
Experiment with speeds like 1/15 to 1/60 for stunning, painterly bird images that break traditional photography rules.
Shutter Speed and Motion
Were those blurry bird shots driving you crazy? Shutter speed is your secret weapon for Motion Blur Control. Here’s how to master the art of capturing birds in motion:
- Fast Capture at 1/1000 second freezes split-second wing movements
- Slow Shutter techniques create stunning motion blur effect
- Panning Technique tracks moving subjects with artistic precision
Understanding bird photography composition techniques can also greatly enhance your ability to capture stunning bird photos.
Your camera settings can transform ordinary shots into extraordinary bird photography moments.
ISO Settings Optimization
You’ll want to master ISO settings to capture crisp, noise-free bird photos that pop with incredible detail.
Understanding how to optimize your camera’s sensitivity to light will transform your wildlife shots from blurry disappointments to stunning, sharp images that showcase every feather.
Low ISO Benefits
At the heart of image clarity, a low ISO setting is your secret weapon for noise reduction in bird photography.
By keeping your ISO as low as possible, you’ll capture sharper, cleaner images with stunning detail, and this technique will help preserve the intricate feather textures that make bird photos truly breathtaking, which can be achieved by sticking to ISO 100-400 in bright conditions to maximize image quality.
High ISO Uses
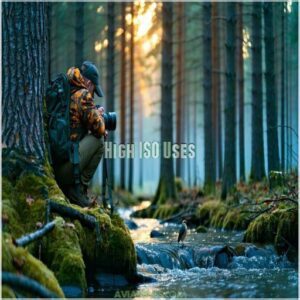
When light gets scarce, you’ll want to crank up your ISO to capture those elusive birds.
High ISO settings let you shoot in darker conditions, trading some image quality for the ability to freeze action.
But be smart: in aperture priority mode, balance digital gain carefully to minimize high ISO noise while maintaining shutter speed for crisp shots.
ISO and Noise Reduction
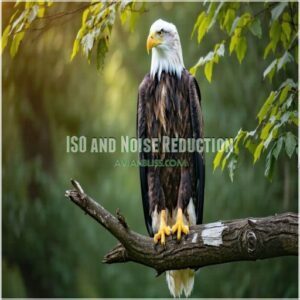
Nail down your noise reduction skills to keep your bird photos crystal clear. ISO can make or break your image quality, especially in tricky lighting.
Here’s how to minimize digital grain and preserve those crisp details:
- Stick to lowest possible ISO
- Use noise reduction in post-processing
- Invest in a camera with superior low-light performance
- Leverage aperture priority mode strategically
- Sharpen images selectively to combat noise
Focus Modes Compared
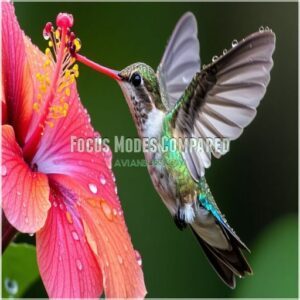
When you’re tracking a swift bird through your viewfinder, choosing the right focus mode can mean the difference between a blurry disappointment and a razor-sharp masterpiece.
You’ll want to understand the nuances of continuous autofocus, back-button focus, and manual focus to capture those breathtaking avian moments with precision and confidence.
Continuous Autofocus
Continuous autofocus is your best ally for tracking birds mid-flight.
This AF setting locks onto motion with fast focus adjustments, keeping your shots sharp as birds dart unpredictably, especially paired with a high shutter speed.
It’s a lifesaver for motion capture, especially when considering the challenges of photographing birds in flight, and your best ally will help your images turn out well.
Explore your camera’s autofocus modes to verify it’s set for bird photography.
Trust it—your images will soar!
Back-Button Focus
Back-button focus gives you game-changing control for focus precision in bird photography. By using the AF-ON button for autofocus, you can:
- Lock focus on perches, recomposing easily.
- Track birds mid-flight with continuous autofocus.
- Avoid unwanted refocusing for tricky shots.
- Simplify multitasking with smart button mapping.
Understanding the back button technique is essential for mastering this focus technique.
This focus technique keeps you ready for every action-packed moment!
Manual Focus
If autofocus feels limiting or struggles to lock onto a bird obscured by branches, manual focus can be your go-to tool for precision.
Paired with lens calibration and manual controls, you adjust the focal point exactly where you want it.
This technique shines with perched subjects, especially in manual mode, where you control aperture value and focal length effortlessly.
Bird Photography Tips
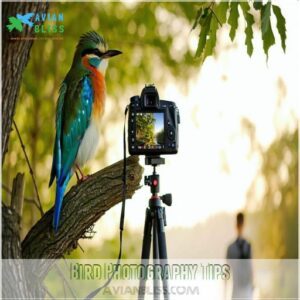
Capturing stunning bird photos requires patience, smart planning, and the right camera settings.
Whether it’s a sharp portrait or an action-packed shot of a bird in flight, understanding your gear will help you nail the perfect moment.
Bird Portraits
In the context of bird portraits, nailing those feather details and sharp beak shapes is everything.
Use a wide aperture like f/4 to blur the background and make the plumage textures pop.
Eye capture is key—focus there for a striking shot.
Pair this with ISO 400-800 for perfect lighting and experiment with your bird photography camera settings for breathtaking results.
Mastering bird conservation techniques can also elevate your photography skills and contribute to the preservation of bird species.
Environmental Portraits
Capturing environmental portraits highlights birds in their natural habitat. Balance the bird’s details with the surrounding nature by adjusting your aperture value for a deeper depth of field.
- Use f/8 or f/11 to include rich landscape views.
- Track bird behavior to predict dynamic poses.
- Prioritize wildlife conservation by keeping distance.
- Explore soft light during golden hours to enhance colors.
Birds in Flight
Nailing those airborne moments takes practice and the right camera settings for birds in flight.
Use a telephoto lens, continuous autofocus, and a shutter speed of at least 1/1000 to capture crisp wing movement.
Anticipate flight patterns by tracking birds early.
Burst mode ups your chances of killer aerial shots.
Steady hands—or a monopod—are a must!
Camera Settings Scenarios
Understanding which camera settings work best in different scenarios can make or break your bird photos.
Whether you’re shooting in low light, bright sunlight, or trying to capture fast-moving action, adjusting your settings correctly guarantees sharper, more vibrant shots.
Low Light Conditions
Low light photography tests your patience and settings know-how. To keep shadow details sharp and avoid noise:
- Use a wider aperture (f/2.8-f/4) for more light.
- Increase ISO but stick to noise reduction in editing.
- Lower shutter speed slightly, but not below 1/300 for motion.
When capturing bird behavior is the goal, understanding these camera settings is essential for achieving professional results.
Experiment, and don’t shy away from flash usage when necessary, such as when capturing bird behavior on camera.
Bright Light Conditions
Bright light can wash out colors and details in bird photography. Use faster shutter speeds to control sunlight exposure and avoid overexposure.
Dial down your ISO to reduce noise while maintaining sharpness. Adjust aperture to balance bright contrast and depth.
Leverage light metering for shadow control and highlight reduction. Understanding bird photography techniques is vital for capturing stunning images.
Continuous autofocus guarantees crisp details, even in harsh lighting.
Action Shots
Action shots demand speed and precision. To freeze motion, use these key camera settings for birds:
- Shutter speed: Minimum 1/1000 to avoid motion blur, faster for birds in flight.
- Fast lenses: Wide apertures, like f/2.8, brighten shots.
- Bird tracking: Continuous autofocus guarantees sharp focus.
- Burst mode: Capture split-second moments easily.
- Camera stabilization: Use a tripod or monopod for steady results.
Advanced Camera Settings
Mastering advanced camera settings like white balance, metering mode, and burst mode can take your bird photography to the next level.
These precise adjustments help you capture stunning images, whether you’re dealing with tricky lighting or fast-moving subjects.
White Balance
White balance is key to nailing natural colors. Auto White is fine for starters, but for tricky lighting conditions, try custom presets or manual tweaks.
Adjusting color temperature keeps birds’ feathers looking true to life. Warm glow at sunrise? Cool daylight hues? Perfect!
Here’s a cheat sheet:
| Use Case | |||
|---|---|---|---|
| Sunrise/Sunset | Cloudy | 6000-7000 | Golden glow; warm tones |
| Overcast | Shade | 7000-8000 | Neutral balance in soft light |
| Midday Sun | Daylight | 5000-6000 | True and balanced representation |
| Indoor/Artificial | Tungsten | 3000-3500 | Neutralizing orange lighting |
Metering Mode
Getting light and color right matters as much as sharpness. Metering mode adjusts how your camera measures light.
For bird photography settings:
- Evaluative Metering balances light across the frame.
- Spot Metering isolates tricky exposures, like a bird’s face.
- Center-Weighted Metering prioritizes your subject’s lighting.
- Partial Metering prioritizes high-contrast skies effortlessly was incorrect, it was high-contrast skies effortlessly.
Master this, and your exposure triangle will rarely stumble.
Burst Mode
Burst mode is your best friend when nailing action shots in bird photography.
It helps capture fast motion with minimal blur, especially for birds in flight. Pair it with continuous autofocus and a high frame rate to track movement seamlessly.
Use a fast shutter speed to reduce camera shake, ensuring sharp results. These camera settings for birds are unbeatable for fast capture moments.
Frequently Asked Questions (FAQs)
What are the best bird photography camera settings?
Start with Aperture Priority mode using f/6 for soft backgrounds, ISO 800 for balanced light sensitivity, and a shutter speed of 1/1000 to freeze motion.
Use continuous autofocus and track birds like they’re celebrities.
What is the best aperture for bird photography?
Picture a bird framed perfectly against a creamy backdrop—use a wide aperture like f/4 or f/6 to blur distractions and make your subject pop.
Close up? Test f/8 for sharper details.
How to take a bird photo on a camera?
Focus on the bird’s eye, use a long lens (300mm+), wide aperture (f/4–f/6), and fast shutter speed (1/1000+).
Switch to continuous autofocus, keep ISO low, and shoot during soft morning light.
How do I know if my camera is good for bird photography?
You’ve got the right camera for bird photography if it has a fast burst mode, good low-light performance, reliable autofocus, and compatibility with telephoto lenses.
Test its speed and precision to be sure!
What is the best ISO setting for bird photography?
Start with ISO 800 for bird photography—it’s bright enough for sharp shots yet avoids too much image noise.
Adjust higher for dim light or action, but balance it carefully to minimize grainy distractions.
Experiment!
How to capture birds in flight with a camera?
Over 90% of bird photographers recommend shutter speeds of at least 1/1000 to freeze motion.
Pair that with continuous autofocus, burst mode, and a wide aperture to track flight patterns effortlessly and capture crisp shots.
What is the best setting for bird photography?
Use Aperture Priority mode with a wide aperture (f/6) to blur the background, ISO 800 for balanced light sensitivity, and fast shutter speeds (1/1000+) to freeze motion.
Continuous autofocus helps track those unpredictable bird movements.
What ISO is best for bird photography?
Start around ISO 800 for bird photography, especially in good light.
Adjust higher in low light but watch for noise.
Finding balance between sharpness and clarity is key—trial and error will be your best guide.
How to set up a camera for bird photography?
Think of your camera as a birdwatcher’s toolkit—set aperture priority mode for depth control, use continuous autofocus for sharpness,
keep ISO around 800 for clarity, and crank shutter speed above 1/1000 to freeze flight.
How do you get sharp pictures in bird photography?
To nail sharp bird photos, use fast shutter speeds (1/1000+), continuous autofocus, and back-button focus to track movement.
Steady your camera with a tripod or monopod, and prioritize focus on the bird’s eye for detail.
Conclusion
Mastering the best camera settings for bird photography takes practice, but it’s totally worth it.
The balance of wide apertures for dreamy backgrounds and fast shutter speeds for crisp flight shots is essential.
Pair that with ISO tweaks and continuous autofocus to capture every wing-beat in sharp detail.
Don’t forget, tools like back-button focus and burst mode can make all the difference.
With these tips, you’ll turn fleeting wildlife moments into stunning, frame-worthy images.
- https://expertphotography.com/camera-settings-for-bird-photography/
- https://learnbirdwatching.com/best-camera-settings-for-bird-photography/
- https://digital-photography-school.com/bird-photography-camera-setting/
- https://www.reddit.com/r/photography/comments/fgbqjs/best_settings_for_capturing_birds/
- https://www.kevinpepperphotography.com/shutter-speeds-for-wildlife-photography

