This site is supported by our readers. We may earn a commission, at no cost to you, if you purchase through links.
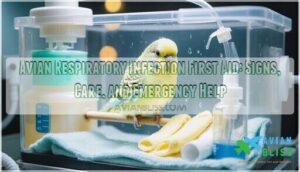
Avoid smoking, air fresheners, or anything “smelly” that could worsen the problem. Watch for open-mouth breathing, tail bobbing, or wheezing—clear warning signs.
If you have a nebulizer handy, use it with a vet-approved saline solution to ease breathing. Don’t forget, stressed birds don’t heal well, so keep the noise and handling to a minimum.
Severe cases need the vet ASAP, so call quickly if things escalate—you’ll thank yourself later, as stressed birds don’t heal well and may require immediate veterinary attention.
Table Of Contents
- Key Takeaways
- Recognizing Avian Respiratory Infection Symptoms
- Avian Respiratory Infection First Aid at Home
- Understanding The Causes of Avian Respiratory Infections
- Essential First Aid Supplies for Avian Respiratory Infections
- Preparing Food Safely to Prevent Avian Influenza
- The Role of Vaccination in Preventing Avian Influenza
- When to Seek Veterinary Care for Avian Respiratory Infections
- Managing and Preventing Avian Respiratory Infections in Flocks
- Frequently Asked Questions (FAQs)
- Can avian respiratory infections be transmitted to humans?
- What is the recovery time for avian respiratory infections?
- Can stress contribute to avian respiratory infections?
- How can I support my bird’s immune system during an infection?
- Are there any natural remedies for avian respiratory infections?
- How to treat bird respiratory infection at home?
- What is the medicine for respiratory infection in birds?
- Can birds recover from respiratory infections?
- How do you help a bird that is struggling to breathe?
- How do you treat respiratory infection in chickens at home?
- Conclusion
Key Takeaways
- Move your bird to a warm, quiet space (70–80°F) with added humidity to ease breathing.
- Watch for critical signs like open-mouth breathing, tail bobbing, or wheezing—these need immediate attention.
- Use a nebulizer with vet-approved saline or medications, but limit sessions to avoid stress.
- Severe cases require prompt veterinary care—don’t wait if symptoms worsen.
Recognizing Avian Respiratory Infection Symptoms
You’ll notice your bird’s breathing changes before other symptoms appear, making early detection essential for successful treatment.
Early detection of breathing changes in birds paves the way for quicker treatment and a healthier, happier feathered friend.
Watch for tail bobbing, rapid breathing, clicking sounds, or your bird sitting quietly at the cage bottom with ruffled feathers, as these signs indicate your feathered friend needs immediate attention.
Common Signs and Symptoms in Birds
Spotting respiratory symptoms in your bird requires careful observation. When your feathered friend develops an avian respiratory infection, you’ll notice these warning signs:
- Breathing Difficulties – rapid breathing, tail bobbing, or bird breathing heavily
- Behavioral Changes – lethargy, decreased appetite, sitting at cage bottom
- Feather Changes – ruffled, fluffed-up appearance indicating discomfort
- Discharge Types – nasal discharge, watery eyes, or mouth secretions
Watch for Posture Abnormalities like drooping wings and clicking sounds during breathing – these signal respiratory distress needs immediate attention.
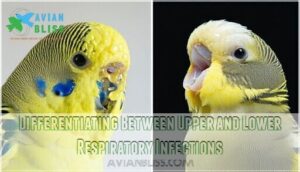
Differentiating Between Upper and Lower Respiratory Infections
Now that you’ve spotted the common warning signs, pinpointing whether your bird’s infection sits in the upper or lower respiratory tract helps you respond appropriately.
Upper respiratory infections target your bird’s nose, sinuses, and throat.
You’ll notice nasal discharge, sneezing, and voice changes.
Eye swelling often accompanies these symptoms, and your bird might make clicking or wheezing breathing sounds.
Lower respiratory infections affect the lungs and air sacs.
Watch for tail bobbing, labored breathing from the chest, and distinct posture changes where your bird sits low with drooped wings.
| Upper Respiratory Signs | Lower Respiratory Signs |
|---|---|
| Nasal discharge, sneezing | Tail bobbing, chest breathing |
| Voice changes, clicking sounds | Open-mouth breathing |
| Eye swelling, head shaking | Drooped wings, low posture |
| Throat clearing attempts | Abdominal effort breathing |
| Runny nose, watery eyes | Severe breathing distress |
Understanding these differences guides your first aid approach and helps veterinarians plan targeted treatments like nebulization therapy.
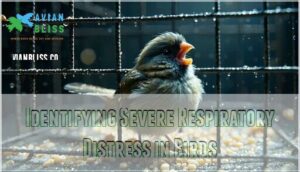
Identifying Severe Respiratory Distress in Birds
Beyond basic infection signs, severe respiratory distress demands immediate action.
Your bird’s body language tells the story – watch for these emergency indicators:
- Open-mouth breathing with visible tongue discoloration (cyanosis signs)
- Extreme tail bobbing paired with wings drooping or held away from body
- Collapse risk behaviors like sitting on cage bottom, unable to perch
These neurological symptoms signal crisis-level avian respiratory infection.
Avian Respiratory Infection First Aid at Home
When you spot respiratory symptoms in your bird, you’ll need to act quickly but calmly to provide immediate care before veterinary treatment.
Your home first aid response can stabilize your feathered friend’s condition and prevent complications, but it’s not a substitute for professional medical attention, and you should seek veterinary treatment as soon as possible.
Stabilizing The Bird Before Treatment
Now that you’ve identified respiratory distress signs, you must act fast to stabilize your bird. Every second counts when dealing with labored breathing.
Maintain warmth by moving your bird to a warm humid environment (85-90°F).
Here’s your immediate action plan:
- Minimize stress – reduce handling and dim lights
- Encourage intake – offer fresh water nearby
- Create a quiet environment for safe transport to your vet
Providing Oxygen Therapy and Airsac Tubes
When respiratory distress hits, oxygen therapy and airsac tubes are lifesavers.
Oxygen therapy and airsac tubes provide life-saving support, offering your bird the breath of relief it urgently needs during respiratory distress.
Set up oxygen by placing your bird in a small carrier, delivering 1-2 liters per minute. In critical cases, vets may insert an airsac tube for direct breathing support. Some owners also purchase airsac tube products for emergency preparedness.
| Oxygen Delivery | Usage | Benefit |
|---|---|---|
| Enclosed Carrier | Home use | Simple oxygen delivery |
| Airsac Tube Placement | Vet-provided | Immediate stabilization |
| Monitoring Oxygenation | Pulse oximeter | Tracks oxygen levels |
Stay calm and act fast!
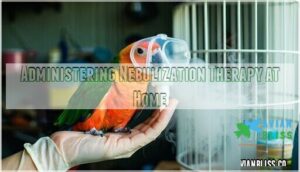
Administering Nebulization Therapy at Home
Nebulization therapy feels like breathing fresh mountain air, but customized to ease your bird’s respiratory distress.
It’s a straightforward process:
- Prepare a nebulizer solution per vet instructions.
- Use bird-safe antibiotics or F10 SC diluted 1:10.
- Position the nebulizer 12–18 inches from the cage for ideal mist delivery.
- Limit sessions to 10–15 minutes, 2–3 times daily.
- Watch for stress—panting or fluffed feathers signal discomfort.
A specialized device like a bird nebulizer can help deliver medication effectively.
Always clean equipment after each use to avoid infections, ensuring effective treatment for avian respiratory infections.
Preparing a Safe and Hygienic Environment
Creating a clean, stress-free recovery area is essential for your bird’s health.
Set up a quarantine space with steady warmth (75-80°F) and 40-50% humidity. Use avian-safe cleaners for daily cage cleaning and remove dusty items to improve air quality. Add an air purifier to enhance ventilation. Stick to strict hygiene practices.
Here’s a quick guide:
| Task | Frequency | Tools Needed |
|---|---|---|
| Cage cleaning | Daily | Avian-safe cleaner, gloves |
| Sanitation | Weekly deep clean | Disinfectants, fresh papers |
| Monitor air quality | Always | Air purifier |
| Reduce stress | Continuous | Quiet, dim room |
Understanding The Causes of Avian Respiratory Infections
Respiratory infections in birds can come from viruses, bacteria, fungi, or even environmental factors like dust and poor air quality.
Understanding these causes helps you protect your bird and catch issues before they turn serious, which is crucial for maintaining your bird’s health and preventing serious complications.
Avian Influenza (Bird Flu) and Its Transmission
Avian influenza, or bird flu, spreads quickly among domestic and wild birds, with viral subtypes like H5N1 being highly contagious.
Transmission routes include saliva, mucus, feces, and contaminated surfaces. You’ll want to keep a close eye because these viruses mutate rapidly, complicating control efforts.
Symptoms in birds often include:
- Sudden lethargy and loss of appetite
- Difficulty breathing and respiratory noises
- Nasal discharge or swollen sinuses
- Unexplained deaths in flocks
Zoonotic potential exists, so avoid close contact to prevent risks and ensure control efforts are effective.
Newcastle Disease and Infectious Bronchitis
Newcastle Disease and infectious bronchitis in birds can wreak havoc on your flock if left unchecked.
Both spread rapidly but show distinct signs:
- Newcastle Symptoms: Gasping, head-shaking, high mortality rates.
- Bronchitis Transmission: Sneezing, watery eyes, reduced egg yield.
- Disease Prevention: Keep strict hygiene, vaccinate, isolate sick birds.
Early action is critical for minimizing losses.
These diseases impact more than health—they hurt finances too, with severe economic impacts on flocks and owners alike.
Mycoplasma and Bacterial Infections in Birds
Bacterial infections are stealthy, often catching you off guard.
Mycoplasma, like an annoying guest, causes chaos in your bird’s body, inviting other infections. The immune suppression makes respiratory problems worse, triggering chronic issues.
| Concern | Effect on Birds |
|---|---|
| Mycoplasma Transmission | Spreads in close quarters |
| Bacterial Resistance | Hampers antibiotic use |
| Immune Suppression | Weakens overall health |
| Coinfections | Complicates treatments |
| Treatment Strategies | Designed by avian vets |
Recognize bird respiratory infections early and consult an avian vet for proper care!
Other Causes of Respiratory Infections in Birds
Sometimes, your bird’s respiratory health faces unexpected threats, like Aerosol Poisoning, which can cause sudden distress.
Beyond Mycoplasma, several culprits can harm their breathing:
- Bacterial Strains: Staphylococcus aureus causes skeletal issues, while Bordetella avium triggers coryza.
- Fungal Infections: Often thrive in damp environments, attacking weakened birds.
- C. psittaci (Psittacosis): This bacterial infection spreads rapidly via airborne particles.
- Pasteurella multocida: Leads to fowl cholera, devastating flocks.
- Environmental Factors: Dust, smoke, or poor ventilation worsen respiratory risks.
Prevention protects!
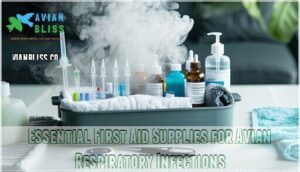
Essential First Aid Supplies for Avian Respiratory Infections
Having the right supplies on hand can make a critical difference when your bird shows signs of respiratory distress.
From humidifiers to basic medications, assembling a first aid kit suited for avian care helps you act swiftly and effectively.
Personal Protective Equipment (PPE) for Owners
How can you protect yourself when caring for a sick bird? Start with PPE types like disposable gloves, N95 masks, and protective eyewear.
Wear a washable gown or old clothing to reduce transmission risks. After handling, clean PPE thoroughly or use proper disposal methods.
Safe handling and biosecurity practices—like disinfection and quarantine—help prevent cross-contamination and keep both you and your feathered friends healthy.
Medications and Antibiotics Commonly Used
When treating an avian respiratory infection, antibiotics like doxycycline or enrofloxacin are your go-to bird respiratory meds.
Antifungal drugs handle fungal issues, while nebulization solutions deliver medication directly to the lungs.
Anti-inflammatories and mucolytic agents, like guaifenesin, reduce swelling and loosen mucus.
Always consult your veterinarian for exact dosages—guesswork can harm your bird’s recovery more than help, and medications save lives when used right!
Nebulizers and Humidifiers for Respiratory Relief
For respiratory relief, a nebulizer transforms liquid into a fine mist, allowing medications or saline solutions to reach your bird’s lungs directly.
Different nebulizer types cater to specific needs—consult your vet for guidance.
Humidifiers, set to 40-60%, help maintain air moisture, soothing irritated airways and aiding recovery. Always opt for cool-mist humidifiers to avoid overheating.
Cleaning protocols are critical: clean nebulizers and humidifiers thoroughly after use to prevent bacteria buildup.
Consider an avian nebulizer purchase for effective treatment. Regular nebulization and proper humidifier settings guarantee your feathery friend breathes easier during stressful times, ensuring a faster recovery with the right treatment.
Oxygen Tanks and Airsac Tubes for Emergency Use
When respiratory distress strikes, oxygen therapy can save your bird’s life.
A portable oxygen tank and airsac tubes are must-haves in your first aid kit. Oxygen delivery methods, like controlled-flow tanks, guarantee safe, regulated support during emergencies.
Here’s what to keep ready:
- Portable oxygen tank with a flow regulator.
- Airsac tubes, sized for your bird.
- Sterile saline solution for cleaning.
- Gloves and face masks for hygiene.
- Disinfectant wipes for quick sterilization.
Monitor oxygenation closely, follow guidelines for Emergency Oxygen Dosage, and provide proper Post-Tube Care. Preparation matters!
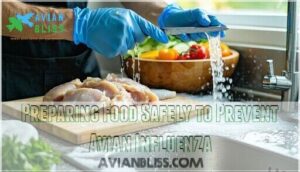
Preparing Food Safely to Prevent Avian Influenza
You can reduce the risk of avian influenza by handling poultry and eggs with care, cooking them thoroughly to kill harmful pathogens.
Wash your hands and utensils after contact with raw poultry, and keep raw meat away from other foods to prevent contamination.
Handling and Cooking Poultry and Eggs
Your kitchen’s biosecurity starts with safe handling and cooking.
Always cook poultry and eggs to 165°F—use a thermometer, not guesswork.
Raw poultry and eggs can be sneaky carriers of avian influenza, so treat them like tiny pathogens.
Wash hands thoroughly, store them separately, and clean surfaces immediately after contact.
Proper egg storage and careful handling help maintain kitchen safety, reducing cross-contamination risks.
Remember, a clean kitchen is a healthier kitchen!
Preventing Cross-Contamination in The Kitchen
In your kitchen, small changes can make a world of difference in preventing cross-contamination and ensuring kitchen safety.
Keep biosecurity in mind by making smart choices during food prep:
- Use Separate Cutting Boards: Red for raw poultry, green for produce.
- Practice Good Hand Washing: Scrub your hands thoroughly before and after handling food.
- Surface Disinfection Methods: Wipe countertops with hot, soapy water or food-safe sanitizer after prepping.
Don’t forget proper food storage protocols—keep raw poultry on the bottom shelf to avoid drips.
These habits protect your health while reinforcing sanitation.
Safe Disposal of Infected Bird Carcasses
When cleaning up infected bird carcasses, follow strict Carcass Handling Protocols to guarantee safety and prevent cross-contamination.
Start with Personal Protective Equipment like gloves. Use a sturdy plastic bag turned inside out to pick up the bird, seal it, then double-bag for added biosecurity.
Dispose of it according to Legal Requirements by placing it in a secure trash container. Thoroughly clean and disinfect surfaces afterward to protect the environment and prevent further risks.
For questions about Disinfection Procedures or local quarantine rules, contact wildlife authorities. Always prioritize Environmental Protection—improper disposal puts others, including wildlife, at risk of illness. Stay safe!
The Role of Vaccination in Preventing Avian Influenza
Vaccination plays a vital role in keeping birds safe from the dangerous avian influenza virus, helping their immune system fight off infection.
It’s a simple yet effective way to protect your flock and reduce the spread of this highly contagious disease.
The U.S. Government’s Vaccine Development Efforts
Keeping birds safe from avian flu starts with robust vaccine funding and research grants.
The U.S. is investing heavily in avian influenza vaccines, targeting threats like H5N1. Agencies like the CDC run clinical trials, develop emergency use stockpiles, and track flu strains, ensuring swift responses to bird respiratory illnesses.
These efforts act as a safety net, reducing risks before avian flu symptoms spiral. Think of it as insuring public health for both birds and humans.
Seasonal flu vaccines for humans also play a part, reducing cross-species influenza risks in shared environments, which is crucial for public health.
Effectiveness of Vaccines Against Avian Influenza
In regards to avian influenza, vaccines are helpful but not flawless.
Their efficacy depends on targeting specific strains, yet avian flu’s rapid mutations pose challenges.
Vaccinated birds often show partial immunity, reducing avian respiratory infection severity, shedding, and death rates by 60-80%.
While vaccination programs improve disease control, the need for future research remains critical.
Always consult an avian vet treatment plan customized to your bird’s risks.
Importance of Seasonal Flu Vaccines for Owners
Getting a seasonal flu shot is a simple step that helps protect both you and your bird.
It reduces the risk of spreading infections while ensuring you’re ready to care for your feathered friend.
Here’s why it’s important:
- Owner Protection: Prevents seasonal flu, so you stay healthy.
- Reduced Transmission: Lowers the chance of combining flu viruses when handling birds.
- Bird Health: Helps you focus on avian respiratory infection first aid—keeping birds safe and healthy.
When to Seek Veterinary Care for Avian Respiratory Infections
If your bird shows signs like labored breathing, nasal discharge, or sitting fluffed up and lethargic, it’s time to call a vet.
Don’t wait—birds can hide illnesses, and delaying care could make things worse.
Recognizing Emergency Situations in Birds
When your bird shows signs of breathing difficulty like open-mouth breathing, rapid tail bobbing, or labored breathing, you’re dealing with a critical situation.
Look out for avian emergencies like sudden collapse, bluish skin (cyanosis), or severe lethargy.
Neurological signs, such as difficulty perching, may also hint at respiratory distress.
Immediate action is vital—don’t wait for signs like wing drooping or dramatic trauma response.
Time is your best ally— get your bird to a vet at the first signs of distress.
Always trust your instincts!
Veterinary Diagnostic Procedures and Tests
If your bird shows alarming respiratory symptoms, it’s time to visit an avian vet for precise diagnostic evaluations.
They’ll run tests like:
- Blood Analysis: Checks infection markers and organ health.
- Radiography (X-rays): Analyzes air sacs and lungs for abnormalities.
- Culture Sensitivity & PCR Testing: Identifies specific pathogens affecting breathing.
These procedures help your veterinarian pinpoint issues, ensuring effective treatment.
Think of it as your bird’s "CSI moment" for faster recovery.
Treatment Options and Medications Prescribed by Veterinarians
Your vet tailors treatment for avian respiratory infections based on your bird’s symptoms.
Antibiotic choices like doxycycline and azithromycin target bacterial infections. Antifungal drugs such as itraconazole treat fungal cases, while anti-inflammatories like meloxicam ease swelling.
Nebulization therapy delivers antibiotics or mucolytic agents directly to the respiratory tract, aiding breathing. For severe distress, oxygen and fluid therapy might be needed.
Trust your avian veterinarian to balance bird respiratory antibiotics and supportive care for effective recovery.
Managing and Preventing Avian Respiratory Infections in Flocks
If your flock’s health is a priority, managing respiratory infections starts with strong prevention practices.
By focusing on biosecurity, quarantine, and routine check-ups, you’ll keep your birds breathing easy and your flock thriving.
Biosecurity Measures for Flock Owners
Protecting your flock from avian respiratory infections starts with strong biosecurity. Think of your setup as a fortress guarding against invisible enemies.
Here’s how to keep them safe:
- Use footbaths at entry points to kill bacteria.
- Limit visitors to those absolutely necessary.
- Separate equipment for different age groups to prevent cross-contamination.
- Create clean zones and keep dirty areas isolated.
With these simple practices, you’ll build a healthy, infection-free flock.
Quarantine and Isolation Protocols
To limit the spread of respiratory infections, set up an isolated area at least 30 feet from your flock.
Use separate equipment for quarantined birds, changing clothes and disinfecting thoroughly after handling them.
Keep new or sick birds in quarantine for 30-45 days, checking for symptoms like sneezing or nasal discharge twice daily.
A simple respiratory infection quarantine guarantees safety—you’re not just protecting birds, but minimizing the risk of being the disease’s unwitting delivery service, which is crucial for preventing the spread of infections.
Regular Health Check-Ups and Monitoring for Birds
In the context of bird health, a little attention goes a long way.
Start a daily log to track things like weight monitoring, eating habits, and behavior observation.
Subtle shifts can signal bird symptoms like respiratory infection symptoms.
Schedule regular check-ups with an avian veterinarian for fecal exams and other preventative care.
Early detection saves lives as well as keeps your feathered friends chirping happily, and this is crucial for their overall health and well-being.
Frequently Asked Questions (FAQs)
Can avian respiratory infections be transmitted to humans?
Don’t ruffle your feathers, but some avian respiratory infections, like psittacosis, can jump to humans.
It’s rare, though, and good hygiene—like washing hands after handling birds—keeps you safer than a bird in hand.
What is the recovery time for avian respiratory infections?
Recovery time for avian respiratory infections varies but typically takes 1-3 weeks with proper care.
You’ll see improvement faster if you follow vet advice, keep stress low, and maintain a clean, humid environment.
Can stress contribute to avian respiratory infections?
Stress weakens a bird’s immune system, making it easier for infections to take hold.
Just like people, birds under stress struggle to fight off illnesses.
Reduce stress with a calm environment, proper care, and routine vet checks to help maintain a bird’s health and prevent illnesses, making reduce stress a key factor.
How can I support my bird’s immune system during an infection?
An ounce of prevention’s worth a pound of cure—offer fresh fruits, greens, and high-nutrient pellets, reduce stress with quiet surroundings, and use a humidifier for comfort.
Always consult your avian vet for supplements or care.
Are there any natural remedies for avian respiratory infections?
Natural remedies include steaming for nasal congestion, diluted apple cider vinegar (with vet approval), and echinacea for immunity.
Always prioritize vet-recommended care, as holistic methods should support—not replace—medical treatment for serious infections.
How to treat bird respiratory infection at home?
Move your bird to a warm, quiet space, use a humidifier or steam from a bathroom to ease breathing.
Make certain fresh water and a clean cage are available.
Contact an avian vet for proper guidance.
What is the medicine for respiratory infection in birds?
Treating avian respiratory infections can feel like traversing a stormy sky.
Common medications include antibiotics like doxycycline or enrofloxacin for bacteria, and antifungals like itraconazole for fungi.
Always consult an avian vet for accurate treatment.
Can birds recover from respiratory infections?
Yes, birds can recover from respiratory infections if treated promptly.
Veterinary care, proper medication, and supportive care like warmth, hydration, and stress reduction are essential.
Early intervention makes all the difference in their recovery.
How do you help a bird that is struggling to breathe?
When in doubt, breathe it out—steam can help.
Place your bird in a steamy bathroom for 10-15 minutes, keep them warm and calm, and consult an avian vet immediately for personalized care.
How do you treat respiratory infection in chickens at home?
Start by isolating the chicken in a warm, quiet space, make certain clean water is available.
Add apple cider vinegar (1 tablespoon per gallon) to boost immunity, and use steam for congestion.
Consult a veterinarian if symptoms persist.
Conclusion
Acting quickly when facing avian respiratory infection first aid can save your bird’s life.
Watch for warning signs like tail bobbing or open-mouth breathing, and keep the environment warm, humid, and calm.
Use a nebulizer with vet-approved saline if available, but avoid over-handling, and remember that severe cases need immediate veterinary care.
So don’t delay if symptoms worsen, as staying attentive and prepared with the right supplies guarantees you’re ready to help your bird when they need you most, which is crucial for immediate veterinary care.
- https://en.wikipedia.org/wiki/Avian_infectious_bronchitis
- https://elsevier.health/en-US/preview/oxygen-therapy-nasal-cannula-or-oxygen-mask-ambulatory-ce
- https://www.dvm360.com/view/avian-treatments-work-proceedings
- https://www.petmd.com/reptile/conditions/respiratory/respiratory-infections-reptiles
- https://allbirdproducts.com/collections/bird-antibiotic-medications?page=3

