This site is supported by our readers. We may earn a commission, at no cost to you, if you purchase through links.
You capture the shot—a kingfisher mid-dive, wings tucked, feathers sharp against morning light. The RAW file holds everything your sensor recorded, but what sits on your memory card isn’t what you envisioned through the viewfinder.
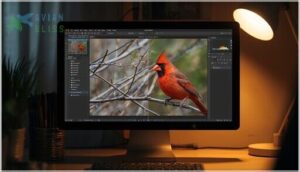
A structured bird photography editing workflow transforms that raw data into the image you saw in the field, pulling detail from shadows, controlling distracting backgrounds, and revealing the intricate texture in each feather.
The difference between a snapshot and a portfolio piece often lives in the post-processing, where deliberate adjustments to exposure, local contrast, and selective sharpening separate keepers from near-misses.
Here’s how to build a repeatable system that moves your images from import to final export with consistency and control.
Table Of Contents
- Key Takeaways
- Choosing and Organizing Bird Photos
- Essential Editing Tools and Software
- Global Adjustments for Bird Images
- Local Editing Techniques for Detail Enhancement
- Exporting and Optimizing Final Images
- Frequently Asked Questions (FAQs)
- What is the best editing software for bird photography?
- Which is the correct order of photographic workflow?
- What is the best shooting mode for bird photography?
- How can lighting conditions influence editing decisions?
- What are the best practices for saving edited files?
- How does background selection impact the subjects clarity?
- What common mistakes should be avoided during editing?
- How to handle motion blur in flight shots?
- When should you use focus stacking techniques?
- How to preserve natural colors in harsh lighting?
- Conclusion
Key Takeaways
- A structured bird photography editing workflow transforms RAW files into portfolio-quality images through deliberate post-processing decisions on exposure, local contrast, and selective sharpening that separate keepers from near-misses.
- High-frame-rate bird shoots generate thousands of images, but only 1–10 percent survive technical culling at 100 percent magnification—star ratings during the culling phase mark frames with crisp feather detail, clean backgrounds, and compelling behavior for keeper selection.
- Global adjustments establish your editing foundation by setting proper exposure, contrast, and white balance before local refinements, while the tone curve provides precision control for shadow recovery and highlight preservation without crushing blacks or blowing whites.
- Local masking and selective adjustments deliver surgical control over specific areas—maximum sharpening on the beak, eye enhancement through brightened catchlights and lifted iris clarity, and moderate texture sliders (7–25 range) for plumage detail without noise amplification.
Choosing and Organizing Bird Photos
Before you touch a single slider, you need a system that keeps your best shots within reach and everything else out of your way. A solid workflow starts the moment you pull your memory card, and the decisions you make here will either save you hours or leave you drowning in thousands of similar frames.
Let’s break down how to import, evaluate, and organize your bird photos so you can spend more time editing and less time hunting through folders.
Importing and Cataloging RAW Images
Your RAW files deserve a rock-solid foundation from day one. Use Lightroom or Capture One to copy images from your SD card into a dedicated folder structure—organize by year and event for quick retrieval.
During image ingestion, these catalog organization tools automatically capture metadata like exposure settings and lens data, turning chaotic shoots into searchable libraries. Set consistent folder structure rules now, and you’ll save hours down the road.
Establishing a good file storage system is essential for efficient photo management.
Culling and Selecting The Best Shots
Once you’ve imported your files, technical culling begins. High-frame-rate sessions dump 3,000–4,000 images on you, so tools like PhotoMechanic or FastRawViewer let you fly through embedded JPEGs at near-instant speed. Zoom to 100 percent for sharpness evaluation and motion analysis on every bird’s eye—most action sequences yield only 1–10 percent keepers.
Once you’ve narrowed down your keepers, consider how lighting conditions influenced each shot—especially if you captured them during golden hour, when warm tones naturally enhance feather detail and color saturation.
High-frame-rate bird shoots dump thousands of images, but only 1–10 percent survive technical culling at 100 percent magnification
Apply star ratings as you go, marking frames with crisp feather detail, clean backgrounds, and compelling behavior for keeper selection. This process involves using image editing tools to polish your selections.
Organizing Files for Efficient Workflow
After star ratings, you need a folder structure that won’t crumble under 100,000 bird files. Set up year/location/shoot-date hierarchies mirrored across your internal, external, and cloud storage—identical paths prevent confusion when you hop between machines. Rename imports with date, camera body, and sequence number so operating-system search grabs the right kingfisher frame instantly. Apply species keywords and location metadata tags during import; these let you filter collections without shuffling actual files, preserving your digital photography workflow and backup strategies intact.
| Organization Layer | Method | Benefit |
|---|---|---|
| Folder Structure | Year → Location → Shoot Date | Instant retrieval across drives |
| File Naming | Date_Camera_Sequence | OS search finds frames fast |
| Metadata Tags | Species + GPS keywords | Filter without moving files |
| Backup Strategies | 3-2-1 rule with cloud storage | Guards your entire workflow optimization |
Essential Editing Tools and Software
Your editing software is the foundation of every great bird photo—choose wisely, and you’ll save time while unlocking your images’ full potential.
The right tools handle everything from RAW processing and lens corrections to sophisticated noise reduction and detail sharpening.
Pairing those technical adjustments with natural light techniques for bird photography helps you capture vivid colors and sharp details in every shot.
Here’s what you need to build a professional bird photography editing workflow.
Start by mastering (https://avianbliss.com/bird-photography-background-tips/) to make your subjects stand out cleanly before diving into post-processing adjustments.
Recommended Software for Bird Photography
Your editing toolkit makes or breaks your ability to bring out hidden detail and color in every frame. Adobe Lightroom acts as the foundation for non-destructive RAW processing and batch workflow management, while Photoshop manages pixel-level retouching when you need surgical precision.
For challenging high-ISO shots, consider specialized tools:
- DxO PhotoLab – DeepPrime XD noise reduction adds roughly two stops of clean performance
- Topaz Denoise AI – AI-powered enhancement preserves feather texture in difficult lighting
- Lightroom Desktop – Cloud sync keeps your catalog accessible across devices
- Free alternatives – Darktable and RawTherapee offer capable RAW processing at zero cost
Setting Camera Profiles and Lens Corrections
Profile settings and lens corrections form your editing foundation before you touch a single slider. Apply your camera’s calibration profile in Lightroom to match the manufacturer’s color science, then enable lens corrections to eliminate distortion, vignetting, and chromatic aberration automatically.
These optical optimizations guarantee accurate geometry and color reproduction, letting you focus on creative adjustments rather than technical flaws in your bird portraits.
Using Plugins for Noise Reduction and Sharpening
High ISO settings and distant subjects push your sensor to its limits, creating noise that obscures feather detail. Specialized plugins handle these challenges better than built-in tools, giving you professional results without destroying texture.
- Apply Topaz DeNoise AI for noise reduction while preserving feather structure and sharpness
- Use detail enhancement sharpening tools after initial postprocessing techniques
- Target specific areas with masking for precise image refining
- Export sharpened files optimized for your final output destination
Global Adjustments for Bird Images
Once you’ve imported your images and set up your software, it’s time to lay the foundation for the entire edit. Global adjustments affect your entire image at once, establishing the baseline before you move into detailed work.
These three essential steps will transform your RAW file into a properly exposed, balanced image ready for fine-tuning.
Cropping and Straightening for Composition
Your first crop shapes everything that follows in post-processing techniques. Align your subject’s major masses along the rule of thirds grid—this composition balance immediately strengthens bird photography.
Use image rotation to straighten horizons by 1–2 degrees, preventing tilt that pulls attention from feather detail.
Effective cropping techniques and framing strategies position the eye near intersecting points, maximizing engagement while preserving essential information in your photography editing software.
Exposure, Contrast, and White Balance Corrections
Your histogram tells the story—check for clipping before you touch a slider. Start with Exposure Compensation to place your bird mid-histogram, then apply Contrast Adjustment to separate plumage from background. Use the White Balance Dropper on a neutral patch to eliminate color casts.
Histogram Analysis guides every move:
- Lift shadows without introducing Noise Reduction issues
- Preserve highlight detail in white feathers
- Apply selective Color Correction to iridescent plumage
- Monitor Tonal Mapping for natural Image Enhancement
Tone Curve and Color Enhancements
The tone curve is your precision instrument for Shadow Recovery and Highlight Control—lift the left side to reveal hidden feather texture, pull down highlights on the right to preserve white plumage detail. Apply subtle S-curves for Contrast Adjustment Techniques that add depth without crushing blacks or blowing highlights during your Lightroom Editing Techniques workflow.
| Adjustment | Purpose |
|---|---|
| S-Curve | Improve global contrast and separation |
| Lift Shadows | Reveal underexposed feather detail |
| Lower Highlights | Preserve white plumage information |
| Channel Curves | Fine-tune Color Balance in specific tones |
| Flat Curve | Maintain natural Tone Mapping for softlight scenes |
Move to HSL panels for targeted Color Correction—desaturate distracting backgrounds, boost plumage saturation selectively, adjust luminance to make your subject pop. Color Grading through split-toning adds cohesive warmth or coolness without overpowering natural tones, completing your Image Enhancement foundation before local adjustments.
Local Editing Techniques for Detail Enhancement
Once you’ve nailed the overall look of your image, it’s time to zero in on the details that make bird photography truly stand out. Local adjustments let you fine-tune specific areas—bringing out texture in feathers, adding pop to the eyes, and cleaning up anything that pulls focus from your subject.
Here’s how to take your edits from good to gallery-worthy with targeted precision.
Masking and Selective Adjustments
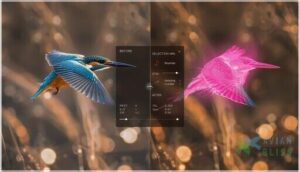
Masking transforms good bird photos into outstanding ones by giving you surgical control over specific areas. Your Image Editing Software’s Select Subject tool gets you 80% there, but you’ll need manual Mask Refinement to nail those intricate Feather Edges where automation fails.
- Define precise selection controls across tonal ranges using Tonal Mapping and Edge Detection for targeted adjustments
- Blend adjustments smoothly with feathered edge masks while preserving critical feather details
- Apply luminosity masks to constrain edits to specific brightness values, reducing halo risk in high-contrast plumage
- Implement iterative Local Contrast adjustments to avoid global noise amplification
- Toggle mask visibility to validate edge integrity and refine Background Mask separation through Masking and Layering techniques
Enhancing Feathers, Eyes, and Beaks
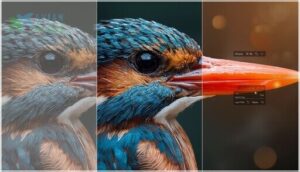
Once your masks are dialed in, direct your Bird Photo Editing energy where it counts: the beak demands maximum Beak Sharpening—push your Unsharp Mask Amount to 500 with a tight 0.15 radius.
Next, add Eye Enhancement by brightening catchlights and lifting iris Clarity around 15.
For Plumage Texture, apply moderate Feather Detail via Texture sliders (7–25 range), recovering Image Sharpening without noise amplification through Photo Retouching in Bird Photography Editing workflows.
Removing Distractions and Unwanted Elements
After sharpening the bird’s key features, tackle background clutter with the Clone Stamp and Healing Brush—sample clean texture near twigs or fence wires, then paint over them. For larger objects, Content Aware Fill reconstructs sky or foliage automatically.
Use Local Masking to darken busy backgrounds or apply Background Simplify through inverted masks, reducing micro-contrast without deleting habitat context. This Photo Retouching preserves ecological honesty while your Clone Tool and Noise Reduction keep Image Editing efficient.
Exporting and Optimizing Final Images
You’ve spent hours perfecting your bird images, and now it’s time to get them out into the world. The export process isn’t just clicking a button—different destinations require specific settings to showcase your work at its best.
Let’s walk through how to prepare your images for web galleries, print projects, and social media platforms so they look sharp everywhere they land.
Preparing Images for Web, Print, and Social Media
Your final image needs different treatment depending on where it lands. Web optimization demands sRGB color space and smaller dimensions—1200 to 2048 pixels wide—paired with moderate file compression to keep loading times quick.
For social media, Instagram caps at 1080 pixels, while Facebook manages up to 2048.
Print work requires full resolution at 240–300 ppi, often in Adobe RGB, with output sharpening adjusted to paper type for crisp feather detail.
Export Settings and File Formats
Once you’ve dialed in dimensions and resolution, choosing the right export settings locks in your work. JPEG at 80–100 quality in Lightroom strikes the sweet spot—file sizes shrink without visible loss in feather detail. For web and social platforms, stick with sRGB color space to prevent unexpected color shifts.
Print-bound files need a different approach:
- Export 16-bit TIFF masters with Adobe RGB for maximum tonal range
- Apply ZIP compression to reduce file size without artifacts
- Set output resolution to 240–300 DPI at your intended print dimensions
- Keep archival masters in lossless formats like PSD or DNG for future edits
Your postprocessing workflow isn’t complete until you’ve saved derivatives for each platform while preserving a high-resolution master. Photo editing software manages these export profiles efficiently—create presets for Instagram, Facebook, and print labs so you’re not rebuilding settings every time. That consistency protects your images through digital image processing and ensures your bird photographs look sharp wherever they land.
Frequently Asked Questions (FAQs)
What is the best editing software for bird photography?
Think of editing software as your darkroom—Adobe Lightroom Classic leads the pack for bird photography, combining powerful noise reduction, accurate color rendering, and lens correction profiles that preserve critical feather detail across your workflow.
Which is the correct order of photographic workflow?
Your post-processing workflow should follow this sequence: image ingestion and backup, culling to select keepers, global editing adjustments, local refinements, then export and archive management. This order maximizes efficiency while protecting your digital assets.
What is the best shooting mode for bird photography?
Like a Swiss Army knife adapted to terrain, Manual Mode with Auto ISO dominates bird photography—locking shutter speed and Aperture Control while the camera adjusts sensitivity, ensuring sharp wings and consistent exposure as light shifts constantly.
How can lighting conditions influence editing decisions?
Lighting effects dictate exposure compensation, white balance, and noise reduction strategies. Harsh midday light demands contrast reduction in Lightroom, while low light requires balancing shadow recovery with detail preservation through careful postprocessing techniques.
What are the best practices for saving edited files?
A corrupted catalog can erase months of work—save edits as XMP sidecars alongside RAW files, export 16-bit TIFF masters in ProPhoto RGB, and maintain offsite backups using a 3-2-1 strategy for complete protection.
How does background selection impact the subjects clarity?
Background complexity directly affects your subject’s clarity—cluttered scenes slow recognition and reduce visibility.
Strong luminance contrast, shallow depth of field, and sharp edge contrast at boundaries help isolate birds using masking during image editing.
What common mistakes should be avoided during editing?
Too much sharpening destroys feather texture, while heavy noise reduction creates plastic-looking plumage. Avoid pushing global adjustments beyond +30, extreme crops that suffocate your subject, and unethical manipulation that misrepresents nature.
How to handle motion blur in flight shots?
Start by diagnosing whether blur stems from motion or focus errors—directional streaking indicates motion.
Apply targeted sharpening strategies, layer-based masking, and AI deblurring tools to refine critical features like eyes while managing wing blur creatively.
When should you use focus stacking techniques?
Picture two warblers on a branch, one close and one far—you can’t get both sharp in a single frame.
Use focus stacking when depth of field limits sharpness across your subject, especially for perched birds.
How to preserve natural colors in harsh lighting?
Set your white balance to a fixed preset like Daylight to maintain consistent plumage colors.
Use Lightroom’s vibrance slider and HSL adjustments for targeted color correction without oversaturating feathers in harsh midday light.
Conclusion
Master your bird photography editing workflow, and you master the margin between good and unforgettable. Every adjustment—from culling to color correction, masking to metadata—compounds into images that command attention.
The techniques here aren’t theoretical; they’re field-tested methods that separate snapshots from portfolio work. Your raw files hold the potential. Your editing process reveals it.
Build consistency, polish deliberately, and watch your keeper rate climb alongside the quality of every frame you release.
