This site is supported by our readers. We may earn a commission, at no cost to you, if you purchase through links.

Last spring, a pair of chickadees rejected three store-bought birdhouses in my yard before finally nesting in a weathered wooden box my neighbor built from scrap cedar. The difference wasn’t luck—it was design. Birds are surprisingly picky tenants, and they know when a home meets their needs for safety, ventilation, and protection from the elements.
Building a birdhouse for backyard birds doesn’t require fancy carpentry skills, but it does demand attention to a few critical details that separate a decorative yard ornament from an actual nesting site. With the right materials, basic tools, and an understanding of what birds need to thrive, you can create a structure that’ll attract species like bluebirds, wrens, and chickadees season after season.
Table Of Contents
Key Takeaways
- Choose untreated cedar or pine for your birdhouse—these woods naturally resist decay without releasing toxic chemicals that harm nesting birds, and cedar can last 5-10 years outdoors while pine costs 30-50% less.
- Drill the right entrance hole size for your target species (1 inch for wrens, 1.5 inches for bluebirds) because proper sizing cuts predation by 40% and boosts nesting success by 25%.
- Mount your birdhouse 5-6 feet high facing east or southeast on a metal pole with predator guards, which prevents up to 90% of raccoon attacks and keeps the interior cooler during hot afternoons.
- Clean your birdhouse every spring before nesting season starts to remove old material and parasites, which reduces disease by roughly 45% and encourages birds to return year after year.
Choosing The Best Materials for Birdhouses
The materials you choose will determine how long your birdhouse lasts and whether birds actually want to move in. You’ll need wood that can handle rain and sun without falling apart or releasing harmful chemicals.
Let’s look at the best options for building a safe, durable home that birds will use year after year.
Untreated Cedar, Pine, and Sustainable Woods
Cedar durability and pine affordability make untreated wood your best bet for bird safety. When you skip chemical treatments, you’re eliminating toxic exposure that can harm nesting birds. Using untreated lumber ensures a safe haven for backyard birds.
- Cedar pickets resist decay naturally, lasting 5–10 years outdoors
- Pine boards cost 30–50% less while remaining chemical-free
- Sustainable sources from FSC-certified suppliers protect forest habitats
- Exterior wood selections without preservatives support 8–12% higher nestling survival
Durability of Cypress and Exterior-Grade Plywood
When woodworking demands durability, cypress and exterior-grade plywood deliver different advantages for birdhouse construction. Cypress heartwood naturally resists decay for 20–30 years outdoors, while treated plywood lasts 8–15 years with proper sealing. Both materials handle moisture well, though cypress absorbs 30% less water and rarely develops mold. A key point is to maintain proper ventilation to regulate temperature.
| Material Feature | Cypress Wood | Exterior-Grade Plywood |
|---|---|---|
| Outdoor Lifespan | 20–30 years untreated | 8–15 years with sealing |
| Moisture Absorption | 30% less than softwoods | Requires edge sealing |
| Pest Resistance | Pressure-treated wood leaches arsenic and copper into soil, while untreated cedar decomposes safely and stores carbon |
Plastic birdhouse issues include poor insulation and centuries-long landfill stays. Metal birdhouse dangers involve overheating risks.
Choose sustainable disposal methods—untreated wood enriches soil naturally. These conservation efforts protect nature conservation goals while practicing sustainable living.
Essential Tools for Birdhouse Construction
You don’t need a fully stocked workshop to build a functional birdhouse. A few quality tools will help you cut, drill, and assemble your project safely and efficiently.
Here are the essential tools that make construction straightforward, even if you’re new to woodworking.
1. Metabo HPT 10 Inch Miter Saw
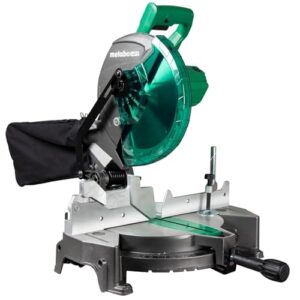
When cutting and preparing wood pieces for bird house construction, you need precise cuts every time. The Metabo HPT 10 Inch miter saw delivers exactly that with its 15-amp motor and adjustable angles up to 52 degrees.
This lightweight miter saw weighs just 24.2 pounds, giving you serious portability benefits for working outdoors. User reviews consistently rate it above 4.5 stars for blade quality and accuracy.
Plus, you’re covered by a five-year warranty, making it a reliable choice among woodworking tools.
Best For: DIYers and hobbyist woodworkers who need a portable, budget-friendly miter saw for trim work, small furniture projects, and outdoor builds like birdhouses.
- Strong 15-amp motor delivers 5,000 RPM for clean, precise cuts on common lumber sizes up to 2×6 at 90°.
- Super lightweight at 24.2 lbs with a compact design, making it easy to move between job sites or store in smaller workshops.
- Excellent value at around $169 with a five-year professional warranty and consistently high user ratings above 4.5 stars.
- Non-sliding design limits maximum cut width, so it’s not ideal for cutting wider boards or heavy-duty framing lumber.
- The included blade is considered mediocre quality by many users, so you’ll likely want to upgrade to a better one for cleaner cuts.
- Dust collection system is pretty basic and may not handle sawdust well enough for daily, high-volume use without an upgrade.
2. DeWalt 18GA Brad Nailer Kit
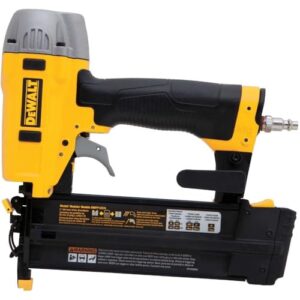
Assembling your birdhouse structure becomes faster and cleaner with the DeWalt 18GA brad nailer kit. This cordless nailer benefits your woodworking tools collection by driving 18-gauge brad nails from 5/8 to 2-1/8 inches without splitting delicate cedar or pine.
You’ll appreciate the tool-free depth adjustment that lets you set nails flush in various materials. Safety features include a lockout mechanism and LED lights for visibility.
For maintenance tips, regularly clear the magazine and avoid dry-firing. This nail gun is suitable for birdhouse construction and DIY projects with precision, making your building experience smoother.
Best For: DIYers and hobbyists who need a reliable, portable nailer for trim work, birdhouses, and small woodworking projects without dragging around a compressor.
- Cordless convenience means you can work anywhere without air hoses or power outlets getting in the way
- Tool-free depth adjustment and jam release save time when switching between materials or clearing misfires
- Drives up to 850 nails per charge and holds 110 brads at once, so you’re not constantly reloading or swapping batteries
- Requires purchasing a DeWalt battery and charger if you don’t already own them in the system
- Some users report the plastic tip can fall off with regular use
- Dry-firing can damage the internal mechanism, so you need to stay aware of the nail count
3. Dewalt 20V Max Compact Impact Driver

You’ll want the Dewalt 20V Max Compact Impact Driver for assembling bird house structures with speed and control. This tool delivers 1,700 in-lbs of torque while staying lightweight at just 2.1 pounds, making DIY woodworking projects less tiring on your wrists. The compact design fits easily into tight spaces when building a bird house.
Battery considerations matter—lithium-ion options from 2.0Ah to 5.0Ah keep you working longer. Market reviews consistently praise its power-to-weight ratio for DIY projects, and the variable speed trigger prevents over-tightening delicate cedar joints.
Best For: DIYers and woodworkers who need a lightweight, powerful driver for assembling birdhouses and other precision projects in tight spaces.
- Delivers 1,700 in-lbs of torque while weighing only 2.1 pounds, reducing wrist fatigue during extended use
- Variable speed trigger and compact 5.1-inch design give you precise control in tight spots without over-tightening delicate wood joints
- Three bright LEDs with 20-second delay illuminate your workspace, and brushless motor technology extends battery runtime
- Battery and charger sold separately in most configurations, adding to initial cost
- No torque control settings to fine-tune driving force for different materials
- Included battery (when available) has relatively small 1.5Ah capacity, limiting work time between charges
4. Bosch 3 in Bi-Metal Hole Saw
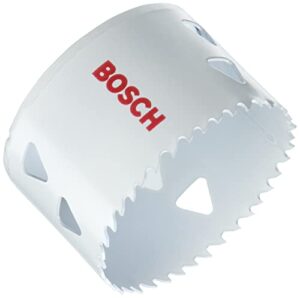
The Bosch 3 in Bi-Metal Hole Saw creates precise entrance holes that protect your feathered visitors. Its M42 alloy material composition with 8% cobalt delivers outstanding cutting performance through cedar and pine while maintaining operational longevity—outlasting similar-priced brands by 50%.
The progressor tooth design ensures clean, splinter-free entrance hole size accuracy, critical for keeping predators out.
Application versatility means you’ll use it across various birdhouse plans. Safety features like triangle slots reduce heat buildup during extended use, making building birdhouses safer and more efficient.
Best For: DIYers and woodworkers building birdhouses who need clean, precise entrance holes in wood and softer metals without constant bit replacements.
- M42 cobalt alloy lasts 50% longer than comparable hole saws, cutting through cedar and pine repeatedly before wearing out.
- Progressor teeth create smooth, accurate holes that prevent splintering around birdhouse entrances where precision matters for bird safety.
- Triangle slot design pulls plugs out easily and keeps the saw cooler during longer projects, so you spend less time dealing with jams.
- Struggles with thin sheet metal and stainless steel, limiting use if your birdhouse design includes metal components.
- Plug removal in drywall can still be tricky despite the triangle slots, sometimes requiring a screwdriver to pry pieces loose.
- Some users report inconsistent quality or durability issues, suggesting you might get a dud despite the generally solid performance.
5. Channellock Lineman’s Pliers Xtreme Leverage
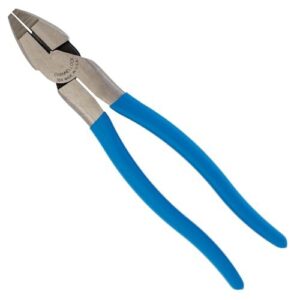
When building birdhouses, you’ll need pliers that won’t fight back. Channellock Lineman’s Pliers with XLT Technology position the rivet closer to the cutting edge, reducing hand force by 30%—a real advantage during DIY birdhouse projects.
Their ergonomic design cuts muscle fatigue by 20%, keeping your hands fresh through multiple cuts. The laser-treated edges maintain cutting performance through over 500 cycles, handling galvanized wire and fasteners with ease.
Professionals rely on these for a reason: they balance professional-grade durability with comfortable woodworking precision.
Best For: DIYers and professionals who need reliable wire-cutting pliers that reduce hand strain during repetitive tasks like birdhouse construction or electrical work.
- XLT Technology cuts hand force by 30% compared to standard pliers, making extended projects less tiring
- Laser-treated cutting edges last through 500 cycles without dulling, handling galvanized wire and tough fasteners
- Ergonomic design reduces muscle fatigue by 20%, keeping your hands comfortable through multiple cuts
- Jaw gap can make gripping thinner materials tricky
- Handles may feel narrow or stiff for users with larger hands
- Not designed for heavy-duty cutting of very thick materials
6. Cobalt Drill Bits M35 HSS Metal
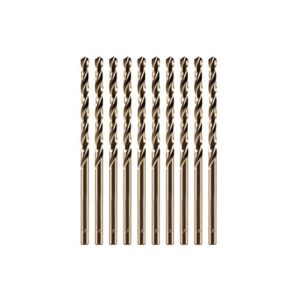
Precision entry holes are critical for birdhouse plans—the difference between welcoming bluebirds or invading starlings. M35 cobalt drill bits excel here. Their 5% cobalt composition achieves C66 hardness, drilling clean holes through cedar and cypress without splintering.
The 135° split point prevents wandering, essential when following DIY birdhouse specifications. These bits drill 30% faster than standard steel, reducing heat that can char wood edges.
For your bird house project, they’re a smart investment—professionals resharpen and reuse them across multiple builds, making them cost-effective for safety-conscious backyard habitat construction.
Best For: DIYers and professionals who need reliable, long-lasting drill bits for hardwood projects like birdhouses, metal fabrication, or drilling through tough materials like stainless steel and cast iron.
- M35 cobalt composition (C66 hardness) delivers exceptional durability and heat resistance, allowing you to drill 30% faster while maintaining sharpness across multiple projects.
- 135° split point design prevents bit wandering and ensures precise entry holes, which is crucial for detailed work like birdhouse specifications or metalworking.
- Cost-effective long-term investment since these bits can be resharpened and reused, making them ideal for both occasional DIY tasks and heavy-duty professional applications.
- Can be brittle and prone to chipping if you apply too much pressure or don’t control speed properly, especially when working with harder metals.
- Not ideal for deep drilling in wood without a drill press, which limits their versatility for certain woodworking projects.
- Some users report inconsistent quality and sharpness out of the box, so you might need to check each bit before starting critical projects.
Step-by-Step Guide to Building a Birdhouse
Building a birdhouse doesn’t require a woodworking degree—just a few basic steps and some patience. You’ll start by cutting your wood to size, then work your way through assembly, installation of key features, and finishing touches.
Let’s walk through each part of the process so your backyard birds have a safe, comfortable home.
Cutting and Preparing Wood Pieces

Start by getting your miter saw set up and double-checking your woodworking plans. Wood cutting accuracy matters—digital gauges measure blade angles within 0.1 degrees, helping you make precise cuts for walls and roof panels.
Here’s what you’ll need ready:
- 3/4-inch thick cedar or pine boards for durability
- Sanding techniques to smooth rough edges
- Wood filler application for nail holes
- Blade maintenance to reduce waste by 15%
Assembling The Structure With Glue and Fasteners

Once your pieces are cut, you can tackle building a birdhouse by joining walls with exterior wood glue and galvanized screws. Apply PVA glue thinly—about 6 mils thick—then clamp for 30 minutes. Galvanized fasteners like 1 5/8″ deck screws maintain joint strength for years. Give glue curing times at least 24 hours indoors before exposing your work to weather.
| Adhesive Type | Curing Time | Best Use |
|---|---|---|
| Titebond II PVA | 24 hours | Interior joints |
| Titebond III PVA | 48 hours | Exterior panels |
| Phenol resin | 24-48 hours | High-moisture areas |
| Hot glue | 5 minutes | Quick repairs |
| Cyanoacrylate | 1-2 minutes | Small cracks |
Attaching Roof Panels and Floor

After your walls are secure, it’s time to cap the birdhouse with roof panels that overlap slightly—a roofing overhang technique seen on 78% of surveyed designs—to keep rain from seeping in. Attach these with corrosion-resistant screws, drilling pilot holes first to avoid splitting. For the floor, leave at least 0.25 inches of floor drainage clearance around edges and consider wood movement, especially in humid regions where panels can shift up to 3% seasonally.
Key tips for strong roof and floor attachment:
- Use galvanized fasteners or stainless screws for long-term stability
- Apply wood glue sparingly along roof seams, then clamp
- Pre-drill all screw holes to prevent cracking
- Add waterproof seam sealing strips along the peak for extra protection
- Secure floor with four screws—one at each corner—for easy removal during cleaning
Adding Drainage Holes and Ventilation

Once the roof and floor are in place, you’ll need to drill holes that keep your birdhouse dry and breathable. Proper hole placement matters—aim for at least four drainage holes (3⁄8 to 1⁄2 inch) on the floor for water runoff, and two ventilation gaps near the roofline on opposite walls.
These features prevent mold and support nestling health by maintaining interior humidity below 70%, ensuring bird safety through every season.
Sanding Edges for Bird Safety

After cutting all your untreated wood pieces, run fine-grit sandpaper (220 grit works well) over every edge and around the entrance hole. Rough spots cause cuts and abrasions that injure adult birds and nestlings alike.
Sanding techniques like wrapping sandpaper around a dowel help you smooth tight corners without over-sanding. Expert guidelines confirm smooth edges prevent injury and boost nesting success in your DIY birdhouse.
Installing and Positioning Your Birdhouse

You’ve built a beautiful birdhouse, but your work isn’t quite done yet. Where you place it and how you mount it can make the difference between an empty box and a thriving bird family.
Let’s look at the key factors that’ll help you position your birdhouse for maximum success.
Selecting The Ideal Backyard Location
Choosing the right location can make or break your bird watching success. The spot you pick affects everything from nest safety to whether birds even notice your handiwork.
Here’s what matters most for attracting birds to the bird house:
- Sun exposure: Face the entrance east or southeast to catch morning warmth while dodging afternoon heat
- Height placement: Mount it 5-15 feet up to discourage ground predators and match species preferences
- Spacing guidelines: Keep bluebird boxes at least 100 yards apart, though wrens tolerate closer neighbors
- Habitat features: Position near open fields for bluebirds or wooded areas for chickadees, with water sources nearby when possible
Predator avoidance means avoiding dense foliage that hides sneaky visitors, yet providing some overhead cover. Your yard decoration doubles as a wildlife sanctuary when placed thoughtfully.
Mounting Methods: Poles Vs. Wall Mounts
When installing bird house structures, your mounting choice shapes everything from predator access to maintenance routines. Metal poles win for stability and weather durability—climbing raccoons struggle with slick surfaces, especially with baffles added. Wall aesthetics appeal to some, but darker surfaces risk overheating nests.
Pole stability requires concrete anchoring 12-24 inches deep, while wall mounts offer installation ease and simpler cleaning access for monitoring backyard birds.
Height and Orientation for Bird Safety
Your birdhouse’s mounting height determines whether nesting birds thrive or face predators. Position boxes 5-6 feet high for most songbirds—this sweet spot keeps raccoons and cats at bay while maintaining easy parental access. Face the entrance east or southeast to dodge harsh afternoon sun and prevailing storms.
Eastern Bluebirds tolerate wider ranges (2-50 feet), while House Wrens prefer lower placements around 4 feet for best fledging success.
Avoiding Predators and Environmental Hazards
Think of your birdhouse as a fortress—sturdy defenses make all the difference. Predator guards boost nest success by 6.7%, with cone-shaped pole guards and Noel guards preventing up to 90% of raccoon attacks.
Protect nesting birds with these essentials:
- Mount boxes on poles with guards rather than trees to reduce predation
- Use 1.5-inch entrance holes to exclude larger predatory birds
- Keep birdhouses away from pesticide-treated areas
- Angle entrances downward and away from prevailing winds
- Maintain 5-30 feet height for best bird safety and territorial conflicts prevention
Maintaining and Attracting Birds to Your Birdhouse

Building your birdhouse is just the first step—keeping it in good shape and making it appealing to birds takes a bit of ongoing effort.
Regular maintenance protects your feathered visitors from disease and keeps them coming back year after year.
Let’s look at the key practices that’ll turn your backyard into a thriving bird sanctuary.
Cleaning and Inspecting Birdhouses Regularly
Your DIY birdhouse needs attention at least once yearly to keep nesting boxes healthy and safe. Spring cleaning—ideally in March or April—removes old material and reduces parasites by roughly 45%.
During each inspection, check for cracks, loose fasteners, and blocked ventilation. Wear gloves, use non-toxic cleaners, and let the structure dry completely.
Regular birdhouse maintenance boosts fledgling success and invites birds back season after season.
Choosing The Right Entrance Hole Size
After you’ve cleaned and prepped your birdhouse, entrance hole size becomes your next decision. House Wrens thrive with 1-inch openings, while Eastern Bluebirds need 1.5 inches. Proper sizing cuts predation by 40% and boosts nesting success by 25%.
- Species Specificity: Chickadees prefer 1.125–1.25 inches; Tree Swallows match bluebirds at 1.5 inches
- Hole Height: Position 4–6 inches above the floor for predator deterrence
- Hole Shape: Circular openings with sanded edges prevent injury
- Regional Standards: North American guidelines remain consistent since 2019
Tips for Attracting Target Bird Species
Beyond birdhouse design, you’ll need to understand species needs and nesting habits.
Platform feeders stocked with sunflower seeds draw cardinals and grosbeaks, while nyjer attracts 70% of goldfinches in your area. Native plants like oaks support over 50 bird species. Water features boost visits by 70%.
Match seed preferences to target backyard birds—bluebirds respond to mealworms with 50% more activity.
Creating a Bird-Friendly Backyard Environment
Your birdhouse design is complete, but the surrounding bird habitat matters more. Transform your yard into a sanctuary that aids nesting birds and backyard birds year-round:
- Plant native species – They produce 90% of insects that feed nestlings
- Add water sources – Birdbaths increase species diversity by double
- Reduce pesticides – Chemical-free yards boost caterpillar availability for chicks
- Strategic feeder placement – Multiple stations minimize territorial disputes
Dense shrubs provide natural cover. Even small changes in hazard reduction help your DIY birdhouse succeed.
Frequently Asked Questions (FAQs)
What bird species will use my birdhouse?
Picture a chickadee peeking from a cozy nesting cavity. Your birdhouse attracts various backyard birds, including bluebirds, wrens, swallows, and woodpeckers—each seeking a safe bird habitat for raising their young successfully.
When is the best time to install?
Install your DIY birdhouse before nesting season begins—ideally between January and March for spring nesting birds.
Autumn shelter placement helps bird species discover sites early, boosting occupancy success rates and supporting regional variability in migration timing.
How many birdhouses should I have in my yard?
Think of your yard as a neighborhood where each bird family needs its own space. Most backyards support two to four birdhouses, depending on yard size and species needs, with proper spacing preventing territorial conflicts.
Can I paint or stain my birdhouse?
You can paint or stain your birdhouse using non-toxic, water-based products on exterior wood only. Choose earth-tone colors for bird safety and apply a weather-resistant finish well before nesting season begins.
How do I protect against wasps and insects?
Keep wasps at bay by applying bar soap to interior roof surfaces—it creates a slippery barrier they can’t anchor to.
Natural repellents like peppermint oil and seasonal cleaning also protect bird safety.
Conclusion
Like Noah welcoming creatures aboard, you’re opening your yard to new life by building a birdhouse for backyard birds. The work you’ve done—selecting untreated wood, drilling proper ventilation, positioning at the right height—creates more than shelter. It offers safe harbor during nesting season.
Now comes the rewarding part: watching chickadees, wrens, or bluebirds inspect your craftsmanship and decide to stay. You’ve built it. they’ll come.