This site is supported by our readers. We may earn a commission, at no cost to you, if you purchase through links.
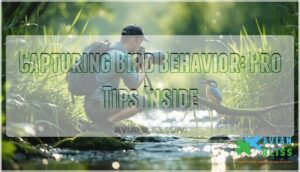
To get started, you’ll need to research your subject, choosing the right camera and lens for the job.
Understanding bird patterns and behavior is key to anticipating and capturing their fascinating moments.
With practice, you’ll develop an eye for composition and learn to work with lighting and weather conditions.
As you master capturing bird behavior on camera, you’ll uncover the secrets of these amazing creatures, and that’s just the beginning of your photographic journey.
Table Of Contents
- Key Takeaways
- Capturing Bird Behavior Basics
- Essential Gear for Capturing Bird Behavior
- Mastering Camera Settings for Bird Behavior
- Approaching Birds for Capturing Behavior
- Composition and Framing for Bird Behavior
- Lighting and Weather Conditions for Bird Behavior
- Capturing Birds in Flight and Motion
- Post-Processing for Enhancing Bird Behavior Photos
- Ethical Considerations for Capturing Bird Behavior
- Growing as a Bird Photographer
- Frequently Asked Questions (FAQs)
- Should you use a camera trap to photograph birds?
- How do you capture a bird portrait?
- How long does it take to set up a bird camera?
- What is the rule of birds photography?
- What AF mode should I use for bird photography?
- What shutter speed is needed for birds flying?
- How do you capture birds in flight?
- How to shoot a bird with a camera?
- How do you create compelling bird photography?
- Do bird photographers really need a camera?
- Conclusion
Key Takeaways
- You’ll need to research your subject, choosing the right camera and lens for capturing bird behavior, and understand bird patterns and behavior to anticipate and capture their fascinating moments.
- To get great shots, you’ll have to master camera settings like fast shutter speeds, aperture control, and autofocus modes, and use techniques like panning and pre-release capture to freeze motion and create artistic effects.
- You should approach birds slowly and quietly, respecting their boundaries and personal space, and use natural blinds and camouflage to minimize disturbance and get intimate, natural-looking photos.
- You’ll also have to edit your photos to make them pop, using techniques like exposure adjustments, contrast control, and noise reduction to enhance the image and create a professional-looking result that showcases the bird’s behavior and beauty.
Capturing Bird Behavior Basics
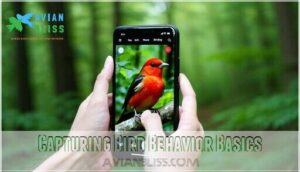
You’ll capture more compelling bird photographs when you understand your subjects’ daily routines, feeding patterns, and preferred habitats before you pick up your camera.
Understanding bird habits is key to capturing stunning photographs
Success starts with researching local bird species through field guides and birding apps, then visiting locations where these birds naturally gather throughout different seasons.
Researching Bird Species and Habits
Start your bird behavior analysis by studying local species through field guides and birding apps.
Research seasonal changes in populations, daily routines, and social dynamics.
Join birding groups for insider knowledge on recent sightings and prime locations.
Understanding bird feeding habits, bird nesting behavior, and bird flight patterns transforms you from casual observer into skilled avian behavior study practitioner.
Supplementing their diet with sunflower seeds works to attract songbirds.
Understanding Bird Patterns and Behavior
Understanding avian behavior transforms your photography from random snapshots into purposeful captures.
Successful bird photographers decode these essential patterns:
- Migration Patterns – seasonal movements that create concentrated photo opportunities
- Mating Rituals – dramatic displays during breeding season offering dynamic shots
- Feeding Habits – predictable meal times when birds are most active
- Social Structures – flock dynamics and territorial behaviors that reveal compelling interactions
Mastering bird behavior analysis helps you anticipate those perfect moments before they happen.
Finding Suitable Locations for Bird Photography
Once you’ve grasped bird patterns, location scouting becomes your secret weapon.
Scout your local birding hotspots like wetlands, forests, and bird sanctuaries where species naturally congregate.
Connect with local guides who understand seasonal migrations and habitat research.
Remote locations often offer undisturbed subjects, while public access areas provide convenience.
Pro tip: Visit birdwatching hotspots during different seasons—spring and fall migrations reveal prime photography opportunities.
Essential Gear for Capturing Bird Behavior
You’ll need the right equipment to capture birds behaving naturally, starting with a camera that shoots at least 7 frames per second and a telephoto lens with 300mm minimum focal length.
Your gear setup should also include a sturdy tripod for stability, high-capacity memory cards for extended shooting sessions, and weather-resistant accessories to protect your investment in challenging outdoor conditions.
Choosing The Right Camera for Bird Photography
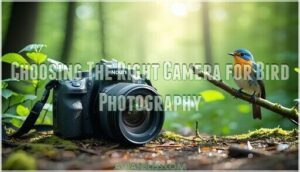
When choosing your bird photography equipment, the camera body forms your foundation.
Weather sealing protects against harsh conditions, while fast frame rates (7fps minimum) capture fleeting moments.
Sensor size affects reach—crop sensors bring distant subjects closer, though full-frame delivers superior image quality.
Many photographers prioritize cameras with environmental protection features for outdoor shoots.
Consider these essential camera features:
- Autofocus techniques with tracking capabilities for moving subjects
- Budget options that balance performance with affordability
- High megapixel count for detailed crop flexibility
Selecting The Perfect Lens for Bird Behavior
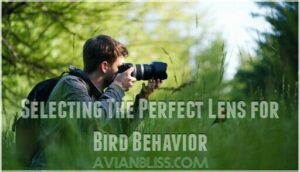
Your telephoto lens choice directly impacts your bird photography success. Focal length determines how close you’ll get – 300mm works for nearby subjects, while 400-600mm handles distant or skittish birds.
Choose the right telephoto lens for stunning bird photography results
Image stabilization reduces shake when handholding heavy glass. Consider lens weight carefully; lighter options prevent fatigue during long shoots.
Budget options like 70-300mm zooms offer versatility, while teleconverter use extends reach affordably, making any telephoto more effective for capturing detailed bird behavior. Many photographers use a specialized lens for birds.
Additional Essential Gear for Bird Photography
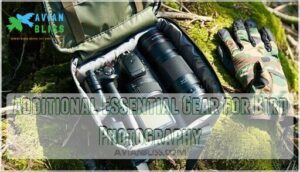
Your telephoto lens needs backup. A weatherresistant camera bag shields camera gear from harsh conditions, while high-capacity memory cards prevent missed opportunities.
Don’t forget UV filters for lens protection and cleaning supplies for crystal-clear shots. Pack bird guides for field identification, and consider camouflage clothing plus sturdy tripods for stability.
A durable camera bag is essential for protecting your equipment. Weather protection keeps you shooting longer outdoors.
Mastering Camera Settings for Bird Behavior
You’ll need to master three critical camera settings to capture sharp, compelling images of birds in action.
Getting your shutter speed, aperture, and autofocus modes right means the difference between blurry snapshots and professional-quality shots that showcase natural bird behavior.
This understanding is crucial for achieving professional-quality shots.
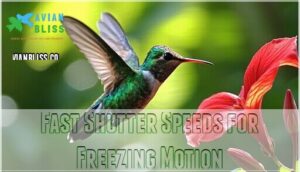
Fast Shutter Speeds for Freezing Motion
Now that you’ve got your camera and lens sorted, mastering shutter speed becomes your secret weapon for capturing sharp bird behavior photos.
Think of shutter speed as your motion-stopping superhero – the faster it goes, the crisper your action shots become.
Here’s your starting playbook for different scenarios:
- Perched birds: Start at 1/1000s for basic movements and preening
- Birds in flight: Jump to 1/2000s minimum for freezing flight motion
- Fast action: Push to 1/4000s for hummingbirds or rapid wing beats
- Shutter priority mode: Let your camera handle ISO while you control motion clarity
Blur reduction happens when you match your camera settings to bird behavior patterns.
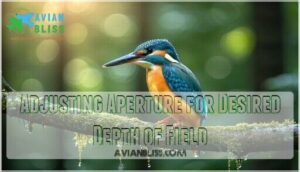
Adjusting Aperture for Desired Depth of Field
While fast shutter speeds freeze motion, aperture control shapes your story’s visual impact.
Your bird photography aperture choice determines what viewers see first.
For stunning subject isolation, shoot wide at f/2.8 or f/4.
This aperture sweet spot creates dreamy background blur that makes birds pop like they’re floating in silk.
You’ll love how distracting branches disappear into creamy bokeh.
Need group focus for multiple birds or habitat shots?
Close down to f/8 or f/11.
These camera settings keep more elements sharp, telling richer environmental stories.
Your creative aperture decisions control depth of field in bird behavior photos—wide isolates, narrow reveals context.
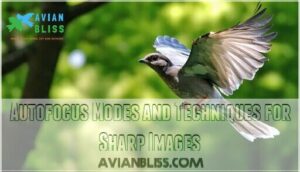
Autofocus Modes and Techniques for Sharp Images
After dialing in your aperture, sharp focus becomes your next challenge.
AF-C modes excel at tracking moving birds, while back-button focus separates focusing from shooting for better control.
Continuous autofocus handles flight shots beautifully.
When lighting gets tricky, focus bracketing captures multiple shots at different focus points.
These bird photography autofocus tips transform blurry disappointments into pin-sharp keepers.
Approaching Birds for Capturing Behavior
You’ll need to master the art of getting close to birds without disturbing their natural behaviors, which requires patience, respect, and careful technique.
Success depends on moving slowly, maintaining proper distance, and reading bird body language to capture authentic moments while keeping your subjects comfortable.
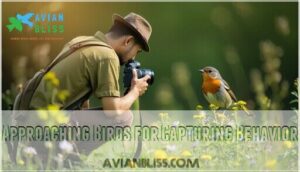
Slow and Quiet Approach Techniques
Successfully photographing birds requires mastering the gentle art of stealth. Move deliberately with soft, calculated steps while wearing earth-toned camouflage that matches your surroundings. Always position yourself downwind so your scent won’t alert sensitive birds.
Watch their body language closely—relaxed postures mean you’re invisible to them. Patience pays dividends in bird photography.
- Camouflage techniques: Choose clothing that blends naturally with local vegetation and terrain colors
- Wind direction: Always approach from downwind to prevent birds from detecting your human scent
- Slow movements: Take deliberate, measured steps to avoid startling birds with sudden motions
- Blind placement: Position yourself behind natural cover like rocks, trees, or dense vegetation
- Ethical considerations: Maintain respectful distances while observing bird behavior and stress signals
Respecting Bird Boundaries and Personal Space
Birds need their bubble of safety just like you do.
Ethical observation starts with maintaining a respectful distance – at least 50 feet for most species, double that near nests.
Watch for stress signals like rapid head movements, wing-flicking, or alarm calls. These behaviors scream "back off!"
When you spot these warning signs, retreat slowly until normal activity resumes.
Consider using a bird photography blind to minimize disturbance while capturing authentic behavior.
Wildlife respect and habitat preservation depend on responsible tourism practices that prioritize bird photography ethics over the perfect shot.
Anticipating and Preparing for Bird Behavior
Once you’ve mastered respectful distances, reading bird behavior becomes your secret weapon for capturing stunning shots.
Think of it as decoding nature’s body language – each species has unique tells that signal their next move.
Here’s how to sharpen your bird photography anticipation skills:
- Study seasonal changes in feeding patterns and migration timing
- Research habitat preferences where different species feel most comfortable
- Document behavior patterns through careful bird photography observation and practice
Watch for wing stretches before takeoff or head tilts signaling direction changes.
These anticipation techniques transform random encounters into predictable photo opportunities while maintaining ethical considerations.
Composition and Framing for Bird Behavior
You’ll transform ordinary bird photos into compelling stories by mastering composition techniques that highlight natural behavior patterns.
Strategic framing using the rule of thirds, leading lines, and environmental context creates images that capture both the bird’s actions and its relationship with the surrounding habitat, which is essential for creating a compelling story.
Creating Compelling Bird Photography Compositions
Great shots start with smart positioning. Use the Rule of Thirds to place birds along intersecting lines rather than dead center.
Eye-Level Shots create powerful connections with viewers. Clean Backgrounds eliminate distractions – blur busy branches or reposition yourself.
Focus on Action Capture moments like feeding or preening. Show birds within their Natural Habitat to tell complete stories through thoughtful bird photography composition.
Using Leading Lines and Framing Elements
Transform ordinary bird photos into compelling visual storytelling by mastering leading lines and framing elements.
Use branches, shorelines, or fence posts as natural guides toward your subject, creating depth creation that draws viewers deeper into the scene.
Natural frames like foliage gaps or architectural elements add foreground interest while providing context.
These composition techniques elevate your bird photography composition beyond simple snapshots into engaging narratives.
Capturing Birds in Their Natural Habitat
While leading lines guide your viewer’s eye, habitat storytelling creates the complete picture. Your bird photography techniques should showcase how birds interact with their surroundings, revealing authentic bird behavior within natural settings.
Wildlife photography becomes more powerful when you include environmental context. Show bird habitats honestly, capturing both pristine wilderness and areas with human influence. This approach supports conservation impact by documenting real conditions.
Focus on these ethical considerations for authentic habitat documentation:
- Frame birds within their ecosystem without disturbing nesting areas
- Capture habitat diversity across different seasons and weather conditions
- Document feeding behaviors that show species-specific adaptations
- Include natural shelter and roosting spots birds actually use
- Show connectivity between different habitat zones birds traverse
Consider using rule of thirds to position birds in the frame.
Lighting and Weather Conditions for Bird Behavior
You’ll discover that lighting and weather conditions dramatically affect your ability to capture stunning bird behavior photographs.
Understanding how different light sources and weather patterns influence bird activity will help you predict the best shooting opportunities and adjust your camera settings accordingly, which is crucial for capturing stunning bird behavior photographs.
Golden Hour and Soft Light for Bird Photography
Golden hour creates the most enchanting bird photography lighting conditions you’ll encounter.
During sunrise and sunset, soft light bathes your subjects in warm, honey-colored tones that make feathers shimmer.
This diffused lighting eliminates harsh shadows while adding depth and dimension.
Position yourself for backlighting birds to create stunning sunrise silhouettes, or use side lighting to reveal intricate feather details and vibrant colors perfectly.
Overcast Skies and Diffused Light for Bird Behavior
When overcast skies blanket the landscape, you’ve discovered bird photography’s hidden treasure. Diffused light eliminates harsh shadows while enhancing color saturation naturally.
Overcast Advantages for bird behavior photography:
- Soft Light Benefits – Even illumination reveals intricate feather details
- Shadow Reduction – No harsh contrasts that hide facial features
- Color Saturation – Natural hues appear richer and more vibrant
- Ideal Subjects – Active birds emerge during cooler conditions
- Extended shooting windows without changing light angles
Capturing Birds in Various Weather Conditions
Weather challenges your bird photography skills like nothing else.
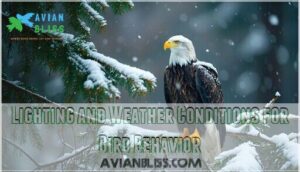
Rainy day shots capture water droplets clinging to feathers, while snowy birding creates stunning contrast against dark plumage.
Foggy conditions produce ethereal, dreamlike scenes that transform ordinary birds into mystical subjects.
Windy challenges reveal fascinating feather patterns and flight adaptations.
Even harsh sunlight offers backlighting opportunities when positioned correctly.
Capturing Birds in Flight and Motion
Flight patterns change rapidly, so tracking birds requires continuous focus tracking and fast bird photography shutter speed settings.
Use pre-release capture to catch takeoff moments you’d otherwise miss.
Panning smoothly helps maintain sharp subjects while creating artistic motion blur in backgrounds.
Study wing positions during different flight phases—this knowledge transforms your bird photography from snapshots into compelling storytelling images.
Post-Processing for Enhancing Bird Behavior Photos
Your raw bird behavior photos contain incredible moments, but proper post-processing transforms them into stunning images that showcase every feather detail and natural color.
You’ll learn essential techniques for adjusting exposure and contrast, making selective edits to highlight specific bird features, and reducing noise while enhancing colors to create professional-quality results that showcase every detail with natural color.
Basic Adjustments for Exposure and Contrast
After capturing that perfect flight shot, your raw image needs polished exposure and contrast to truly pop. Start with the Exposure Triangle basics—adjust your exposure compensation to fix any overexposure or underexposure issues.
Watch your Histogram Usage carefully; those peaks shouldn’t kiss the edges. Shadow Recovery brings back lost detail in dark feathers, while avoiding Highlight Clipping keeps those bright whites intact.
Fine-tune your Contrast Levels and tone curve for that professional punch.
Here’s your post-processing checklist:
- Check histogram for proper exposure adjustments
- Recover shadows without creating noise
- Prevent highlight clipping in white plumage
- Adjust contrast levels for natural depth
Advanced Techniques for Selective Adjustments
Bird photography’s selective adjustments transform ordinary shots into stunning portraits.
Masking techniques and luminosity masks let you target specific tonal ranges with precision. Radial filters spotlight your subject’s eye, while graduated filters balance harsh skies.
Master dodge and burn techniques to sculpt feather details naturally. Color range selections isolate plumage hues for fine-tuning.
Selective masking makes certain your adjustments look seamless, not artificial. Begin with global adjustments, then refine with local editing techniques.
Noise Reduction and Color Grading for Bird Photos
High ISO bird shots need polishing to truly shine. Think of noise reduction and color grading as the final touch that transforms good photos into stunning ones.
Your post-processing workflow should tackle these essentials:
- Start with luminance noise reduction before addressing color noise issues
- Apply selective sharpening techniques to restore detail lost during noise cleanup
- Use HSL adjustments for precise color balance control on individual feather tones
- Experiment with artistic grading to enhance natural bird colors authentically
- Create custom presets for consistent detail recovery across similar lighting conditions
Ethical Considerations for Capturing Bird Behavior
You’re not just capturing images when you photograph birds—you’re entering their world as a guest who must respect their space and well-being.
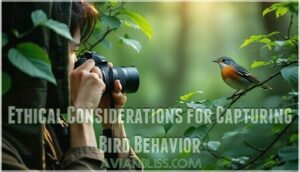
Ethical bird photography means maintaining safe distances, avoiding nesting areas during breeding season, and never prioritizing a shot over a bird’s natural behavior or safety, which is crucial for their well-being.
Respecting Wildlife and Their Habitats
You must minimize disturbance to birds, prioritizing their wellbeing and habitat preservation.
Maintain a respectful distance, avoiding nests and breeding areas to prevent stress.
Ethical considerations are essential in bird photography, ensuring peaceful observation and sustainable practices that promote bird photography respectful distance and natural habitats.
Environmental Awareness and Sustainability
You can make a positive impact on bird conservation by packing reusable gear and minimizing your environmental footprint.
Join local conservation groups to understand habitat preservation better and track changes in bird populations, supporting sustainable practices in bird photography and conservation efforts, which can lead to a significant positive impact through sustainable practices.
Honesty in Presentation and Sharing Bird Photos
When sharing bird photos, authenticity matters.
Avoid image manipulation and misleading context.
Consider these ethical considerations:
- Transparent editing
- Accurate metadata
- Respect copyright
- Disclose baiting
- Honest presentation, ensuring responsible sharing and bird photography authenticity.
Growing as a Bird Photographer
You’re taking the first step to growing as a bird photographer by recognizing the importance of practice and patience.
As you continue to learn and improve, you’ll develop your unique style and voice in bird photography, allowing you to capture stunning images that showcase your skills and creativity.
Practice and Patience for Improving Skills
You’ll improve with consistent practice, patience rewards your efforts.
To develop skills,
- Start with simple shots
- Track birds without your camera
- Set goals for each session
- Experiment with lighting
Document progress, overcoming frustration leads to mastery in bird photography practice.
Learning From Others and Workshops
You’ll gain valuable insights by learning from others and workshops.
| Workshop Benefits | Mentorship Opportunities |
|---|---|
| Skill Development | Online Communities |
| Networking Events | Bird Photography Community |
Join online communities for bird photography learning and shared outings.
Developing Your Unique Style and Voice in Bird Photography
As you grow, you’ll find your unique style.
To develop it, consider:
- Playing with color palettes
- Experimenting with composition
- Focusing on emotional impact
To capture stunning details, remember to use fast shutter speeds when photographing birds.
Creating a cohesive portfolio, showcasing your personal expression and artistic vision in bird photography, is also essential for growth.
Frequently Asked Questions (FAQs)
Should you use a camera trap to photograph birds?
Like a hunter stalking prey, you’ll snap perfect shots with a camera trap, but it’s not ideal for birds, as it can startle them, disrupting natural behavior.
How do you capture a bird portrait?
You’ll capture stunning bird portraits by using a telephoto lens, getting eye-level, and focusing on high-contrast areas like the head or wing edges for sharp, intimate images.
How long does it take to set up a bird camera?
As you set up, it usually takes around 10-30 minutes, depending on your equipment and location, to get your bird camera ready for action, isn’t that quick?
What is the rule of birds photography?
You’ll want to follow the rule of thirds, using leading lines, and framing birds naturally to create visually appealing compositions that tell compelling stories.
What AF mode should I use for bird photography?
You should use AI Servo or AF-C mode for tracking moving birds, and single-point autofocus for stationary ones, to guarantee sharp images and better control over focus.
What shutter speed is needed for birds flying?
Like a swift arrow, you’ll need a shutter speed of at least 1/2000s to freeze birds in flight, ensuring sharp images that reveal their majestic beauty.
How do you capture birds in flight?
You’ll need a fast shutter speed, around 1/1000th of a second, and a telephoto lens to freeze birds in flight, capturing sharp images with great detail and clarity instantly.
How to shoot a bird with a camera?
You’ll capture stunning bird photos by using a telephoto lens, adjusting camera settings, and anticipating their behavior, with 70% of birders succeeding with practice and patience, try it.
How do you create compelling bird photography?
You create compelling bird photography by anticipating behavior, using natural blinds, and applying composition techniques like the rule of thirds to capture stunning, intimate moments of birds in their habitats.
Do bird photographers really need a camera?
You’ll definitely need a camera to photograph birds, as it’s the essential tool for capturing their beauty and behavior in various settings and conditions effectively.
Conclusion
You’re now a master chef, whipping up stunning photos of bird behavior.
With practice, you’ll refine your skills in capturing bird behavior on camera, anticipating their fascinating moments, and preserving them forever.
You’ll develop a keen eye, and your photos will tell amazing stories, making capturing bird behavior on camera a true art form.

