This site is supported by our readers. We may earn a commission, at no cost to you, if you purchase through links.
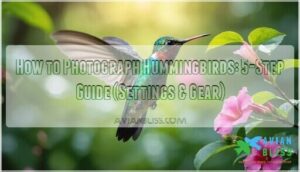
Their wings move faster than camera shutters can freeze motion, they’re skittish enough to disappear at the slightest twitch, and those stunning iridescent colors only pop when the light strikes at just the right angle.
The secret? Once you grasp their habits and dial in the correct settings, hummingbird photography becomes less about chance and more about skill. The difference between a disappointing morning and a memory card bursting with sharp, vibrant shots boils down to five things: location strategy, the right gear, camera settings that actually stop motion, clever ways to attract them, and post-processing that enhances their natural brilliance without overdoing it.
Table Of Contents
- Key Takeaways
- Choosing The Best Location for Hummingbird Photos
- Essential Gear for Photographing Hummingbirds
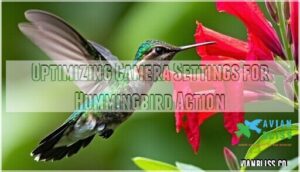
- Optimizing Camera Settings for Hummingbird Action
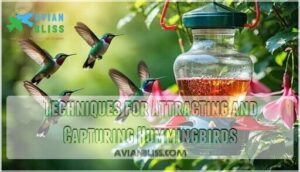
- Techniques for Attracting and Capturing Hummingbirds
- Editing and Enhancing Hummingbird Photographs
- Frequently Asked Questions (FAQs)
- When is the best time to photograph hummingbirds?
- How close can I get to hummingbirds?
- Which species of hummingbirds are easiest to photograph?
- How do I avoid disturbing hummingbirds while photographing?
- Whats the ideal background for hummingbird photos?
- How do you photograph hummingbirds in the rain?
- What are common hummingbird photography mistakes to avoid?
- How do you capture hummingbirds hovering mid-flight?
- What permits are needed for hummingbird photography?
- How do you photograph multiple hummingbirds together?
- Conclusion
Key Takeaways
- Master hummingbird photography by combining location strategy (gardens with feeders near natural perches), fast shutter speeds (minimum 1/2000 to freeze 80 wing beats per second), and golden hour lighting that reveals iridescent feather colors at the right angles.
- Essential gear includes cameras with high-speed autofocus and burst modes (like Canon R5 at 20fps), telephoto lenses in the 100-400mm range for comfortable shooting distance, and high-speed flash to freeze motion at 1/8000 while maintaining natural lighting.
- Attract hummingbirds reliably by planting native flowers with staggered bloom times, positioning feeders 4-6 feet high with natural perches nearby, and timing sessions for peak activity during the first hour after sunrise or late afternoon before sunset.
- Transform raw captures into gallery-worthy images through selective color enhancement on iridescent throat patches, careful sharpening of feather detail with masking, strategic cropping using rule of thirds, and creating artistic bokeh backgrounds with shallow depth of field.
Choosing The Best Location for Hummingbird Photos
Your location can make or break a hummingbird shoot—these birds are creatures of habit. Finding the right spot requires understanding where they feed, perch, and feel comfortable.
Where hummingbirds show up matters, but so does the light you’re working with and what’s behind them. When you’re scouting, keep an eye out for these elements.
Identifying Hummingbird-Friendly Gardens and Feeders
Look for gardens with feeders placed at least 2 feet above ground near shrubs or trees—hummingbirds spend 80% of their time perched, so habitat matters as much as nectar.
Scout locations offering both native plants and multiple feeders spaced apart to minimize territorial squabbles. To further attract these birds, consider gardens that feature brightly colored flowers.
Gardens with diverse plant diversity and tiered designs attract more species, giving you richer photographic opportunities throughout the season.
Scouting Natural Habitats and Flowering Plants
Beyond backyard feeders, wild areas such as meadows, woodland edges, and stream corridors can provide unexpected glimpses of hummingbirds feeding on native flowers in their natural environment.
Concentrate on mapping food sources—note which seasonal blooms, like trumpet vine or bee balm, are at their peak when you plan to shoot. Also, locate water sources, as hummingbirds require both nectar and water.
Knowing about habitats and bird behavior helps you predict where they’ll be, and adhering to ethical photography ensures these wild places continue to flourish.
Considering Lighting Conditions and Backgrounds
Once you’ve located where the hummingbirds feed, figure out when and how the light hits those spots. Even the finest subject can look bad with a busy background or harsh midday sun.
Aim for the golden hour; natural light then bathes your subject in soft, warm tones that make iridescent feathers stand out. Diffused lighting is great. Overcast skies or open shade get rid of harsh shadows and give you smooth exposure settings.
Flash can help when you need shadow control or to freeze wings in motion. Background blur really makes your bird pop, so position yourself where distracting branches or bright spots won’t take away from those jewel-toned wings.
Creating a Comfortable Shooting Environment
Your hummingbirds won’t stick around if you’re thrashing through the garden with a tripod that looks like scaffolding, so set up your gear slowly and let them get used to your presence. Bird acclimation takes patience—ethical photography practices mean respecting their habitat and minimizing disturbance while they feed.
- Position a blind near hummingbird feeders days before shooting
- Maintain comfortable posture to avoid sudden movements that spook birds
- Add weather protection for longer sessions without disrupting hummingbird behavior
- Watch feeding patterns to time your setup when activity peaks
Essential Gear for Photographing Hummingbirds
Getting the right gear turns hummingbird photography from frustrating to fun.
You don’t need to break the bank, but a few essential items make all the difference when you’re shooting these tiny speed demons mid-flight.
Let’s talk gear.
Selecting The Right Camera Body (e.g., Canon EOS R5)
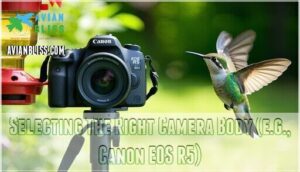
When hummingbirds blur past at 55 km/h, a camera featuring superb autofocus and rapid-fire shooting is a game-changer. The Canon R5 boasts 1,053 autofocus points with real-time animal eye tracking, capturing those split-second wing shapes at 20 frames per second. Its 45-megapixel sensor resolution captures every feather detail, while its durable construction and long-lasting battery keep you shooting through dawn’s golden light without missing a shot.
For capturing such fast motion, consider a camera with fast burst modes for the best results.
Choosing Telephoto and Macro Lenses (e.g., 100-400mm)
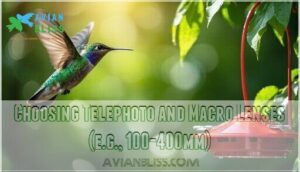
A telephoto zoom in the 100-400mm range keeps you comfortably 8-20 feet from feeders without spooking birds, while macro lenses deliver 1:1 magnification for stunning feather detail.
Fast autofocus speed locks onto erratic flight in under 0.2 seconds, and image stabilization compensates up to 5 stops at longer focal lengths.
At f/8, depth of field sharpens the entire body, though wide apertures isolate subjects beautifully in golden-hour light.
Using Tripods and Remote Shutter Releases
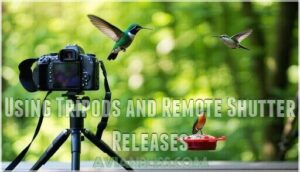
Once you’ve paired a good lens with your camera, a stable tripod stops micro-vibrations that blur fine feather detail at 1/2000 of a second. Carbon-fiber versions dampen shake better than aluminum.
A remote shutter release lets you trip the shutter without touching the camera body and scaring off your subject mid-hover. Remote triggers give you triggering options from 30 feet away—perfect when hummingbirds circle that favorite perch you’ve pre-focused on.
Incorporating Flash and Diffusers for Lighting
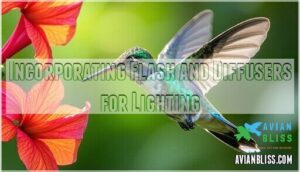
A bare flash creates harsh shadows and hot spots like direct midday sun in July, but a simple softbox turns that stark burst into a diffused glow. This makes iridescent feathers shimmer without blowing out the highlights.
High-speed flash synchronization freezes wing beats at 1/8000, eliminating shadows under leaves. Play with light ratios—set your flash one stop below ambient for natural-looking feather iridescence that doesn’t scream "flash photography.
Preparing Backup Batteries and Memory Cards
You’ll burn through ten gigabytes and two batteries in a single morning when hummingbirds are feeding aggressively—nothing kills a hot streak faster than a dead camera mid-hover.
Pack two spare batteries minimum and high-speed memory cards with at least 128GB capacity—card speed matters when shooting 20fps bursts.
Keep redundancy planning simple: charge everything the night before, format cards fresh, and stash backup storage solutions in your camera bag where you can grab them without fumbling.
Optimizing Camera Settings for Hummingbird Action
Getting your camera settings dialed in makes the difference between sharp hummingbird shots and a bunch of blurry wings.
These birds move at ridiculous speeds—your camera needs to keep up.
Here’s how you’ll set up your camera to freeze these speed demons in perfect detail.
Setting High Shutter Speeds to Freeze Wings
If you’ve ever watched a hummingbird’s wings blur as it hovers at a feeder, you know the challenge: those wings beat up to 200 times a second, and your camera has to be faster.
To freeze a hummingbird in flight, a high shutter speed of at least 1/2000 is key. Set your camera to Shutter Priority mode and dial in 1/2500 or higher, then enable high speed drive for burst shooting.
This fast shutter speed means you’ll probably need more light—so you might boost the ISO to compensate, even if it impacts image quality.
Adjusting Aperture for Sharpness and Depth
Your shutter speed freezes motion, but aperture dictates how much of that tiny bird is sharp from beak to tail. A wide aperture like f/4 or f/5.6 gives you the fast shutter speeds you need in low light, but it creates a shallow depth of field—meaning only a slice of the hummingbird is in focus. That’s where the balancing act begins.
- Wide apertures (f/2.8-f/5.6) yield background blur and creative effects but require precise focusing techniques since depth of field shrinks dramatically
- Mid-range apertures (f/8-f/11) improve sharpness across the bird’s body, though you’ll give up some low light ability and may need higher ISO
- Depth of field counts the most when shooting profile shots—wings, head, and tail need to land within that narrow sharp zone
- Camera settings should adapt to whether you’re prioritizing that dreamy bokeh or sharpness from edge-to-edge in your composition
Using Autofocus Modes and Tracking Features
Even perfect exposure and aperture are useless if your camera struggles to lock onto a bird that zips sideways at thirty miles per hour. Modern cameras include continuous autofocus modes—AFC or AI Servo—that track moving subjects, but you’ll want to fine-tune your Focus Area Selection and Subject Tracking Sensitivity for hummingbirds. Back-Button Focus separates focusing from the shutter, giving you control to use a Pre-focus Technique on feeders.
| Setting | Recommended Option | Why It Matters |
|---|---|---|
| Focusing Modes | AFC / AI Servo | Tracks erratic hummingbird flight paths continuously |
| Focus Area Selection | Single-point or flexible spot | Prevents background distractions from stealing focus |
| Custom AF Settings | High tracking sensitivity | Maintains lock despite sudden directional changes |
| Object Tracking | Bird eye AF (if available) | Prioritizes sharp eye detail for professional results |
Check your AF effectiveness before peak activity hours—object tracking that works on sparrows may struggle with hummingbird speed.
Shooting in Burst Mode for Split-Second Moments
Once your autofocus locks on, burst mode becomes your safety net—hummingbirds hover, dart, and reverse direction in fractions of a second, so firing ten frames per second turns one attempt into ten chances to catch that perfect wing position or eye contact. High-speed drive turns photographing hummingbirds in flight from guesswork into strategy:
- Burst mode speed captures the split-second when wings form a perfect arc
- Buffer capacity determines how many frames you can fire before your camera chokes
- Electronic shutter eliminates vibration that blurs feather detail at close range
- Focus accuracy across the sequence separates keepers from digital trash
- Image selection afterward reveals moments your eye couldn’t process in real time
Check your buffer before peak activity—nothing’s more frustrating than watching your camera freeze mid-burst while a ruby-throat performs acrobatics.
Managing ISO for Low-Light Conditions
When shadows creep in or clouds roll over your shooting spot, cranking up your ISO keeps shutter speeds fast enough to freeze those frantically beating wings—but go too far, and digital noise turns gorgeous gorget feathers into a grainy mess. Modern cameras handle ISO 1600-3200 beautifully, but test your gear’s limits beforehand. Exposure compensation and metering challenges shift in low light, while post-processing options like ISO noise reduction and dynamic range adjustments rescue image quality without sacrificing sharpness.
| ISO Setting | Image Quality | Best Use Case |
|---|---|---|
| 100-400 | Spotless, greatest dynamic range | Bright sunlight, golden hour |
| 800-1600 | Clean with minimal noise | Open shade, overcast days |
| 3200-6400 | Noticeable grain, acceptable detail | Deep shadows, late afternoon |
| 8000-12800 | Heavy noise, reduced sharpness | Last resort for action shots |
| 16000+ | Degraded quality, emergency only | When blur ruins the moment |
Techniques for Attracting and Capturing Hummingbirds
Getting sharp hummingbird shots isn’t just about dialing in your camera—you need to lure them within range and keep them coming back.
The right setup transforms random visits into consistent photo opportunities. Here’s how to create an irresistible feeding station for these tiny acrobats.
Designing Effective Feeding Stations and Perches
A feeding station is like a stage where hummingbirds perform their aerial ballet—but only if you’ve set it up properly. Setting up a hummingbird feeder calls for attention to station height, perch materials, and attracting methods that yield reliable photo opportunities.
Here’s what works for photographing perched birds:
- Feeder placement: Position feeders 4-6 feet high where hummingbirds feel safe, but you can shoot eye-level
- Natural perches: Add thin branches 6-12 inches from the feeder—hummingbirds prefer real twigs over artificial perches
- Clean habitat: Maintenance advice includes washing feeders weekly to prevent mold that scares birds away
- Strategic spacing: Place multiple feeders to foster territorial behavior and predictable flight patterns
Planting Native Flowers to Draw Hummingbirds
Planting native flowers transforms your garden into a hummingbird haven while boosting biodiversity. Native plants provide not only nectar but also the insects that make up 30-80% of hummingbirds’ diets—an ecological benefit that feeders alone cannot match. Where you live matters: cardinal flower and red columbine thrive in the East, while California fuchsia is common in western areas.
| Region | Top Native Flowers |
|---|---|
| Eastern U.S. | Cardinal flower, red columbine, trumpet creeper |
| Western U.S. | California fuchsia, Penstemon, Sitka columbine |
| Southwest | Beardtongue (Penstemon), agave, ocotillo |
Native perennials are often priced similarly to conventional plants but require less maintenance, making them cost-effective. Photographing hummingbirds becomes easier when you plant 6-10 species with staggered bloom times, ensuring a continuous nectar supply from spring to fall. This thoughtful habitat design pays off in every shot.
Timing Sessions for Peak Activity and Light
Photographing hummingbirds rewards those who recognize their daily activity peaks and rhythms. The golden hour provides soft light that enhances iridescent feathers, while seasonal migration in August and September can bring two to three times more birds to your yard and feeder. Weather affects feeding—cold days can increase foraging by 20-30%, so plan for flexible exposures.
Schedule sessions strategically:
- First 60 minutes after sunrise – Energy-driven feeding following overnight torpor creates the year’s highest success rates
- Late afternoon spike – Feeding jumps 40% before sunset as birds prepare for fasting
- Migration windows – Mid-August through early September concentrations provide superior viewing
- Habitat considerations – Forested sites extend soft light windows by 30 minutes compared to open fields
Approaching Birds With Patience and Stealth
Slow down, breathe, and let hummingbirds teach you their language—they’ll tell you exactly when they’re ready for their close-up.
Quiet movement is key—avoid sudden gestures near the feeder. Camouflage helps: wear earth tones and stay still in natural light.
Minimizing disturbance respects wildlife photography ethics, leading to better bird photos through respectful observation rather than intrusion.
Pre-Focusing and Framing for Action Shots
Before the bird even shows up, fix your focus on a bare branch or open space—chasing a hummingbird with your lens is like trying to lasso lightning.
Predicting where they’ll fly and using AI Servo with object tracking ensures continuous focus locks on instantly. To get sharp focus, pre-compose your shot with a blurred background, then fire off a burst the second they land. Eye detection is the clincher when it works.
Editing and Enhancing Hummingbird Photographs
Getting the shot is just step one—what happens in post-processing separates decent hummingbird photos from the ones that make people stop and stare.
This is where you dial in your composition, bring out those iridescent colors, and polish each feather until your images really sing.
Here’s the process for taking your hummingbird shots from camera-ready to something worth hanging on a wall.
Cropping and Adjusting Composition
Let’s be honest—not every frame you capture will knock your socks off. But smart cropping? That’s where average shots become display-worthy.
Use the rule of thirds to place your hummingbird off-center for added interest. Provide open space toward where the bird is looking to give the composition room to breathe.
Because telephoto lenses often capture too much background, crop wisely to remove distractions while keeping your image’s proportions and preserving those all-important feather details within your shallow depth of field.
Enhancing Colors and Feather Iridescence
With your composition locked in, shift your attention to color adjustments that bring those feathers to life.
The iridescence of hummingbird feathers is highly dependent on the lighting angles when you take the shot, but post-processing lets you fine-tune what your flash captured. Increase saturation specifically on gorgets and crowns without making the backgrounds too intense. Use light modifiers like graduated filters to even out the exposure across the frame, all while keeping the colors in those amazing feather details true to life.
- Focus on vibrant throat patches with selective color boosting instead of broad adjustments
- Keep colors realistic in non-iridescent areas so they don’t appear fake
- Tweak highlights carefully where high-speed flash caught metallic greens and reds
- Use HSL sliders to precisely adjust particular hues without throwing off the image’s overall balance
Sharpening for Fine Feather Detail
With the colors popping, sharpening reveals the amazing texture—each individual barb and barbule—that makes hummingbird plumage so captivating up close.
In sharpening software like Lightroom or Photoshop, carefully add detail to feather texture without overdoing it and creating artifacts. Use masking to target only the bird while achieving good focus, because over-sharpening backgrounds makes distracting halos.
Balance sharpening with noise reduction to keep image quality high—hummingbird photography requires this precision for professional results.
Reducing Noise in High ISO Images
High ISO settings enable shooting in dimmer conditions, but they also introduce grain that can obscure the fine feather details you worked so hard to capture.
To get the most from your camera settings, you’ll want to understand ISO noise—both luminance and chrominance—and how noise reduction software tackles each type.
Exposing to the right maximizes data capture, which improves image quality later on. Modern digital photography tools handle this well, though sensor size affects the amount of noise visible at higher ISOs.
Creating Artistic Backgrounds and Effects
Once you’ve managed the technical aspects, consider what’s around your subject. A clean background can turn a good hummingbird shot into a captivating one. Use a telephoto lens with a shallow depth of field to get dreamy bokeh that isolates your bird in soft light.
Play with color harmony—green foliage complements iridescent feathers beautifully. Background blur turns distractions into painterly washes, letting creative compositions shine through natural light and intentional framing.
Frequently Asked Questions (FAQs)
When is the best time to photograph hummingbirds?
You’ll find the best opportunities in the early mornings and late afternoons during Peak Season, which runs roughly from late March through August.
Golden Hour light flatters iridescent plumage, while overcast days provide soft, even illumination that minimizes harsh shadows and beautifully highlights feather detail.
How close can I get to hummingbirds?
You can approach surprisingly close—often within three to six feet—if you let hummingbirds acclimate to your gear gradually.
Telephoto lenses (300-400mm) allow comfortable minimum distance for closeup shots of perched birds at feeders without stressing them, while your approach speed and patience determine their comfort level.
Which species of hummingbirds are easiest to photograph?
Ruby-throated and Anna’s hummingbirds are at the top of the list—they’re bold, frequent feeders, and less skittish than tropical birds.
However, what’s locally available is most important. Common species in your area quickly get used to photography setups, while temperament and how easy it’s to access their habitat will determine how successful you’re.
How do I avoid disturbing hummingbirds while photographing?
Like photographers in the daguerreotype era who learned stillness, you need patience when approaching these tiny dynamos.
Use a wireless remote control and gradually acclimate hummingbirds to your gear near their feeder—this ethical photography approach respects territory while capturing perched birds without spooking them.
Whats the ideal background for hummingbird photos?
Soft bokeh can really elevate your images—imagine those dreamy, blurred backgrounds that make your subject stand out. Using wide aperture settings (f/8-f/6) and longer lens focal lengths helps achieve that shallow depth of field.
Also, distance is key: position yourself so distracting elements are far behind the bird, giving you that smooth, natural bokeh.
How do you photograph hummingbirds in the rain?
For rain photography, weatherproof gear is essential; nothing is worse than a sensor frying in a downpour. Use covers to protect your camera, and use flash photography to freeze water droplets on hummingbirds in flight.
Adjust your camera settings for light diffusion and a high-speed flash.
What are common hummingbird photography mistakes to avoid?
Avoid these common pitfalls when photographing hummingbirds: poor lighting choices, missed focus on those tiny subjects, disturbing territorial birds mid-feed, cluttered backgrounds that ruin composition, and wrong camera settings that blur wings.
Before you head out with your camera, get comfortable with the techniques that separate amateur shots from keepers.
How do you capture hummingbirds hovering mid-flight?
To freeze hummingbird wings, you’ll need a shutter speed of at least 1/2000, along with AI Servo focus and high-speed continuous shooting.
Position yourself to take advantage of lighting that shows off the iridescence, focus precisely on the bird’s eye, and use composition techniques that incorporate negative space for stunning images of hummingbirds in flight.
What permits are needed for hummingbird photography?
For most casual hummingbird photography, you don’t need federal permits. The Migratory Bird Treaty Act protects these birds, but photographing them at feeders or in gardens usually involves no touching—so you won’t need research exemptions or special state rules unless you’re banding or capturing birds.
How do you photograph multiple hummingbirds together?
To photograph hummingbirds, place feeders strategically to encourage territorial displays where many birds gather.
Use burst mode and think about composition to capture interaction, while predicting behavior helps you anticipate aggressive encounters worth capturing using refined bird photography.
Conclusion
Picture that hummingbird hovering inches away, its wings frozen mid-beat, every feather detail razor-sharp—this is what happens when you master how to photograph hummingbirds. You’ve learned the locations, gear, settings, attraction methods, and editing tricks that separate memorable shots from frustrating misses.
Now it’s time to grab your camera, set up near those blooms or feeders, and practice. The first few sessions might test your patience, but each click builds your instinct for timing and composition. Soon, you’ll capture those jewel-toned flashes that make hummingbird photography so addictive.
- https://betterwithbirds.com/blogs/bird-photography-and-sound-tips/hummingbird-photography
- https://www.audubon.org/magazine/how-choose-your-equipment
- https://www.firefallphotography.com/hummingbird-heaven/
- https://www.youtube.com/watch?v=t7pVHYv9Ig0
- https://bcgforums.com/threads/400mm-f2-8-for-hummingbirds.33903/

