This site is supported by our readers. We may earn a commission, at no cost to you, if you purchase through links.
 A sparrow strikes your window at full speed and crumples to the ground. You scoop up the trembling bird and notice one wing hanging at an unnatural angle. Window collisions account for 8-17% of all wing fractures in wild birds, and without proper stabilization, that broken wing can mean a death sentence.
Birds can’t survive long with untreated fractures—the injury prevents flight, feeding, and escape from predators. Learning to apply a basic splint buys critical time until you can reach a wildlife rehabilitator or avian veterinarian.
The technique requires steady hands, the right materials, and an understanding of avian anatomy. A properly splinted wing can mean the difference between a bird that heals and one that doesn’t make it through the night.
Table Of Contents
Key Takeaways
- Proper splinting within the first 24-48 hours dramatically increases survival chances for birds with wing fractures, which account for 8-17% of window collision injuries and prevent flight, feeding, and predator escape.
- Effective splinting requires matching materials to bird size (lightweight tape for songbirds, stronger support for raptors), folding the wing naturally against the body, and ensuring the wrap allows one fingertip to slide beneath without restricting breathing or circulation.
- Recovery demands vigilant monitoring every 15 minutes initially for circulation problems, daily splint checks for 2-3 weeks, pain management with medications like Butorphanol, and controlled environmental conditions (75-85°F) to prevent complications like infection, muscle atrophy, or malunion fractures.
- Professional veterinary or wildlife rehabilitation help becomes critical within 24 hours of splinting, especially when birds show infection signs (swelling, discharge, weight loss), lack improvement after 48 hours, or have complex fractures requiring specialized orthopedic care beyond basic stabilization.
When Should You Splint a Bird’s Wing?
Not every injured bird needs a splint. You’ll want to know when splinting helps and when it causes more harm.
Let’s look at the signs that tell you a wing injury requires immediate stabilization.
Common Causes of Wing Injuries
Wing injuries in birds stem from preventable accidents and natural threats. Window collisions cause 8–17% of wing fractures, while predator attacks—especially from cats—claim over 1 billion birds annually in the U.S. Environmental hazards like storms injure another 10–15%. Disease transmission, parasites, and human negligence compound these risks.
Window collisions, predator attacks, and storms injure millions of birds annually through largely preventable accidents and natural threats
Recognizing these common causes helps you respond quickly when bird injuries occur. It’s essential to provide proper emergency care services to prevent further complications.
Recognizing Symptoms of Wing Fractures
Once you know what caused the injury, you need to spot the telltale signs that a wing is actually broken. A droopy wing hanging lower than normal is the clearest indicator. Watch for the bird holding its wing at an odd angle or unable to fold it properly against its body.
You may notice visible swelling, bruising, or active bleeding at the fracture site. The bird often shows avian pain indicators like reluctance to move, labored breathing, or distress vocalizations.
Feather damage evaluation reveals bent or broken flight feathers near the injury.
Assessing Injury Severity and Urgency
After spotting symptoms, you need to determine how urgent the situation is. Check for severe dehydration or bleeding from the mouth or nose—these appear in nearly 50% of window-strike cases and demand immediate stabilization. Look for eye injuries, which accompany fractures in 60% of collision cases. Birds with open fractures or proximal wing breaks face worse odds. Closed ulnar fractures heal over five times more successfully than open ones. Internal bleeding signals life-threatening trauma requiring oxygen therapy before you attempt splinting.
Understanding the causes of bird collisions, such as those related to glass window collisions, is vital for effective treatment and prevention.
Risks of Untreated Wing Injuries
When internal bleeding or fractures go untreated, your bird faces a steep drop in survival—often within 24 to 48 hours. Without proper wing injury treatment, you risk:
- Infection Risk spreading through open wounds
- Malunion Fractures healing incorrectly and causing permanent damage
- Limited Flight capability affecting hunting and survival
- Chronic Pain reducing quality of life
- Wing problems preventing successful avian orthopedic care
Bird injury rehabilitation becomes nearly impossible once complications set in.
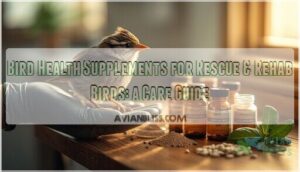
Essential Supplies for Bird Wing Splinting

Having the right supplies ready makes splinting safer and more effective for the injured bird. You’ll need specific materials that won’t damage delicate feathers or cause additional stress during manipulation.
Here’s what to gather before you begin.
Types of Splinting Materials (e.g., Tensoplast Tape)
The right splinting material can mean the difference between a bird that flies again and one that never heals properly. Tensoplast tape is ideal for avian orthopedic care because it stretches with the bird’s movements and leaves minimal residue on feathers.
You’ll need materials that provide injury stabilization without restricting blood flow. Proper tape applications require elastic fabric tape rather than rigid alternatives. These splinting techniques guarantee effective splint designs for bird wing injuries.
Choosing The Right Splint for Bird Size and Injury
Matching your splint to the bird’s anatomy isn’t guesswork—it’s about understanding whether you’re dealing with a sparrow-sized songbird or a red-tailed hawk. Small songbirds need lightweight splint materials that won’t overwhelm their delicate bird anatomy. Larger raptors require stronger splint designs for shoulder injuries or leg fractures.
Your injury assessment determines whether you’re stabilizing a simple wing fracture or complex orthopedic care needs. Avian physiology varies markedly between species, so proper splinting means matching support to body size and injury type.
Additional Tools for Wound Care and Immobilization
Beyond tape and splints, you’ll need tools that stop bleeding, clean wounds, and keep birds calm during what can be a stressful procedure.
Stock gauze pads for wound cleaning and controlling hemorrhage. Keep sterile saline for flushing debris from injury sites. Styptic powder stops active bleeding fast.
Cotton swabs help apply antiseptics to damaged tissue. Soft towels provide gentle immobilization techniques during splinting and wound care without causing additional stress to fragile avian patients.
Preparing a Safe Work Area
A cluttered workspace is a recipe for disaster when you’re trying to stabilize a frightened bird with a broken wing. Clear your workstation setup of unnecessary items. Sanitize equipment with alcohol wipes before each bird management session. Lay out all tools within arm’s reach—this workspace organization prevents fumbling during critical bird rehabilitation methods.
Dim lighting reduces stress for wildlife rescue and care. Use a non-slip mat to prevent escape attempts during avian care procedures that promote bird health through proper rehabilitation techniques.
Step-by-Step Guide to Splinting Bird Wings
Splinting a bird’s wing takes patience and the right technique. You’ll need to work quickly but gently to avoid causing more stress or harm. The steps below walk you through the entire process, from restraint to final checks.
Safely Restraining and Handling Injured Birds

Before you even reach for the splint, your first job is to secure the bird without causing more harm—or getting pecked in the process. Use a towel to gently wrap the bird’s body, keeping wings tucked close.
This restraint technique protects both you and the bird during injury assessment. Support the head and avoid squeezing the chest—birds need their ribcage free to breathe properly.
Cleaning and Stabilizing The Injury

Once you’ve got a secure hold, inspect the wing for active bleeding, dirt, or contamination that could sabotage healing. Stop any bleeding with light pressure using sterile gauze. Clean visible wounds gently with saline solution to remove debris.
Your injury assessment should identify:
- Open fractures breaking through skin
- Joint dislocations at shoulder or elbow
- Soft tissue swelling indicating internal damage
- Feather contamination from oil or chemicals
- Wing position—drooping signals probable fracture
Gentle stabilization techniques start with folding the wing naturally against the body, respecting avian anatomy to prevent further harm.
Applying a Splint for Different Wing Injuries

Your splinting approach depends entirely on which bone fractured and where along the wing it broke. Distal fractures—those in the hand bones—need a figure-eight wrap with Tensoplast tape to immobilize the wing against the body.
Proximal shoulder injuries require body wraps that stabilize without restricting breathing. You’ll gently fold the wing into its natural resting position before applying tape.
Securing The Splint for Minimal Movement

The tape must hold firmly enough to prevent any wing movement but never so tight that it cuts off blood flow or makes breathing difficult. You should be able to slide one fingertip beneath the wrapping without effort. This guarantees proper support and immobilization without compression.
Test the static splint by gently pressing near the fracture site—zero movement means your secure wrapping succeeded in creating effective orthotics for injury stabilization.
Monitoring for Proper Circulation and Fit

After you’ve confirmed the splint holds steady, check the wing every 15 minutes for the first two hours to catch circulation problems before they turn serious.
Look for these warning signs during your circulation checks:
- Cold wing tips or pale skin beneath feathers
- Swelling above or below the splint fit
- Bird showing increased pain despite immobilization support
If you notice any edema control issues or compromised blood flow, loosen the tape slightly while maintaining injury assessment stability for proper wing mobility recovery and pain relief.
Aftercare and Rehabilitation for Injured Birds

Once the splint is in place, your work shifts to helping the bird heal and regain function. Recovery requires careful monitoring, supportive care, and patience as the wing mends.
The following steps will guide you through pain management, healing assessment, environmental setup, and the critical process of evaluating flight readiness.
Pain Management and Supportive Care
When pain is left unchecked, healing stalls—so you’ll need to act fast. Pain management is crucial in avian species, and Butorphanol at 1-3 mg/kg intramuscularly provides safe opioid pain relief. Additionally, high-dose meloxicam (2.0 mg/kg) has been shown to markedly reduce pain scores within days.
Pain assessment in birds relies on behavioral indicators such as fluffed feathers and decreased activity. To support the healing process, it is essential to maintain optimal environmental conditions, including an ambient temperature between 29°C and 35°C.
Fluid therapy plays a vital role in preventing dehydration, with a recommended range of 50-150 mL/kg/day. Proper bird nutrition is also critical, with high-protein diets helping to prevent malnutrition-related delays.
Wound care and immobilization through splinting are necessary to minimize the risk of infection. Rehabilitation techniques, such as passive range of motion exercises, are essential in preserving avian anatomy function and preventing joint contracture.
| Supportive Care Element | Recommended Protocol |
|---|---|
| Pain Management | Butorphanol 1-3 mg/kg IM + meloxicam 2.0 mg/kg for 6-48 hours |
| Environmental Conditions | Temperature 29-35°C, humidity 50-70% |
| Fluid Therapy | Maintenance fluids 50-150 mL/kg/day |
| Nutrition Support | High-protein, calorically adequate diet |
Monitoring Healing and Adjusting The Splint
Healing doesn’t follow a straight line, so watching for subtle shifts in behavior and wing position tells you when it’s time to loosen, tighten, or remove the splint entirely. Check the splint daily during post-splint care to assess healing progress and prevent complications.
- Week 1-2: Watch for swelling reduction and improved appetite—signs that fracture management is working
- Week 2-3: Test gentle wing extension to assess injury recovery and adjust immobilization as needed
- Week 3-4: Look for active preening and balanced perching—indicators your rehabilitation techniques are supporting wildlife rehabilitation goals
Rest, Oxygen Therapy, and Cage Setup
During those critical first weeks, creating a calm recovery space with the right oxygen support can mean the difference between a bird that heals and one that doesn’t. Your cage design for avian rehabilitation should minimize stress while supporting animal health.
Wildlife rescue and rehabilitation experts know that bird rescue depends on controlled rest periods and proper oxygen therapy when internal injuries accompany wing fractures.
| Recovery Environment Element | Setup Requirements | Bird Monitoring Focus |
|---|---|---|
| Cage size | Small enough to limit movement during rest periods | Watch for wing dragging or imbalance |
| Oxygen levels | 30-40% via flow-through box if breathing is labored | Check respiratory rate every 2-4 hours |
| Perch placement | Low, padded perches to prevent re-injury during splinting recovery | Observe grip strength and posture shifts |
Test Flights and Assessing Recovery Progress
Before you release any bird back to the wild, you’ll need to evaluate its flight ability through careful testing that reveals whether damaged wings have regained enough strength and coordination for survival. Start with short, controlled flights in a confined space—watch for wing symmetry, lift power, and landing stability. These recovery metrics guide your injury assessment and determine rehabilitation outcomes.
Wildlife rescue and rehabilitation professionals use these rehabilitation techniques for birds to measure flight readiness before release. Wing strength improves gradually, so repeated tests over days help verify your avian rehabilitation efforts support wildlife conservation goals through successful bird rescue outcomes.
Preventing Complications and Promoting Recovery

Even with a well-placed splint, your work isn’t done. You need to watch for hidden threats that can derail recovery—parasites that drain strength, contaminated feathers that ground flight, and infections that spread fast.
Here’s what to monitor and when to call for backup.
Identifying and Treating Parasites (mites, Lice)
While your recovering bird rests in its quiet space, tiny parasites like mites and lice may be silently draining its strength one blood meal at a time. You’ll spot these pests by checking feathers closely for movement or dark specks near the skin.
- Mite infestation appears as red or gray dots crawling on skin and quills
- Bird lice cluster around the head, neck, and under-wing areas
- Feather mites cause damaged plumage and constant preening behavior
- Parasite removal techniques include avian-safe sprays prescribed by your veterinarian
Parasite control is essential for wildlife conservation and proper animal care and management during rehabilitation.
Addressing Feather Contamination (oil, Dirt)
Oil-soaked feathers strip away a bird’s two most essential defenses—the ability to fly and the ability to stay warm. You’ll need to bathe the bird using Dawn dish soap diluted in lukewarm water for proper oil removal. Gently work the solution through contaminated plumage using your fingertips in downward strokes.
| Contaminant Type | Cleaning Method |
|---|---|
| Motor oil | Dawn dish soap bath with multiple rinses |
| Dirt and mud | Lukewarm water spray and gentle finger combing |
| Sticky residue | Vegetable oil application followed by soap wash |
| Heavy grime | Sequential baths with 10-minute drying intervals |
| Dust buildup | Fine mist spray and air drying in warm space |
Feather restoration requires thorough rinsing until water runs clear. Pat dry with clean towels and place the bird in a temperature-controlled space for feather care and wildlife rescue protocols.
Signs of Infection or Poor Healing
Watch closely—infection signs can show up within just a few days of splinting. Over 40% of wing fracture cases develop soft tissue swelling that requires immediate splint adjustment.
You’ll see persistent redness around the wound in more than half of post-surgical birds. Check for purulent discharge, which appears in 62% of infected wounds. Foul odor signals mixed bacterial infection.
Weight loss affects 72% of birds with systemic infection. Abnormal feather growth or loss occurs in 67% of chronic infection cases. Drooping wings, swollen joints, and joint stiffness indicate poor healing.
Monitor daily for proper wound care management and injury repair progress.
When to Seek Veterinary or Wildlife Rehab Help
If you spot any of those infection red flags—or if your bird isn’t improving after 48 hours—it’s time to call in professional backup. Wildlife experts provide emergency care and proper injury assessment.
Seek vet consultation for complex fractures or systemic illness. Rehab referral connects you with specialists in avian health and wellness.
Wildlife rescue and conservation centers offer veterinary treatment options and rehabilitation center operations for bird conservation efforts.
Frequently Asked Questions (FAQs)
How long should a bird wing splint stay on?
Most wing fractures need splinting for 2-3 weeks, though healing time depends on injury severity and wing stability during the recovery phase. Simple breaks may heal faster, while complex fractures affecting multiple bones require extended splinting and veterinary treatment options to guarantee proper avian health and wellness.
Can splinted birds eat and drink normally during recovery?
Most splinted birds eat and drink normally during recovery. You need to provide fresh water and appropriate food within easy reach.
Nutrition needs and hydration methods remain unchanged, though upper extremity support may require repositioning food dishes.
What temperature is safe for injured bird recovery?
Think of a recovering bird as needing the same gentle warmth you’d find in a nest at dawn. Your injured bird needs a safe temperature between 75-85°F for ideal recovery. This thermal comfort aids avian thermoregulation when their body is vulnerable.
Wildlife rescue centers and veterinary medicine experts recommend this recovery environment range for wild bird rehab, safeguarding animal welfare during conservation efforts while their healing progresses.
How do you prevent muscle atrophy in splinted wings?
You can’t completely stop muscle loss, but gentle range of motion exercises help. Once swelling decreases, carefully extend and flex the wing joint daily. This maintains flexibility and circulation.
Physical therapy through controlled muscle stimulation prevents contracture. Keep sessions brief to avoid musculoskeletal stress while promoting joint mobility during splinting.
Should you splint both wings if only one is injured?
No—never splint both wings when only one wing is injured. Dual splinting or bilateral support restricts natural movement and balance. You need wing symmetry for proper posture during recovery. Splint only the fractured side.
Conclusion
That bird in your hands won’t wait for hesitation. Every minute counts when a fractured wing threatens survival. You’ve learned how to splint bird wings with precision—from recognizing injury patterns to securing immobilization without cutting circulation.
But the splint is just the beginning. Watch for swelling. Check the wrap daily. Contact a licensed rehabilitator within 24 hours. Your steady hands bought time, but professional care transforms a temporary fix into genuine recovery.
The difference between a bird that flies again and one that doesn’t often comes down to what happens in these first critical hours.