This site is supported by our readers. We may earn a commission, at no cost to you, if you purchase through links.

Last spring, a pair of Carolina wrens built their nest inside an old boot on my neighbor’s porch. They raised four chicks there, right next to the welcome mat. It wasn’t ideal—too much foot traffic, zero predator protection, and let’s not even talk about drainage.
But here’s the thing: wrens don’t need flawlessness, and neither do you when you’re just starting out with bird houses for beginners. A few basic cuts, the right entrance hole size, and proper placement beat fancy designs every time. The birds eating beetles in your garden this summer won’t care if your corners aren’t perfectly square or if you skipped the decorative roof shingles.
Table Of Contents
- Key Takeaways
- Essential Birdhouse Basics for Beginners
- Step-by-Step Guide to Building Your First Birdhouse
- Birdhouse Designs and Species to Attract
- Top Tools and Accessories for Birdhouse Projects
- Frequently Asked Questions (FAQs)
- Where not to put a bird house?
- What do you put in the bottom of a birdhouse?
- How often should I clean my birdhouse?
- When is the best season to install birdhouses?
- Do birdhouses need ventilation and drainage holes?
- What colors attract or repel different bird species?
- Can I relocate a birdhouse after installation?
- Conclusion
Key Takeaways
- Building a simple birdhouse requires just basic woodworking tools and untreated wood like pine or cedar—birds care more about proper entrance hole sizing and ventilation than perfect craftsmanship or fancy decorations.
- Different bird species need specific entrance hole diameters to feel safe and deter predators: chickadees and wrens prefer 1⅛-inch holes, while bluebirds require 1½-inch openings positioned about 6 inches above the floor.
- Birdhouses provide natural pest control by attracting species that devour beetles, aphids, and caterpillars without chemicals, turning your yard into a healthier ecosystem while giving you front-row seats to wildlife activity.
- Critical mistakes beginners make include using toxic finishes, placing houses in direct sun without ventilation, drilling wrong-sized entrance holes, and forgetting drainage—all easily avoided by following proven plans and using materials like cedar that naturally resist rot.
Essential Birdhouse Basics for Beginners
Building your first birdhouse doesn’t have to be intimidating. You’ll get the best results when you understand a few key principles before you pick up a saw.
Start by reviewing some proven birdhouse and nesting box plans to see which designs match your skill level and the birds in your area.
Let’s cover the essential basics that’ll set you up for success and help you avoid the rookie mistakes that frustrate most first-timers.
Benefits of Adding Birdhouses to Your Yard
Adding a birdhouse isn’t just about giving birds a place to nest—it’s about inviting natural pest control and ecosystem balance right into your yard. Backyard birds gobble up beetles, aphids, and caterpillars, protecting garden health without chemicals.
A birdhouse invites natural pest control into your yard—backyard birds devour beetles, aphids, and caterpillars without chemicals
They’ll scatter seeds, support biodiversity, and turn your space into a lively hub for bird watching and wildlife conservation. Plus, you get a front-row seat to nature’s best show! For more details on birdhouses’ impact, discover these wildlife preservation benefits.
Common Mistakes First-Time Builders Should Avoid
Even with solid DIY birdhouse plans, you can still trip up on basics. Wrong placement in direct sun overheats nests, while poor hole sizing invites predators or the wrong species. Skipping ventilation holes causes mold, and toxic finishes scare birds away.
Birdhouse construction demands attention to these details—your woodworking skills will shine when you avoid these pitfalls from the start!
Choosing The Right Materials for Longevity
Material selection sets the stage for years of use. Cedar wood resists rot naturally and needs no toxic chemicals, while pine wood demands exterior sealant since it’s vulnerable to moisture. Skip scrap wood unless it’s kiln-dried—warping ruins entrances.
Pair solid wood choices with stainless steel screws and non-toxic wood glue. Your woodworking skills deserve materials that last! Sustainable options like reclaimed redwood protect birds and your investment.
Recommended Tools for Simple Construction
Once you’ve picked your materials, the right tools turn planning into action. You’ll need a cordless drill driver for screws and mounting holes, a small hand saw for precise cuts, and a bi-metal hole saw kit for clean entrance openings.
Don’t forget wood glue, safety glasses, and a tape measure. These basics tackle most woodworking projects without breaking the bank!
Step-by-Step Guide to Building Your First Birdhouse
Building your first birdhouse is easier than you think—you don’t need fancy equipment or expert carpentry skills. With just a few basic cuts and some glue, you’ll have a cozy home ready for your feathered visitors in an afternoon.
Let’s walk through each step, from choosing your wood to adding those final decorative touches.
Selecting Wood and Preparing Materials

You’ll want untreated wood so birds stay safe if they peck near the entrance. Pine’s a great budget pick for DIY—it’s easy to cut and accepts paint well. Cedar resists rot naturally, perfect for outdoor birdhouses. Even scrap wood works if it’s free of chemicals!
Position your finished birdhouse at the right height for safe feeder placement to protect visiting birds from ground predators.
Before woodworking begins, air-dry lumber to 6-12 percent moisture. That simple material prep step prevents warping later. For more details on properly checking wood moisture content guidelines, see this helpful resource.
Cutting and Assembling Birdhouse Parts

Start with a sharp hand saw for clean vertical cuts—backsaw or fine tooth models reduce tear-out on your panels. Clamp a straight edge guide to keep rip cuts within 1/16 inch consistency.
Pre-drill screw holes so wood won’t split during assembly. Dry-fit all joints before applying wood glue; this helps you catch alignment issues early.
Sand edges with 120-grit paper between cuts for smooth, bird-safe surfaces!
Creating The Entrance Hole and Perch

Precision matters here—your entrance hole determines which feathered tenants move in! Follow these hole sizing tips to welcome the right birds:
- Drill a 1⅛-inch hole for chickadees and wrens using a hole saw centered 6–8 inches above the floor.
- Use 1½ inches for bluebirds to balance entrance safety with predator guards.
- Sand the rim smooth to protect delicate beaks.
- Add a ¾-inch perch 1–2 inches below the hole—or skip it to deter climbing predators.
- Check birdhouse ventilation by drilling small side holes near the top.
Finishing Touches: Sanding, Painting, and Decorating

Think of this as dressing up your birdhouse for years of outdoor life! Start with 120-grit sandpaper to smooth rough edges—birds and builders both appreciate splinter-free surfaces.
Choose non-toxic, water-based exterior paint in light colors that won’t overheat nestlings. Apply two thin coats for durability, seal all edges, and skip painting the interior to keep fledglings safe.
Birdhouse Designs and Species to Attract

Not all birds look for the same kind of home. Chickadees and wrens love traditional box-style houses, while bluebirds need specific entrance sizes to feel safe.
Let’s look at the best designs for attracting different species to your yard.
Classic Box Birdhouses for Chickadees and Wrens
Box birdhouses offer chickadees and wrens a cozy refuge they’ll happily call home. Your DIY birdhouse plans should include an entrance hole measuring 1⅛ to 1¼ inches—just right for these pint-sized cavity nesters.
Skip the perch to discourage predators, and use untreated pine or cedar for birdhouse materials that resist weather. Add ventilation slots near the top and drainage holes below for proper birdhouse construction.
Species-Specific Features for Bluebirds
Bluebirds need bigger accommodations than chickadees! Your bluebird house should feature a 1½-inch entrance hole positioned about 6 inches above the floor.
Install predator guards on mounting poles to protect eggs and hatchlings from climbing raccoons.
Place your DIY birdhouse plans in open fields or meadow edges, 5 to 6 feet high, facing away from harsh winds for ideal bluebird nesting success.
Alternative Designs: Gourd and Recycled Birdhouses
Want something beyond basic woodworking for beginners? Gourd crafting offers natural habitats that birds love! Dried gourds create sustainable birding homes you can hang from trees.
For birdhouse upcycling fans, try recycled materials like old clocks or license plates—these recycled birdhouses add quirky charm to your yard.
Seal gourds with outdoor varnish and drill drainage holes for DIY home improvement that’s eco-friendly and fun!
Tips for Placement to Maximize Bird Visits
You’ve picked your design—now for the real magic: birdhouse orientation and nesting height! Position your birdhouse 5 to 8 feet high in light sun exposure, 10 to 15 feet from trees for backyard birds’ quick escapes.
Keep predator deterrence strong with these yard layout tips:
- Face away from prevailing winds
- Avoid cat hiding spots
- Use metal pole baffles
- Maintain clear ground visibility
Wildlife gardening transforms bird watching into pure joy!
Top Tools and Accessories for Birdhouse Projects
You don’t need a fully stocked workshop to build a great birdhouse. A hand saw and drill will get you started, but having the right tools makes the work faster and more enjoyable.
Here are five accessories that’ll take your birdhouse projects from good to great without breaking the bank.
1. Irwin Quick Grip Mini Bar Clamp
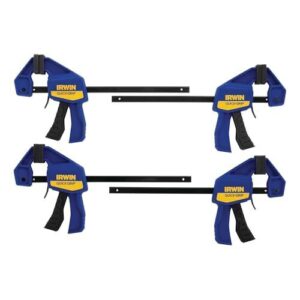
You’ll need one hand free for positioning small birdhouse pieces while gluing or drilling, and that’s where the Irwin Quick Grip Mini Bar Clamp really shines.
This 6-inch clamp grips with up to 140 pounds of force—plenty for holding delicate cuts steady without crushing soft pine. The one-handed trigger lets you squeeze, position, and release quickly, while non-marring pads protect your carefully sanded surfaces.
At just one pound, it won’t tire you out during assembly, and the resin body manages workshop heat without warping.
| Best For | Woodworkers and DIY enthusiasts who need a compact, one-handed clamp for small projects like birdhouses, picture frames, or repairs in tight spaces. |
|---|---|
| Brand | IRWIN |
| Weight | 1 pound |
| Color | Blue |
| Material | Resin and steel |
| Primary Use | Clamping workpieces |
| Portability | Highly portable |
| Additional Features |
|
- One-handed quick-release trigger makes positioning and adjusting easy while you work
- Non-marring pads protect finished surfaces from scratches and dents
- Delivers 140 lbs of clamping pressure despite weighing just one pound
- Plastic construction feels less durable than all-metal clamps
- Pricier than some comparable mini clamps on the market
- Occasional stiffness in the release mechanism may require lubrication
2. Dewalt Compact Table Saw
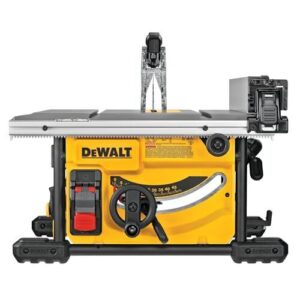
When you’re ready to cut multiple birdhouse panels from a single board, the Dewalt Compact Table Saw manages the job without taking over your workshop. Its 8⁄inch blade and 15-amp motor power through pine and cedar smoothly, while the rack-and-pinion fence adjusts quickly for consistent cuts.
At 54 pounds, it’s light enough to move but stable during operation. The onboard storage keeps your guard and wrenches within reach, and the metal roll cage protects it from those inevitable bumps.
| Best For | Finish carpenters and DIYers who need a portable saw for job sites or small workshops where space is tight but need enough rip capacity for full sheet goods. |
|---|---|
| Brand | DEWALT |
| Weight | 54 pounds |
| Color | Yellow |
| Material | Blend |
| Primary Use | Cutting plywood sheets |
| Portability | Job site portable |
| Additional Features |
|
- 24.5-inch rip capacity handles 4×8 plywood sheets without breaking a sweat
- Weighs only 54 pounds with onboard storage, making it easy to move between job sites
- Rack-and-pinion fence adjusts quickly and smoothly for consistent, repeatable cuts
- Miter gauge has noticeable play in the slot, which can hurt precision on angled cuts
- 8¼-inch blade size limits cut depth compared to standard 10-inch table saws
- Fence isn’t adjustable for vertical square, so you’re stuck with factory settings
3. Hychika Bi Metal Hole Saw Kit
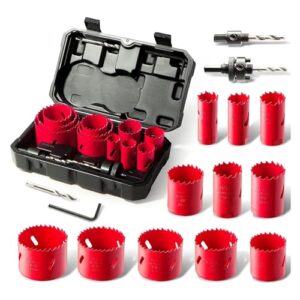
Once your birdhouse walls are assembled, you’ll need perfectly round entrance holes—and that’s where the Hychika Bi-Metal Hole Saw Kit shines. This set includes eleven sizes from ¾ inch to 2½ inches, so you can drill openings for chickadees, bluebirds, or wrens without switching kits.
The bi-metal teeth cut through pine and cedar smoothly, and the side groove clears sawdust as you work. Two mandrels, three drill bits, and a sturdy carrying case keep everything organized between projects.
| Best For | DIYers and builders who need a versatile hole saw set for cutting clean, precise openings in wood, plastic, and soft metals across multiple projects. |
|---|---|
| Brand | Generic |
| Weight | 3.3 pounds |
| Color | Red |
| Material | High Speed Steel |
| Primary Use | Drilling holes |
| Portability | Includes storage box |
| Additional Features |
|
- Includes 11 different blade sizes (¾” to 2½”) plus mandrels, drill bits, hex key, and storage case—everything you need in one kit
- Bi-metal construction with hardened steel teeth (69-81HRC) cuts quickly through pine, cedar, PVC, and gypsum board with smooth precision
- Built-in chip removal groove clears sawdust efficiently during cutting, preventing clogging and overheating
- Larger hole saws require a drill with at least a ½” chuck, which may limit use with smaller cordless drills
- Fixed locking pins on the large mandrel can create slight play when installing bigger saws
- Removing wood plugs from the saw blade after cutting can be difficult and often requires taking the mandrel apart
4. Dewalt Cordless Drill Driver Set

A lightweight drill makes all the difference when you’re screwing together birdhouse panels. The Dewalt DCD771C2 weighs just 3.64 pounds and delivers 300 UWO of power through a two-speed transmission (0–450 and 1,500 rpm).
The ½-inch ratcheting chuck grips your bits securely, while the built-in flashlight helps you see inside tight corners.
Two 1.3Ah batteries and a charger keep you working, and the compact design slips easily between fence posts or deck rails.
| Best For | DIYers and homeowners tackling light woodworking, furniture assembly, and everyday repairs who need a portable drill that won’t wear out their arm. |
|---|---|
| Brand | DEWALT |
| Weight | 3.64 pounds |
| Color | Yellow |
| Material | Metal |
| Primary Use | Drilling and driving |
| Portability | Includes contractor bag |
| Additional Features |
|
- Lightweight at 3.64 pounds makes overhead work and extended use comfortable
- Two-speed settings (0-450 and 1,500 rpm) handle both drilling and driving tasks
- Comes with two batteries, charger, and storage bag so you can work right out of the box
- Won’t drill into concrete or masonry, limiting its use for certain home projects
- Chuck may not grip bits as tightly as higher-end models, causing slippage during heavy use
- Not the smartest buy if you’ve already invested in a different 20V battery system
5. Dewalt Titanium Drill Bit Set
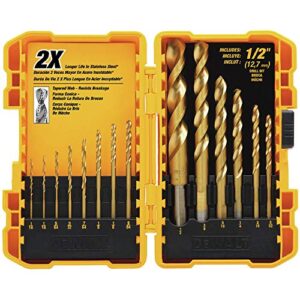
Pilot-point tips reduce walking, so you’ll drill clean entrance holes on the first try. This 14-piece set (DW1341) spans 1/16 to ½ inch and features titanium nitride coating for three times the lifespan of standard bits.
The no-spin shanks lock into your chuck, and you can tackle pine, cedar, even scrap plywood without swapping tools.
Each bit is clearly marked for quick selection, and the rugged case keeps everything organized between projects—no more fishing through toolboxes.
| Best For | DIYers and pros who need a versatile bit set that handles wood, plastic, and soft metals without constant bit changes. |
|---|---|
| Brand | DEWALT |
| Weight | 15.2 ounces |
| Color | Multi |
| Material | Titanium Nitride Coating |
| Primary Use | Drilling various materials |
| Portability | Includes storage case |
| Additional Features |
|
- Pilot-point tips stop the bit from wandering, so you get clean holes right away
- Titanium nitride coating lasts three times longer than standard bits
- No-spin shanks grip tight in the chuck so bits won’t slip mid-drill
- Only the larger bits have the no-spin feature—smaller ones use regular round shanks
- The included case could be sturdier for protecting your investment
- Some buyers reported longer-than-expected shipping times
Frequently Asked Questions (FAQs)
Where not to put a bird house?
Placing your birdhouse anywhere near busy roads could be the worst mistake you’ll make. Keep it at least 30 feet from traffic, away from windows, and clear of noisy mowers.
What do you put in the bottom of a birdhouse?
You’ll want dry sawdust or untreated wood shavings about 2 to 3 inches deep. This base absorbs moisture and keeps the nest comfortable without attracting mold or pests.
How often should I clean my birdhouse?
You should clean your birdhouse at least once a year after birds have finished nesting. Late summer or early fall works best, giving you time to prep for the next breeding season.
When is the best season to install birdhouses?
You might think any season works, but late winter to early spring—February through March—is your sweet spot. Birds scout nesting sites then, giving your birdhouse time to weather before they move in.
Do birdhouses need ventilation and drainage holes?
Your birdhouse needs both ventilation and drainage holes. Small openings near the roof let hot air escape, while floor corner holes drain rainwater, keeping nestlings safe and comfortable.
What colors attract or repel different bird species?
Bright reds and blues actually repel cautious species but draw hummingbirds and bluebirds closer! Neutral browns and grays keep chickadees comfortable, while yellow tones attract goldfinches seeking seed-rich feeding spots.
Can I relocate a birdhouse after installation?
You can relocate a birdhouse, but only when it’s unoccupied. Moving an active nest is illegal in many regions and harms nesting birds. Wait until the season ends before making changes.
Conclusion
That old boot on my neighbor’s porch? It became a symbol of something bigger—proof that imperfect starts lead to real results.
Your first attempt at bird houses for beginners won’t win design awards, but it’ll give feathered families exactly what they need. Grab your saw, cut those boards, and drill that entrance hole.
By June, you’ll hear chicks chirping inside your handiwork. The birds won’t judge your craftsmanship—they’ll just move in and start singing.
- https://get.adobe.com/reader/
- http://www.birdsandblooms.com/backyard-projects/diy-birdhouse/build-one-board-diy-birdhouse/
- https://www.familyhandyman.com/project/build-a-backyard-birdhouse/?trkid=soc-fhm-pinterest
- http://www.ana-white.com/2013/04/plans/kids-kit-project-1-modern-birdhouse
- https://builtbykids.com/how-to-build-a-modern-birdhouse/