This site is supported by our readers. We may earn a commission, at no cost to you, if you purchase through links.
A bird bath crashing down on your patio isn’t just embarrassing—it’s dangerous. Last summer alone, emergency rooms treated hundreds of injuries from toppled garden fixtures, many involving unstable pedestals that seemed fine until a strong wind or curious toddler put them to the test.
The difference between a bird bath that stands for decades and one that becomes a liability often comes down to one factor: a properly designed concrete bird bath pedestal for stability. Concrete’s weight distribution and ground contact create physics that lighter materials simply can’t match.
When you understand what makes these pedestals work—and how to install them correctly—you’ll never worry about finding shattered ceramic in your garden again. The right pedestal does more than hold water; it anchors your investment against weather, wildlife, and the unexpected forces that test every outdoor fixture.
Table Of Contents
- Key Takeaways
- Why Concrete Pedestals Ensure Bird Bath Stability
- Key Features of Stable Concrete Bird Bath Pedestals
- Top 7 Concrete Bird Bath Pedestal Products
- Preparing The Ground for Maximum Stability
- Installing a Concrete Pedestal Bird Bath
- Maintenance Tips for Stable Bird Baths
- Troubleshooting Common Stability Issues
- Safety Considerations for Bird Bath Pedestals
- Material Comparisons: Concrete Vs. Alternatives
- Frequently Asked Questions (FAQs)
- How do you make a bird bath stable?
- Why put marbles in bird bath?
- Is concrete ok for bird bath?
- How do you keep a concrete bird bath from turning green?
- How to prevent cracking during cold weather?
- What is the ideal pedestal material durability?
- Can bird baths support additional decorative weight?
- How to repair chips on concrete pedestals?
- Are there eco-friendly concrete bird bath options?
- Can I paint my concrete bird bath pedestal?
- Conclusion
Key Takeaways
- Concrete pedestals weighing 50 to 100 pounds create the mass and low center of gravity needed to prevent tip-overs that send thousands to emergency rooms annually, far outperforming lightweight resin alternatives that require anchoring.
- Proper ground preparation—removing 6 inches of soft topsoil, compacting the base, adding crushed gravel, and installing weed barrier fabric—prevents settling and maintains level stability for decades.
- Regular maintenance including draining before freezes, applying annual sealers, scrubbing every 2-3 days, and refilling to 1-2 inch depths protects both the concrete structure and visiting birds from damage and disease.
- Strategic placement at least six feet from play areas, combined with wide-footprint pedestals on compacted bases, delivers the safety and weather resistance that justifies concrete’s higher upfront cost over materials that crack within seasons.
Why Concrete Pedestals Ensure Bird Bath Stability
A concrete pedestal isn’t just a decorative choice—it’s the foundation that keeps your bird bath upright and secure through every season. The sheer weight and structural design work together to prevent tipping, protect anyone who might brush past it, and stand up to years of weather without breaking down.
Let’s look at the three key reasons concrete delivers the stability your bird bath needs.
Importance of Weight and Mass
Mass is your first line of defense against a toppling bird bath. A solid concrete pedestal weighing 23 to 45 kilograms anchors your setup far better than lightweight resin alternatives under 10 kilograms.
Concrete density—around 2,300 kilograms per cubic meter—translates directly into stability factors that resist wind gusts and visiting birds. Proper weight distribution through a heavy bird bath pedestal keeps everything upright season after season.
For a durable and stable setup, consider using concrete bird baths as they provide a reliable water source.
Preventing Tip-Overs and Accidents
That weight directly tackles real accident risks. Between 2020 and 2022, tip-over incidents sent over 17,000 people to emergency rooms annually, with children under six making up a disproportionate share. A concrete pedestal with a stable base minimizes these hazards through proper ground preparation and built-in heft.
Between 2020 and 2022, tip-over incidents sent over 17,000 people to emergency rooms annually—a concrete pedestal’s weight and stable base directly prevent these hazards
You’re adding tipover prevention and garden stabilization techniques that protect curious pets and toddlers exploring your yard—not just supporting a bowl. By considering pet safety tips, homeowners can create a safer outdoor environment.
Long-Term Durability Outdoors
Beyond accident prevention, you’re investing in decades of service. Properly formulated concrete stands withstand hundreds of freeze-thaw cycles—Toronto sees 45–72 per year—while maintaining over 80% structural integrity through durability testing.
That freeze resistance translates to 25–50 years outdoors when you manage drainage and apply sealers, far outlasting resin alternatives that crack under weathering effects and material degradation from outdoor exposure.
Key Features of Stable Concrete Bird Bath Pedestals
Not all concrete pedestals are created equal—the difference between a wobble-free bird bath and one that tips in the first windstorm comes down to a few critical design features. You’ll want to look for a wide base that hugs the ground, a low center of gravity that fights against tipping, and weather-resistant construction that won’t crumble after a few seasons.
Let’s break down the three features that separate a solid pedestal from a shaky one.
Wide Footprint for Enhanced Balance
Think of a wide pedestal footprint as your bird bath’s insurance policy against tipping. When you anchor a concrete block pedestal with a broad base, you’re distributing weight over more ground area—reducing pressure on any single spot.
That footprint design makes all the difference on soft soil or during storms. Proper ground preparation and leveling beneath a wider pedestal width means better balance enhancement and long-term base stability you can count on.
Low Center of Gravity Benefits
A pedestal’s low center of gravity is your secret weapon for landscape stability. When mass distribution puts weight closer to the ground interface, you anchor the concrete block pedestal against wind resistance through pure physics.
That compact design means you’ll need a much stronger gust to tip the stand—because gravity stability improves as the center drops. Base weighting near ground level simply keeps everything upright where it belongs.
Weather Resistance and Longevity
Properly made concrete bird baths resist sun, rain, and wind for decades—often reaching 30 to 40 years outdoors. Freeze damage poses the biggest threat when trapped moisture expands in winter, so you’ll want to drain water before hard frost. Applying concrete sealers limits moisture protection issues and extends outdoor longevity.
With basic bird bath maintenance, weather durability bolsters landscape stability methods season after season.
Top 7 Concrete Bird Bath Pedestal Products
You’ve got a solid understanding of what makes a concrete pedestal stable—now it’s time to put that knowledge to work.
The products below include actual pedestals designed to anchor your bird bath, plus essential ground prep tools that turn soft soil into a rock-solid foundation.
Each item plays a specific role in creating a setup that won’t wobble, tip, or sink over time.
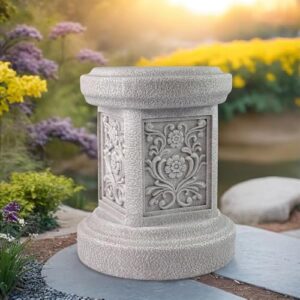
1. Classic Outdoor Statuary Pedestal Stand
At 12.4 inches tall and 7.1 pounds, this resin pedestal design simply won’t anchor a heavy concrete bird bath—you’ll need far more structural integrity. While the Art Deco floral patterns offer aesthetic options for indoor statuary materials, the lightweight construction undermines outdoor placement stability.
For concrete sculpture or water features requiring serious concrete stand selection and installation, you’re looking at pedestals weighing 45 to 60 kilograms minimum. This option works beautifully for lightweight décor in controlled outdoor space planning, but skip it for bird baths where safety matters.
Best For: Anyone wanting a decorative indoor pedestal for small resin statues, vases, or lightweight planters—not for serious outdoor concrete bird baths or heavy garden sculptures.
- Elegant Art Deco design with floral patterns adds a nice decorative touch to entryways or living rooms
- Lightweight at 7.1 pounds makes it easy to move around and reposition as needed
- Weather-resistant resin works for covered patios or mild outdoor conditions
- Way too light and small to safely support concrete bird baths or heavy outdoor statuary
- Fragile construction means it can arrive damaged or break with rough handling
- At 12.4 inches tall, it’s smaller than most people expect and lacks the weight for true outdoor stability
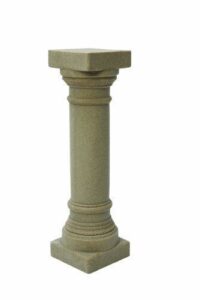
2. Greek Column Garden Statue Decor
At 32 inches tall, this polyethylene Greek column design won’t deliver the mass you need for a concrete bird bath—it’s hollow resin, not actual concrete. The sandstone-look column design adds garden aesthetics as a decorative accent or landscape design element, but you’ll need to fill it with gravel for even minimal statue placement stability.
For a true garden centerpiece supporting water-filled bowls, skip lightweight pedestal materials like this. Instead, choose solid concrete options weighing 45–60 kilograms to anchor your outdoor furniture and decor selection properly.
Best For: Gardeners wanting an affordable decorative accent piece for lightweight statues or planters, not for supporting actual birdbaths or heavy urns.
- Lightweight polyethylene makes it easy to move around and reposition in your garden layout
- Natural sandstone finish gives a classical look at a fraction of the cost of real stone columns
- Hollow design lets you add gravel or sand for extra weight when you need more stability
- Lacks the mass and durability of concrete pedestals needed for water-filled birdbaths or heavy statuary
- Noticeable plastic seams and shiny appearance up close undercut the authentic stone aesthetic
- Requires filling and may still need anchoring in windy conditions, unlike solid concrete columns
3. Flat Self Stabilizing Table Base
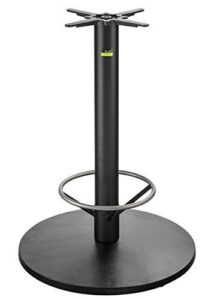
When your bird bath keeps rocking on uneven ground, you need rock-solid base construction. However, this 83-pound cast iron table base with FLAT technology isn’t the solution. Designed for restaurant tables, not concrete bird bath pedestals, its 30-inch footprint and anti-wobble systems stabilize furniture through floor adaptation, not heavy stone bowls.
The self-adjusting mechanism suits bar-height dining, but for lasting bird bath stability outdoors, you’ll want genuine concrete and proper table base materials.
Best For: Restaurant and bar owners who need a reliable table base that automatically adjusts to uneven floors and eliminates wobbling without constant manual fixes.
- Self-stabilizing FLAT technology keeps tables steady on uneven surfaces like cobblestone patios or old hardwood floors, so customers don’t have to deal with spills or annoying wobbles.
- Heavy-duty cast iron construction at 83 pounds provides serious stability for bar-height tables while supporting tops up to 47 inches round.
- Automatic adjustment means staff don’t waste time shimming tables with napkins or coasters, and multiple tables can be aligned perfectly for large parties.
- Weight limit of 55 pounds for the tabletop is pretty restrictive and rules out heavier marble or thick wood surfaces that some restaurants prefer.
- At nearly $970, it’s a significant investment compared to standard table bases, which might be tough for smaller establishments or startups on tight budgets.
- Cast iron isn’t ideal for fully exposed outdoor use where rain and moisture sit constantly, since it can eventually corrode despite the powder coating.
4. Easy Christmas Tree Stand Holder
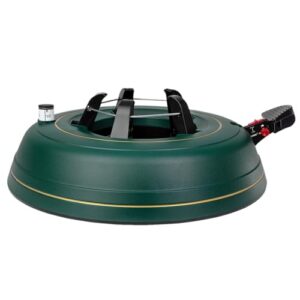
When shopping for a concrete bird bath pedestal, you might stumble across heavy-duty tree stands marketed for Christmas Tree Tips and Holiday Decor. The Krinner model, supporting 10-foot trees with its 10-pound plastic base and foot-pedal mechanism, demonstrates solid Tree Stand Safety principles—but it won’t stabilize your bird bath.
Its 18-inch footprint and plastic construction lack the mass concrete provides. For true Pedestal Materials that anchor stone bowls year-round, skip seasonal storage solutions and choose purpose-built pedestals instead.
Best For: Anyone who wants a stable, hassle-free way to set up and maintain a real Christmas tree without the usual wrestling match or constant refilling.
- Sets up quickly with a foot pedal mechanism, so one person can handle the whole job without crawling under branches or tightening screws
- Holds a solid amount of water (1.2 to 1.6 gallons depending on the model) and includes an indicator so you know when it’s time to refill
- Built tough with materials that last through multiple seasons, handling trees up to 10 feet tall and 80 pounds when decorated
- Costs more than basic tree stands, which might feel steep if you’re only using it once a year
- The water gauge sometimes sticks at the top and needs a tap to show the real level, which can be annoying
- Takes up space in storage because of the crank mechanism, and the opening for adding water is tighter than you’d expect
5. Heavy Duty Steel Tamper Tool
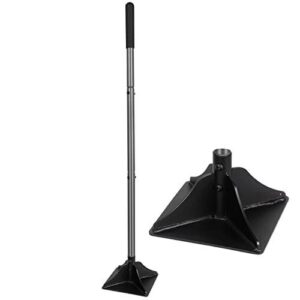
Before you position your concrete block pedestal, you need to prepare stable ground. That’s where a heavy-duty steel tamper earns its place. This 9-pound tool with its 8-inch steel head lets you compact soil, gravel, and crushed stone in shallow lifts, creating a firm base that won’t settle over time.
Proper Compaction Techniques and ground leveling prevent your pedestal from tilting as seasons shift. When used with Tamper Tool Safety practices—steel-toe boots, controlled strikes—this simple implement anchors your bird bath installation for years of worry-free use.
Best For: DIYers and homeowners preparing small-scale bases for garden fixtures like bird bath pedestals, stepping stones, or pavers who need an affordable manual tool for compacting thin layers of soil and gravel.
- Compact design with an 8×8-inch steel head that’s perfect for targeting small footprint areas without disturbing surrounding ground
- Adjustable handle height and cushioned grip reduce strain during repetitive tamping work
- Effective at consolidating 2-4 inch lifts of gravel and soil to create stable bases that resist settling
- At 9 pounds, it requires significant effort and multiple passes to achieve proper compaction, especially compared to powered plate compactors
- Some users report the tamp plate could be thicker and screws tend to loosen, causing rattling during use
- Not built for professional or large-area projects—best suited for casual DIY jobs rather than heavy-duty commercial work
6. Heavy Duty Weed Barrier Fabric
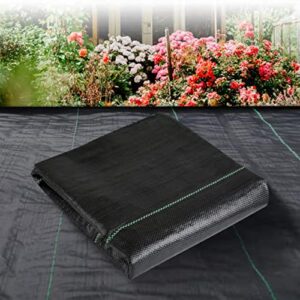
Once you’ve compacted the ground, a heavy-duty weed barrier fabric completes your foundation. This polypropylene geotextile material—usually 3 to 5 ounces per square yard—blocks weeds while letting water drain freely beneath your concrete pedestal.
Fabric installation is straightforward: lay it over your compacted base, then cover with gravel. The result? Landscape stabilization that prevents soil migration and keeps your pedestal level year after year.
Think of it as erosion control insurance—your bird bath won’t sink or shift when spring rains arrive.
Best For: Homeowners and landscapers who need a reliable under-gravel layer to stop weeds and stabilize soil beneath garden beds, pathways, or concrete pedestals.
- Lets water and nutrients flow through to keep soil healthy while blocking up to 98% of light that weeds need to grow
- Durable polypropylene construction with UV protection means it can last 5 to 20 years depending on conditions and use
- Prevents gravel from sinking into dirt and keeps your base stable, which saves you from constantly adding more stone
- Edges can fray or shred when you cut it to size, so you might need to seal them with heat or tape
- Some users find thinner versions don’t hold up as well in high-traffic areas or under heavy loads
- Not ideal for every soil type or climate—performance can vary depending on your specific yard conditions
7. Natural Gray Decorative Rock Stones
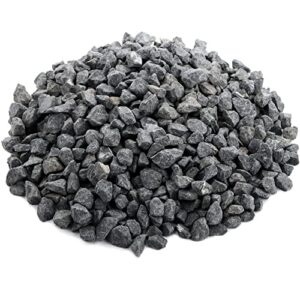
Gray stone finishes what the fabric started. Natural landscaping rock—usually 0.75 to 2 inches in diameter—spreads around your concrete pedestal base in a 3- to 4-inch layer, adding roughly 45 pounds per square foot of bearing support.
This decorative gravel choice offers stone durability that outlasts organic mulch by years, and its mass helps stabilize the entire bird bath assembly against wind and accidental bumps.
Rock selection matters for garden safety: dense gray stone resists displacement, protects your compacted base from erosion, and maintains a clean perimeter that won’t rot or attract pests.
Best For: Homeowners looking for a low-maintenance, long-lasting ground cover around bird baths, garden structures, or landscaping features that need stable support and erosion control.
- Lasts for years without needing replacement, unlike organic mulch that breaks down and requires refilling every 1–3 years.
- Provides solid bearing support and stability around pedestals and fixtures, with a 3- to 4-inch layer adding about 45–50 pounds per square foot.
- Naturally suppresses weeds by blocking seed-to-soil contact and won’t rot, decompose, or attract pests over time.
- Some bags may contain broken or irregularly shaped pebbles, and actual weight can occasionally fall short of the advertised 10 pounds.
- Natural sizing means pebbles vary in shape and shade, so you might not get perfectly uniform coverage.
- Requires initial effort to install properly at the right depth, and once in place, it’s more permanent than mulch—harder to rearrange or remove if you change your design.
Preparing The Ground for Maximum Stability
A stable bird bath starts with the ground beneath it. Without proper preparation, even the heaviest concrete pedestal can sink, shift, or lean over time.
Here’s how to create a solid foundation that keeps your bird bath level and secure for years.
Removing Soft Topsoil and Leveling
Soft topsoil—often 10 to 15 cm deep—can’t bear the weight of a heavy concrete pedestal without settling. Removing it down to firmer subsoil is essential for foundation stability and proper ground leveling.
Here’s how to prepare the base:
- Clear vegetation and mark the pedestal footprint
- Excavate 15 to 20 cm to eliminate organics and roots
- Use a straightedge to check for flatness across the area
- Verify the surface is level before placing any flagstone or gravel
Compacting Soil and Adding Gravel Base
After you’ve leveled the excavation, focus on building a firm foundation. Compact the exposed subgrade with a plate tamper—two to three passes will boost soil density and prevent the birdbath base from settling.
Then spread a 10 to 15 cm layer of crushed gravel across the area. Compact it thoroughly to lock particles together, creating excellent drainage systems and a stable platform for your concrete pedestal.
Installing Weed Barrier Fabric
Before placing your pedestal, roll out UV-stabilized landscape fabric over the compacted ground—it cuts weed growth by roughly 90 percent while stabilizing soil beneath your concrete bird bath. This step protects drainage systems and boosts long-term stability.
- Fabric Selection: Choose woven material for tensile strength under heavy loads.
- Weed Suppression: Overlap seams 15–20 cm to block intrusions.
- Erosion Control: Secure edges with landscape staples every 20 cm.
Installing a Concrete Pedestal Bird Bath
Once you’ve prepped the ground, you’re ready to set the pedestal in place and lock in that stability you worked so hard to create. This part isn’t complicated, but getting the measurements right and leveling everything properly makes all the difference between a birdbath that stands strong for years and one that’s constantly shifting.
Let’s walk through the three key steps to get your concrete pedestal installed correctly.
Measuring and Excavating The Base Area
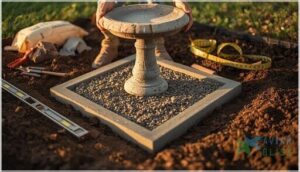
Start by measuring your pedestal’s base diameter, then mark a circle at least four inches wider on all sides. Excavate down six inches through the soft topsoil—you’ll need room for gravel thickness and a pedestal slab or concrete block.
Soil compaction matters here, so tamp the bottom firmly.
This base preparation creates the foundation you need, whether you’re using flagstone or a simple gravel pad for ground leveling.
Placing and Leveling Concrete Blocks
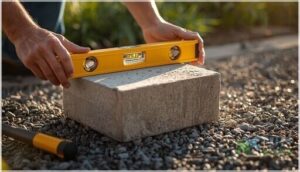
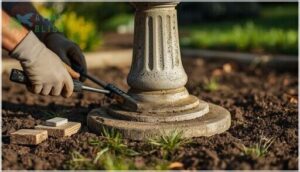
Once your gravel base is down, set your concrete block or pedestal slab in the center. Use a spirit level across both axes—front-to-back and side-to-side. Tap down high corners with a rubber mallet, or lift and add gravel beneath low spots.
Block alignment depends on that first unit being perfectly level; any wobble now will telegraph straight up through your pedestal.
Ensuring Proper Alignment and Placement
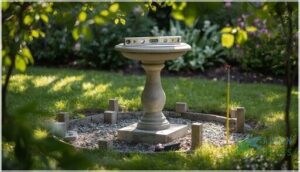
After your blocks sit level, you’ll need to position the concrete pedestal itself with an eye toward bird safety and long-term stability. Wind resistance improves when you shift the unit a few inches away from vertical structures that create turbulence. Use your spirit level one final time, and confirm these ground preparation details:
- Pedestal base covers the entire footprint of your leveling pad
- No gaps remain between concrete and the top block
- Securing points align with the center of your excavated area
- Leveling techniques hold across both axes under light pressure
Maintenance Tips for Stable Bird Baths
A stable bird bath doesn’t stop being your responsibility once it’s in the ground. You’ll need to keep an eye on the water, the concrete itself, and how everything’s holding up through the seasons.
Here’s what you should stay on top of to keep your setup solid and your feathered visitors happy.
Regular Cleaning and Algae Prevention
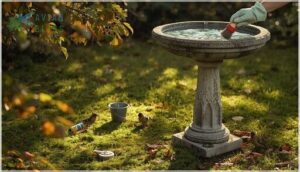
Clear water doesn’t just look better—it keeps your birds healthy and safe. Scrub your basin every 2–3 days with a stiff brush and a 10% bleach solution or hydrogen peroxide to tackle biofilm removal and control algae. Rinse thoroughly before refilling.
This simple cleaning schedule prevents disease transmission, stops mosquitoes from breeding, and ensures your garden maintenance routine protects the wildlife you’re working so hard to attract.
Inspecting for Wear and Damage
Beyond scrubbing, you need regular Visual Inspection to catch Crack Assessment and Surface Erosion before they threaten Bird Bath Security. Check your pedestal quarterly for signs of Material Deterioration and Structural Weakness that compromise yard safety:
- Hairline cracks wider than 0.1 millimeters signal stress requiring closer examination
- Visible chips or exposed aggregate accelerate freeze–thaw damage
- Wobbling or tilt indicates settlement and increases tip-over risk
Early Bird Bath Maintenance and Safety checks protect your landscape protection investment.
Refilling and Draining Water Properly
Once you’ve spotted wear, water quality depends on smart refill frequency. During summer, evaporation rates demand attention every 2–3 days to maintain shallow depths and disrupt mosquito control cycles before larvae mature. Your yard maintenance routine should include draining stagnant water, rinsing the basin, and refilling to 1–2 inches—keeping this water feature fresh protects outdoor safety measures for visiting birds.
| Season | Refill Frequency | Drainage Systems Check |
|---|---|---|
| Summer | Every 2–3 days | Daily evaporation monitor |
| Spring/Fall | Twice weekly | Clear debris regularly |
| Winter | Daily (heated baths) | Prevent ice buildup |
Troubleshooting Common Stability Issues
Even a well-installed bird bath can develop stability problems over time as the ground shifts, settles, or weathers. You might notice a slight wobble, uneven water levels, or gradual sinking that throws everything off balance.
Here’s how to diagnose and fix the most common issues so your bird bath stays rock-solid through every season.
Addressing Ground Settling or Erosion
Over time, you’ll notice settling as poorly compacted soil loses 5% to 15% of its volume beneath your pedestal. Combat ground instability by adding a 4-inch gravel layer under the concrete base—it improves drainage systems, prevents frost heave, and anchors your structure.
Redirect runoff at least four feet away to control erosion, and maintain proper soil compaction around the footprint for lasting stability.
Fixing a Wobbly or Uneven Pedestal
Even after careful ground prep, you might find your pedestal rocking slightly. Start stability tests with a bubble level across the top—if it shows unevenness beyond 0.5 degrees, slip composite shims under the low side for wobble correction.
For soil-based installations, firm up loose earth around the base with a tamper, or re-bed the pedestal on leveling bricks for lasting base reinforcement.
Seasonal Adjustments and Storage
When freezing temperatures arrive, you’ll need to drain your bird bath completely and move it indoors to prevent cracking. Concrete preservation depends on keeping moisture out—dried pedestals stored in sheds or garages avoid the freeze-thaw damage that weakens outdoor pieces by nearly 30% after repeated winters.
These winter storage tips protect your investment while maintaining long-term stability and safety.
Safety Considerations for Bird Bath Pedestals
A stable bird bath won’t do much good if it poses a hazard to the people and pets who share your yard. Even a well-anchored concrete pedestal can become a risk if you don’t think through where you place it and how you secure it.
Let’s cover the practical steps that keep everyone safe while your feathered visitors enjoy their drink.
Preventing Injuries to Pets and Children
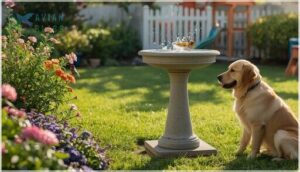
Bird baths may seem harmless, but they pose real risks. Toddlers can drown in just an inch of water, and heavy concrete can cause crushing injuries if a pedestal tips over.
Your yard hazard removal starts with outdoor risk assessment: keep bird baths away from play areas, empty shallow water daily, and anchor every pedestal firmly.
These yard safety precautions deliver family injury reduction and garden safety while protecting pet safety tips and child accident prevention through proper securing, stability, and safety measures.
Choosing Child-Safe Locations
Beyond anchoring, proper placement builds lasting garden safety. Keep bird bath installation at least six feet from play areas—national injury data link fixed objects near active zones to thousands of ER visits yearly.
Position pedestals in supervision zones where you maintain clear sight lines from the house, never near driveways or deep water hazards.
Age zoning matters: place ornamental features in adult garden sections, away from sandbox or swing traffic control routes.
Anchoring Methods for Extra Security
When strong winds or uneven ground threaten stability, ground anchors and concrete footings lock your pedestal in place. Drive 30-inch anchors rated for 3,000-pound loads into compacted soil, or use mechanical fastening—four concrete screws through predrilled base holes eliminate wobble entirely.
Subsurface stakes add multi-directional restraint, while poured footings resist wind resistance forces that topple lighter designs.
Material Comparisons: Concrete Vs. Alternatives
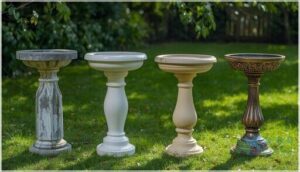
You’ve got plenty of options beyond concrete when shopping for a bird bath pedestal, but not all materials deliver the same performance. Resin, plastic, and metal stands each bring their own trade-offs in stability, weather tolerance, and upkeep.
Let’s break down how concrete stacks up against the alternatives so you can make the right call for your yard.
Concrete Vs. Resin Pedestal Stability
When you’re weighing pedestal materials, the numbers tell a clear story. A 26-inch concrete bird bath can hit 180 pounds, while resin barely cracks 5 pounds—that’s a 35-times difference. This massive weight gap directly affects how your bird bath manages wind resistance and ground conditions. Concrete anchors itself through sheer mass, but resin needs stakes or ballast to pass basic stability tests.
| Factor | Concrete | Resin |
|---|---|---|
| Weight | 180–190 lbs | Under 5 lbs |
| Wind Resistance | Stays put | Needs anchors |
| Tip-Over Risk | Very low | High without ballast |
| Portability | Heavy, permanent | Easy to move |
Weather Resistance and Maintenance Needs
Weathering harsh seasons isn’t the same for every material. Your concrete bird bath battles freeze damage through winter, demanding water sealing and crack prevention. Resin shrugs off ice but degrades under UV. Both need algae control, yet concrete requires deeper attention to surface erosion and pore sealing to maintain weather resistance and garden stability.
| Maintenance Need | Concrete | Resin |
|---|---|---|
| Freeze Damage | High risk; seal & drain | Minimal risk |
| Algae Control | Weekly scrubbing | Quick rinse |
| Surface Erosion | Needs resealing yearly | UV fading only |
| Crack Prevention | Critical in cold zones | Not applicable |
Cost and Longevity Factors
You’ll spend $80 to $200 on a concrete bird bath pedestal versus $25 to $50 for plastic—a budget analysis that stings upfront. Yet longevity tests prove concrete lasts decades with minimal maintenance expenses, while plastic cracks within seasons. Material costs fade when durability factors multiply: your concrete investment pays per-year dividends in outdoor decor ideas that won’t topple or crack.
| Factor | Concrete | Plastic |
|---|---|---|
| Initial Cost | $80–$200 | $25–$50 |
| Lifespan | 20+ years | 2–5 years |
| Replacement Frequency | Once | 4–10 times |
| Cost Per Year | ~$4–$10 | ~$5–$25 |
Frequently Asked Questions (FAQs)
How do you make a bird bath stable?
Like a lighthouse needs bedrock to weather storms, your bird bath requires proper Base Preparation and smart Weight Distribution.
Start with Ground Stabilization—excavate, compact soil, add gravel—then choose a heavy pedestal that anchors everything securely for lasting safety.
Why put marbles in bird bath?
Marbles improve bird safety by adding grip to slippery surfaces and creating shallow perching zones.
They also support pollinators like bees and butterflies while enhancing visual attraction through texture and color in your birdbath.
Is concrete ok for bird bath?
Concrete is perfectly safe for birds once fully cured—commercial basins usually include the recommended 1–2 inch depth, textured surfaces for grip, and enough mass (often 180+ pounds) to resist tipping during visits from larger wildlife.
How do you keep a concrete bird bath from turning green?
Think of algae like uninvited guests at a garden party—they thrive in stagnant conditions.
You’ll keep your concrete bird bath clean by changing water every two to three days and scrubbing weekly with diluted white vinegar.
How to prevent cracking during cold weather?
You’ll want to drain your concrete bird bath completely before freezing temperatures arrive, apply a waterproof sealer annually for crack prevention, and store it indoors or cover it with insulated protection for reliable winterization tips.
What is the ideal pedestal material durability?
For maximum pedestal longevity, you’ll want material strength that delivers compressive resistance above 20 megapascals and weather resistance through decades of freeze–thaw cycles—concrete durability anchors stability testing better than resin alternatives.
Can bird baths support additional decorative weight?
Most pedestals handle typical water and bird load capacity comfortably, but adding heavy yard decoration—planters or statues—creates dangerous balance factors.
Decorative safety demands keeping weight limits low; a few stable stones improve traction without compromising pedestal stability.
How to repair chips on concrete pedestals?
Small chips need surface preparation first—wire brush loose material, then apply polymer-modified concrete patching compound or epoxy bonding adhesive. Feather edges smooth for durability.
Pre-wetting the concrete layer helps repair mortars bond properly to your bird bath pedestal.
Are there eco-friendly concrete bird bath options?
Concrete bird baths can champion sustainable gardening when you choose low-carbon formulations with recycled aggregates, natural tung oil sealants, and permeable surfaces that support wildlife gardening while reducing environmental impact in your green landscaping projects.
Can I paint my concrete bird bath pedestal?
Yes, you can paint your birdbath pedestal using exterior-grade, water-based acrylic or latex paints. Choose non-toxic, zero-VOC formulations for bird safety, prepare the surface properly, and apply a clear sealant for weather protection and patio design cohesion.
Conclusion
One wobble is all it takes—a single unstable moment that transforms your peaceful garden feature into a hazard zone. Your birds deserve a safe watering hole, and your family deserves a yard free from preventable accidents.
You’ve now got the blueprint: a concrete bird bath pedestal for stability, properly installed on compacted ground, will outlast storms, seasons, and the test of time. No guesswork, no crossed fingers. Just solid engineering meeting practical design.
- https://www.outdoorescape.com.au/blogs/news/the-ultimate-bird-bath-guide-do-not-buy-the-bird-bath-until-you-read-this
- https://foter.com/bird-bath-pedestal
- https://www.houzz.com/discussions/6367483/how-can-i-prevent-this-birdbath-from-falling-off-pedestal
- https://www.solidrockstoneworks.com/spiral-birdbath.html
- https://fancygardens.co.uk/blog/how-to-stop-garden-statues-ornaments-falling-over/

