This site is supported by our readers. We may earn a commission, at no cost to you, if you purchase through links.
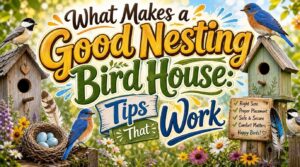
 Keeping birdhouses in tip-top shape isn’t just for the birds—it’s for you, too.
Clean them out yearly (end of breeding season works best) by removing old nests and scrubbing with a 10% bleach solution.
Got cracks or wobbly bits? Repair those pronto to keep your feathered tenants safe.
Check drainage and ventilation while you’re at it; clogged holes can turn a cozy home into a soggy mess.
Don’t forget predators—reinforce weak spots to keep the bad guys out.
And when winter rolls around, convert it into a roosting box or insulate it for extra warmth. A little care goes a long way!
Table Of Contents
- Key Takeaways
- Cleaning Bird Houses
- Bird House Repair
- Bird House Maintenance
- Winterizing Bird Houses
- Bird House Placement
- Frequently Asked Questions (FAQs)
- How do you maintain a birdhouse?
- How important is exterior maintenance for a birdhouse?
- How do you clean a birdhouse in early spring?
- What should you do when removing a birdhouse?
- How do I know if my Birdhouse needs repairs?
- How often should you clean a birdhouse?
- Do you leave bird houses out in the winter?
- How to fix a bird house?
- How can I attract specific bird species?
- What materials are best for building birdhouses?
- Conclusion
Key Takeaways
- Clean your birdhouse twice a year with a 10% bleach solution to keep it pest-free and sanitary.
- Inspect for cracks, loose screws, and blocked drainage or ventilation holes to ensure safety and durability.
- Repair damage promptly using wood filler, waterproof glue, and rust-resistant hardware to extend the birdhouse’s life.
- Convert your birdhouse for winter by adding insulation, sealing gaps, and turning it into a safe roosting spot for birds.
Cleaning Bird Houses
Cleaning bird houses keeps them safe and inviting for feathered visitors while preventing pests and harmful bacteria.
A clean birdhouse means a safe, cozy haven for birds, free from pests, bacteria, and unwanted surprises.
With a quick scrub and proper sanitizing, you’ll give birds a healthier place to call home.
Annual Cleaning Schedule

Set up a solid birdhouse cleaning schedule to keep your avian tenants happy and healthy. The best timing? Twice a year—after nesting season in late summer or fall and again during winter preparation in early spring.
Cleaning birdhouses prevents pests, diseases, and lingering odors. Before you begin, always check for surprise occupants! Use gloves and a flashlight for safety.
Then follow these straightforward birdhouse cleaning steps:
- Use a mild bleach solution (10% mix) for sanitizing.
- Remove debris while protecting yourself from bacteria.
- Allow the birdhouse to air dry completely before reassembly.
Removing Old Nesting Material

After breeding season, grab gloves and get to work with birdhouse nests removal. Old nests don’t get reused and often harbor pests like birdhouse mites. Slip on gloves, grab a flashlight, and check for leftover eggs or chicks first—no surprises, right?
Then, clear out all nesting material to promote pest prevention and disease control. Removing debris keeps the birdhouse clean, healthy, and ready for new occupants.
To prevent bacteria, consider seasonal bird house cleaning. Plus, keeping the interior empty guarantees proper drainage.
Toss old material responsibly—compost or trash will do. Finally, you’re prepping a pest-free, cozy home for the next nesting cycles.
Sanitizing With Bleach Solution

After removing old nesting material, proper birdhouse disinfection becomes your next priority.
Mix one part bleach with nine parts water for ideal bleach concentration—this birdhouse cleaning solution effectively eliminates birdhouse bacteria and birdhouse mold. Scrub every surface thoroughly, paying attention to corners where parasites hide.
Rinsing thoroughly prevents residue concerns that could harm returning birds. Bird safety depends on complete bleach removal, so rinse multiple times.
Alternative sanitizers like vinegar solutions work too, though bleach solution remains the gold standard for serious birdhouse cleaning. Regular cleaning helps maintain the birdhouse’s structural integrity.
Drying and Reassembling

Once your birdhouse has enjoyed its sunlight sanitation, inspect every joint for structural integrity.
Check hardware tightness—loose screws spell trouble for future tenants.
Seal any gaps with wood filler to maintain birdhouse structural integrity.
During safe reassembly, verify birdhouse joint reinforcement is solid.
Proper birdhouse drying and thorough birdhouse reassembly create a fortress-like home that’ll weather storms and welcome feathered families season after season.
Bird House Repair
You’ll need to inspect your bird house regularly for cracks, loose screws, and weathered wood that could let in rain or predators.
Think of it like checking your own home’s foundation, since even small problems can quickly turn into major headaches that’ll leave your feathered tenants looking for new digs, because small problems can escalate quickly.
Inspecting for Damage

After cleaning, you’ll need to examine your birdhouse for potential problems.
A thorough birdhouse inspection reveals structural weaknesses that could spell disaster for nesting birds.
Check these critical areas:
- Wood decay around joints and entrance holes—soft spots mean trouble
- Hardware condition including screws, hinges, and mounting brackets for rust
- Roof leaks and enlarged entrances that welcome unwanted predators
Consider the species’ specific needs when evaluating damage.
This birdhouse structural integrity check guarantees safe nesting.
Replacing Broken Parts

After spotting damage, it’s time for Material Selection and Hardware Replacement.
Choose cedar wood for Roof Restoration – it naturally resists weather and pests. For superior results, consider cedar roof products designed for longevity.
Entrance Repair requires precise hole sizing for your target species. Replace rusty hinges and latches with galvanized hardware to prevent corrosion.
Weatherresistant materials guarantee your birdhouse repair lasts years, keeping feathered friends safe and cozy!
Reinforcing Weak Joints

Over time, your birdhouse’s connections might loosen like an old friendship. Wood fillers and quality glue types restore joint security effectively. Proper hardware reinforcement prevents future wobbling, while attention to seam integrity keeps everything solid.
- Apply wood filler to gaps before they expand into major problems
- Choose waterproof adhesives designed for outdoor birdhouse repair projects
- Clamp joints tightly during drying for maximum birdhouse structural support
- Replace worn screws with galvanized hardware for lasting repair
- Check corner connections where stress concentrates most heavily
Ensuring Proper Ventilation

Proper ventilation turns your birdhouse into a comfortable home rather than a stuffy attic. Check that ventilation holes aren’t blocked by debris or old nesting material. Airflow design matters—stagnant air creates condensation problems that lead to mold growth. Material breathability helps regulate temperature naturally.
- Ventilation hole size should be 1/4 inch diameter, placed near the roof line
- Condensation prevention requires proper drainage holes at the floor corners
- Overheating risks decrease with adequate birdhouse airflow and shaded placement
- Birdhouse insulation works best when paired with effective ventilation systems
Bird House Maintenance

You’ll need to inspect your bird houses regularly to catch problems before they become major headaches, checking for everything from pest invasions to drainage issues that could turn your feathered guests’ dream home into a soggy nightmare.
Think of yourself as a landlord for birds—applying non-toxic preservatives and ensuring proper ventilation will keep your tenants happy and your investment protected for years to come, which is a key aspect of being a responsible landlord for birds.
Regular Inspection
A thorough birdhouse inspection is key to keeping your feathered friends safe and happy.
Regular checks can catch issues like cracks, loose screws, and wobbly joints before they become major problems.
Birdhouses should also have adequate ventilation holes to guarantee proper airflow.
To get started, try this checklist:
| Task | Frequency | Tools Needed | Signs to Watch For |
|---|---|---|---|
| Damage Assessment | Biannual | Flashlight, gloves | Cracks, deteriorated wood |
| Hardware Checks | Quarterly | Screwdriver, pliers | Rusty or loose screws |
| Structural Soundness | Annual | Level, mallet | Wobbling or gaps |
| Seasonal Readiness | Fall/Spring | Ladder, soft cloth | Warping, leaks |
With a quick inspection routine, your birdhouse stays in top shape.
Think of it as an annual tune-up—essential for birdhouse maintenance, birdhouse repair, and guaranteeing your hard work doesn’t go to the birds!
Checking for Pests and Predators
Three essentials for tackling birdhouse pests and predators:
- Predator Identification: Look for clues like chewed entrances or wasp nests.
- Deterrent Methods: Try predator guards or natural pest control, like soap spray for wasps.
- Entrance Reinforcement: Cover holes in the off-season or adjust sizes to prevent nesting competition.
Seasonal prevention is key.
Check birdhouses twice a year for invaders to keep spaces cozy, safe, and ready for feathered families.
Ensuring Drainage and Ventilation
Think of birdhouse ventilation and drainage as the secret to happy birds—like a cozy home that stays dry and fresh.
Clear drainage holes stop rainwater pooling, while smart ventilation design keeps air flowing.
Tiny holes? Not great for humid spots—moisture control matters!
Airflow optimization also depends on material breathability.
Check often for clogs; a soggy birdhouse isn’t exactly bird-friendly, as airflow optimization is crucial!
Applying Non-Toxic Preservatives
Shielding your birdhouse from the elements is essential for its longevity.
Use nontoxic preservatives to guarantee safety for the birds while boosting durability.
Apply thin coats of eco-friendly brands like PolyWhey for:
- Wood protection against weather.
- Longevity improvement with waterproof coatings.
- Birdhouse preservation free of harmful VOCs.
Consider various brands for purchase when selecting a preservative.
Let each coat dry thoroughly, and enjoy a sturdy, bird-safe home season after season!
Winterizing Bird Houses

Winterizing bird houses helps protect them from harsh weather while ensuring they’re ready for birds next season.
You’ll add insulation, check for damage, and even convert some into cozy roosts for wintering birds.
Cleaning and Storing
Once birdhouse cleaning is done, seasonal storage keeps things in top shape.
A solid storage location prevents pests and mold.
Follow this quick guide:
- Clear all debris using cleaning supplies.
- Dry thoroughly for mold prevention.
- Wrap in plastic for long-term protection.
- Check for leftover pests during disassembly.
- Stack gently to avoid warping or damage.
Converting to Roost Boxes
Transforming a birdhouse into a roost box is a smart move to aid birds through chilly winters.
Start by lowering the entrance hole to keep warm air inside, creating an ideal winter shelter design.
Block some ventilation holes—birds will appreciate the cozy insulation.
Add perches or small ladders for communal warmth, catering to species-specific roosts and roosting bird behavior.
For extra heat, line the inside with wood shavings or old fabric.
Top it off with a layer of dark shingles or tar paper to absorb sunlight, which guarantees better birdhouse winterization while meeting seasonal roosting needs seamlessly!
Adding Insulation and Perches
Keeping birds cozy this winter is easier than you think! A little effort with birdhouse insulation materials goes a long way.
- Add wood shavings or dry grass to the floor for ideal insulation thickness.
- Use twigs or wooden dowels as perch alternatives—birds aren’t picky, but perch benefits are huge.
- Keep ventilation openings clear, preventing dampness while ensuring warmth.
Pro-tip: Cedar wood weatherproofs brilliantly, giving your birdhouse a touch of luxury!
Protecting From Wind and Snow
Strong winds and snowloads can test your birdhouse’s structural integrity, so pick a spot shielded from harsh weather.
Secure it tightly for wind resistance, using screws or brackets. Add insulation methods, like straw or wood shavings, to keep birds cozy and safe. Use roof protection to guard against ice.
Here’s a quick guide:
| Challenge | Solution |
|---|---|
| Harsh winds | Tighten mounting hardware |
| Snow accumulation | Sloped roofs, tar paper coating |
| Cold temperatures | Add shavings or straw |
| Damp conditions | Guarantee proper drainage solutions |
The provided solutions aim to address potential issues such as harsh winds, snow accumulation, and cold temperatures, ensuring the birdhouse remains safe and comfortable for its occupants.
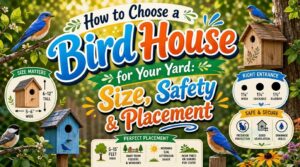
Bird House Placement

Placing your birdhouse correctly is key to attracting birds and keeping them safe. Pick a spot that’s high enough to deter predators, while offering shade and protection from harsh weather.
Choosing The Right Location
Finding the perfect birdhouse location can turn your yard into a bird paradise.
Focus on sunlight exposure and weather protection, keeping birds cozy yet safe.
Make certain secure predator access prevention with these tips:
- Pick partial shade, letting in morning sunlight.
- Mount birdhouses 5-10 feet high to block intruders.
- Meet species needs by placing birdhouses near their natural habitats and food sources.
Mounting and Securing
**Securing your birdhouse means safety for birds and peace of mind for you.
Attach it with a sturdy birdhouse mounting bracket, ensuring a secure attachment**.
Keep the mounting height between five to ten feet for most species and add predator baffles for extra protection.
Consider using galvanized steel pole mounts for enhanced stability and predator deterrence.
Double-check connections from time to time—birds won’t mind a little maintenance.
| Feature | Purpose | Benefit |
|---|---|---|
| Mounting Height | Reduces predator risk | Safer nesting environment |
| Secure Attachment | Stability | Better weather resistance |
| Predator Baffles | Discourages intruders | Birds feel more secure |
Protecting From Predators
How do you protect birdhouses from sneaky predators? Start by adding predator guards to entry holes—these block unwanted visitors.
Keep the entrance size species-friendly but predator-proof. Mount birdhouses 5-6 feet high, away from nearby branches. Install stovepipe baffles to stop climbing threats.
Regularly inspect for damage and hazards to maintain safety.
- Predator Guards block intrusions.
- Match entrance size carefully.
- Use stovepipe baffles for climbing deterrence.
- Make certain birdhouses are in secure, predator-safe locations.
- Monitor birdhouses consistently.
Ensuring Proper Orientation
When you’re planning birdhouse placement, paying attention to sunlight exposure and wind direction can make all the difference.
Position the entrance away from strong winds and balance shade with warmth in hotter climates to keep birds comfy.
Research species’ needs for ideal birdhouse orientation. About 5-10 feet high works well for predator avoidance.
Secure birdhouses tightly—imagine them as "feathered Airbnb rentals." Every thoughtful birdhouse positioning tweak encourages safe, happy tenants.
Frequently Asked Questions (FAQs)
How do you maintain a birdhouse?
Imagine a five-star hotel crammed with bacteria and rodents—your birdhouse needs twice-yearly scrubbing with a 10% bleach solution.
Drying in sunlight, and repairs for cracks, ensuring birds live safely and comfortably.
How important is exterior maintenance for a birdhouse?
Keeping a birdhouse’s exterior in good shape protects it from weather damage, predators, and decay.
Cracks, leaks, and rust weaken its durability, so regular inspections, repairs, and a touch of non-toxic sealant are essential.
How do you clean a birdhouse in early spring?
Scrub, rinse, disinfect—spring cleaning is essential for birdhouses.
Start by emptying old nests, then use a stiff brush and a 1:9 bleach solution to sanitize.
Rinse thoroughly, dry completely, and inspect for damage before reassembling.
What should you do when removing a birdhouse?
When removing a birdhouse, wear gloves, check for leftover nests or pests, and clean it.
Inspect for cracks or damage, sanitize with a bleach solution, and store in a dry, safe place to preserve it.
How do I know if my Birdhouse needs repairs?
Check for cracks, loose parts, rust, or enlarged entrances.
If the roof leaks, ventilation holes are blocked, or hardware’s unstable, it’s repair time.
Squirrels chewing? Birds won’t appreciate the DIY renovations—fix that fast!
How often should you clean a birdhouse?
You should clean your birdhouse twice a year—once after the nesting season ends in late summer or fall and again in early spring.
Regular cleaning keeps it safe, pest-free, and ready for new tenants.
Do you leave bird houses out in the winter?
Think of a birdhouse as a winter cottage—it’s best left outside, offering shelter during harsh months.
Block entrances to keep out rodents, or create a cozy winter roost box for feathered friends.
How to fix a bird house?
Fixing a birdhouse is simple: patch cracks with wood filler, tighten screws, and replace weathered parts with durable wood.
Add non-toxic sealant, clear ventilation holes, and secure it firmly.
It’s like birdhouse first aid!
How can I attract specific bird species?
Lure your favorite feathered guests by customizing entrances to match their size, offering native plants, and placing birdhouses at ideal heights.
Add a splash of humor—bluebirds love sunny spots, while wrens aren’t picky house shoppers!
What materials are best for building birdhouses?
Use untreated cedar, pine, or cypress for birdhouses since they’re durable, weather-resistant, and safe for birds.
Avoid treated wood, as chemicals can harm birds.
Add ventilation holes and avoid painting interiors to keep it natural and ensure the birdhouse remains safe with ventilation.
Conclusion
Properly practicing bird house maintenance and repair preserves your feathered friends’ habitats, promotes safety, and prevents problems.
A little yearly care—cleaning, checking cracks, ensuring drainage, and reinforcing weak spots—can make a big difference.
When winter hits, tweak the setup to shield birds from chilly challenges with insulation or perch additions.
It’s simple science: sturdy, sanitized, and snug birdhouses mean healthy, happy tenants.
So, grab your gloves and gear up—your avian neighbors will thank you!
- https://www.jstor.org/stable/3544812
- https://www.allaboutbirds.org/news/after-birds-leave-a-nest-can-i-clean-out-the-nest-for-future-use/
- https://birdingoutdoors.com/how-long-birds-take-to-learn-to-fly-interactive-charts/
- https://en.wikipedia.org/wiki/Nest_box
- http://triblive.com/lifestyles/jessicawalliser/3939903-74/fruit-tree-pests