This site is supported by our readers. We may earn a commission, at no cost to you, if you purchase through links.
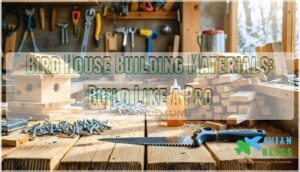 You’ll need quality bird house building materials to create a home that’ll last through seasons and attract feathered friends.
Start with 3/4-inch cedar or untreated pine for natural weather resistance. Cedar’s like nature’s preservative, naturally repelling insects while aging gracefully.
Grab galvanized screws or finishing nails to prevent rust, plus waterproof wood glue for joints that won’t fail when rain tests your craftsmanship. Don’t forget hinges for cleaning access—trust me, birds aren’t tidy tenants.
A clear, non-toxic oil-based finish protects without harmful chemicals. These basics form your foundation, but choosing the right entrance hole size and proper ventilation can make or break your bird attraction success.
Table Of Contents
- Key Takeaways
- Choosing The Right Materials
- Essential Birdhouse Components
- Cutting The Wood for Birdhouses
- Drilling The Entrance Hole
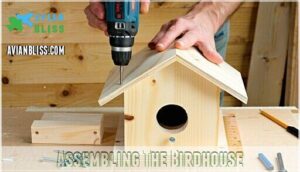
- Assembling The Birdhouse
- Finishing Touches
- Unique Birdhouse Materials and Designs
- Birdhouse Construction Tips
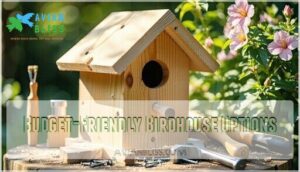
- Budget-Friendly Birdhouse Options
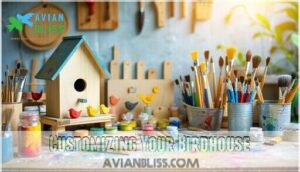
- Customizing Your Birdhouse
- Frequently Asked Questions (FAQs)
- What is the best material to build a birdhouse?
- Is it cheaper to buy or build a birdhouse?
- Is it okay to use treated lumber for bird houses?
- What material should bird houses be made of?
- What is the best wood to make a birdhouse out of?
- How to make a homemade birdhouse?
- Which wood glues are safe for birdhouse construction?
- How long will different woods last outdoors?
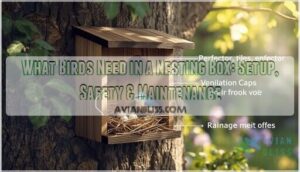
- Should birdhouses have ventilation holes or drainage?
- Are recycled plastic materials safe for bird homes?
- Conclusion
Key Takeaways
- You’ll want to choose cedar, redwood, or cypress for your birdhouse since these woods naturally resist decay and insects without needing toxic treatments that could harm nesting birds.
- You should use galvanized screws or stainless steel hardware instead of regular nails to prevent rust, and waterproof wood glue will keep your joints strong through weather changes.
- You’ll need to drill proper ventilation holes near the roof and drainage holes in the floor corners to keep nestlings healthy and prevent moisture buildup inside the birdhouse.
- You can save money by building your own birdhouse for $15-25 using untreated materials, compared to buying one for $30-80, while also customizing it for specific bird species.
Choosing The Right Materials
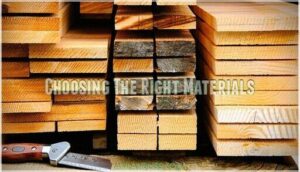
You’re about to build a birdhouse, and choosing the right materials is essential for the birds’ safety and comfort.
You’ll want to select materials like cedar, redwood, or cypress, which are naturally resistant to decay and insects, and avoid toxic chemicals that can harm the birds.
Choose cedar, redwood, or cypress—nature’s own bird-safe materials that resist decay and insects without harmful chemicals.
Types of Wood for Birdhouses
When picking wood types for your birdhouse, you’ll want to zero in on materials that are durable and safe.
Here are four excellent wood options to examine:
- Cedar: Known for Cedar Durability and pest resistance.
- Redwood: Appreciated for Redwood Aesthetics and weather resistance.
- Cypress: Valued for being Cypress Weatherproof and insect-resistant.
- Pine: An affordable option, but remember Pine Treatment is vital.
For specific options, consider sourcing cedar materials.
These selections, including cedar, pine, redwood, and cypress, will keep your backyard visitors cozy for years.
Untreated Pine and Cedar Options
Consider untreated pine and cedar—great choices for your birdhouse project.
Pine’s affordability makes it beginner-friendly, though its Pine Durability is lower.
Cedar, known for its Natural Resistance, offers excellent Cedar Insulation.
| Feature | Pine | Cedar |
|---|---|---|
| Cost | Lower | Higher |
| Durability | Moderate | High |
| Resistance | Needs Treatment | Natural Resistance |
| Insulation | Good | Excellent |
| Species Preference | Varies | Varies |
Both wood types display beautiful natural grain patterns with a clear finish.
Cedar is a durable, rot-resistant option with built-in weather resistance.
You can enhance untreated pine or cedar bird house building materials with linseed oil.
It’s all about choosing the best wood for bird houses for you.
Exterior Grade Plywood Alternatives
You’re looking for alternatives to solid wood, try exterior grade plywood, a durable option.
It’s often cheaper and easier to work with, making it a great choice.
Recycled materials, like composite boards or recycled plastic lumber, offer eco-friendly options for your birdhouse project, aligning with natural materials and plywood.
Essential Birdhouse Components
You’re building a birdhouse, and it’s time to focus on the essential components that’ll make it safe and comfortable for birds.
You’ll need to ponder materials like zinc-plated hooks and hinges, outdoor paint, and exterior wood screws and nails to guarantee your birdhouse is durable and well-constructed.
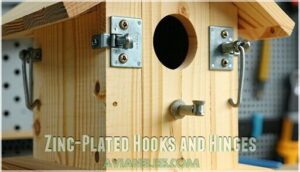
Zinc-Plated Hooks and Hinges
When building a birdhouse, you’ll need zinc-plated hooks and hinges for durability and rust prevention.
One way to make your birdhouse more sustainable is to explore upcycled design options.
- Choose zinc-plated hooks for easy latching
- Install a hinge at the top of the cleaning door
- Position hooks away from entrance holes
- Use galvanized screws for extra durability, ensuring your bird house hardware remains rust-resistant.
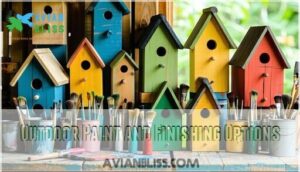
Outdoor Paint and Finishing Options
You’ll choose non-toxic exterior paint, considering natural colors and cheerful hues, and apply it with proper drying time between coats.
Ensuring a weather-ready and stylish birdhouse with nontoxic finishes and weatherproofing options is crucial.
Consider safe exterior coatings for longevity.
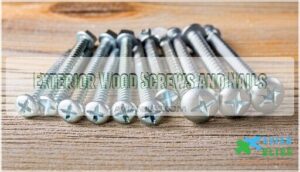
Exterior Wood Screws and Nails
You’ll need 1 1/4-inch exterior wood screws, preferably stainless steel or galvanized for rust resistance.
These screws offer better hold than nails and allow for future repairs, making them a great choice for your birdhouse project with their reliable head types and shank design.
Cutting The Wood for Birdhouses
You’re now ready to cut the wood for your birdhouse, and to guarantee accuracy and safety, you’ll need to measure and mark the wood carefully.
Using the right tools and safety precautions to avoid errors and injuries.
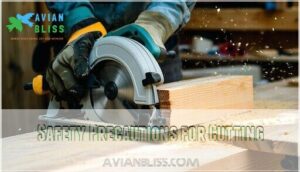
Safety Precautions for Cutting
You’ll want to prioritize safety when cutting wood.
Wear eye protection, work gloves, and a dust mask.
Consider:
- A stable workspace
- Secure wood
- Sharp blades
to guarantee a smooth process with your circular saw or jigsaw, protecting yourself from harm.
Durable woods like cedar or pine are ideal, but you can also explore recycled wood options for a more sustainable approach.
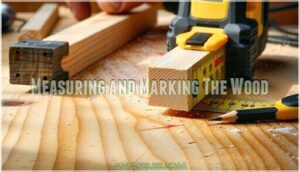
Measuring and Marking The Wood
You’re measuring and marking the wood for your bird house.
Use a pencil, measuring tape, and carpenter’s square to guarantee accurate angles and consistent dimensions.
Consider the grain direction of your birdhouse lumber to prevent errors, and choose the right wood size and type, such as cedar or pine.
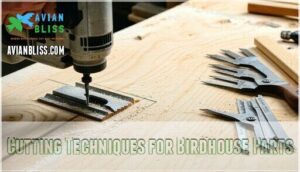
Cutting Techniques for Birdhouse Parts
You’re cutting bird house wood, considering saw blade selection.
Here are tips:
- Choose the right saw
- Consider grain direction
- Use a jigsaw for curved cuts
- Make precise angle cuts
- Account for kerf considerations, ensuring accurate birdhouse construction with the right lumber and wood size.
Drilling The Entrance Hole
You’re now ready to drill the entrance hole, a key step in building your birdhouse.
You’ll need to choose the right drill bit and attach it to your drill, then carefully drill the hole to the correct size for the bird species you’re trying to attract.
Choosing The Right Drill Bit
You’re ready to drill the entrance hole.
Choose a drill bit wisely.
Consider hole saw bits for clean cuts or spade bits for a budget-friendly option.
Drill bit types and materials matter, especially for varying wood hardness and desired hole size, ensuring a smooth drilling process with basic tools.
For precise, clean holes, consider using specialized cutting tools for the best results with clean cuts.
Attaching The Hole Saw Bit or Spade Bit
You’re now attaching the hole saw bit or spade bit to your drill.
For a hole saw, insert the pilot bit into the arbor, then twist until snug, ensuring arbor compatibility for clean cuts and minimal bit wobble.
This is a basic tool step in bird house building with your drill.
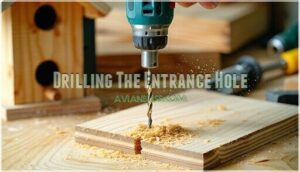
Drilling The Entrance Hole Accurately
Drilling the entrance hole requires precision.
Consider:
- Bit size
- Hole placement
- Preventing splintering
- Angled drilling for smooth edges, creating a perfect birdhouse entrance hole with a hole saw bit or spade bit.
The key factors to consider are all crucial for a successful drilling process.
Assembling The Birdhouse
You’re now ready to assemble the birdhouse, and to make certain it’s sturdy and safe for the birds.
You’ll start by pre-drilling holes for screws, then attach the side board to the floorboard.
Pre-Drilling Holes for Screws
When assembling your birdhouse, you’ll want to master pre-drilling holes for screws.
- Choose the right drill bit
- Mark hole locations
- Drill to the right depth, preventing splitting and ensuring a straight screw fit with your exterior wood screws, which is crucial for a successful assembly using exterior wood screws.
Attaching The Side Board to The Floorboard
You’re now attaching the side board to the floorboard.
Position them at a 90-degree angle, ensuring flush edges.
Drive 1 1/4-inch exterior wood screws through pre-drilled holes, adding a thin bead of wood glue for extra stability, and consider using clamps to prevent splits and align the angle perfectly.
Attaching The Front and Back Boards
Now that your side board is attached to the floorboard, position the front piece flush against them.
Use exterior wood screws to secure it, pre-drilling holes to prevent splitting, and apply wood glue for reinforcement, ensuring board alignment and secure fastening.
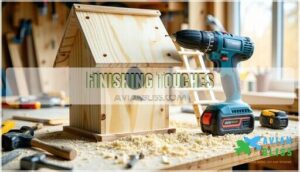
Finishing Touches
You’re almost done building your birdhouse, and it’s time to add the finishing touches.
Now, you’ll focus on adding a roof, attaching it with screws, and considering a perch or ladder to complete your birdhouse.
Adding a Roof to The Birdhouse
With your birdhouse frame now solid, let’s top it off with a birdhouse roof. You’ll want a cozy, dry shelter for your feathered friends.
The roof shape and roof overhang are key to protection. Here’s what makes a great birdhouse roof:
- Steep roof angle sheds water quickly.
- Wide overhangs protect entrance holes.
- Ventilation gaps prevent overheating.
- Weatherproof material choice guarantees roof durability.
Consider waterproof roof material for longevity.
Attaching The Roof With Screws
You’re ready to attach the roof with screws.
Use 1 1/4-inch exterior wood screws, pre-drilling holes about 1 inch from edges, and countersink them slightly for waterproofing, preventing splits, and ensuring a secure fit with the right screw types and placement.
Adding a Perch or Ladder
When adding a perch or ladder to your birdhouse, consider Climbing Aids and Ladder Safety.
Instead of a traditional Perch Design, use small grooves for a natural ladder effect, prioritizing Bird Preference and Perch Materials for a safe bird house, ensuring proper birdhouse building and construction.
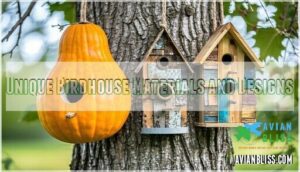
Unique Birdhouse Materials and Designs
You’re about to explore unique birdhouse materials and designs that can enhance your birdhouse building experience.
By considering alternatives like gourds, cedar, and upcycled materials, you can create a one-of-a-kind birdhouse that attracts birds and adds a personal touch to your yard, making it a unique addition.
Using Gourds as Birdhouse Material
After those final touches, you might want to try gourd birdhouses. They’re nature’s bird house alternatives!
Getting started with natural gourds is easier than you’d think:
- Pick mature, hard-shelled Gourd Species that feel light.
- Clean and dry them for 6 months in a well-ventilated space for Gourd Preparation and Gourd Durability.
- Sand the surface smooth before carving your entrance hole. Consider Gourd Painting or Hanging Gourds after the dried gourds are ready. They’re great upcycled materials!
Creating a Modern Birdhouse With Cedar
With cedar, you’ll create a modern birdhouse featuring natural charm and resistance to decay.
Cedar grain enhances minimalist aesthetics, ensuring bird safety and longevity focus in your bird house building materials, specifically cedarwood, for a unique birdhouse design and construction.
| Material | Benefit |
|---|---|
| Cedar | Decay resistance |
| Cedarwood | Bird safety |
| Cedar grain | Aesthetics |
| Modern design | Longevity |
| Cedarwood | Construction |
The use of natural materials like cedar ensures the birdhouse has a unique design and construction that prioritizes bird safety and longevity.
Upcycled Materials for Birdhouses
You can build unique birdhouses using upcycled treasures like:
Transform everyday discards into charming bird sanctuaries with creativity and environmental consciousness.
- Old wooden drawers
- Clean tin cans
- Wine bottles
- Broken ceramic plates
Repurposed wood and metal scraps offer creative combinations.
Try repurposing materials, like old teapots or license plates, to create eco-friendly birdhouses with recycled materials.
Building these houses with recycled materials also aids in bird conservation efforts.
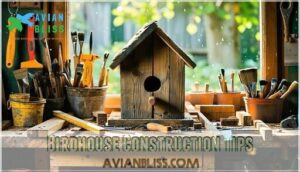
Birdhouse Construction Tips
You’re about to learn the best birdhouse construction tips to build a safe and cozy home for birds.
By following these tips, you’ll be able to create a sturdy and attractive birdhouse using the right materials and techniques.
Using a Single Pine Board for Construction
You can craft a simple pine shelter using one 1×6-foot untreated pine board, minimizing wood waste with efficient cutting plans.
Ensuring single-board durability for your birdhouse, considering pine board dimensions and birdhouse size limits for a cozy bird sanctuary, is crucial for a successful project, and this can be achieved by using a simple pine shelter.
Building a Birdhouse With a License Plate Roof
When building a birdhouse with a license plate roof, you’ll need to flatten the vintage license plate and drill drainage holes.
Attach it securely with rust-resistant screws and add silicone sealant for weatherproofing.
This License Plate Prep and Plate Attachment Method guarantees a durable bird house roof, addressing weatherproofing concerns and aesthetic considerations with recycled hardware.
Creating a Teapot Birdhouse
Select a vintage teapot with a wide spout entrance for your bird house.
Clean it, drill drainage holes, and secure a mounting bracket. Add a small perch and consider a nontoxic sealant.
Paint weather-resistant designs for Aesthetic Design, prioritizing Bird Safety with proper Teapot Selection and Drainage Solutions, using suitable birdhouse materials.
Budget-Friendly Birdhouse Options
You’re looking for budget-friendly options to build a birdhouse, and there are several materials you can use to create a safe and cozy home for birds without breaking the bank.
By choosing affordable materials, such as pine or exterior-grade plywood, and following DIY plans, you can build a birdhouse that’s both functional and cost-effective.
Affordable Materials for Birdhouses
You can find affordable materials for birdhouses at salvage yards, including discounted cedar or pine boards.
Consider recycled materials like old fence posts or scrap lumber, ensuring they’re untreated and chemical-free.
Pine alternatives and plywood benefits make them great options for DIY birdhouse plans with basic tools.
DIY Birdhouse Plans on a Budget
You can build a DIY bird house on a budget using free plans, salvaged materials, and simple tools, making it a kid-friendly build with community sourcing for untreated pine boards and reclaimed plywood, keeping costs down with affordable materials.
Location considerations are key to attracting birds, so consider sun exposure carefully, which is a complete concept in itself and crucial for the success of your DIY bird house project, involving community sourcing.
Repurposing Materials for Birdhouses
You can create unique birdhouses by repurposing materials like old wooden drawers, clean tin cans, or wine bottles.
Consider upcycled birdhouses made from reclaimed plywood or scrap wood. Pallet birdhouses are another option, and you can even use metal roofing or plastic alternatives for a durable design.
Get creative and think outside the box to build a cozy home for your feathered friends.
Customizing Your Birdhouse
You’re now ready to customize your birdhouse, and it’s where you can let your creativity shine.
By adding a personal touch, customizing the design, or adding a theme, you can create a unique birdhouse that reflects your style and provides a welcoming home for your feathered friends.
This allows you to make the birdhouse a reflection of your personal taste, making it a welcoming home for the birds.
Adding a Personal Touch to Your Birdhouse
You can add a personal touch with custom paint, unique roofs, and themed decor.
Consider:
- Bird-safe accents
- Artistic hardware
- Decorative paint colors
Make your birdhouse reflect your personality while keeping it functional and safe for birds.
Customizing The Birdhouse Design
You can customize your bird house design with various roof styles and entry sizes.
| Roof Style | Entry Size | Color Choices |
|---|---|---|
| Modern | Small | Earthy |
| Classic | Medium | Bright |
| Rustic | Large | Pastel |
Adding a Theme to Your Birdhouse
You can personalize your birdhouse with themed designs, like fairy-tale castles or superhero hideouts, using weather-safe paints and natural decorations, making it a unique character house that stands out with creative color palettes and decorative elements.
Consider DIY birdhouse kits for an educational and fun activity, which can be found at DIY birdhouse kits, to create a unique character house with creative color palettes.
Frequently Asked Questions (FAQs)
What is the best material to build a birdhouse?
Cedar stands strong, redwood resists rot, cypress weathers storms—you’ll want these naturally decay-resistant woods for your feathered friends.
Skip treated lumber’s toxic chemicals; choose untreated cedar or redwood that’s three-quarters inch thick for proper insulation.
Is it cheaper to buy or build a birdhouse?
Building your own birdhouse costs $15-25 versus buying one for $30-
You’ll save money and customize dimensions for specific bird species.
However, purchasing saves time if you lack woodworking tools or experience, but it is worth noting that purchasing can be a convenient option.
Is it okay to use treated lumber for bird houses?
No, you shouldn’t use treated lumber for birdhouses. The toxic chemicals in pressure-treated wood can harm birds, eggs, and chicks. Stick with natural, untreated cedar, redwood, or cypress instead.
What material should bird houses be made of?
Like telegraph operators choosing quality copper wire, you’ll want untreated cedar, redwood, or cypress for your feathered tenants.
These naturally rot-resistant woods keep birds safe while standing up to Mother Nature’s tantrums year after year, providing a safe and durable home for your feathered tenants.
What is the best wood to make a birdhouse out of?
You’ll want cedar, redwood, or cypress for your birdhouse since they naturally resist decay and insects.
These woods provide excellent insulation and durability without needing toxic treatments that could harm nesting birds.
How to make a homemade birdhouse?
Cut cedar planks to size, drill entrance holes, and assemble with galvanized screws.
Sand rough edges, add drainage holes in the floor, create ventilation gaps, and apply non-toxic exterior finish for weather protection.
Which wood glues are safe for birdhouse construction?
Waterproof wood glue and outdoor-rated wood glue work best for birdhouse construction.
You’ll want non-toxic, water-resistant formulas that won’t harm birds.
Avoid glues with harmful chemicals—stick with brands specifically designed for exterior woodworking projects.
How long will different woods last outdoors?
Cedar and redwood’ll last 15-20 years outdoors without treatment, while cypress handles 10-15 years. Pine only survives 3-5 years untreated, and plywood needs replacement every 2-3 years despite proper sealing.
Should birdhouses have ventilation holes or drainage?
You’ll definitely need both ventilation and drainage in your birdhouse.
Add small holes near the roof for airflow and quarter-inch holes in floor corners for water drainage to keep nestlings healthy and dry.
Are recycled plastic materials safe for bird homes?
Nearly 90% of plastic birdhouses crack within two years outdoors.
You shouldn’t use recycled plastic materials for bird homes—they trap heat, lack proper insulation, and can release harmful chemicals that endanger nesting birds’ health.
Conclusion
Remember, a well-built house stands on solid foundations, and your birdhouse is no different.
Quality bird house building materials make the difference between a seasonal decoration and a lasting avian sanctuary.
Cedar’s natural durability, galvanized hardware’s rust resistance, and proper ventilation create homes that’ll welcome feathered families for years.
You’ve got the knowledge—now gather your materials and start building.
Your backyard birds will thank you with their songs, and you’ll enjoy watching generations of wildlife thrive in your craftsmanship.
- https://happygardens.com/blogs/news/best-wood-bird-houses?
- https://pixabay.com/users/dirtfarmerjay-5130142/
- https://www.audubon.org/news/what-nesting-materials-are-safe-birds
- https://goopennc.oercommons.org/courseware/lesson/6070/overview
- https://brightpathkids.com/family-blog/diy-how-to-build-a-birdhouse-with-recycled-material

