This site is supported by our readers. We may earn a commission, at no cost to you, if you purchase through links.
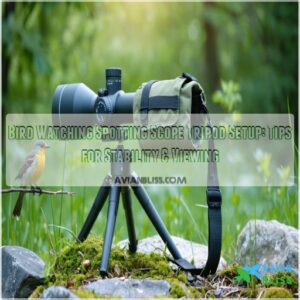
Start by spreading the legs wide and low rather than extending the center column – this keeps things steady as a rock. Match the tripod height to your eye level, making small adjustments for angled scopes to prevent neck strain.
On uneven ground, adjust each leg individually and use a bubble level to keep everything balanced. Secure your scope with the mounting plate, double-checking all locks.
For extra stability in windy conditions, consider hanging a weight bag from the center hook. There’s a whole world of advanced techniques waiting to enhance your birding experience with the right setup and a steady hand.
Table Of Contents
- Key Takeaways
- Tripod Setup Basics
- Optimal Tripod Height
- Attaching Spotting Scope
- Tripod Heads and Mounting
- Spotting Scope Types and Operation
- Selecting The Right Tripod
- Frequently Asked Questions (FAQs)
- How tall of a tripod do I need a spotting scope?
- Will any tripod work with a spotting scope?
- What is the best tripod head for birding?
- What magnification spotting scope for bird watching?
- How long should a tripod last with proper maintenance?
- Can tripods be used in water or marshy conditions?
- What are the best tripod transportation and storage methods?
- How do temperature changes affect tripod performance and stability?
- Should I lubricate tripod joints and if so, when?
- Conclusion
Key Takeaways
- Keep your tripod low and stable by adjusting the legs instead of extending the center column, especially on uneven ground. Use weights or ground anchors for extra stability in windy conditions.
- Match the tripod height to your natural eye level for comfort. Adjust angled scopes slightly lower for better ergonomics and avoid neck strain during long sessions.
- Secure your spotting scope firmly using a mounting plate or quick release system. Double-check all locks to prevent wobbling or slipping during use.
- Choose a tripod with a stable load capacity and proper head type. Fluid heads allow smooth panning, while ball heads are great for quick adjustments when tracking birds.
Tripod Setup Basics
Setting up a tripod correctly is key to getting clear, steady views through your spotting scope.
Focus on keeping it stable, adjusting the height carefully, and securing it on uneven ground.
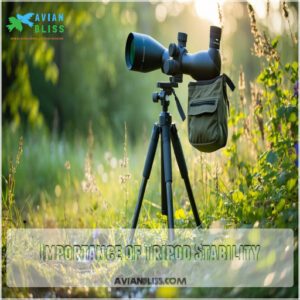
Importance of Tripod Stability
Why does tripod stability matter? Without it, even the best spotting scope shakes, making details impossible to see.
Test stability by gently tapping—does the image settle quickly? Lock legs securely, and distribute weight evenly.
For added wind resistance, hang a bag from the center. A stable spotting scope tripod isn’t optional; it’s your ticket to clearer views and reduced frustration when bird watching.
Minimizing Tripod Extension
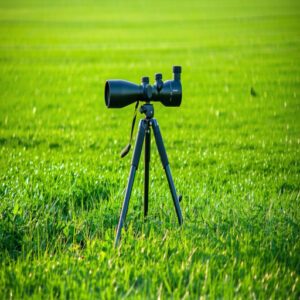
Keeping your tripod for spotting scope stable is easier if you avoid extending it too much.
A shorter tripod height boosts stability and cuts down wobbling from vibrations or wind.
Here’s how to minimize extension effectively:
- Adjust the legs, not the central column.
- Use wider tripod leg angles for scope balance.
- Choose level ground during setup.
- Lower your spotting scope tripod height.
- Add weights for wind resistance.
By following these steps, you can effectively minimize extension and keep your tripod stable, which is crucial for clear visibility.
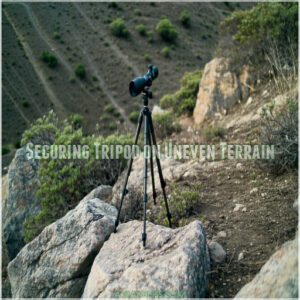
Securing Tripod on Uneven Terrain
Uneven ground can challenge your tripod setup.
Start by adjusting the tripod legs individually for stability. Use leveling techniques like eyeballing flat surfaces or built-in bubble levels.
On tricky terrain, ground anchors or weighted bags keep everything steady.
A tripod for spotting scope use thrives when you minimize central column height. These stability tips will achieve clear views regardless of the terrain’s quirks.
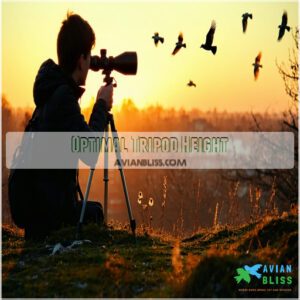
Optimal Tripod Height
Setting your tripod to the right height makes bird watching more comfortable and keeps your scope steady.
Aim for a position that matches your natural eye level, so you’re not straining or hunching while viewing.
Adjusting Height for Angled Scopes
When using an angled spotting scope, set the tripod height so it’s comfortable to view without straining.
Angled scope stability improves when the tripod legs are adjusted evenly and the central column stays low.
A detailed bird watching equipment guide offers valuable insights for selecting appropriate gear.
Use small tweaks for eye level alignment, and remember, height adjustment depends on terrain and your viewing angle.
A stable tripod for birding guarantees smoother scope tilt adjustment during use.
Adjusting Height for Straight Scopes
Straight scope viewing works best when the scope height adjustment matches your natural eye level.
Use tripod legs for height adjustment instead of relying on the central column—it’s more stable. For uneven terrain, adjust one leg at a time to keep things level.
Always double-check tripod leg locking for security. With straight scopes, ideal height settings help avoid strain during birding adventures, ensuring a more stable experience.
Considering Scope Angle and Viewing Situation
When setting up your spotting scope, remember that scope angle and terrain adjustment affect the viewing height.
An angled spotting scope often works better for elevated views, while a straight scope feels natural at eye level.
Adjust the tripod for birding so it matches your scope position and situation.
For uneven ground, tweak the legs to stabilize your bird watching scope and improve your setup, ensuring a stable view with the correct tripod adjustment.
Attaching Spotting Scope
Attaching your spotting scope to the tripod is simple but needs care to keep it secure and steady.
Make sure the mounting plate or quick-release system is tightly fastened, so nothing wobbles while you’re watching, and ensure it is secure.
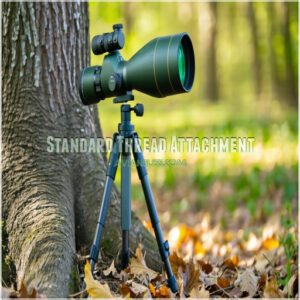
Standard Thread Attachment
When setting up your tripod for birding, attaching your spotting scope starts with understanding thread types and screw threads.
Most scopes and tripods use a standard ¼-20 inch thread screw, making mounting systems straightforward.
Simply align the threads and tighten securely, this attachment method maintains stability.
If your tripod uses a quick release plate, double-check its lock for added safety before you begin observing, ensuring a secure and stable setup.
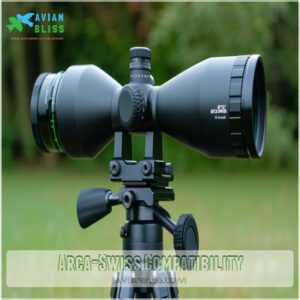
Arca-Swiss Compatibility
It’s a universal system that provides a snug fit and smooth operation.
Here’s how it helps:
- Use Arca-Swiss plates for secure mounting.
- Pair plates with compatible tripod heads.
- Quick release plate clamps speed up setup.
- Tripod adapters enhance flexibility.
- ArcaSwiss systems offer reliable support for your scope’s stability.
Quick Release Attachment Procedure
Attaching a scope with a quick release system saves time and hassle.
Consider best spotting scope features for best birdwatching.
Start by securing the quick release plate to your spotting scope using the provided screw.
Next, slide the plate into the tripod head’s attachment slot until it clicks.
Confirm the locking mechanism to ensure stability.
Quick release connectors make switching gear seamless, perfect for flexible viewing.
| Attachment Step | Action | Tools Needed | Notes |
|---|---|---|---|
| Secure Plate | Attach to scope | Quick release plate | Tighten for stability |
| Align Plate | Position in tripod head slot | None | Ensure precise alignment |
| Lock Plate | Engage locking mechanism | Tripod adapter | Verify plate is secure |
| Test Stability | Adjust and wiggle to check steadiness | None | Avoid shaky footage or viewing |
Tripod Heads and Mounting
When setting up your tripod, choosing the right head is key to smooth movement and stability for your spotting scope.
Whether you go with a pan-and-tilt head, ball head, or fluid head, each offers unique controls to fit different viewing styles.
Pan and Tilt Heads
A pan tilt head offers smooth control for your spotting scope setup, making it easy to track birds in motion.
The tilt mechanism lets you adjust up or down, while the pan head glides left to right.
This tripod head type provides precise movement for fluid tracking. Specialty retailers offer pan tilt head bird watching equipment.
Pair it with a quick release system for hassle-free adjustments, and you’ll master bird watching effortlessly.
Ball Heads and Fluid Heads
For smooth tripod stability, you’ll want to pick between a ball head and a fluid head.
Here’s how they stack up:
- Ball Heads: Offer versatile ball movement, ideal for quick adjustments during your spotting scope setup.
- Fluid Heads: Provide silky fluid motion, perfect for digiscoping or tracking.
- Weight Consideration: Fluid heads are heavier.
- Mounting Systems: Both fit standard spotting scopes reliably.
When selecting a tripod, consider the importance of high quality tripods for superior viewing experiences.
Choose based on your scope needs!
Choosing The Right Tripod Head
Finding the right tripod head depends on your viewing needs.
A ball head offers quick adjustments, perfect for fast-moving birds. Fluid heads provide silky tilt mechanisms, ideal for smooth panning.
Gimbal heads excel with heavy spotting scopes. Look for one with a quick release plate for easy setup.
You can buy a bird watching tripod head online. The right mounting system guarantees you’re steady and ready, whether tracking or observing still scenes with a quick release and smooth panning.
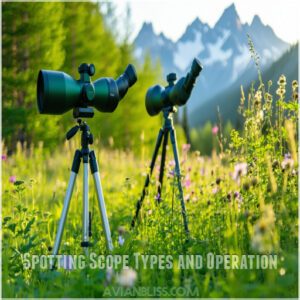
Spotting Scope Types and Operation
Regarding spotting scopes, you’ve got two main styles to choose from: angled and straight.
Understanding their differences, along with how magnification and lens size work, helps you pick the right fit for your bird-watching adventures.
Angled Vs Straight Scopes
When choosing a bird watching scope, think about your needs.
An angled spotting scope works great for elevated viewing, offering flexibility and comfort during long sessions.
It’s especially handy when sharing with others since the eyepiece design adjusts easily.
Consider the best spotting scope features before making a purchase.
On the other hand, a straight spotting scope excels at quick target acquisition, perfect for fast-moving birds or spotting from a vehicle.
Both options differ in viewing comfort, optical quality, and ease of spotting scope setup.
So, compare durability and scope comparison needs to fit your birding scope setup style—there’s no wrong choice, just what works for you.
Magnification and Objective Lens
For bird watching, magnification and objective lens size are key. A high-quality objective lens makes images brighter, even in low light.
Follow these tips:
- Keep magnification around 40-60x to avoid blur from movement.
- Choose optical coatings that enhance clarity and cut down on glare.
- Select a spotting scope with good eye relief for comfort during extended use.
- Focal length affects zoom flexibility, so pick what suits your style.
- Read reviews to align magnification limits with your goals.
An angled spotting scope aids in elevated viewing—great for mastering birdwatching, which requires a good understanding of bird watching techniques.
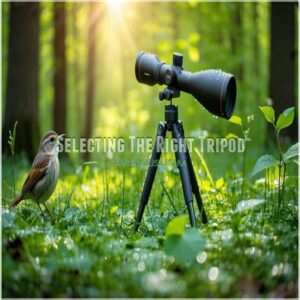
Selecting The Right Tripod
You’ll find that choosing the right tripod for your spotting scope makes all the difference between spotting that rare warbler and watching it fly away in a blur.
While budget options can work well for beginners, you’ll want to focus on stability features like solid leg locks and a sturdy center column that can support your scope’s weight, which is crucial for a clear view of the rare warbler.
Budget Considerations and Recommendations
For stable bird watching, you’ll need to invest over $200 in a reliable tripod setup.
The Manfrotto MT190X3 aluminum tripod paired with the 128RC Fluid Head offers an affordable yet sturdy combination.
The Alaska Kit II is a popular and economical choice.
If you’re looking for premium options, Swarovski’s Carbon Fiber kits provide lightweight convenience, while the Vortex High Country II Kit balances features with value.
Budget-conscious? The Amazon Basics 60-inch tripod works in a pinch.
Factors to Consider for Tripod Selection
Three key factors will make or break your tripod’s performance.
First, check the Load Capacity to verify it’ll support your spotting scope at high magnification.
Next, consider Tripod Materials – carbon fiber offers lightweight stability while aluminum provides durability.
Recommended Tripod and Head Kits for Bird Watching
For reliable bird watching, the Manfrotto MT190X3 paired with the 128RC Fluid Head offers great value.
Consider the best spotting scope features before making a purchase.
If you’re looking for lightweight options, consider the Leofoto Manba LV-284C carbon tripod.
The Swarovski Carbon Fiber Professional kit handles heavy loads up to 46 lbs, while their Compact version folds to just 19.7 inches – perfect for travel.
Each kit delivers smooth panning and rock-solid stability for your spotting scope.
Frequently Asked Questions (FAQs)
How tall of a tripod do I need a spotting scope?
Like a giraffe reaching for treetops, your tripod should match your standing height plus 6-8 inches.
You’ll want it tall enough for comfortable viewing without extending the center column for maximum stability.
Will any tripod work with a spotting scope?
Not all tripods work with spotting scopes.
You’ll need one with a ¼-20 inch thread mount, sturdy construction, and good load capacity.
Most camera tripods will work if they’re stable enough.
What is the best tripod head for birding?
You’ll want a fluid head that moves smoothly for tracking birds.
A two-way pan/tilt head like the Manfrotto 128RC or Benro S4Pro offers precise control without breaking the bank.
What magnification spotting scope for bird watching?
You’ll find sweet success with a scope offering 20-60x zoom magnification.
It’s perfect for spotting those feathered friends near and far, while keeping them crystal clear at varying distances for detailed observation.
How long should a tripod last with proper maintenance?
With regular cleaning and proper care, you’ll get 8-10 years from a quality tripod. Store it dry, tighten loose parts, and avoid salt water exposure to maximize its lifespan.
Can tripods be used in water or marshy conditions?
Like a duck to water, you’ll find most tripods handle wet conditions well.
They’re built to withstand moisture, but you’ll want to dry and clean them afterward.
Extended submersion isn’t recommended for non-waterproof models, as it can cause damage, so it’s essential to handle them with care after exposure to water.
What are the best tripod transportation and storage methods?
Store your tripod in a padded case to prevent damage.
You’ll want to clean it after use and carry it in a dedicated bag with shoulder straps.
Don’t forget to secure all locks.
How do temperature changes affect tripod performance and stability?
Temperature swings can make your tripod’s metal parts expand or contract, affecting stability.
You’ll notice legs getting stiffer in cold weather and looser in heat.
Consider weather-resistant materials for consistent performance.
Should I lubricate tripod joints and if so, when?
You’ll want to apply light silicone-based lubricant to your tripod’s joints when they become stiff or squeaky.
Don’t overdo it – a tiny dab twice yearly keeps things smooth without attracting dirt.
Conclusion
As they say, practice makes perfect – and that’s especially true for your bird watching spotting scope tripod setup.
You’ll find that taking time to master proper mounting techniques, height adjustments, and stability tricks pays off with crystal-clear views of your feathered friends.
Remember, a stable foundation is key, so don’t rush the setup process.
With these tips in hand, you’re ready to transform your birding experience from shaky glimpses to steady, detailed observations.
- https://www.birdwatching.com/tripods/education/tripod_advisor.html
- https://www.birdwatchingdaily.com/gear/spotting-scopes/tripods/
- https://www.transcontinenta.co.uk/en/blog/good-tripod-spotting-scope.html
- https://birdallianceoregon.org/visit-us/nature-store/spotting-scopes-and-tripods/
- https://shotkit.com/spotting-scope-tripods/

