This site is supported by our readers. We may earn a commission, at no cost to you, if you purchase through links.

Grab the wrong wood or drill a hole a quarter-inch too wide, and you won’t get bluebirds. You’ll get sparrows kicking out the birds you actually wanted, or worse, an empty box all season. That’s the gap between a birdhouse and a house birds move into.
Building wooden bird houses for beginners doesn’t take fancy tools or years of shop experience. It takes the right cedar board, the correct hole size for your target species, and screws instead of nails so the joints don’t work loose. Get those details right, and you’ve built more than a box. That’s a home you made from scratch, and something bluebirds will actually raise chicks in come spring.
Table Of Contents
- Key Takeaways
- Best Wood for Beginner Bird Houses
- Bird House Design by Species
- Ventilation, Drainage, and Predator Protection
- Top 8 Tools and Materials for Bird House Building
- 1. IRWIN Quick Grip One Handed Mini Bar Clamp
- 2. DEWALT 15 Amp Portable Table Saw
- 3. HYCHIKA Bi Metal Hole Saw Kit
- 4. DEWALT 20V Max Cordless Drill Driver Set
- 5. DEWALT Titanium Nitride Speed Tip Drill Bits
- 6. Jorgensen 24in One Hand Clamp Spreader
- 7. Titebond II Premium Wood Glue
- 8. 3M General Purpose Sandpaper Assorted Grits
- Step-by-Step Wooden Bird House Build
- Frequently Asked Questions (FAQs)
- Which bird species are easiest to attract first?
- How do I clean a birdhouse between seasons?
- When is the best time to put up birdhouses?
- Can birdhouses attract unwanted pests or animals?
- How long does a wooden birdhouse typically last?
- How high above ground should birdhouses be mounted?
- How far should birdhouses be from bird feeders?
- What safety gear should beginners wear while building?
- How often should birdhouses be cleaned each year?
- Which direction should a birdhouse entrance hole face?
- Conclusion
Key Takeaways
- Choose untreated cedar or pine, use screws instead of nails, and drill species-specific entrance hole sizes to actually attract birds instead of pests.
- Match dimensions and hole diameter to your target species, since bluebirds, wrens, chickadees, and swallows each need different floor sizes and entrance hole diameters.
- Build in proper ventilation, floor drainage holes, and a sloped roof overhang to keep nests dry and prevent mold and overheating.
- Add predator guards like steel baffles and escutcheon plates, and mount boxes at the right height facing east to protect nestlings and keep unwanted animals out.
Best Wood for Beginner Bird Houses
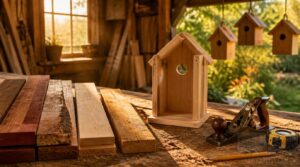
Picking the right wood is where every good birdhouse starts. Not all lumber is safe for birds, and some options work way better than others. Here’s what you need to know before you make a single cut.
Cedar tends to top the list for its natural rot resistance, and these cedar bird house plans walk you through picking boards that’ll hold up through the seasons.
Untreated Cedar and Pine
Grab untreated cedar or standard pine for your first birdhouse. Cedar’s natural oils fight rot and repel insects without chemicals. cedar’s natural oil resistance helps it outlast pine in humid Texas conditions.
Pine costs less but absorbs moisture faster, so it warps sooner. Both age into a soft gray patina outdoors.
For beginner-friendly builds, cedar’s longer lifespan often beats pine’s lower price tag over time.
Safe Reclaimed Lumber
Old barn wood makes a charming birdhouse, but don’t skip the homework. Test for lead paint if the lumber predates 1978, and check for asbestos when sourcing from industrial buildings.
Buy from certified reclaimers who provide documentation. Wash boards with mild soap, sand off residue, and dry fully. Kiln-dried to 12% moisture prevents warping. This eco-friendly choice rewards patience and care.
Woods to Avoid
Not every board deserves a spot in your birdhouse. Pressure-treated lumber leaches chemicals into soil and nests, so skip it entirely.
Watch for these red flags:
- Dark spots or soft, crumbly wood signal rot already setting in
- Green wood with high moisture content will warp and crack as it dries
- Camphor and other strong-smelling exotics can bother birds and trigger allergies
Budget-friendly Wood Sources
Skip full-price lumber runs. Local auctions here in Saxony often list reclaimed bundles for pennies, and sawmills sell mill ends 30-60% off retail. Pallet wood cleans up fine too.
| Source | Typical Savings |
|---|---|
| Sawmill ends | 30-60% |
| Reclaimed pallets | 50-70% |
| Online bundles | 20-40% |
A single pine board from a salvage yard beats new stock every time. Budget-friendly building starts with knowing where to look.
Eco-friendly Material Tips
Beyond the wood itself, small choices add up fast. Look for sustainable sourcing through certified mills, swap metal fasteners for reclaimed hardware, and try hemp twine as a natural fiber binder.
Bamboo plywood resists warping and grows back quickly, making it a solid eco-friendly building material.
Finish everything with low-VOC paints or tung oil, nontoxic finishes for wildlife that keep your birds safe and healthy.
Bird House Design by Species
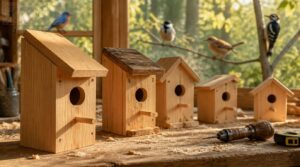
Not every bird wants the same house. Size and hole diameter change based on who you’re hoping to attract. Here’s what to build for five common backyard species.
Bluebird House Dimensions
Bluebirds are picky about their real estate. Give Eastern species a 4×4 inch floor, but Mountain and Western bluebirds need 5×5 for comfort.
Drill your entrance hole at 1½ to 1 9/16 inches, placed 6-7 inches up the front panel. Keep interior cavity depth around 7-8 inches, and mount the box 4-6 feet high, facing east.
Wren and Chickadee Sizes
Small birds, small boxes—wrens and chickadees don’t need much room to call it home.
- House wrens run 4.3–5.1 inches; chickadees average 4.7–5.5 inches
- Both weigh just 0.3–0.4 ounces, wingspans near 6–7.5 inches
- Wrens lay 4–7 eggs; chickadees lay 5–9
- Floor space: 4×4 inches works for both species
Entrance hole: 1⅛ inches. Mount 6–10 feet high, and you’ve built something both species will fight over.
Tree Swallow Requirements
Watch the sky near a pond, and you’ll spot Tree Swallows dive-bombing bugs mid-air—that’s your clue they’re close.
| Feature | Spec |
|---|---|
| Entrance hole | 1.4–1.5 in |
| Floor size | 5×5 in |
| Height | 5–10 ft |
| Spacing | 10 ft apart |
| Location | Near water |
They nest colonially, so don’t crowd boxes. Clean out yearly—it keeps parasites away.
Entrance Hole Placement
Entrance hole size isn’t a guess—it’s your best defense against unwanted guests. Match the species-specific entrance diameter (1⅛" for wrens, 1½" for bluebirds), and place it 6-8" above the floor.
Face it east or away from prevailing wind for orientation wind protection. Round holes deter predators best. Add an escutcheon plate for extra predator deterrence—cheap insurance for a safe nest.
Beginner-friendly Box Plans
Good news: you don’t need a lumber yard’s worth of materials for your first build. A single-board birdhouse plan using one 6x6x8" cedar board keeps cutting simple.
Clear plan layouts list every cut upfront, no guesswork. Basic carpentry tools—saw, drill, square—handle it all.
Pre-drilled hole alignment and butt joints mean quick assembly, easy mounting, and a nesting box you’ll actually finish.
Ventilation, Drainage, and Predator Protection
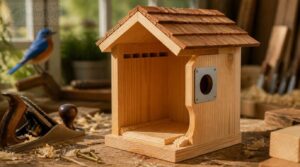
A birdhouse isn’t just a box with a hole. It needs to breathe, drain, and keep hungry critters out. Here’s what makes that happen.
A birdhouse must breathe, drain, and keep hungry critters out to truly become a home
Roof and Side Vents
Because heat rises fast in a closed box, airflow balance matters as much as the entrance hole itself.
- Roof vent gaps of 0.25–0.5 in near the peak
- Side-wall vents placed high, opposite each other
- Combined venting for steady moisture regulation
- Reduced interior drafts on nestlings
- Better heat exhaust during summer
Good vent placement keeps birdhouse ventilation working quietly, preventing condensation before it starts.
Floor Drainage Holes
Floor holes finish the airflow job vents start. Drainage to keep nests dry means 8–12mm holes near corners, angled slightly for effective water flow.
| Hole Size | Placement | Purpose |
|---|---|---|
| 8mm | Corner | Light drainage |
| 10mm | Corner | Standard flow |
| 12mm | Corner | Heavy rain areas |
| Multiple small | All corners | Prevents clogging |
This prevents nesting mold and keeps interior humidity managed all season.
Sloped Roof Overhangs
Water has to go somewhere, and a sloped roof sends it away from the box instead of straight down the walls. Extend the overhang past the front and sides for real rainwater shedding, plus UV protection and heat reduction on hot afternoons.
This rain deflection design also boosts structural stability, keeping your simple, beginner-friendly nesting box drier and sturdier season after season.
Pole Baffles and Guards
Squirrels don’t quit — they climb, jump, and chew their way to a free meal. That’s why predator guards for birdhouses matter as much as the box itself.
- Galvanized steel baffles: smooth, chew-proof, tough
- Dome shapes block grasping paws
- Mount 4 ft up the pole
Metal vs plastic? Steel wins for durability; plastic works if squirrel pressure’s low.
Fixing Leaks and Drafts
Even a well-built box develops gaps over time, so a quick seasonal check keeps birds safe and dry.
Run your finger along seams — cracked corners need fresh silicone sealant. Test drafts with a smoke pencil near vents.
| Problem | Fix | Check Interval |
|---|---|---|
| Cracked seams | Silicone sealant | Yearly |
| Drafty joints | Weatherstripping | Yearly |
| Clogged drainage | Clear holes | Monthly |
Good ventilation prevents moisture buildup and rot.
Top 8 Tools and Materials for Bird House Building
Good tools make a good birdhouse, plain and simple. You don’t need a full workshop, just a handful of reliable pieces that do their job well. Here are the eight you’ll actually reach for, from clamps to sandpaper.
1. IRWIN Quick Grip One Handed Mini Bar Clamp
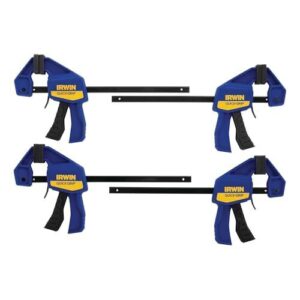
Ever tried holding a birdhouse panel steady with one hand while driving a screw with the other? That’s where this little clamp earns its keep.
The IRWIN Quick-Grip Mini Bar Clamp squeezes the trigger and locks down fast, giving you up to 150 lbs of clamping pressure from a compact 6-inch bar. Its reinforced resin body and hardened steel center keep panels aligned without bowing, so your corners stay square while the glue sets.
The non-marrying pads are the real MVP here. They grip cedar and pine tight without leaving dents or scuff marks on your finished exterior.
At just over a pound for a four-pack, it’s light enough for a young helper to use too. A genuinely handy addition to any beginner’s workbench.
| Best For | hobbyists, DIYers, and beginners who need a compact, easy-to-use clamp for small woodworking or craft projects like birdhouses, model building, or light repairs. |
|---|---|
| Best For | Beginners/Hobbyists |
| Primary Material | Resin/Steel |
| Weight | Just over 1 lb |
| Suited For Cedar/Pine | Yes |
| Key Limitation | Not for heavy-duty |
| Ease of Use | One-handed, beginner-friendly |
| Additional Features |
|
- One-handed quick-release trigger makes clamping fast and effortless, even for young or novice users
- Non-marrying pads protect delicate surfaces like cedar and pine from dents and scuff marks
- Reinforced resin body with hardened steel bars keeps panels aligned and corners square while glue sets
- Maximum clamping force of about 150 lbs may not be enough for heavy-duty or industrial tasks
- Not built for high-precision or tight-tolerance applications
- Resin construction may hold up poorly under extreme heat, cold, or chemical exposure
2. DEWALT 15 Amp Portable Table Saw
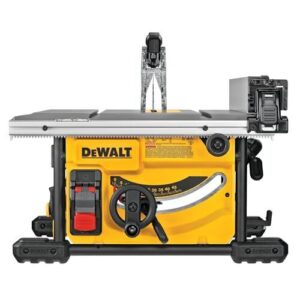
Clean cuts start with a saw that won’t quit halfway through a sheet of plywood. That’s the job of the DEWALT 15 Amp Table Saw.
Its 15-amp motor spins at 5,800 RPM, ripping through cedar and pine without bogging down mid-cut. The rack-and-pinion fence glides smooth and locks tight, so every panel comes out the same width, cut after cut.
With a 24.5-inch rip capacity, you can break down a full sheet of plywood solo, no extra hands needed. The metal roll-cage base shrugs off drops and rough handling, and on-board storage keeps your guard, fence, and wrenches from wandering off mid-project.
One catch: there’s no built-in dust port, so plan on sweeping up or hooking up a shop vac separately.
| Best For | DIYers and jobsite pros who need to break down full 4×8 sheets of plywood solo without sacrificing portability. |
|---|---|
| Best For | DIYers/Jobsite Pros |
| Primary Material | Metal |
| Weight | Heavy (metal base) |
| Suited For Cedar/Pine | Yes |
| Key Limitation | No dust port |
| Ease of Use | Solo-operable |
| Additional Features |
|
- 24.5-inch rip capacity handles full sheets of plywood with ease
- Rack-and-pinion fence delivers fast, precise, repeatable cuts
- Durable metal roll-cage base holds up to jobsite drops and rough handling
- No built-in dust extraction port, so you’ll need a separate shop vac
- All-metal construction adds weight, making frequent carrying tougher
- 8-1/4 in. blade limits cutting depth compared to larger saws
3. HYCHIKA Bi Metal Hole Saw Kit
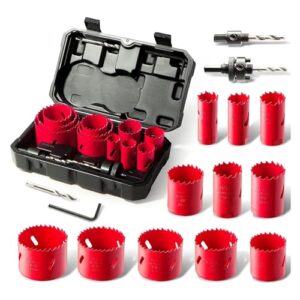
A wobbly, off-size hole is the fastest way to scare off a bluebird, so this kit earns its spot in your toolbox. The HYCHIKA Bi Metal Hole Saw Kit packs 11 blade sizes, 3/4 inch to 2-1/2 inches, covering bluebirds, wrens, chickadees, and swallows without buying separate tools.
Bi-metal blades mean a hard-alloy cutting edge fused to a flexible backing. Teeth run 69-81 HRC hardness, so they stay sharp through cedar, pine, and even PVC or thin metal. Two mandrels let you switch blades in seconds, and the side chip-removal groove clears sawdust as you cut, keeping edges clean.
Max cutting depth sits at 40mm, plenty for standard box walls. Everything, blades, mandrels, drill bits, hex key, stores in one compact case. That’s organization that saves you time.
| Best For | DIYers and hobbyists building birdhouses or tackling home projects who need clean, precise holes across wood, PVC, and thin metal without buying multiple tools. |
|---|---|
| Best For | DIYers/Hobbyists |
| Primary Material | Bi-Metal |
| Weight | Compact case |
| Suited For Cedar/Pine | Yes |
| Key Limitation | Limited cutting depth |
| Ease of Use | Quick blade swaps |
| Additional Features |
|
- 11 blade sizes (3/4" to 2-1/2") cover a wide range of birdhouse entry holes and other project needs
- Bimetal blades with 69-81 HRC hardness stay sharp through cedar, pine, PVC, and thin metal
- Compact case keeps blades, mandrels, drill bits, and hex key organized and ready to grab
- Max cutting depth of 40mm won’t work for thicker box walls or deeper cuts
- Not built for continuous heavy-duty or industrial use
- Requires coolant or water plus careful speed control to avoid tooth damage from heat
4. DEWALT 20V Max Cordless Drill Driver Set
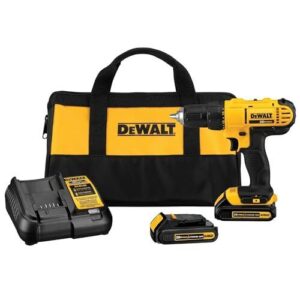
Pilot holes and screws are where boxes fall apart, or come together right. This kit is built for that job.
The 300 UWO motor and two-speed transmission (0-450 rpm low, 0-1,500 rpm high) let you drive screws slow and steady near edges, then switch fast for bigger holes. A 1/2-inch ratcheting chuck grips bits tight, no wobble, no stripped screws.
You get two 20V batteries, a charger, and a storage bag. That’s uninterrupted building, even on a Saturday with three boxes to finish.
The built-in LED lights up shaded workbenches or garage corners. It won’t drill masonry, and it’s brush-motored, not brushless, but for cedar and pine? Reliable, beginner-ready, and tough enough to last seasons.
| Best For | DIY homeowners and hobbyists tackling furniture assembly, home repairs, and light woodworking projects like the pine and cedar boxes described above. |
|---|---|
| Best For | DIY Homeowners |
| Primary Material | Metal/Plastic |
| Weight | N/A |
| Suited For Cedar/Pine | Yes |
| Key Limitation | Not for masonry |
| Ease of Use | Beginner-ready |
| Additional Features |
|
- Two-speed transmission gives precise control for delicate screwdriving and enough power for larger holes
- Dual 20V batteries and included charger keep projects moving without downtime
- Built-in LED light makes it easy to work in dim garages or shaded benches
- Brushed (not brushless) motor may wear faster under heavy, repeated use
- Not suitable for concrete, masonry, or industrial-grade drilling
- Some users report occasional stalling, and replacement batteries cost more than competing brands
5. DEWALT Titanium Nitride Speed Tip Drill Bits
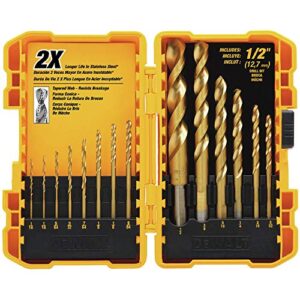
A cheap bit set will wander on start, and that split-second slip is how cedar panels crack. DEWALT’s Titanium Nitride Speed Tip set (DW1341 G) solves that with a speed tip design that bites the instant it touches wood, no wandering, no walking across your panel.
The 14 bits run from 1/16" to 1/2", covering every pilot hole and drainage hole your birdhouse needs. That’s floor drainage, vent gaps, and screw pilots, all handled with one case.
The titanium nitride coating cuts friction and resists heat, so bits stay sharp through pine and cedar without dulling mid-project. A no-spin shank keeps each bit locked in your chuck, no slipping under torque.
At 15.52 oz, the whole set fits in a tough plastic case that keeps sizes organized on your bench.
| Best For | Hobbyists and pros drilling pilot holes, drainage gaps, and screw holes in wood projects like birdhouses who need accurate starts without bit wander. |
|---|---|
| Best For | Hobbyists/Pros |
| Primary Material | Titanium Nitride Steel |
| Weight | 15.52 oz |
| Suited For Cedar/Pine | Yes |
| Key Limitation | Not for hard steel |
| Ease of Use | No-wander start |
| Additional Features |
|
- Speed-tip design bites instantly, preventing walking or slipping at start
- Titanium nitride coating resists heat and friction for longer-lasting sharpness
- No-spin shank keeps bits securely locked in the chuck under torque
- Not designed for hard ferrous steel or hardened alloys
- Plastic case offers less impact protection than a metal container
- Size range tops out at 1/2", so larger holes need separate bits
6. Jorgensen 24in One Hand Clamp Spreader
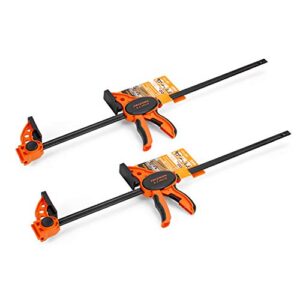
Those bits get your holes drilled clean, but glue-up is where solo builds usually go sideways. One panel shifts while you reach for a screw, and suddenly your box sits crooked forever. That’s the problem the Jorgensen 24-inch One-Hand Clamp Spreader solves.
Squeeze the trigger one-handed while your other hand holds panels square. The contoured grip and glass-filled nylon handle make repeated squeezes easy on your wrist, and the quick-release lever lets you reposition in seconds instead of fighting a stuck clamp.
Padded jaws protect cedar and pine from dents, and at a 300-pound load limit, it controls every glue joint your birdhouse throws at it. Need extra reach? The head converts to a spreader, or you can join two clamps for double the opening. One tool, two jobs — that’s smart shop math.
| Best For | Hobbyists and DIYers tackling woodworking, cabinet installs, or model-making projects who need fast, one-handed clamping without a second pair of hands. |
|---|---|
| Best For | Hobbyists/DIYers |
| Primary Material | Nylon/Steel |
| Weight | N/A |
| Suited For Cedar/Pine | Yes |
| Key Limitation | Not for large joinery |
| Ease of Use | One-hand operation |
| Additional Features |
|
- One-hand operation with a quick-release lever makes repositioning fast and simple
- Converts from clamp to spreader, or joins with a second unit for double the opening
- Soft-plastic pads and end caps protect finished surfaces from marring
- 400 lb load capacity and 24 in max opening aren’t suited for heavy-duty or large-scale joinery
- Release lever takes a few cycles to master before operation feels smooth
- Firmer plastic pads may grip less securely than soft rubber on very smooth surfaces
7. Titebond II Premium Wood Glue
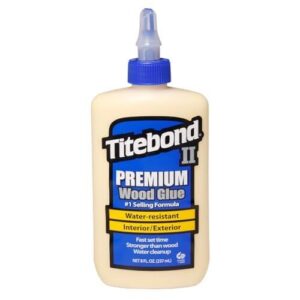
Clamps hold panels tight, but glue is what keeps them together for years. That’s where Titebond II Premium earns its spot in your toolbox.
It passes ANSI Type II water resistance testing, so rain and humidity won’t weaken those cedar or pine joints down the road.
You get roughly an hour of working time at room temperature before it sets, plenty of room to square up panels before clamping. Full cure takes 24 hours, so don’t rush your next step.
Cleanup is just soap and water while wet. Once cured, it’s non-toxic and FDA-approved for indirect food contact, meaning curious birds pecking around won’t face any risk.
Sands smooth, accepts exterior finishes without issue, and holds strong through freeze-thaw cycles. That’s a bond built to last outdoors.
| Best For | Titebond II Premium is best for woodworkers building outdoor furniture, birdhouses, planters, and other exterior or moisture-exposed projects that need a reliable, water-resistant bond. |
|---|---|
| Best For | Woodworkers |
| Primary Material | Water-Based Formula |
| Weight | N/A |
| Suited For Cedar/Pine | Yes |
| Key Limitation | 24-hour cure time |
| Ease of Use | Easy soap-water cleanup |
| Additional Features |
|
- Passes ANSI/HPVA Type II water-resistance testing, standing up to rain and humidity
- Strong initial tack with a fast set time, plus easy cleanup with just soap and water
- Food-safe once cured, making it a solid choice for cutting boards and kitchen woodworking
- Not rated for submersion or underwater bonding
- Full cure takes a full 24 hours, so projects need time before handling
- Cold temperatures can slow down set time and require extra patience with clamping
8. 3M General Purpose Sandpaper Assorted Grits
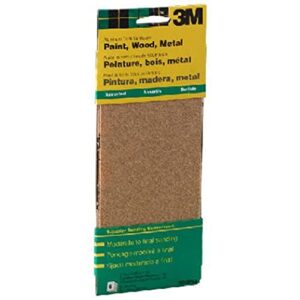
Once your glue cures, splinters are the last thing you want greeting curious little claws. That’s where 3M’s assorted sandpaper pack comes in — 60, 100, and 150 grit sheets covering everything from rough saw marks to final smoothing.
Start coarse to knock down rough edges, then work your way finer. Skipping straight from 60 to 150 leaves scratches the middle grit would’ve fixed. Wrap a sheet around a scrap block for flatter results on cedar or pine panels, and always sand with the grain for a cleaner finish.
Pay extra attention to the entrance hole rim, where birds land and grip. Smooth edges there mean fewer scraped feathers.
At 0.8 ounces total, this pack won’t weigh down your toolbox, but six sheets go a long way on a first build.
| Best For | DIYers and hobbyists working on birdhouses, small furniture, or repair projects who need a versatile sandpaper assortment for wood, paint, and metal. |
|---|---|
| Best For | DIY/Repair Projects |
| Primary Material | Aluminum Oxide |
| Weight | 0.8 oz |
| Suited For Cedar/Pine | Yes |
| Key Limitation | Limited grit range |
| Ease of Use | Simple hand sanding |
| Additional Features |
|
- Six assorted grits (60, 100, 150) allow smooth progressive sanding without skipping steps
- Lightweight and compact at just 0.8 ounces, easy to store in any toolbox
- Aluminum oxide material works well across wood, paint, and general metal surfaces
- Limited to three grit levels, which may not cover specialized or fine-finish tasks
- Wears down faster on very hard metals compared to carbide-based abrasives
- Small pack size means frequent reordering for larger or high-volume projects
Step-by-Step Wooden Bird House Build
You’ve got your wood picked out and your tools laid out on the bench. Now comes the fun part: turning flat panels into an actual home. Here’s the build broken into five simple steps, start to finish.
Measure and Cut Panels
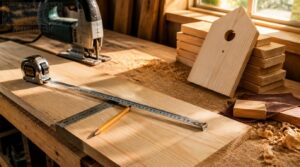
Grab your measuring tape and mark twice before you cut once. Accuracy here sets up every step after it.
- Measure panels to ±1/16 inch
- Mark lines with a sharp pencil and square
- Cut with hand saw or jigsaw, blade on waste side
- Sand edges 120–180 grit for smooth, splinter-free cuts
Dry fit pieces before assembling. Keep grain running lengthwise for strength.
Drill Clean Entrance Holes
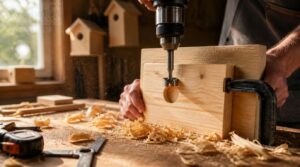
Once your panels are cut, the entrance hole decides whether birds move in or move on. Hole diameter precision matters most—1⅛" for bluebirds, 1" for wrens, 1¼" for swallows.
Use a sharp Forstner or hole saw bit with a backer board behind the panel to prevent tear-out. Drill straight and steady, then sand the rim smooth. Deburring removes snags that could injure fledglings.
Assemble With Screws
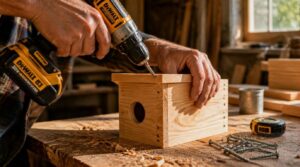
Now comes the fun part: turning flat panels into a real simple wooden box. Use exterior-rated screws, 1¼", stainless steel for wet climates.
Pre-drill pilot holes 1/16" smaller than screw diameter—splitting ruins panels fast. Two screws per corner joint, staggered spacing on face frames. Set your drill’s torque low, snug not flush. That’s basic carpentry tools doing real work, and it’s a home you made from scratch.
Apply Exterior-only Finish
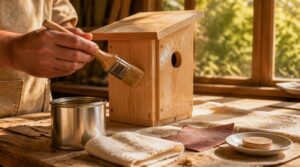
Before any finish touches the box, sand it smooth with 120-180 grit—rough wood won’t hold a coat right. Use low-VOC, water-based finish on exterior surfaces only; oil-based lasts longer but smells stronger while curing. Cure between 50-85°F. Clear finishes add UV protection without hiding grain.
- Sand smooth
- Wipe with tack cloth
- Seal knots
- Apply thin coats
- Let dry fully
Mount, Clean, Maintain
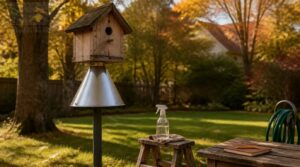
Time to mount your finished box. Pick a pole 5-7 feet high, add a steel predator baffle, and secure with corrosion-resistant lag screws.
Clean every fall: mild soap, full rinse, dry completely.
Check hinges and hardware monthly—log dates and fixes. Reseal every 2-3 years. That’s a home you made from scratch, built to last seasons.
Frequently Asked Questions (FAQs)
Which bird species are easiest to attract first?
House wrens, chickadees, bluebirds, and tree swallows are your easiest cavity nesters to attract first. They readily accept properly sized nesting boxes, arrive early spring scouting for sites, and settle in fast when food and water sit nearby.
How do I clean a birdhouse between seasons?
Pop open the removable cleanout panel, scoop out old nesting material, and scrub with a 10 percent bleach solution. Rinse well, air-dry fully in sun, then rehang — this autumn disinfection routine cuts parasites and mold before winter roosting begins.
When is the best time to put up birdhouses?
Like a scout checking the trail before hikers arrive, birds check boxes weeks early. Aim for late winter installation through early spring.
Adjust for regional climate shifts, since chickadees and swallows follow different seasonal breeding cycles and arrival patterns.
Can birdhouses attract unwanted pests or animals?
Yes — wasps, mice, and sparrows often move in uninvited. Preventing wasp colonies and deterring rodent intrusion starts with clean boxes, no gaps over ⅛ inch, and a solid predator guard or metal baffle on the mounting pole.
How long does a wooden birdhouse typically last?
Think of your birdhouse like a jacket left out in the weather: sun, rain, and time wear it down. A well-sealed cedar box lasts 8-10 years; unsealed pine fades in 2- Climate and upkeep decide the rest.
How high above ground should birdhouses be mounted?
Mount it 5–10 feet up for most species — bluebirds prefer 4-6 feet, swallows and wrens tolerate higher spots. Adjust for climate, predator height strategies, and urban garden heights, keeping your birdhouse cleaning schedule easy and backyard wildlife thriving.
How far should birdhouses be from bird feeders?
Keep at least 10 to 15 feet between feeders and nesting boxes—bluebirds want 15-20 feet, tree swallows 20- This buffer cuts species competition, predator access, and nesting stress, creating separate resource zones that support healthy backyard biodiversity.
What safety gear should beginners wear while building?
Suit up like you’re prepping for battle, minus the sword. Grab ANSI Z1 safety glasses, hearing protection, an N95 dust mask, and snug-fitting gloves. Add closed-toe shoes and a tidy workspace, and you’re covered from sawdust to splinters.
How often should birdhouses be cleaned each year?
Once a year, minimum, after breeding season ends. That’s peak parasite prevention timing. Humid climates or multi-brood species like wrens need mid-season checks too.
Clean with disposable gloves and bleach solution, then air dry fully before next season’s nesting box maintenance begins.
Which direction should a birdhouse entrance hole face?
Nearly 90% of birding guides point the same way: face the entrance east.
Morning sun warms nestlings gradually while avoiding afternoon heat. East orientation also blocks prevailing winds and reduces predator sightlines, keeping humidity balanced and your birds comfortable through the season.
Conclusion
Sawdust on your hands is proof you built something real. Every cedar panel, every drilled hole, every driven screw brings you closer to wooden bird houses for beginners that actually work.
Get the dimensions right, skip the nails, and vent it properly, and you’ve built a safe nursery, not just a box.
Hang it. Step back. Watch a bluebird check it out, and you’ll know you did it right.