This site is supported by our readers. We may earn a commission, at no cost to you, if you purchase through links.
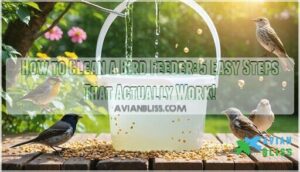
Start by taking your feeder apart completely—think of it as giving your bird’s dining room a deep clean.
Soak all parts in a 10% bleach solution for about 10 minutes, then scrub away any stubborn seed hulls or mold with an old toothbrush.
Rinse everything thoroughly with clean water and let it air dry completely before refilling.
This simple routine prevents deadly diseases like salmonella from turning your backyard buffet into a health hazard.
The right cleaning supplies make all the difference.
Table Of Contents
- Key Takeaways
- Cleaning Bird Feeders
- How to Clean Bird Feeders
- Cleaning Frequency Matters
- Effective Cleaning Techniques
- Maintaining Clean Feeders
- Frequently Asked Questions (FAQs)
- How do you clean a bird feeder?
- Do bird feeders need to be cleaned?
- How do you bleach a bird feeder?
- What should I do if my bird feeder is dry?
- Do you sanitize your bird feeders?
- Can you clean a bird feeder with soap?
- Can you clean bird feeders using vinegar?
- How do you clean a copper bird feeder?
- What is the best thing to clean bird feeders with?
- Is Dawn dish soap safe for bird feeders?
- Conclusion
Key Takeaways
- Clean your feeder every two weeks to prevent deadly diseases like salmonella and avian flu from spreading among birds, with more frequent cleaning needed during hot or humid weather when bacteria grow faster.
- Disassemble completely and soak all parts in a 10% bleach solution (one part bleach to nine parts water) for 10 minutes, then scrub with a bottle brush or old toothbrush to remove stubborn seed hulls and mold.
- Rinse thoroughly and air-dry completely before refilling to ensure no cleaning residue remains that could harm visiting birds – any leftover soap or bleach can be toxic to your feathered friends.
- Monitor your feeder’s condition regularly and watch for warning signs like cloudy nectar, moldy seeds, or sick birds, which signal that you need immediate deep cleaning or temporary feeder removal.
Cleaning Bird Feeders
You might think tossing seeds into a feeder is all it takes to keep birds happy, but dirty feeders can actually make your feathered friends sick with diseases like salmonella and avian flu.
Regular cleaning isn’t just about keeping things tidy—it’s about creating the fresh, clean conditions that birds naturally seek in the wild.
Importance of Regular Cleaning
Your backyard bird-feeding station becomes a disease hotspot without proper feeder maintenance.
Don’t let your bird feeder become a deadly buffet—clean feeders save lives.
Dirty feeders harbor deadly mold, bacteria, and fungi that spread conjunctivitis, salmonella, and avian flu among visiting birds. Regular bird feeder cleaning protects wild bird safety and prevents devastating outbreaks.
Proper maintenance involves understanding the importance of feeder cleaning to prevent disease spread.
- Disease Prevention: Clean feeders eliminate harmful pathogens that cause fatal illnesses
- Bird Health: Proper bird feeder hygiene keeps your feathered visitors thriving year-round
- Cleaning Schedules: Consistent feeder maintenance prevents dangerous bacterial buildup
Supplies and Safety Precautions
Before you start scrubbing, gather your cleaning supplies and protective gear.
You’ll need rubber gloves for protection against bacteria, a safety mask to avoid inhaling debris, and alcohol wipes for disinfecting surfaces.
Grab scrubbing tools like bottle brushes and old toothbrushes, plus gentle dish soap or bleach.
Think of it as suiting up for battle against bird germs!
Step-by-Step Cleaning Process
Gather your cleaning supplies and don protective gear before tackling this essential bird feeder maintenance task.
Empty old seeds, then disassemble your feeder completely for thorough access.
Regular cleaning schedules are vital to maintain a healthy environment for the birds.
Essential cleaning steps:
- Soak – Submerge parts in warm soap solutions for 5-10 minutes
- Scrub – Use bottle brush techniques on stubborn residue
- Rinse – Apply proper rinse methods, then make certain complete dry storage before refilling
How to Clean Bird Feeders
Mastery of cleaning bird feeders guarantees your feathered friends stay healthy and your yard remains a haven for wild birds.
Your bird feeder cleaning guide starts with understanding feeder materials and using proper cleaning tools for effective bird feeder sanitization.
Here’s your essential bird feeder maintenance checklist:
- Empty completely – Remove all old seeds, nectar, or suet before starting
- Disassemble parts – Take apart removable components for thorough cleaning
- Scrub thoroughly – Use bottle brushes to reach every corner and crevice
- Disinfect properly – Apply bleach solution to eliminate harmful bacteria
- Rinse and dry – Ensure complete removal of cleaning residue before refilling
Clean bird feeders protect bird health and maintain proper feeder placement effectiveness.
Regular cleaning backyard procedures are vital for preventing the spread of diseases among birds.
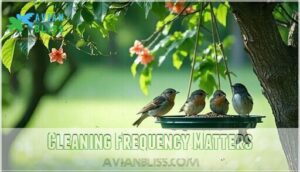
Cleaning Frequency Matters
You can’t just clean your bird feeder whenever you remember it exists, like that gym membership you bought in January.
Different feeders need different cleaning schedules to keep your feathered friends healthy and disease-free.
Seed and Suet Feeders
Most seed and suet feeders need cleaning every two weeks to maintain proper feeder hygiene and bird health.
During wet weather or heavy use, you’ll want to clean them weekly since moisture accelerates mold growth. Check your seed storage regularly—if it’s clumping or smells off, it’s time for immediate suet maintenance.
Clean feeder design makes sanitization easier too. Regular cleaning is essential for preventing the spread of diseases among birds, especially during suet feeder maintenance.
Hummingbird Feeders
Unlike seed feeders, hummingbird feeder cleaning demands more attention due to sugar’s tendency to spoil quickly. Clean your nectar feeders every 2-3 days during hot weather and weekly in cooler conditions.
When hummingbird nectar turns cloudy, it’s time for immediate sanitization. This is crucial because sugar solutions can develop bacteria rapidly, especially in certain feeder designs and materials.
- Hot weather requires hummingbird feeder cleaning every 2-3 days to prevent dangerous mold growth
- Cool temperatures allow weekly feeder cleaning frequency for ideal bird feeder sanitization
- Cloudy nectar signals immediate need for hummingbird feeder maintenance regardless of schedule
- Different feeder designs and feeder materials affect how quickly bacteria develops in sugar solutions
- Proper feeder placement in shade helps extend time between cleanings while maintaining bird attraction
Adjusting Frequency Based on Weather
Weather conditions directly impact your cleaning frequency like a thermostat controls your comfort.
Just like your comfort depends on the thermostat, your birds’ health depends on weather-adjusted cleaning schedules.
Humid climates and rainy seasons accelerate bacterial growth, demanding twice-weekly cleanings. Extreme temperatures make seeds spoil faster, while dry spells offer some relief.
Hot, muggy days turn feeders into petri dishes overnight. Adjust your bird feeder sanitation schedule accordingly—your feathered friends depend on weather-appropriate feeder cleaning frequency for their health.
Effective Cleaning Techniques
You’ve learned when to clean your feeders, but knowing how to clean them properly makes all the difference between healthy birds and disease outbreaks.
The right techniques turn a messy chore into a simple routine that keeps your feathered friends coming back safely.
Soaking and Scrubbing Feeders
Now that you know when to clean, let’s tackle the actual scrubbing process.
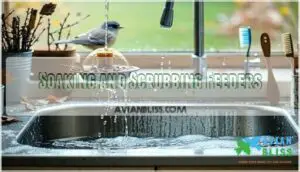
Start by soaking feeders in hot, soapy water for 5-10 minutes—this loosens stubborn grime like magic.
Use a bottle brush or old toothbrush as your scrubbing tools to reach every nook.
The right water temperature and soap solutions make all the difference for effective brush cleaning and sanitizing.
Regular cleaning is essential for preventing the spread of diseases through proper feeder maintenance.
Disinfecting With Bleach or Vinegar
After scrubbing, you’ll need proper disinfectant to kill harmful bacteria.
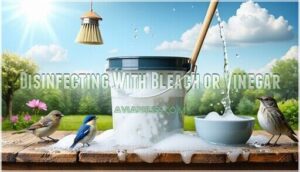
Mix nine parts water with one part bleach for your bleach solution, or try a gentler vinegar solution using four parts hot water to one part vinegar.
These cleaning agents work as effective sanitizing methods when you soak feeders for ten minutes.
Never mix bleach and vinegar together – pick one disinfectant per cleaning session.
For effective cleaning, understanding bleach cleaner properties is essential in determining the right cleaning solution with the use of bleach solution.
Rinsing and Drying Feeders
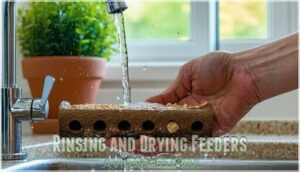
Thorough rinsing removes every trace of cleaning chemicals that could harm visiting birds. You’ll want to flush all surfaces with clean water until there’s no soap residue or bleach smell remaining.
Here are essential steps for proper feeder sanitizing and water removal:
- Rinse each feeder component under running water for 30 seconds minimum
- Check feeding ports and crevices where residue prevention matters most
- Shake out excess water before starting the drying process
- Air-dry feeders completely in direct sunlight when possible
- Store clean, dry feeders in covered areas to prevent contamination
To ensure the feeders are completely clean and dry, it’s crucial to follow these steps carefully, as proper feeder sanitizing and water removal are key to maintaining a safe environment for the birds.
Maintaining Clean Feeders
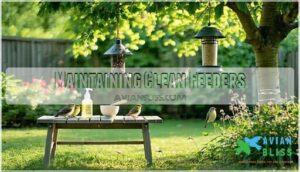
You’ve mastered the cleaning process, but keeping your feeders consistently clean requires a simple maintenance routine that’ll make your backyard birds healthier and happier.
Regular upkeep prevents those nasty disease outbreaks that can turn your peaceful bird-watching spot into a wildlife emergency room.
Preventing Disease Outbreaks
You can prevent devastating disease outbreaks by staying vigilant about feeder sanitation.
When birds cluster around dirty feeders, bacteria growth explodes like wildfire through your backyard flock.
Disease prevention starts with recognizing warning signs and taking immediate action.
| Warning Sign | Action Required |
|---|---|
| Cloudy nectar in hummingbird feeders | Clean immediately, replace solution |
| Sick birds at feeding stations | Remove all feeders for 2 weeks |
| Moldy seeds or suet | Deep clean with bleach solution |
| Bird droppings accumulation | Scrub and disinfect thoroughly |
| Unusual bird behavior or deaths | Contact wildlife authorities |
Wild bird care means protecting entire populations, not just individual visitors, which is crucial for disease prevention and maintaining a healthy backyard flock through proper sanitation and recognizing warning signs.
Keeping Birds Healthy
Clean bird feeders directly support bird health by creating safe dining spots that protect our feathered friends from harmful bacteria and diseases.
Your commitment to regular cleaning keeps visiting birds thriving year-round.
- Bird Nutrition: Fresh, mold-free seeds provide essential nutrients for ideal energy and growth
- Beak Health: Clean feeding ports prevent bacterial infections that damage delicate beaks
- Flock Management: Healthy feeders reduce disease transmission between bird species
Monitoring Feeder Condition and Storing Properly
Keeping your feeders in top shape means regularly checking for cracks, wear, and damage that could harbor bacteria.
Store clean feeders in dry, rodent-proof containers during off-seasons to prevent pest infestations.
Proper bird feeder storage is essential for maintaining clean and safe feeders.
| Feeder Storage Tips | Bird Health Benefits |
|---|---|
| Use airtight containers | Prevents mold growth |
| Store in cool, dry areas | Reduces disease risk |
| Check monthly for damage | Maintains safe feeding |
Regular bird feeder maintenance and seasonal cleaning guarantee year-round bird feeder upkeep that’s of the highest standard.
Frequently Asked Questions (FAQs)
How do you clean a bird feeder?
Picture Sarah watching her favorite cardinals suddenly stop visiting her backyard sanctuary.
You’ll empty old seeds, scrub with soapy water, rinse in diluted bleach solution, then air-dry completely before refilling your feeder, ensuring a clean and safe environment for the cardinals.
Do bird feeders need to be cleaned?
Yes, you’ll need to clean bird feeders regularly to keep your feathered friends healthy. Dirty feeders spread diseases like salmonella and avian flu, while clean ones attract more birds safely.
How do you bleach a bird feeder?
Looking to disinfect your feeder safely?
Mix one part bleach with nine parts water, soak the feeder for ten minutes, then rinse thoroughly with clean water.
Let it air-dry completely before refilling, this step is crucial for safe use.
What should I do if my bird feeder is dry?
If your bird feeder’s completely dry, you’re ready to refill it with fresh seed.
Double-check there’s no leftover debris or mold hiding in corners before adding new food for your feathered friends.
Do you sanitize your bird feeders?
Clean feeders gleaming in sunlight attract healthier birds.
You should sanitize yours every two weeks using a bleach solution—one part bleach to nine parts water.
It’s your birds’ lifeline against deadly diseases.
Can you clean a bird feeder with soap?
You can safely clean bird feeders with mild dish soap and warm water. Just make sure you rinse thoroughly afterward to remove all soap residue, which could harm visiting birds.
Can you clean bird feeders using vinegar?
Yes, you can absolutely clean bird feeders with vinegar.
Mix one part white vinegar with two parts water for an effective, bird-safe solution.
It naturally disinfects and removes stubborn residue without harmful chemicals, using vinegar as a key component.
How do you clean a copper bird feeder?
Copper feeders need gentle care to maintain their beautiful finish.
Use warm soapy water and a soft brush, avoiding harsh chemicals that’ll damage the metal.
Rinse thoroughly and dry completely before refilling with fresh seed.
What is the best thing to clean bird feeders with?
You’ll get the best results using a 10% bleach solution—that’s one part bleach to nine parts water.
This powerful combo kills bacteria and mold while keeping your feathered friends healthy and happy.
Is Dawn dish soap safe for bird feeders?
Dawn dish soap works well for cleaning bird feeders when you rinse thoroughly afterward.
You’ll want to avoid leaving any soap residue since it can harm birds.
A gentle scrub followed by complete rinsing does the trick.
Conclusion
Like a well-maintained restaurant kitchen, your bird feeder needs consistent care to keep serving up safe meals.
Now you know exactly how to clean a bird feeder using these five straightforward steps.
Remember, a clean feeder every two weeks prevents disease and keeps your backyard visitors thriving, and your feathered friends depend on you for their health—and they’ll reward your efforts with countless hours of entertainment right outside your window.
- https://www.audubon.org/news/three-easy-important-ways-keep-your-bird-feeder-disease-free
- https://www.wbu.com/bird-feeder-care-cleaning
- https://www.allaboutbirds.org/news/how-to-clean-your-bird-feeder
- https://www.nurturenativenature.com/post/clean-feeders-healthy-birds
- https://www.birdforum.net/threads/new-way-to-clean-bird-feeders.460765
