This site is supported by our readers. We may earn a commission, at no cost to you, if you purchase through links.
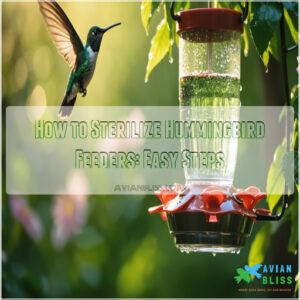
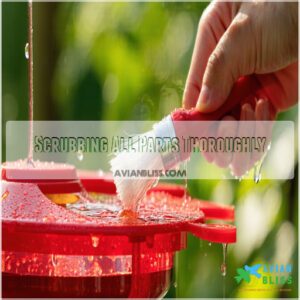
Rinse all parts with hot water, then scrub thoroughly using bottle brushes to remove residue, especially around seams and feeding ports.
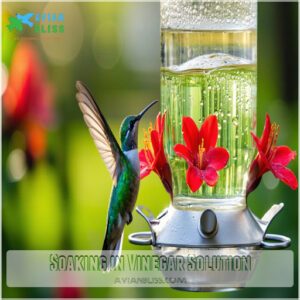
Soak the components in a vinegar solution (1 part vinegar to 4 parts water) for 30 minutes.
For stubborn mold or bacteria, a mild bleach solution (1 part bleach to 9 parts water) works well—just rinse thoroughly afterward with clean water.
Let all parts air dry completely before reassembling.
Regular cleaning slows spoilage, keeps hummingbirds safe, and encourages their visits, making a sparkling feeder truly keep them coming back, which is the key to maintaining a hummingbird safe environment.
Table Of Contents
- Key Takeaways
- Importance of Clean Hummingbird Feeders
- How to Sterilize Hummingbird Feeders
- Cleaning Supplies and Techniques
- Cleaning and Drying The Feeder
- Maintaining Clean Feeders and Preventing Mold
- Frequently Asked Questions (FAQs)
- What is the best way to disinfect a hummingbird feeder?
- Is it okay to clean hummingbird feeders with vinegar?
- Do I need to boil sugar water for hummingbirds?
- How to sterilize a hummingbird feeder?
- How do you sanitize a hummingbird feeder?
- Can you bleach a hummingbird feeder?
- How to sterilize a bird feeder?
- Are hummingbird feeders easy to clean?
- How can I store feeders during winter?
- Can feeders harm hummingbirds if left uncleaned?
- Conclusion
Key Takeaways
- Disassemble the feeder, rinse with hot water, and scrub all parts thoroughly with a bottle brush to remove residue and hidden mold and bacteria.
- Soak the components in a vinegar solution (1 part vinegar to 4 parts water) for 30 minutes or use a mild bleach solution (1 part bleach to 9 parts water) for tougher bacteria, then rinse thoroughly.
- Always air dry the feeder completely to prevent mold and bacteria growth before reassembling and refilling with nectar.
- Clean feeders regularly—every 1-2 days in hot weather and weekly in cooler temperatures—to keep nectar fresh and hummingbirds healthy.
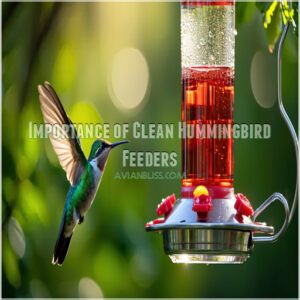
Importance of Clean Hummingbird Feeders
You’ll want to keep your hummingbird feeders clean to prevent harmful bacteria and mold growth that can make hummingbirds sick.
Regular cleaning also guarantees the sugary nectar stays fresh and appealing, attracting more of these delightful birds to your yard with fresh nectar.
Prevention of Mold and Bacteria
For healthy hummingbirds, clean feeders prevent mold and bacteria, which is crucial for nectar safety and hummingbird health.
You can sterilize hummingbird feeders and prevent mold by using a few simple methods, including:
- Rinsing with hot water.
- Soaking in a vinegar solution.
- Scrubbing with a bottle brush.
- Drying completely to prevent bacteria and mold.
Attracting Hummingbirds With Clean Feeders
Because clean feeders mean healthy hummingbirds, regular cleaning attracts more of these delightful pollinators.
Prioritize hummingbird feeder hygiene and nectar quality for thriving birds.
Proper feeder placement, fresh sugar water, and a clean hummingbird feeder guarantee bird safety and boost hummingbird nutrition.
Sterilize hummingbird feeders regularly for a vibrant backyard.
Maintaining a Healthy Hummingbird Environment
Your hummingbird’s health depends on a clean environment.
Regularly sterilize hummingbird feeders, ensuring feeder sanitation and preventing mold.
Change sugar water frequently, especially in hot weather, to maintain hummingbird nutrition and bird health.
For detailed cleaning instructions, review this hummingbird feeder cleaning guide.
Consider environmental factors like shade to prevent spoilage and promote healthy hummingbird feeder hygiene.
Disinfect your hummingbird feeder regularly for ideal bird health.
How to Sterilize Hummingbird Feeders
Keeping your hummingbird feeders clean is essential for the health of these tiny, energetic birds.
You’ll learn how to easily sterilize your feeders to prevent harmful bacteria and mold, ensuring your hummingbirds stay happy and healthy.
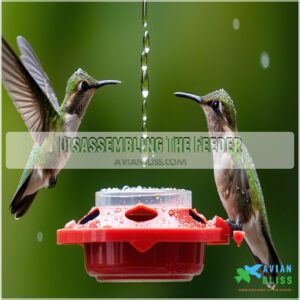
Disassembling The Feeder
To sterilize your hummingbird feeder, carefully take it apart.
Disassembling the feeder exposes hidden mold and reveals feeder parts needing cleaning.
For detailed cleaning instructions, see this hummingbird feeder cleaning guide.
Different feeder designs have unique disassembly tips, so check your instructions.
- Inspect feeder parts for cracks or wear.
- Look for hidden mold in crevices.
- Identify all removable parts.
- Note how parts fit together for reassembly.
- Gather your cleaning tools.
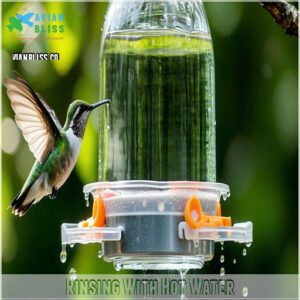
Rinsing With Hot Water
Once your feeder is disassembled, grab the hottest water your tap can handle—this is where the magic happens.
Hot water works wonders for feeder sanitization, blasting away sticky sugar and bacteria.
Here’s how to rinse like a pro:
- Use hot water (not boiling) for safe cleaning.
- Hold each piece under firm water pressure.
- Pay extra attention to seams and hard-to-reach spots.
- Skip blasting with super high pressure—it can crack delicate parts.
- Rinse thoroughly until every last residue disappears.
Soaking in Vinegar Solution
After rinsing with hot water, it’s time to let acidity work its magic.
Mix a vinegar solution—1 part vinegar to 4 parts water—and fully submerge your feeder parts.
Let everything soak for at least 30 minutes.
This process uses vinegar’s natural acidic effects to break down bacteria, mold, and residue, making it a safe and effective sterilization method for your feeder.
For specialized cleaning tools, consider a vinegar hummingbird feeder product.
Grab a soft brush or pipe cleaner to scrub away any stubborn grime during soaking.
Use gentle pressure to avoid scratching.
Once done, rinse thoroughly with clean water to remove any solution traces.
Remember, a clean hummingbird feeder keeps your feathered friends healthy.
Use this vinegar ratio regularly for proper maintenance.
Cleaning Supplies and Techniques
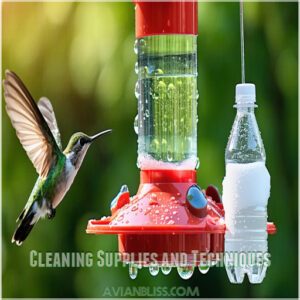
You’ll need the right tools and cleaning solutions to keep your hummingbird feeders safe and spotless.
From bottle brushes to vinegar solutions, these supplies guarantee thorough cleaning and protect hummingbirds from harmful mold or bacteria.
Bottle Brushes and Specialized Cleaning Tools
When it’s time to clean feeders, bottle brushes are your best friend for scrubbing every nook.
For those tiny feeding ports, microbrushes and pipe cleaners are lifesavers.
You can find helpful hummingbird feeder cleaning products online.
After cleaning, rinse and dry your tools to keep them sanitized for future use.
Specialized cleaning tools, found online or in bird stores, simplify your hummingbird feeder maintenance routine for thorough sterilization.
Vinegar and Bleach Solutions
Let’s talk liquids for hummingbird feeder sterilization.
Stick to these sterilization methods:
- Vinegar Ratios: Mix 1 part vinegar with 4 parts water. Its acidic mixtures disinfect without harsh chemicals.
- Bleach Solution: Use 1 part bleach to 9 parts water. Focus on bleach safety—rinse thoroughly!
- Instructions: Soak feeders, scrub any stubborn spots.
- Disinfectant Properties: Vinegar’s eco-friendlier; bleach packs more punch.
For more detailed cleaning instructions, see this helpful hummingbird feeder cleaning guide.
Always disinfect hummingbird feeders carefully to protect those tiny, colorful visitors.
Natural Cleaning Alternatives
Keeping feeders clean doesn’t mean using harsh chemicals—try natural cleaning agents instead.
A simple vinegar solution (1 part vinegar to 2 parts water) works wonders as a natural disinfectant.
For those looking for pre-made solutions, explore a vinegar cleaning solution product.
For stubborn grime, sprinkle baking soda—a gentle abrasive—on damp surfaces.
Lemon juice? It’s perfect for cutting grease and leaves a fresh scent hummingbirds love.
| Here’s a quick guide: | Cleaner | Benefit | Use Case |
|---|---|---|---|
| Vinegar | Natural disinfectant | Kills bacteria safely | |
| Baking Soda | Gentle abrasive cleaner | Scrubs feeder surfaces | |
| Lemon Juice | Grease-cutting, fresh scent | Rinse after use |
Stick to these earth-friendly options, and you’ll protect hummingbirds while keeping your sterilization routine eco-friendly.
Using Rice and Water Solution
Need a simple, natural way to clean your hummingbird feeders? Try a rice and water solution! It scrubs away grime without chemicals.
- Add a handful of rice and lukewarm water.
- Seal and shake vigorously to dislodge buildup.
- Rinse thoroughly with clean water.
- Repeat if needed for stubborn debris.
- Dry completely to prevent mold.
This grain solution is an eco-friendly, safe method for hummingbird feeder sterilization.
Cleaning and Drying The Feeder
Rinse every part of your feeder with clean water to remove all traces of soap or residue.
Let the parts air dry completely in a sunny spot or use a clean towel to speed up drying and avoid water spots.
Scrubbing All Parts Thoroughly
Every piece counts in the maintenance of a clean hummingbird feeder.
Use feeder brushes, like pipe cleaners, for port cleaning and tube scrubbing—essential for hard-to-reach spots.
After disassembling the feeder, gently scrub each part, focusing on residue removal around seams and feeding ports.
A specialized bottle brush works wonders for tubes, ensuring every nook is spotless.
Thorough cleaning keeps your feeder mold-free!
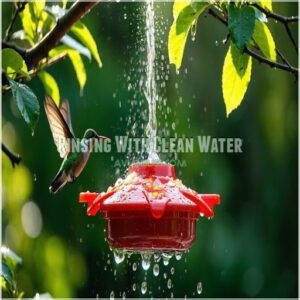
Rinsing With Clean Water
Rinse every piece under steady running water to remove any soap or debris.
Use hot water rinsing, if safe for your feeder, as it helps dissolve residue.
This step, part of effective hummingbird feeder cleaning, guarantees no harmful chemicals linger.
Focus on crevices and avoid water spots by shaking off excess.
The clean water benefits mean healthier, happier hummingbirds.
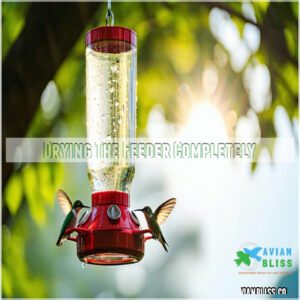
Drying The Feeder Completely
Drying your hummingbird feeder completely is essential for safety and cleanliness.
After cleaning with hot water, make sure it’s bone dry to avoid mold. Here’s how:
- Air drying methods like placing it in direct sunlight work best.
- Use a clean towel for faster drying.
- Shake out any hidden droplets in feeder parts.
This keeps feeders sanitized and mold-free!
Store feeders in a dry spot to prevent dampness.
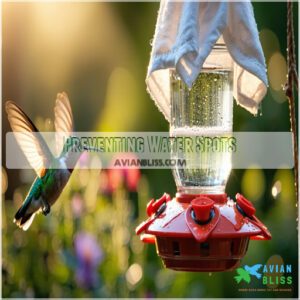
Preventing Water Spots
Preventing water spots is key for spotless feeders.
After rinsing, gently wipe the feeder with a soft cloth to avoid water marks.
Air drying works too, but cloth drying gives more control.
For best results, use distilled water for rinsing.
Regular cleaning also prevents disease outbreaks, and you can learn more with this helpful cleaning guide.
Check the table below for quick comparisons:
| Drying Technique | Spot Prevention | Best Use Case |
|---|---|---|
| Cloth Drying | Excellent | Quick, controlled drying |
| Air Drying | Good | Hands-off drying option |
| Distilled Water Use | Prevents spots | Final rinse before drying |
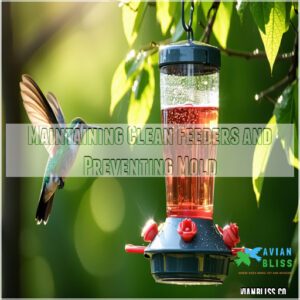
Maintaining Clean Feeders and Preventing Mold
Keeping hummingbird feeders clean is essential for preventing mold and keeping nectar fresh.
Regular cleaning, careful placement in shaded areas, and rotating feeders help maintain a safe environment for the birds.
Cleaning Frequency in Hot Weather
Hot weather speeds up nectar spoilage, putting hummingbird health at risk.
Stick to a regular hummingbird feeder cleaning routine to keep things safe and inviting.
Here’s what you need to do:
- Clean feeders every 1-2 days to stop sugar water from fermenting.
- Check feeders daily for signs of mold or ants.
- Place feeders in shaded areas to slow spoilage and protect hummingbirds.
Frequent cleaning and smart placement keep feeders safe and hummingbirds happy!
Cleaning Frequency in Cool Weather
In cool weather, stick to a weekly schedule for hummingbird feeder cleaning.
Changing nectar regularly helps maintain feeder sanitation and keeps your visitors healthy.
If the nectar looks cloudy or has an odor, clean the feeder immediately to prevent mold or bacteria.
Even in cooler climates, spoiled nectar can harm hummingbirds quickly.
| Condition | Action Needed | Risk Level |
|---|---|---|
| Clear, fresh nectar | Clean weekly | Low |
| Slightly cloudy nectar | Clean every 3-4 days | Medium |
| Cloudy, foul odor | Clean every 2 days | High |
| Mold present | Clean daily | Critical |
Regular cleaning safeguards both nectar quality and bird health!
Storing Feeders in Shaded Locations
Keeping feeders mold-free starts with smart placement.
A shaded area slows mold growth and keeps nectar fresh longer.
For detailed cleaning instructions, visit this hummingbird feeder cleaning guide.
Hummingbirds love reliable feeders, so pick a spot that works for both you and them.
- Hang feeders under a leafy tree or porch awning.
- Avoid exposing feeders to harsh midday sunlight effects.
- Prioritize easy refilling and cleaning access.
- Rotate shady locations for consistent results.
Simple placement boosts hummingbird health and maintenance ease!
Rotating Feeders to Prevent Mold Growth
Rotating feeders is a simple trick to outsmart mold and keep hummingbirds healthy.
Switch feeders every few days to allow thorough cleaning and drying for each.
Use a schedule, like rotating every Monday, Wednesday, and Friday, to avoid mold growth, nectar spoilage, and bacteria.
Proper feeder rotation reduces maintenance stress while ensuring clean, safe nectar for hummingbirds, which is crucial for their health and can be achieved through a simple rotation schedule.
Frequently Asked Questions (FAQs)
What is the best way to disinfect a hummingbird feeder?
Mix one part bleach with nine parts water, soak disassembled feeder parts for one hour, then scrub thoroughly.
Rinse well with warm water, air dry completely, and refill.
Clean weekly for happy, healthy hummingbirds!
Is it okay to clean hummingbird feeders with vinegar?
Yes, you can safely clean hummingbird feeders with vinegar.
Mix a 2:1 ratio of water to white vinegar, soak the parts, scrub away residue, and rinse thoroughly.
It’s natural, effective, and hummingbird-friendly.
Do I need to boil sugar water for hummingbirds?
Around 84% of hummingbirds prefer homemade nectar.
Boiling sugar water isn’t necessary if you use clean water, but it helps dissolve the sugar and guarantees no contaminants harm the birds.
Cool it before filling feeders.
How to sterilize a hummingbird feeder?
Sterilize your hummingbird feeder by soaking it in a bleach solution (1 part bleach to 9 parts water) for an hour.
Rinse thoroughly with hot water, air dry completely, and refill with fresh nectar.
How do you sanitize a hummingbird feeder?
Imagine this: a sparkling clean feeder hummingbirds love.
Soak parts in a 1:9 bleach-water mix, scrub gently, rinse thoroughly, and dry completely.
This routine keeps feeders safe, mold-free, and your feathered friends healthy.
Can you bleach a hummingbird feeder?
You can bleach a hummingbird feeder, but dilute it first—1 part bleach to 9 parts water.
Soak the parts, rinse thoroughly with hot water, and air dry completely to guarantee it’s safe for hummingbirds.
How to sterilize a bird feeder?
Think of it like hitting a refresh button.
Use a diluted bleach solution (1 part bleach to 9 parts water), scrub every nook, rinse thoroughly with hot water, and air dry completely before refilling for safety.
Are hummingbird feeders easy to clean?
Yes, hummingbird feeders are relatively easy to clean if you stay consistent.
With warm water, a small brush, and mild cleaners like vinegar, you can keep feeders mold-free and safe for your feathered visitors.
How can I store feeders during winter?
Over 40% of hummingbird enthusiasts store feeders improperly, risking damage.
Clean yours thoroughly, dry them completely, and keep them in a cool, dry place.
Use airtight bags or containers to block moisture and dirt.
Can feeders harm hummingbirds if left uncleaned?
Dirty feeders can harm hummingbirds by promoting mold and bacteria growth, leading to infections or even death.
Regular cleaning protects their health, prevents spoiled nectar, and guarantees your feeder remains a safe stop for these tiny visitors.
Conclusion
Keeping your hummingbird feeders clean isn’t just busywork—it’s basic hummingbird hospitality.
By learning how to sterilize hummingbird feeders with proper rinsing, vinegar or bleach solutions, and thorough drying, you’re giving these tiny visitors a safe place to eat.
Regular cleaning prevents harmful mold, bacteria, and nectar spoilage, while encouraging healthy, happy hummingbirds to return.
Stick to a routine, especially in hot weather, and you’ll soon master the art of keeping your feeders hummingbird-friendly and spotless.
- https://www.perkypet.com/articles/how-to-clean-a-hummingbird-feeder
- https://www.homesandgardens.com/gardens/how-to-clean-hummingbird-feeders
- https://www.birdsandblooms.com/birding/attracting-birds/feeding-birds/how-to-clean-hummingbird-feeders/
- https://www.surfbirds.com/bird-feeders/clean_hummingbird_feeders.html
- https://www.thespruce.com/best-hummingbird-feeders-4159147
