This site is supported by our readers. We may earn a commission, at no cost to you, if you purchase through links.
String outdoor-rated holiday lights around your feeder for gentle warmth, or try rotating multiple feeders—bringing one inside to thaw while another stays out.
Wrap feeders in fabric or foam insulation, and consider commercial heated options like the Hummers Heated Delight.
Pro tip: stick to a simple 1:4 sugar-to-water ratio using plain white sugar, avoiding honey or artificial dyes.
Want to give your tiny feathered friends a fighting chance? Keep that nectar flowing, and you’ll help them survive the frosty season.
Table Of Contents
- Key Takeaways
- Preventing Freezer Burn
- The Right Nectar Mix
- Hummingbird Survival in Cold Weather
- Providing Water for Birds
- Commercial Heated Feeder Options
- Low-Tech Solutions for Frozen Feeders
- Emergency Measures for Frozen Feeders
- Frequently Asked Questions (FAQs)
- How do I Keep my hummingbird feeder from freezing?
- How do you keep hummingbird nectar from freezing?
- Should hummingbird feeders be heated in cold weather?
- How to prevent hummingbirds from freezing?
- How to protect hummingbird feeder from snow?
- Can hummingbird feeders be left out in winter?
- How can you keep a hummingbird feeder from freezing?
- How to make a hummingbird feeder warmer?
- What temperature is too cold for a hummingbird feeder?
- How to keep your hummingbird feeder from freezing in the winter?
- Conclusion
Key Takeaways
- You’ll want to rotate your hummingbird feeders frequently, bringing one inside to thaw while another stays out, and use gentle heat sources like outdoor-rated holiday lights to prevent nectar from freezing.
- Insulate your feeders with fabric or foam, and consider using commercial heated options that’ll keep the nectar liquid without overheating or harming the birds.
- Stick to a simple 1:4 sugar-to-water ratio using plain white sugar, avoiding honey, brown sugar, or artificial dyes that could harm your tiny feathered friends.
- Help hummingbirds survive cold weather by understanding their unique torpor state and providing consistent access to unfrozen nectar, which is crucial for their winter survival.
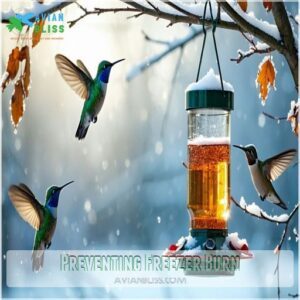
Preventing Freezer Burn
Keeping your hummingbird feeder from freezing during winter can feel like a tricky challenge, but it’s easier with a few clever tricks.
By using insulation, rotating feeders, or adding gentle heat sources, you’ll guarantee your tiny visitors always have access to unfrozen nectar.
DIY Methods for Thawed Feeders
Keep hummingbird feeders frost-free with clever DIY fixes.
- Feeder insulation: Wrap feeders with fabric or foam.
- Heat wraps or pads: Add gentle warmth without overheating.
- Holiday lights: Use outdoor-safe incandescent lights to keep nectar cozy.
These simple techniques prevent frozen feeder disasters!
Rotating Feeders for Consistent Nectar Flow
Switching feeders often keeps nectar flowing and prevents freezing.
Rotate them morning and evening for consistent access.
Using Insulated Feeders can also help maintain a stable temperature.
| Time of Day | Feeder Action | Benefit |
|---|---|---|
| Early Morning | Replace frozen feeder | Supports morning feeding |
| Midday | Monitor for freezing | Maintains nectar flow |
| Evening | Swap out feeder | Prepares for overnight use |
Using Heat Lamps and Holiday Lights Safely
Forget the feeder shuffle—heat lamps and outdoor-rated incandescent lights are lifesavers.
Hang lights snugly but securely for even warmth.
For heat lamps, focus on outdoor heating solutions using shatterproof bulbs and proper wattage.
Prioritize electrical safety to protect both birds and your setup.
Insulation and Heat Tapes for Feeders
Keeping feeders warm can be simple with the right tricks.
- Wrap feeders with foam insulation or thermal tape for warmth.
- Use heat wraps safely, avoiding overlaps to prevent damage.
- Add nectar warmers or feed tube covers for extra protection.
The Right Nectar Mix
Getting the nectar mix just right isn’t hard, but it’s key to supporting hummingbirds during winter.
Stick to a simple sugar-to-water ratio and skip any extras that could harm these tiny visitors.
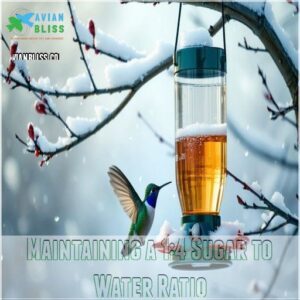
Maintaining a 1:4 Sugar to Water Ratio
A solid 1:4 sugar water ratio guarantees perfect nectar viscosity.
It supports hummingbird nutrition while lowering freezing points, essential for winter feeding.
Stick with plain white sugar for hummingbird feeder care, preventing feeder freeze, and fueling their energy all season.
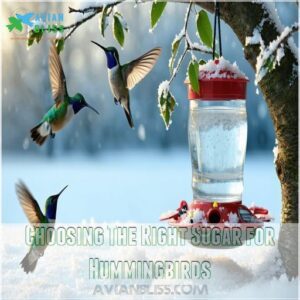
Choosing The Right Sugar for Hummingbirds
Stick to plain, white granulated sugar. It’s the safest choice for nectar quality and hummingbird health. Alternatives can harm their delicate systems.
To guarantee feeder safety and high-quality bird nutrition, remember these:
- Avoid raw sugar – it’s unrefined and risky.
- Steer clear of additives in sugars.
- Focus on balanced sugar content for proper hummingbird nutrition.
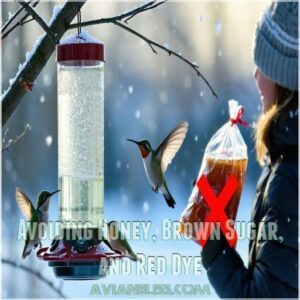
Avoiding Honey, Brown Sugar, and Red Dye
Not all sweeteners are safe for hummingbirds.
Avoid these to keep them healthy:
- Honey: It ferments, harming birds.
- Brown Sugar: Packed with minerals that disrupt digestion.
- Red Dye: Pretty but toxic—skip it.
- White Sugar: Stick with plain sugar for the best nectar safety.
Boiling and Cooling The Nectar Mixture
Boiling your nectar guarantees proper sugar dissolving, creating the right nectar consistency for winter hummingbird care. After boiling, let it cool to room temperature using simple cooling methods—this helps with nectar preservation and thermal control.
Understanding hummingbird visual cues is also vital for effective feeder placement. Properly cooled nectar stays fresher longer in freeze proof feeders. This small step is key for managing frozen hummingbird feeders and improving your hummingbird feeder insulation setup.
Hummingbird Survival in Cold Weather
Hummingbirds are tough little creatures, but cold weather pushes their survival skills to the limit.
They rely on nectar for energy, roost in sheltered spots for warmth, and can even lower their body temperature to conserve fuel overnight.
Torpor and Reduced Body Temperature
Hummingbirds have a unique winter survival trick called torpor, an energy-saving “mini hibernation.” Their body temperature and metabolism drop drastically to survive freezing temperatures.
Support them by offering consistent nectar, preventing frozen hummingbird feeders, and encouraging cold adaptation.
- What torpor does: Preserves energy during lower metabolic states.
- When it happens: Cold nights or harsh winter days.
- How to help: Maintain unfrozen nectar and use hummingbird winter tips.
Roosting in Trees and Shrubs for Warmth
Ever wonder how hummingbirds survive cold nights? These tiny creatures rely on tree shelter and shrubs to stay warm. Dense trees, like pine or spruce, provide natural insulation, creating ideal winter roosting spots. Picture a cozy blanket of branch insulation and leaf coverage—that’s what helps them stay safe from bitter winds.
When it comes to hummingbird nests, evergreens steal the show, offering year-round shelter. Thick shrubs also work, especially if they block gusty winds. If you’ve got a yard, aim for mid-level roosting—too high or low—where temperatures tend to be steadier.
Planting shrubs near cold weather feeders can be a lifesaver. Besides giving birds a resting spot, it also supports hummingbird feeder winterization, helping you prevent hummingbird feeders from freezing. A little planning makes certain your feathered friends thrive all winter long.
Relying on Nectar for Fuel and Energy
Hummingbirds rely on nectar intake to fuel their sky-high metabolic rate. Understanding hummingbird migration patterns can also help in providing the necessary care during winter.
Keep feeders filled with proper sugar water recipes to meet their energy needs. Prevent frozen nectar with these hummingbird feeding tips for their lifeline!
Consuming Insects for Protein and Vitamins
Hummingbirds need insects to meet their dietary protein needs and get essential vitamins. Bugs provide necessary energy for hummingbird health, nutrition, and survival.
Despite winter insect availability being scarce, insects are essential for nutrition during colder months.
Providing Water for Birds
Keeping clean, unfrozen water available for birds in winter is just as important as providing food.
You can use shallow dishes, bird baths, or even small puddles.
Remember to refresh the water regularly to prevent freezing and keep it safe for them to drink.
The Importance of Clean Water Sources
Keeping water clean is like giving your birds a VIP retreat. Scrub those feeders and refresh reservoirs regularly to maintain nectar quality.
Using filtered sources or water purification prevents illnesses.
Just like clean water access is essential for human health, it also supports the well-being of hummingbirds by providing them with a safe source of water.
Healthy fountains guarantee better hummingbird care in winter, supporting frozen feeder solutions.
Using Bird Baths, Shallow Dishes, and Puddles
Give your backyard birds a drink that’s safe and frost-free.
Use:
- Bird Bath Heating: Keep the water flowing.
- Shallow Water Sources: Easy for tiny feet.
- Puddle Maintenance: Avoid stagnant messes.
- Water Feature Safety: Place away from lurking predators.
Refreshing Water Sources Regularly
Refresh water sources daily to stop freezing. Swap out shallow dishes, birdbaths, and puddles with fresh warm water. It’s like gifting hydration during winter.
Hummingbirds thrive on nectar flow, water purification, and feeder thawing methods. To effectively support the local bird population, understanding bird species is vital for creating an inviting environment.
| Water Source | Benefit | Maintenance Tip |
|---|---|---|
| Shallow Dishes | Easy access for birds | Refill with warm water |
| Birdbaths | Supports multiple bird species | Use a birdbath heater |
| Puddles | Natural hydration option | Clear ice each morning |
| Window Feeders | Convenient spot | Warm up indoors overnight |
| Covered Feeders | Shields from wind and snow | Place near a windbreak |
Supporting a Healthy Bird Population
Every birdbath transforms your yard into a wildlife sanctuary.
Using a proper Hummingbird Feeder is essential for maintaining the health of these birds during winter.
Track local bird populations through citizen science apps, boost habitat health, and support hummingbird winter survival by creating safe, nourishing spaces that encourage population growth and bird nutrition.
Commercial Heated Feeder Options
When winter’s chill threatens your hummingbirds’ lifeline, commercial heated feeders can be your secret weapon against nectar freeze.
These ingenious devices like the Hummers Heated Delight and Hummer Heinie Warmer let you keep those tiny travelers well-fed and warm, even when temperatures plummet.
Hummers Heated Delight for Under Eaves
Snug under your eaves, the Hummers Heated Delight transforms winter feeding for tiny feathered friends. Your hummingbirds will thank you with chirpy winter visits, keeping their energy high when temperatures drop low.
Using unique hummingbird feeders can help attract more birds to your yard during colder months.
- Hook a sturdy mount to prevent messy spills
- Clean regularly for nectar freshness
- Shield from harsh weather elements
Hummer Heinie Warmer for Patio Use
Transform your patio into a winter haven for hummingbirds with the Hummer Heinie Warmer. This innovative device uses holiday lights to keep nectar warm, preventing freezing during chilly months, and creating a cozy oasis for your feathered friends when they need it most.
| Feature | Benefit | Caution |
|---|---|---|
| Decorative Lights | Attracts Birds | Monitor Temperature |
| Nectar Warming | Prevents Freezing | Avoid Overheating |
| Patio-Friendly | Easy Installation | Verify Proper Drainage |
| Compact Design | Versatile Placement | Check Electrical Safety |
The Heinie Warmer is more than just a feeder heater; it’s a lifeline for these delicate creatures, bridging the gap between survival and comfort during the harsh winter months. It attracts and supports hummingbirds by strategically placing the warmer.
Choosing The Right Heated Feeder for Your Needs
After checking out the Hummer Heinie Warmer, you’ll want to match your heated hummingbird feeder to your specific needs. Look for outdoor feeder heaters with safe cord connections and appropriate wattage.
Consider reservoir size, material selection, and placement considerations that’ll prevent your hummingbird feeder from freezing.
A well-chosen heated nectar solution keeps your feathered friends fueled during chilly winters.
Low-Tech Solutions for Frozen Feeders
When winter’s chill threatens your hummingbirds’ nectar supply, you’ll want smart strategies to keep their feeders from freezing solid.
With a few clever low-tech tricks, you can protect these tiny travelers and guarantee they’ve got a reliable food source even during the coldest months.
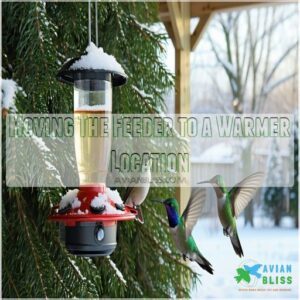
Moving The Feeder to a Warmer Location
If commercial heated feeders aren’t your style, consider strategic feeder placement as a low-tech solution.
Cold winters demand smart thinking for our tiny feathered friends.
Understanding the best hummingbird feeder timing is essential for their survival during harsh weather conditions.
- Shield feeders behind windbreaks like building walls or dense shrubs
- Nestle feeders in shaded areas protected from harsh winter winds
- Explore sunroom or patio locations that offer natural warmth
Keep nectar flowing by moving feeders where temperature stays just above freezing.
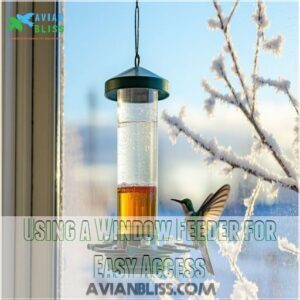
Using a Window Feeder for Easy Access
A window feeder transforms your kitchen view into a hummingbird hotspot while solving winter nectar challenges. Strategic placement guarantees your tiny friends stay warm and well-fed.
For more information on hummingbird feeder maintenance, regular cleaning and checks can help prevent issues.
| Placement Tip | Benefit |
|---|---|
| South-facing window | Maximum heat exposure |
| Clean glass surface | Secure suction cup attachment |
| Indoor temp 68°F+ | Prevents nectar freezing |
Secure the feeder with multiple suction cups, keeping it close to interior warmth, and providing a lifeline for hungry hummingbirds during chilly months. This low-tech solution offers easy cleaning, unobstructed bird watching, and a way to keep your tiny friends safe and healthy, making it a great winter solution.
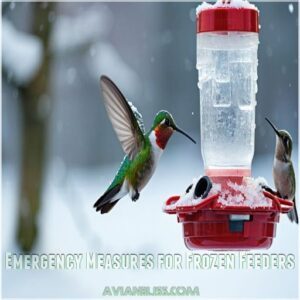
Emergency Measures for Frozen Feeders
When winter strikes and your hummingbird feeder turns into an ice block, you’ll need quick, smart solutions to keep these tiny travelers fed.
Don’t panic—with a few emergency tricks up your sleeve, you can rescue your feathered friends from freezing temperatures and guarantee they’ve got the nectar they need to survive.
Dealing With Frozen Nectar and Feeders
When your hummingbird feeder turns into an ice block, don’t panic.
Quick thawing tricks can save the day:
- Relocate to a sunny, warm spot
- Wrap gently with insulating towels
- Use lukewarm water for a gentle defrost
Rescue those frozen nectar lanes without creating a sugar-water disaster zone.
Your tiny winged friends will thank you for the winter care.
Providing Alternative Food Sources for Hummingbirds
Frozen feeders got you down? No worries! Keep your hummingbird pals fed with creative alternatives that’ll have them chirping with joy:
- Sugar Water: Shallow dishes work magic for these tiny travelers
- Pollen-Rich Flowers: Winter-blooming plants are secret nectar sanctuaries
Slice oranges, scatter mealworms, and craft DIY nectar ice cubes to turn your backyard into a hummingbird haven during chilly days.
Creating a Warm and Safe Space for Hummingbirds
In the depths of winter, give your tiny hummingbird friends a lifeline with a carefully crafted shelter near their feeder.
Tuck a small, insulated birdhouse alongside nectar warmers, creating a cozy refuge from freezing temperatures.
Using a feeder warmer can be an effective way to maintain a consistent nectar temperature.
This warm haven provides a critical sanctuary where they can rest, recharge, and survive the coldest days.
Frequently Asked Questions (FAQs)
How do I Keep my hummingbird feeder from freezing?
Wrap your hummingbird feeder with holiday lights, place it under a sheltered eave, and rotate or bring it inside periodically.
Use hand warmers or light sources to prevent nectar from turning into a winter ice block.
How do you keep hummingbird nectar from freezing?
Worried winter’s chill will harm your hummingbirds?
You can outsmart the cold with a few heat-trapping tricks: string outdoor lights around your feeders, bring them indoors each night, and use a 3:1 sugar-to-water ratio for nectar to prevent freezing.
Should hummingbird feeders be heated in cold weather?
Yes, you’ll want to heat hummingbird feeders in cold weather!
Use incandescent lights, hand warmers, or heated birdbath elements to keep nectar liquid.
These tricks prevent freezing and help tiny birds survive chilly temperatures.
How to prevent hummingbirds from freezing?
Keep your hummingbird feeders from freezing to protect your tiny feathered friends. You can use hand warmers, heated lights, or bring feeders inside.
Rotating multiple feeders and insulating them will also help hummingbirds survive chilly winter days.
How to protect hummingbird feeder from snow?
Sheltering small, snow-susceptible hummingbird feeders requires strategic placement.
You’ll want to hang them under deep eaves. Use protective domes and wrap them with dark-colored baffles to block snow and capture minimal winter sunlight.
Can hummingbird feeders be left out in winter?
Yes, you can leave hummingbird feeders out in winter! Some species stick around, and they’ll need nectar to survive.
Hummingbird feeders can support these tiny travelers during winter with a few precautions, such as using heat sources, rotating feeders, and keeping nectar from freezing.
How can you keep a hummingbird feeder from freezing?
Help your hummingbird feeder beat the freeze with these tips: wrap it with warm holiday lights and place hand warmers near the ports.
Rotate feeders every few hours.
Bring them indoors overnight to prevent nectar from freezing.
How to make a hummingbird feeder warmer?
Wrap your feeder in insulation like an old sock. Attach hand warmers nearby. Use outdoor string lights to keep nectar liquid.
Rotate feeders every few hours to prevent freezing and help your tiny friends stay warm.
What temperature is too cold for a hummingbird feeder?
When temperatures dip below 27°F, you’ll face a chilly challenge.
Your hummingbird nectar becomes an ice cube, leaving these tiny flyers hungry.
Quickly swap out or warm feeders to keep their lifeline liquid and flowing.
How to keep your hummingbird feeder from freezing in the winter?
With 25% of hummingbirds staying put during winter, you’ll want to prevent nectar from turning into a popsicle.
Use incandescent lights, hand warmers, or bring feeders inside overnight to keep these tiny dynamos fueled and flying.
Conclusion
Like a lifeline thrown to tiny feathered survivors, your efforts to keep hummingbird feeders from freezing can mean the difference between life and death.
By implementing these simple winter tips, you’ll help these remarkable birds survive harsh conditions.
Don’t let cold temperatures stop your nectar flow—rotate feeders, use gentle heat sources, and maintain the right sugar mixture. Your thoughtful care guarantees these delicate creatures have the energy they need to brave winter’s chill.
- https://www.hummerhearth.com/
- https://hummersheateddelight.com/
- https://www.birdsadvice.com/how-to-keep-hummingbird-feeder-from-freezing/
- https://www.housedigest.com/1463218/best-way-prevent-hummingbird-feeder-nectar-freezing-fall-winter/
- https://www.hummingbirdsplus.org/nature-blog-network/tips-for-keeping-hummingbird-feeders-from-freezing/

