This site is supported by our readers. We may earn a commission, at no cost to you, if you purchase through links.

A hummingbird burns through nectar so fast that a single bird can visit 1,000 flowers in one day—and your backyard feeder becomes that flower patch the moment you hang one up.
Most beginners assume getting started means wrestling with complicated equipment or mixing up mysterious formulas, but the real barrier is simpler: knowing which decisions actually matter and which ones don’t. The right feeder design, a clean sugar-water ratio, and smart placement can have hummingbirds hovering at your window within days. This guide walks you through every step, from picking your first nectar hummingbird feeder for beginners to keeping it full, fresh, and pest-free all season.
Table Of Contents
- Key Takeaways
- Choose Your First Nectar Feeder
- Compare Feeder Materials
- Top 7 Beginner Nectar Feeders
- 1. First Nature Red Hummingbird Feeder
- 2. Aspects HummZinger Red Hummingbird Feeder
- 3. More Birds Ruby Glass Hummingbird Feeder
- 4. Glass Hummingbird Feeders with Suction Base
- 5. Aspects HummZinger Excel Hummingbird Feeder Ant Moat
- 6. Aspects Jewel Box Window Feeder
- 7. Large Window Mount Hummingbird Feeder
- Make Safe Hummingbird Nectar
- Fill Feeders The Right Way
- Place Feeders for Success
- Prevent Ants and Bees
- Clean and Maintain Feeders
- Frequently Asked Questions (FAQs)
- Conclusion
Key Takeaways
- A saucer-style feeder in the 8–16 oz range is the smartest starting point — it’s easier to clean, resists leaks, and keeps nectar cycling fast enough to stay fresh.
- The only nectar recipe you need is one part white sugar to four parts clean water, boiled and cooled — no red dye, no special additives, nothing else.
- Where you hang your feeder shapes everything: partial shade slows spoilage, nearby shrubs give birds a safe escape route, and staying within 3 feet of windows prevents deadly collisions.
- Cleaning every 48 hours — and daily when temps top 90°F — is the single most important habit that keeps hummingbirds healthy and coming back.
Choose Your First Nectar Feeder

Picking your first hummingbird feeder doesn’t have to feel overwhelming — there are really just a few key features that make all the difference. The right choice comes down to your space, how often you want to maintain it, and how close you want to get to these tiny birds. Here’s what to look for before you buy.
If you’re planning to use a homemade nectar, knowing the correct sugar-to-water ratio for hummingbird feeders is just as important as the feeder itself.
Saucer Versus Bottle Feeders
When you’re picking your first feeder, the choice between saucer and bottle designs shapes almost everything — how often you clean it, how well it resists bees, and how fast nectar cycles through. Saucer feeders sit low and wide, with nectar held below the ports. Bottle feeders hang the reservoir above, using air pressure to control flow.
Saucer designs win on cleaning ease and leak control. Their wide-open tops let you scrub every corner without a bottle brush. Bottle feeders tend to drip in heat when gaskets loosen or trapped air expands — leaving sugary residue that attracts bees fast. For beginners managing a single feeder, a smaller saucer model around 8 to 12 ounces helps you empty and refresh nectar before it spoils. Additionally, glass feeders preserve nectar longer in hot weather.
Window Feeders for Viewing
A window hummingbird feeder takes everything a step further — instead of watching from across the yard, you’re inches from the action. These feeders attach directly to the glass using suction cups, which grip best on clean, smooth windows.
Mount one near seated eye level for the clearest view, and choose an east-facing window to keep nectar cooler through the afternoon.
Beginner-friendly Reservoir Sizes
Reservoir size shapes how often you’re refilling — and how much nectar goes to waste. 8 to 16 ounces is the sweet spot for beginners. An 8 oz feeder holds one cup of nectar, easy to cycle through before it spoils.
In summer heat, smaller reservoirs win: you discard less unused nectar each cleaning cycle.
Perches for Resting Birds
Feeder size sorted — now think about where the bird rests while drinking. A ring perch design wraps around the base of saucer feeders, letting birds sit and sip without hovering. That saves energy, and keeps the bird still long enough for you to notice throat color or tail markings.
Look for molded plastic perches — they won’t rust or loosen over time.
Easy-refill Feeder Openings
The opening style matters more than beginners expect.
Wide-mouth openings let you pour directly from a measuring cup — no funnel, no mess. Saucer dish feeders use a top-fill lid that stays upright while you pour, reducing drips. Inverted bottle feeders rely on a sealed gasket to prevent leaks, so check it regularly for wear.
Compare Feeder Materials

The material your feeder is made from matters more than most beginners expect. It affects how long the feeder lasts, how easy it is to clean, and whether it stays safe for the birds over time. Here’s what to keep in mind before you buy.
Glass Durability Benefits
Glass holds up better than you might expect. With a Mohs hardness of 5.5, it resists the fine scratches that cloud softer plastics over time — keeping your view of the nectar clear season after season. That clarity retention matters practically: you can spot spoiled nectar or debris without guessing.
Its nonporous interior also means sugar residue rinses away cleanly, with nothing absorbed into the walls.
Polycarbonate Crack Resistance
Polycarbonate bends before it breaks — that’s its real advantage. UV-stabilized grades resist sun-induced yellowing and cracking, making them ideal for outdoor feeders. They handle cold snaps down to -40°C without turning brittle.
Stick to warm water and mild soap when cleaning; harsh solvents cause crazing fast. For beginners, it’s a forgiving, durable plastic worth choosing.
Avoid Rust-prone Metal Bases
Metal bases might seem sturdy, but rust is a hidden hazard. Sugar water seeps into seams and threads, keeping metal damp long enough to corrode. Once the coating chips — especially around ports — bare steel deteriorates fast.
Choose feeders with plastic or stainless steel bases instead. A reddish-brown film inside the base means it’s already time to replace it.
Sun Exposure Considerations
Where you hang your feeder matters as much as what’s inside it.
Morning sun placement — east-facing spots — gives hummingbirds gentle early warmth without baking the nectar by afternoon. West-facing locations expose nectar to the strongest heat between 1 p.m. and 5 p.m., accelerating spoilage fast.
Partial shade is your safest bet for nectar temperature control.
Wide-mouth Cleaning Access
A wide-mouth opening is one of the simplest features you can look for in a beginner feeder — and one of the most overlooked.
Here’s why it matters for cleaning:
- Fits a standard sponge or bottle brush inside
- Exposes hidden corner residue directly to your scrubbing
- Lets rinse water flow in and out freely
- Enables easy disassembly of ports and base
- Shortens your full cleaning routine noticeably
Top 7 Beginner Nectar Feeders
Not every feeder is built the same, and choosing the right one early saves you a lot of trial and error. These seven options stand out for beginners because they’re easy to fill, clean, and actually attract birds. Here’s what’s worth your attention.
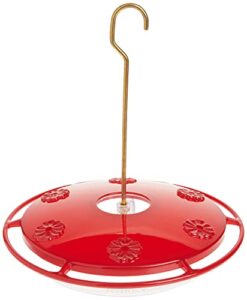
1. First Nature Red Hummingbird Feeder
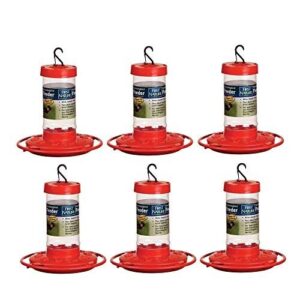
The First Nature Red Hummingbird Feeder is one of the most beginner-friendly options you’ll find. Its 32-ounce reservoir gives you a generous nectar supply without constant refilling, and the wide-mouth jar makes pouring and cleaning genuinely simple.
You get 10 feeding ports arranged around a circular perch, so multiple birds can feed at once without fighting for space. A built-in ant moat resolves one of the most common feeder headaches right out of the box.
| Best For | Anyone just getting into hummingbird feeding who wants something easy to fill, clean, and hang without a lot of fuss. |
|---|---|
| Capacity | 16 oz |
| Material | Glass & plastic |
| Feeding Ports | Multiple |
| Color | Red |
| Mounting Type | Hanging |
| Insect Protection | None |
| Additional Features |
|
- Wide-mouth jar makes refilling and cleaning a breeze—just warm water and soap
- Multiple feeding ports so several birds can eat at once without squabbling
- Bright red color does the job of drawing hummingbirds in naturally
- The included hanging hooks aren’t very sturdy and may snap under pressure
- No built-in ant moat, so ants and bees can find their way to the nectar
- At 16 ounces, the reservoir is on the smaller side and may need frequent refills during peak season
2. Aspects HummZinger Red Hummingbird Feeder
If the First Nature feeder felt a little large, the Aspects HummZinger takes a different approach. Its compact saucer design holds 12 ounces — just enough to stay fresh without wasting nectar.
The clear reservoir lets you check levels at a glance, and the built-in ant moat keeps crawling insects out without extra accessories. Four feeding ports and a 360-degree perch ring give multiple birds room to feed comfortably.
It’s dishwasher safe, too, which makes cleanup genuinely painless.
| Best For | Backyard birders who want a low-maintenance, easy-to-clean feeder that keeps insects out and gives a clear view of visiting hummingbirds. |
|---|---|
| Capacity | Saucer bowl |
| Material | Polycarbonate |
| Feeding Ports | 4 |
| Color | Red |
| Mounting Type | Hanging |
| Insect Protection | Built-in ant moat |
| Additional Features |
|
- Built-in ant moat blocks crawling insects without needing extra accessories
- Clear bowl makes it easy to check nectar levels at a glance
- Dishwasher safe, so cleanup takes almost no effort
- The integrated hook can cause the feeder to lean or sway when birds land
- Nectar gets harder for birds to reach as the levels drop low
- Not a good fit for cold climates — liquid can freeze in sub-zero temps
3. More Birds Ruby Glass Hummingbird Feeder
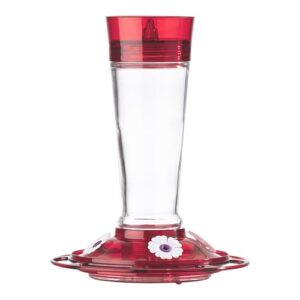
If you prefer the look and feel of glass over plastic, the More Birds Ruby is worth a closer look. The red glass bottle holds 10 ounces — a compact amount that encourages you to refresh nectar often, which is better for the birds.
Its four flower-shaped ports sit on a detachable base, and a built-in ant moat helps keep crawling insects away from the nectar. Just know it’s hand-wash only, so plan a few extra minutes for cleaning.
| Best For | Anyone who wants a stylish, easy-to-monitor feeder and doesn’t mind a quick hand-wash routine to keep things fresh. |
|---|---|
| Capacity | 10 oz |
| Material | Glass & plastic |
| Feeding Ports | 4 |
| Color | Red |
| Mounting Type | Hanging |
| Insect Protection | Built-in ant moat |
| Additional Features |
|
- Glass construction means no staining and you can always see how much nectar is left
- Built-in ant moat keeps crawling pests out of the nectar
- Four flower-shaped ports give multiple hummingbirds a spot to feed at once
- Hand-wash only makes cleaning a little more hands-on
- Plastic parts around the ports and tubes can collect mold over time
- No replacement parts available, so if something breaks, you’re replacing the whole feeder
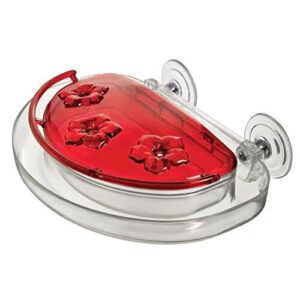
4. Glass Hummingbird Feeders with Suction Base
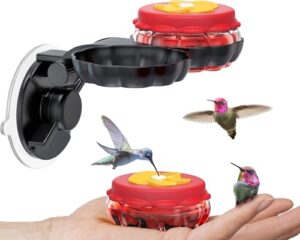
Glass feeders with a suction base take window watching to another level. You press the mount onto a clean, smooth pane, and suddenly hummingbirds are just inches away.
The 1-oz glass reservoir keeps portions small, so nectar stays fresh and waste stays low. The bright red and yellow design does the visual work of attracting birds.
One trade-off: no perches, so birds hover instead of resting — something to weigh if you want longer visits.
| Best For | Anyone who wants a close-up, window-side view of hummingbirds and doesn’t mind skipping the perch. |
|---|---|
| Capacity | 1 oz |
| Material | Glass & plastic |
| Feeding Ports | Not specified |
| Color | Red & yellow |
| Mounting Type | Window or handheld |
| Insect Protection | Window mount barrier |
| Additional Features |
|
- Glass construction keeps the nectar tasting clean and is easy to fill thanks to the wide mouth
- Suction mount sticks right to your window — hummingbirds come to you
- Small 1-oz capacity means you’re refreshing nectar often, so it never sits and spoils
- No perches means birds hover instead of landing, so visits tend to be shorter
- Glass heats up fast in direct sun, which can spoil nectar quicker than you’d expect
- Suction cups and silicone lids can wear out over time, especially in hot weather
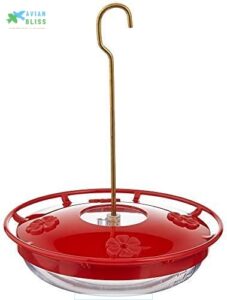
5. Aspects HummZinger Excel Hummingbird Feeder Ant Moat
The Aspects HummZinger Excel is a saucer-style feeder that quietly solves two of the biggest beginner frustrations: ants and bees. Its built-in ant moat sits above the feeder body, using a simple water barrier to stop crawling insects before they ever reach the nectar. No separate clip-on guard needed.
The four feeding ports come with Nectar Guard tips that block flying insects too. A wraparound perch lets hummingbirds rest while feeding — and it’s backed by a lifetime guarantee.
| Best For | Backyard bird watchers who want a low-maintenance feeder that keeps ants, bees, and wasps out of the nectar without a bunch of add-ons. |
|---|---|
| Capacity | 16 oz |
| Material | Polycarbonate |
| Feeding Ports | 6 |
| Color | Beige |
| Mounting Type | Hanging |
| Insect Protection | Built-in ant moat |
| Additional Features |
|
- Built-in ant moat and drip-proof ports do a solid job keeping insects away — no extra accessories needed
- Easy to take apart and clean, which really matters since fresh nectar is the whole point
- Durable polycarbonate won’t yellow or warp over time, so it holds up season after season
- The ant moat needs regular water top-offs to stay effective — let it dry out and the ants are back
- At 16 oz, it’s on the smaller side, so you’ll be refilling fairly often if traffic picks up
- Larger birds like woodpeckers can muscle in and drain the nectar fast
6. Aspects Jewel Box Window Feeder
The Jewel Box window feeder brings the action right to your glass. Its suction-cup mounted bracket holds the feeder directly on your window — no poles, no hooks, no yard required.
The 8-ounce polycarbonate reservoir lifts out cleanly for quick refills, and the hinged lid means you’re not wrestling with a bottle cap every time.
Three feeding ports and a built-in perch let multiple birds settle in comfortably. The red cover does its job attracting hummingbirds without pulling in bees.
| Best For | Anyone who wants a close-up hummingbird experience without a yard — perfect for apartment dwellers, renters, or anyone who just wants birds right at their window. |
|---|---|
| Capacity | 16 oz |
| Material | Plastic |
| Feeding Ports | 10 |
| Color | Red |
| Mounting Type | Hanging |
| Insect Protection | None |
| Additional Features |
|
- Suction-cup mount means zero setup — just stick it to a clean window and you’re done
- The lift-out reservoir makes refilling and cleaning genuinely painless
- Red cover draws hummingbirds in while keeping bees and wasps mostly out
- Eight ounces goes fast, so expect to refill it pretty often in peak season
- The suction cup needs a spotless window surface to hold — grease or film and it won’t stick
- It’s pricier than basic feeders, so the value depends on how much you’ll actually use it
7. Large Window Mount Hummingbird Feeder
If you want to go big, the Nature Anywhere Large Window Mount takes window feeding to another level. Its triple suction cup bracket holds firm on clean glass, and the wide-mouth jar makes refilling straightforward — no funnel needed. The interchangeable flower ports in three colors attract hummingbirds while deterring bees.
Plastic construction keeps the weight down so the suction seal stays secure. A lifetime warranty backs the whole setup, which is reassuring when you’re just starting out.
| Best For | Anyone who wants a front-row seat to hummingbird visits right through their window — especially families with kids or travelers who want to bring the feeder along. |
|---|---|
| Capacity | 16 oz |
| Material | Plastic |
| Feeding Ports | 8 |
| Color | Red |
| Mounting Type | Hanging |
| Insect Protection | None |
| Additional Features |
|
- Triple suction cups plus a leak-proof seal keep things tidy and secure on clean glass
- Interchangeable flower ports in three colors help pull in hummingbirds while keeping bees away
- Wide-mouth jar makes refilling and cleaning quick, no fumbling around required
- Plastic perches can get brittle and crack during hot summer months
- Suction cups need a spotless window surface to hold properly — any grime and they’ll slip
- Plastic jar instead of glass means it may not feel as durable or premium over time
Make Safe Hummingbird Nectar

Making your own nectar is easier than you might think — and getting it right matters more than most beginners realize. The recipe has just a few steps, but each one plays a real role in keeping hummingbirds healthy. Here’s exactly what you need to know.
One Part White Sugar
The foundation of any good nectar recipe is plain white granulated sugar — nothing fancy, nothing else. It’s almost pure sucrose, just like what flowers naturally offer hummingbirds. That close match matters.
When measuring, follow a simple sugar water ratio: one part sugar to four parts water. Start small to keep nectar fresh and waste low.
Four Parts Clean Water
Water is the backbone of your nectar solution — and quality matters more than most beginners realize. Clean municipal tap water works well in most homes. If your tap water has a strong odor or visible sediment, use filtered or bottled drinking water instead.
Avoid softened water, which can contain added sodium that’s harmful to hummingbirds.
Boil Water Before Mixing
Boiling your water before mixing does two things at once: it kills off any bacteria lurking in the tap and dissolves sugar faster. Hot water makes sucrose more soluble, so the mixture clears up quickly with minimal stirring.
Let it cool to room temperature before filling your feeder — hot nectar can warp plastic parts and cause leaks.
Skip Red Food Coloring
Once your nectar cools, resist the urge to add red food coloring. Natural flower nectar is clear, and hummingbirds don’t need dyed sugar water to find your feeder.
Both the National Audubon Society and Cornell Lab of Ornithology agree: red dye has no purpose and may harm birds. Let your feeder’s red ports do the attracting instead.
Refrigerate Extra Nectar Safely
Making a big batch is tempting, but fresh nectar in small amounts is always safer. Let it cool before sealing — trapped heat causes condensation. Refrigerate within two hours, using a clean wide-mouth glass jar with a tight lid.
Your sugar water stays good for up to seven days. Discard anything cloudy, fizzy, or sour-smelling immediately.
Fill Feeders The Right Way
Mixing nectar correctly is only half the job — how you fill your feeder matters just as much. A few simple habits keep the nectar fresh and your hummingbirds coming back. Here’s what to focus on each time you refill.
Start With Small Amounts

Think of your first fill as a test run. Pour just 2 to 4 ounces of sugar water into the feeder and watch what happens over the next day or two.
This small initial fill volume tells you whether one bird is sipping slowly or several are draining it fast — before you’ve mixed a full batch you’ll end up discarding.
Avoid Overfilling Reservoirs

Once you know roughly how much your birds drink, it’s tempting to fill the reservoir right to the top — but that’s where things get messy. Overfilling the reservoir forces nectar against the seals and ports before a stable air pocket can form, often causing drips and sugar residue around the feeding holes that attract ants fast.
Check Nectar Freshness Daily

A quick daily glance at your feeder tells you more than you’d expect. Fresh nectar is clear — the moment it turns cloudy or develops floating bits, it’s past its prime. A sour or yeasty smell is your other big clue: that’s fermentation already underway, and it moves fast in warm weather.
Check the nectar reservoir and ports for dark specks near seams or feeding holes, since mold starts there first before spreading.
Refill Before Completely Empty

Waiting until the last drop is gone might seem efficient, but it actually works against you. Refill before completely empty — ideally when about a quarter of the nectar remains. At that point, the vacuum seal in bottle feeders stays more stable, nectar hasn’t had time to concentrate from evaporation, and dried sugar residue hasn’t hardened around the ports yet.
Hummingbirds rely on spatial memory and revisit the same spots throughout the day. An empty feeder breaks that reliable route — birds move on and may not return quickly. Keeping your nectar level consistent is one of the simplest things you can do to hold their loyalty and keep your feeder working at its best.
Hummingbirds rely on memory — an empty feeder breaks their route and loses their loyalty fast
Adjust for Bird Traffic

Bird traffic shifts constantly, so monitor daily visits for 15–30 minutes each morning to gauge real demand. A feeder drawing 6 or more birds needs faster turnover than one with just 2 or 3 regulars.
When you spot crowding, add feeding stations or match feeder size to actual traffic — small yards often do better with several small feeders than one large reservoir.
Place Feeders for Success

Where you hang your feeder matters more than most beginners expect. A few smart placement choices can mean the difference between a feeder that gets ignored and one that hummingbirds visit all day long. Here’s what to keep in mind before you pick your spot.
Choose Partial Shade
Partial shade is your feeder’s best friend. East or southeast placement gives hummingbirds morning light to spot the ports clearly, then drifts into cooler afternoon shade — slowing fermentation and reducing how often you’ll need to clean.
On days above 80°F, a shaded feeder stays fresh noticeably longer. Check your chosen spot at noon to confirm it’s truly sheltered.
Keep Near Shrubs
Shrubs are a hummingbird’s safety net. Place your feeder near dense shrubs — close enough that a bird can dart to cover the moment a hawk passes through. That quick escape matters more than most beginners realize.
Shrubs also double as territorial viewing spots and wind shelter, letting hummingbirds perch, guard, and hover with less effort. Just keep branches from pressing directly against the feeder.
Use Bright Red Accents
Red is the hummingbird’s first language. Your feeder’s red port visibility does the signaling work — no dye needed in the nectar. Hang a small red ribbon near the hook for extra contrast against green foliage.
Keep those ports clean and glossy; sun-bleached pink plastic loses its pull fast. Clear nectar also makes it easier to spot cloudiness or mold.
Space Multiple Feeders Apart
A single feeder works fine at first, but add a second and the territorial battles begin fast. Aim for 15-foot separation minimum between stations. Better yet, use visual barriers — a fence, hedge, or house corner — so no one bird can police both spots at once.
During migration, seasonal adjustments may mean adding a third feeder entirely.
Avoid Unsafe Window Collisions
Spacing feeders wisely protects territory disputes — but your windows deserve equal attention. The American Bird Conservancy recommends placing feeders either within 3 feet of glass or beyond 30 feet away. That middle zone gives hummingbirds dangerous runway to accelerate before impact.
A window hummingbird feeder using suction cups naturally solves this — birds stay too close to build harmful speed.
Prevent Ants and Bees

Ants and bees can show up fast once word gets out about your feeder — and they’ll drive hummingbirds away before you get to enjoy watching them. The good news is that a few simple design choices and small additions can keep pests out without much extra effort. Here’s what actually works.
Use Built-in Ant Moats
A built-in ant moat is one of the smartest features a beginner can look for in a hummingbird feeder.
On models like the Aspects HummZinger Excel, the moat sits directly above the nectar reservoir — ants must cross it before reaching any feeding port. Keep it filled with plain water, and ants simply can’t get through.
Add Water Barriers
If your feeder doesn’t have a built-in moat, a separate add-on water barrier does the same job. Hang it on the support line above the feeder so ants hit the water gap before reaching the nectar. Keep it level and topped off — a tilted or dry cup offers no protection at all.
Choose Saucer-style Ports
Saucer-style ports work as a quiet line of defense against insects. Because nectar sits below the port openings, bees can’t easily reach the sugar solution with their short tongues.
The Juegoal 12 oz Saucer Feeder uses exactly this recessed port design — keeping nectar accessible to hummingbirds but just out of reach for most crawling or hovering insects.
Try Bee Guard Designs
Bee guards take the saucer idea one step further. These small inserts recess the nectar port deeper into the flower opening, so bees can’t bridge the gap with their short mouthparts — but a hummingbird’s long bill reaches easily.
Check that any guard snaps fully into place; a loose fit lets nectar seep and bees slip through.
Keep Nectar Ports Clean
Sticky nectar ports are one of the quickest ways to attract insects rather than birds. Sugar residue removal starts with hot water and a small port brush — scrubbing each opening individually, not just rinsing. Make daily port inspection a habit:
- Check each hole for cloudy film or dark specks
- Use a vinegar-water solution for mold prevention
- Rinse until no smell remains before refilling
Clean and Maintain Feeders

A clean feeder isn’t just about appearances — it’s one of the most important things you can do for the birds visiting your yard. Nectar spoils faster than most beginners expect, and a neglected feeder can do more harm than good. Here’s what you need to know to keep things fresh and safe.
Clean Every Two Days
Two days might feel fast, but sugar water starts breaking down long before it looks dirty. A 48-hour cleaning cycle removes fresh residue before mold can take hold in hidden seams, port channels, and rubber gaskets.
Use a mild vinegar and water rinse with a small brush to reach narrow ports. Rinse everything thoroughly — then refill with confidence.
Change Nectar in Heat
Hot weather changes the rules. When temperatures climb past 90°F, replace nectar daily — even if the feeder still looks half full. Sugar water ferments fast in heat, and a daily replacement schedule protects hummingbirds from sour, bacteria-laden nectar. Watch for cloudiness, foam, or a yeasty smell as spoilage warning signs.
Fill reservoirs small during heat waves to cut waste.
Scrub Ports and Corners
Every feeding port is a prime spot for sugar buildup — and that residue blocks nectar flow fast.
- Remove snap-in flower ports for direct scrubbing access
- Use a narrow nylon brush for port tunnels
- Bend pipe-cleaner brushes into curved underside recesses
- Scrub corners and thread junctions where liquid pools
- Check ports feel smooth, not sticky, after washing
Use Vinegar Solution
Once the ports and corners are scrubbed clean, a vinegar solution soak does the quiet work of dissolving what brushes miss.
Mix one part white vinegar to nine parts warm water — that’s your go-to ratio. Soak removable parts for 10 to 15 minutes.
Vinegar’s acidity breaks down both dried nectar film and hard water mineral crust without leaving soap residue behind.
Rinse Thoroughly Before Refilling
Vinegar loosens the residue — but rinsing is what actually makes the feeder safe again.
Run fresh water through every port and seam until the flow runs completely clear. No foam, no slippery film, no soap smell. Trapped rinse water dilutes your nectar, so shake out hidden droplets before reassembling.
- Check that ports smell clean
- Drain the base fully
- Confirm no cloudy film remains
Frequently Asked Questions (FAQs)
Why don’t we see baby hummingbirds?
Baby hummingbirds are rarely seen because their hidden nest camouflage blends perfectly with bark and foliage. With a short breeding window of just weeks, most nestlings fledge and disperse before anyone notices them.
When do hummingbirds typically arrive in spring?
In the South, hummingbirds arrive as early as March. Northern regions see them by late April to May. Warmer springs accelerate that northward push — so have your feeder ready before the first bloom appears.
How long do hummingbirds stay at feeders daily?
Most visits last 5 to 20 seconds — just a quick sip before they dart off. Territorial birds may linger 1 to 5 minutes, guarding the feeder from rivals.
Can multiple hummingbird species share one feeder?
Yes — multiple species can share one feeder. Anna’s, Ruby-throated, and Costa’s hummingbirds will feed side by side when nectar is plentiful and ports are evenly spaced, reducing territorial tension naturally.
Do hummingbirds return to the same feeder yearly?
Many hummingbirds return to the same feeder year after year. Their spatial memory is impressive — some even reappear on the same calendar days. Consistent, fresh nectar is your strongest signal to bring them back.
Should feeders be taken down in winter months?
Not necessarily. In many regions, keeping feeders up through winter helps hummingbirds during cold snaps when natural food is scarce. Just clean them regularly to prevent mold buildup.
Conclusion
Think of your feeder as a standing invitation—one hummingbird will gladly accept once you get the basics right. Nectar hummingbird feeders for beginners don’t require precision, just steady consistency: clean nectar, a shaded spot, and a feeder you can maintain without dread.
Every refill you make, every port you scrub, quietly tells a bird this place is safe and worth returning to. Keep showing up for them, and they’ll keep showing up for you.
- https://www.gardenexperiments.com/best-hummingbird-feeder-review-of-four-types
- https://www.birdwatching-bliss.com/best-hummingbird-feeders.html
- https://www.thepioneerwoman.com/home-lifestyle/gardening/g70974440/best-hummingbird-feeder
- https://www.thespruce.com/best-hummingbird-feeders-4159147
- https://jcswildlife.com/first-nature-10-port-hummingbird-feeder-3051-16-oz-1-2-4-or-6-pack/?ref=hVhUWmk6vKk1IL