
This site is supported by our readers. We may earn a commission, at no cost to you, if you purchase through links.

Imagine this: you built a coop, added roosts, filled feeders, and your hens still lay eggs on the floor, tucked in corners, or worse, outside in the mud. Frustrating, right? That mess usually points to one missing piece: proper nesting boxes.
Getting the setup right isn’t complicated, but small details make a big difference. Box size, placement, bedding, and even lighting affect whether your girls actually use them.
This guide walks you through nesting boxes for beginners, from choosing dimensions to training your flock, so you’ll collect clean eggs without the daily hunt.
Table Of Contents
- Key Takeaways
- Why Nesting Boxes Matter
- Choose The Right Box Size
- Calculate Boxes Per Hen
- Pick The Best Nesting Material
- Compare Wood, Metal, and Plastic
- Place Boxes Inside The Coop
- Add Egg-Safe Design Features
- Build a Simple DIY Box
- Train Hens to Use Boxes
- Buy Beginner-Friendly Nesting Boxes
- Frequently Asked Questions (FAQs)
- What are some common nesting box mistakes?
- How to build a simple nesting box?
- How many nesting boxes do I need for 12 hens?
- What is the best stuff to put in a nesting box?
- How often should I collect eggs daily?
- Can nesting boxes be added mid-season?
- Do hens share favorite boxes despite availability?
- How long until hens start using boxes?
- Should nesting boxes be removed in winter?
- Conclusion
Key Takeaways
- nesting boxes to your hens’ breed—10x10x10 inches for bantams, 12x12x12 for medium breeds, and 14x14x14 for large breeds—since a box that’s too big causes crowding and messy eggs.
- Provide one nesting box for every three hens, with a minimum of two boxes even for small flocks, to cut down on competition and floor laying.
- Place boxes in quiet, dark corners at 60 to 70 cm high, lower than the roosts, and away from drafts to match hens’ natural nesting instincts.
- Encourage hens to use boxes by adding fake eggs, soft bedding, and a calm environment, while avoiding treated lumber and other harmful materials that can contaminate eggs.
Why Nesting Boxes Matter
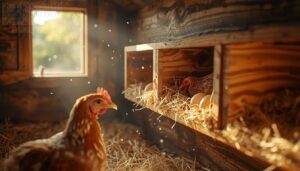
Nesting boxes do a lot more than give your hens a place to sit. Set them up right, and you’ll notice the difference in your coop, your eggs, and your daily routine. Here’s why these simple boxes deserve a spot on your beginner setup checklist.
A well-designed bird house with nesting box makes ventilation, easy access, and cleanup simple, keeping hens comfortable while they lay.
Cleaner, Safer Eggs
When hens lay in a proper box instead of scratching around the coop floor, eggs stay far cleaner and safer to eat. Nesting boxes sized right for your breed reduce cracked shells and protect the cuticle, which naturally guards against Salmonella.
- Fewer droppings near eggs
- Less shell damage
- Lower bacteria exposure
Clean eggs mean easier washing, safer storage, and worry-free cooking later. Ensuring a thorough clean before any sanitizing step, as described in the industry’s effective sanitation steps, further reduces contamination risk.
Reduced Floor Laying
Once eggs stay clean, the next win is keeping hens off the floor entirely. Ideal box height—45 to 60 cm—paired with a wide entrance, makes boxes easier to reach than corners.
Strategic box orientation away from foot traffic, soft bedding texture, and gentle ambient lighting all guide hens toward nesting boxes, cutting floor-laying and egg-eating in your backyard chicken setup.
Better Flock Comfort
A comfy hen is a productive hen. Getting nesting box size right, alongside smart perch design nearby, keeps your flock relaxed and laying steady.
Comfort comes from a few overlapping factors:
- Optimizing airflow to prevent stuffy, ammonia-heavy air
- Temperature control between 18-24°C
- Quiet noise reduction features near boxes
- Steady lighting cycles around 12 hours daily
Easier Egg Collection
A relaxed hen makes for quick pickups, too. Rollaway nesting boxes let eggs roll onto a protected tray, keeping them clean and crack-free.
Add external access doors, and you’ll skip walking through the coop entirely. Pair that with good lighting for visibility and a nesting mat, and your daily egg collection efficiency jumps—less searching, more grabbing, happier mornings.
Choose The Right Box Size
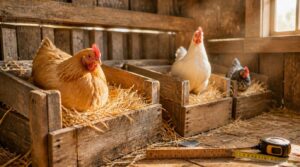
Size matters more than most beginners expect regarding nesting boxes. Your hens’ breed determines exactly how much space they need to settle in and lay comfortably. Let’s break down the right dimensions for your flock, breed by breed.
Bantam Hen Dimensions
Small bodies need small boxes. Bantams weigh just 1 to 2 pounds with mature heights around 6 to 9 inches, so a 10x10x10 inch nesting box fits perfectly.
Their compact frame and 13 to 16 inch wingspan mean less turning room is needed. Bantam eggs stay small too, around 1 to 1.5 ounces, making tight, cozy boxes ideal for nesting box success.
Medium Breed Dimensions
Once your flock grows into Leghorns or standard hybrids, the 12x12x12 inch nesting box becomes the sweet spot for ideal cavity depth and turning radius.
- Standing posture space without crouching
- Ideal entry width for smooth access
- Enough floor space for daily comfort
- Proper nest box placement encourages laying
- Fewer broken eggs, happier hens
This standard backyard chicken nesting box size fits most DIY nesting box plans beginners follow.
Large Breed Dimensions
Big-bodied hens like Orpingtons and Brahmas need real elbow room, so bump your nesting box size up to 14x14x14 inches.
| Breed Type | Box Size | Key Benefit |
|---|---|---|
| Orpington | 14x14x14 in | Full turning space |
| Brahma | 14x14x14 in | Heavy breed comfort |
| Standard Hybrid | 12x12x12 in | Reference comparison |
This dimension prevents overcrowding while supporting proper backyard chicken nesting box placement guidelines.
Avoid Oversized Boxes
Bigger isn’t always better for nesting box dimensions. A box that’s too roomy invites crowding, wasted space, and messy eggs.
- Space utilization drops fast
- Crowding risks rise
- Egg safety suffers
- Cleaning efficiency slows
- Temperature stability wobbles
Stick close to your size guide—12 inches works great for medium breeds. Right size keeps hens comfortable and eggs protected.
Broody Hen Comfort
A hen gone broody wants one thing: peace and quiet. Give her a quiet darkened area with soft bedding, nearby water for hydration, and protein-rich feed within reach.
| Need | Why It Matters |
|---|---|
| Seclusion | Reduces stress, discourages disruption |
| Stable microclimate | Prevents chilling or overheating |
| Predator shielding | Keeps eggs and hen safe |
| Easy access | Lets you check without disturbing her |
Calculate Boxes Per Hen

Once you’ve settled on box size, the next question is how many boxes your flock actually needs. Too few boxes leads to crowding and squabbles, while too many just wastes coop space. Here’s a simple breakdown to help you figure out the right number for your hens.
A good rule of thumb is one nesting box for every three to four hens, mirroring the instinctive spacing hens seek out in natural bird nesting habits and rituals.
Beginner Ratio Guide
Getting the numbers right saves you headaches later. As a quantity guide, aim for one nest for every four to five hens—this ratio curbs egg competition and keeps floor laying in check.
Flock size scaling matters too: start with a minimum of two nesting boxes for beginner setups, then adjust box counts as your flock grows and you observe nesting behavior firsthand.
Small Flock Minimums
Even with just two or three hens, don’t skip nesting boxes altogether. A minimum of two nesting boxes keeps things fair, preventing nesting fights and cutting down on egg theft between bossy hens.
Tiny flocks still need density planning. Two boxes give hens options, so nobody’s stuck waiting outside a locked door while dinner’s ready to arrive.
Boxes for 12 Hens
Twelve hens call for six nesting boxes, following the twelve-hen ratio backyard chicken keepers rely on for smooth mornings.
That’s roughly one box per two birds, giving your flock efficient nest arrangement without long waits.
Here’s why that quantity guide matters:
- Fewer squabbles over prime spots
- Faster morning egg collection
- Happier, less stressed hens
- Cleaner eggs, less trampling
- Balanced use across all boxes
Prevent Nest Competition
Hen hierarchy shapes how boxes get used, so spacing them out matters more than the total count. Cluster arrangement methods—grouping boxes in twos or threes across different coop corners—stop your bossiest hens from guarding every option at once.
Rotate favorite spots seasonally, and keep one backup box ready. This redundancy prevents overcrowding when a dominant hen claims her "throne" and won’t budge.
Pick The Best Nesting Material
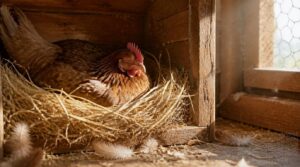
Once your boxes are sized and counted, the next question is what goes inside them. Your hens spend hours nestled in that bedding, so comfort and cleanliness matter just as much as the box itself. Here’s what you need to know about choosing the right material.
Straw Versus Shavings
Straw or pine shavings? Both work, but they behave differently.
Pine shavings absorb moisture fast, keeping boxes drier, while straw mats down when wet and needs more frequent changes. Straw wins on warmth, insulating better for chilly nights.
Shavings offer easier cleanup and lighter handling, though dust-extracted types matter for respiratory health. Cost-wise, straw’s usually cheaper if you’ve got local access.
Nest Pads Explained
Once you’ve picked bedding, consider layering in a nest pad for extra protection. These cushioned inserts sit under your straw or shavings, offering egg breakage prevention and better moisture management.
- Soft landings that spare fragile eggs
- Easy hose-downs between cleanings
- Custom trims for snug box fits
- Better airflow keeps nests drier
- Recycled materials that ease your conscience
Plastic, turf, or foam—each type balances durability with comfort for your flock.
Herbs and Comfort
A pinch of dried chamomile or lavender tucked near the nest adds aromatic nesting scents that calm anxious hens. Peppermint and rosemary work as natural pest deterrents, while fennel helps with digestion.
Keep amounts light and always check for mold—herb safety matters as much as comfort, and good ventilation keeps scents from overwhelming your flock’s nose.
Materials to Avoid
What goes into your nesting box matters as much as what goes on it.
Skip CCA-treated or creosote lumber—both leach arsenic and heavy hydrocarbons into bedding. Avoid old painted wood too; flaking lead paint and asbestos are real hazards in reclaimed materials. Solvent-based sealants and oil stains cause VOC off-gassing in enclosed coops.
Common mistake: reusing "free" scrap wood without checking its history first.
Bedding Replacement Schedule
Fresh bedding isn’t a one-and-done job—it’s an ongoing cleaning routine tied to your nose and your climate.
- Straw: every 1–2 weeks
- Wood shavings: every 1–3 weeks
- Sand: sifted weekly
- Hemp/aspen: weekly top-ups
- Damp bedding: replace immediately
Watch for ammonia odor detection and rotate materials seasonally for smart moisture control strategies.
Compare Wood, Metal, and Plastic
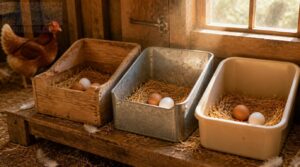
Once you’ve settled on bedding, it’s time to think about the box itself. Wood, metal, and plastic each bring their own strengths to the coop, from durability to easy cleanup. Let’s break down what makes each material worth considering.
Wooden Box Benefits
Wood remains a favorite for wooden nesting boxes, and for good reason. Its natural insulation and thermal mass stability keep temperatures steady for eggs. Wood breathes too, supporting moisture management and reducing condensation.
Choose sustainably sourced lumber for eco-friendly DIY poultry projects, and repairs stay simple with basic tools, giving these boxes solid material durability for outdoor coop life.
Metal Box Durability
Metal nesting boxes shrug off the wear that breaks down other materials, especially in damp coops.
Look for these traits:
- Galvanized or stainless steel for rust resistance
- Intact powder coating to block corrosion
- Welded seams for lasting strength
Reapply coatings after scratches, wipe surfaces clean easily, and you’ve got durable coop accessories built for years of outdoor use.
Plastic Box Cleaning
Plastic nesting boxes clean up fast: rinse with warm water, scrub gently with dish soap, and dry upright to stop mold.
For stains, try a 1:1 vinegar solution; stubborn spots respond well to baking soda paste. Odor neutralization comes from a quick salt-water soak, followed by thorough rinsing—soap residue left behind attracts dirt fast, so don’t skip that step.
Eco-friendly Material Choices
Going green with your coop doesn’t mean sacrificing durability. Bamboo and hemp fibers offer renewable strength for nesting components, while reclaimed wood boards cut embodied energy compared to new lumber.
Look for FSC-certified or rapidly renewable softwoods like pine, and finish everything with plant-based oils instead of solvents. Upcycled crates, local clay, and non-toxic sealants round out a truly sustainable farming approach your flock will thank you for.
Avoid Treated Lumber
That leftover deck lumber in the garage? Skip it for nesting boxes. Pressure-treated wood contains copper compounds that risk chemical leaching into eggs, plus dust that irritates hens’ lungs.
Stick with untreated pine, cedar, or reclaimed boards, sealed with non-toxic oil finishes. Watch for rot, replace worn sections, and your wooden nesting boxes stay safe for years.
Place Boxes Inside The Coop
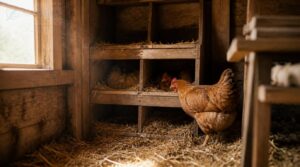
Where you put those boxes matters just as much as how you build them. Hens are picky about where they’ll lay, and the wrong spot can send them right back to the floor. Here’s what to keep in mind when choosing the perfect placement.
Quiet, Dark Corners
Ever notice how hens vanish into shadowy corners before laying? That’s instinct at work.
Hens vanish into shadowy corners before laying because instinct, not habit, guides them there
Corner placement strategy matters—tuck chicken nesting boxes where two walls meet, away from feeders and busy aisles.
This quiet dark corner setup mimics dusk, satisfying natural hen nesting behavior while minimizing flock disturbance. Dim, stable lighting enhances hen privacy and reduces nesting stress, encouraging steady use without spooking your girls mid-lay.
Correct Mounting Height
Mount boxes at 60 to 70 cm above the floor, the sweet spot most hens can hop into without strain.
This height provides predator protection benefits, discourages drafts, and improves nesting box ventilation for airflow around the opening.
It also makes cleaning accessibility easier on your back, letting you reach in without bending or straining your knees.
Lower Than Roosts
Here’s a rule of thumb: keep nest boxes below the roosting bars, sitting 12 to 18 inches off the floor for dampness prevention and shadowing reduction.
Align the entry hole with belly height so hens step in easily, avoiding roosting interference. A short ladder adds ladder accessibility for shorter-legged breeds, making egg laying comfortable and keeping your backyard chicken coop’s nest box placement guidelines beginner-friendly.
Draft-free Placement
Since cold air sneaks in fast, face boxes away from doorways and vents, using internal partitions to block airflow.
Check wind direction outside, then orient entrances against it for a true draft-free nesting area.
Come winter, add seasonal insulation behind boxes and manage humidity to stop condensation—simple habits that keep your backyard chicken coop’s nesting zone airflow calm and eggs unharmed.
Easy Keeper Access
Convenience matters as much as comfort when picking low-maintenance poultry equipment for your coop.
- External retrieval slots for grabbing eggs without stepping inside
- Magnetic latch security keeping doors shut until hens leave
- Corrosion resistant hinges paired with automatic lighting for quick, easy checks
A removable tray makes cleaning fast, so egg collection stays simple, sanitary, and stress-free for you and your flock.
Add Egg-Safe Design Features

Once your boxes are in place, it’s time to fine-tune them for safety. A few smart design choices can mean the difference between clean, whole eggs and cracked, messy ones. Here’s what to add to protect every egg your hens lay.
Sloped Roof Benefits
A 45-degree sloped roof stops hens from roosting on top and messing up your clean design.
That slope also boosts water drainage efficiency, sending rain runoff away instead of pooling. This means better moisture rot prevention and less wind pressure on the box during storms. It even cuts debris accumulation, keeping your nest box maintenance simple year-round.
Front Lip Height
Think of the front lip as a tiny dam for your nesting boxes—it keeps bedding in and eggs from tumbling out.
- Build it 4 to 6 inches tall
- Choose flexible material to absorb bumps without cracking
- Secure mounting hardware tightly for lasting stability
A taller lip adds a bold visual stance, but always leaves room for easy nest box maintenance and eggeating prevention.
Landing Rail Placement
Once that lip’s secured, give your hens a smooth runway to reach it. Rail alignment with the box entrance keeps footing predictable on any wooden nesting box.
Mount rails level, with mounting stability anchored to the frame using corrosion-resistant fasteners. Keep height optimization in mind—match the rail’s top edge to the box opening for real hen safety and lasting rail durability.
Ventilation Hole Placement
Good landing rails only help if hens can breathe easy once inside. Ventilation holes near the upper back corners pull warm air out fast.
- Drill 4-6 holes, ½ inch each
- Place vents up high, away from drafts
- Keep spacing symmetrical for even airflow
- Skip metal shrouds; they turn cold
- Adjust seasonally for moisture control
This simple ventilation design keeps your coop fresh year-round.
Drainage Hole Spacing
Airflow up top means nothing if moisture pools below. Add 5-8 countersunk drainage holes in the box floor, spaced evenly to prevent water pooling near corners.
| Bedding Type | Hole Diameter | Spacing |
|---|---|---|
| Straw | 3/8 in | Even, edge-centered |
| Shavings | 1/4 in | Tighter in humid coops |
| Herbs mix | 1/2 in | Wider in dry climates |
Regular maintenance and cleaning keeps holes clear for moisture control.
Build a Simple DIY Box
Ready to build your own nesting box? You don’t need fancy tools or carpentry experience to get this done right. Here’s what you’ll need, from basic supplies to a few clever shortcuts using materials you might already have.
Beginner Tool List
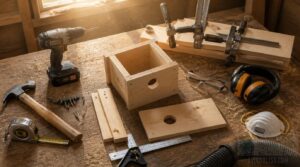
Grab these tools before you start: hammer, tape measure, and a cordless drill driver for basic assembly.
Add safety glasses, ear protection, and a dust mask—cheap insurance for DIY carpentry for poultry projects.
A combination square keeps corners true; clamps hold boards steady while you work.
Finish with a shop vacuum for cleanup, keeping your workspace tidy for your wooden nesting boxes build.
Lumber and Hardware
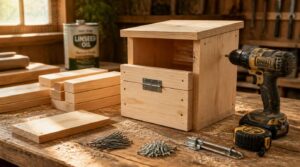
Softwood boards like pine work great for beginners—light, affordable, and easy on your drill. Stick with dimensional lumber (2x4s) for framing strength.
Your hardware matters just as much:
- Rust-resistant fasteners (galvanized nails, stainless steel latch)
- Exterior-grade deck screws with pilot holes
- Galvanized hinges for the access door
Finish with non-toxic sealants for outdoor durability—never pressure-treated lumber near nesting cavities.
Step-by-step Assembly
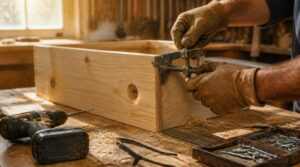
Five main steps turn loose lumber into a sturdy nesting box. Start by checking every fastener and pilot hole before driving screws—this prevents split wood and keeps corners square.
| Step | Focus |
|---|---|
| 1 | Align panels |
| 2 | Hand-tighten first |
| 3 | Cross-pattern screws |
| 4 | Check diagonals |
| 5 | Deburr edges |
Wear eye protection; a tidy workspace keeps your build safe and steady.
Upcycled Crate Ideas

Old wooden crates make surprisingly good nesting boxes once you give them a little love. Reclaimed pine works great for modular crate stacking, letting you add capacity as your flock grows.
Line each crate with washable crate liners for easy cleanup, add a hinged lid for quick access, and cut vented slats for airflow—turning household castoffs into charming, functional coop upgrades.
Cube Shelving Option
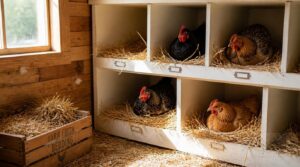
Who says nesting boxes need to look like nesting boxes? Cube storage shelves make a clever, reconfigurable base for individual nests—each 12×12 compartment fits bantam breeds nicely.
- Snap-together modular unit assembly
- Customize cube layouts per flock size
- Add storage bin inclusion for bedding
- Test material durability before installing
- Reposition anytime—true reconfigurable shelving benefits
Perfect beginner buying basics: budget-friendly, adaptable, and ready for quick placement and practical setup.
Train Hens to Use Boxes
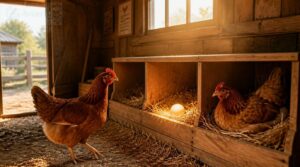
Building the box is only half the job, since some hens need a little convincing to use it. Good news: a few simple tricks can steer them in the right direction fast. Here’s how to make those boxes the obvious choice for every hen in your flock.
Place Fake Eggs
Ever wonder why hens seem to check a nest before laying? A fake egg plays on that instinct, showing your flock this spot is safe and productive.
| Fake Egg Type | Best For |
|---|---|
| Hard plastic | Everyday durability |
| Ceramic | Realistic weight |
| Golf balls | Budget option |
| Wooden beads | Lightweight safety |
Place one at the back third of each box—this simple trick curbs egg-eating and nest competition among your hens.
Make Nests Inviting
Comfort sells the nest. Layer in soft bedding textures like straw or pine shavings, then tuck a divider inside for privacy.
A dab of lavender adds calming herb scents, while a curtain flap cuts glare and shields hens from prying eyes—turning any plain box into a cozy, inviting spot your flock actually wants to use.
Block Floor Nests
Block floor nests sit right on the coop floor, using interlocking blocks for quick, modular construction—no carpentry skills needed. Interior height runs 14 to 16 inches, giving hens room to turn comfortably.
A sloped floor guides eggs onto a cleaning tray, while smooth surfaces resist moisture. For group nesting boxes, keep floor-level access low with soft bedding materials or nesting pads tucked inside for extra coziness.
Reduce Coop Disturbances
Once floor blocks are set, keep the whole coop calm so hens actually trust their nests. Soundproofing coop walls and installing quiet latch hardware cuts startling clatter during collection.
Keep a steady lighting schedule, curb predator alarm triggers, and hang privacy curtains for a secluded, quiet nesting environment.
Respect hen hierarchy by spacing boxes to prevent overcrowding and squabbles.
Stop Sleeping Inside
Some hens still tuck into shadowy coop corners at night instead of using their boxes. Break this habit by making individual nests the clear favorite:
- Raise boxes off the ground to cut dampness
- Add predator-proof latches for security
- Use weatherproof designs outdoors
- Reduce parasite load with clean bedding
- Prevent egg-eating through consistent collection
Good nest box ergonomics keep hens choosing nests over floors.
Buy Beginner-Friendly Nesting Boxes
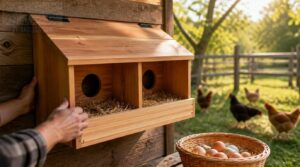
Not everyone wants to build a nesting box from scratch, and that’s perfectly fine. Buying one saves time and takes the guesswork out of sizing and materials. Here’s what to look for, plus a couple of solid options worth checking out.
Pre-made Buying Checklist
Skip the guesswork—run every pre-made box through a quick checklist before buying.
Check dimension verification first: bantam boxes need at least 1500 cm² floor space, medium breeds 1800 cm², large breeds 2100 cm².
| Feature | What to Verify | Why It Matters |
|---|---|---|
| Material Safety | No treated lumber | Prevents skin/egg contamination |
| Cleaning Ease | Removable liners | Faster maintenance |
| Weatherproof Build | Sealed joints | Outdoor durability |
Roll-away Box Features
Once a hen steps off, a sloped floor mechanism rolls her egg away using a simple gravity-aided track, no springs needed. The egg settles into a protected collection trough, safe from pecking and scratching.
This rollaway nesting box design cuts egg breakage, curbs egg-eating habits, and keeps eggs cleaner by reducing contact with damp bedding—smart, low-effort protection for your flock’s daily harvest.
External Access Options
Ever wonder if you even need to step inside the coop to gather breakfast? External nesting boxes solve that, letting you collect eggs from outside your poultry coop design entirely.
This setup streamlines egg collection and keeps daily disturbances low. When shopping, prioritize models with weatherproof external access doors—smooth, practical, and beginner-friendly for anyone building a low-stress backyard routine.
Precision Pet Triple Box
If three hens laying at once sounds chaotic, the Precision Pet Triple Box fixes that with triple compartment benefits in one compact footprint.
Each 12-inch section has its own access door, so you collect eggs without disturbing neighbors.
A shared base pan simplifies cleanup, and mounting it below roost height keeps droppings out, giving beginners a fuss-free start to steady egg production.
CHGCRAFT Wooden Crate Set
Rustic charm meets function with the CHGCRAFT Wooden Crate Set, whose nesting crates stack for compact storage between seasons.
Solid wood panels offer genuine durability, though this set works best as a repurposed option rather than a dedicated nesting crate dimensions match.
For beginners on a budget, add straw and a front lip, then place low in your coop layout for a cozy, farmhouse-style laying spot.
Frequently Asked Questions (FAQs)
What are some common nesting box mistakes?
Watch for improper mounting heights, poor ventilation and moisture buildup, wrong entrance hole sizing, direct sunlight exposure, and treated bedding chemicals. These setup errors invite pests, spoil eggs, and discourage hens from laying where you actually want them to.
How to build a simple nesting box?
Funny how a scrap of cedar fencing can turn into your hens’ favorite spot. Grab a saw, screws, and a drill—cut panels to 12x12x12 inches, assemble with durable screws, sand smooth, then finish exteriors for a simple, sturdy DIY box.
How many nesting boxes do I need for 12 hens?
For 12 hens, aim for 3 to 4 boxes, following the one-box-per-3-to-4-hens ratio. This prevents egg breakage, eases nest competition, and keeps your backyard chickens’ hen hierarchy peaceful during peak egg production.
What is the best stuff to put in a nesting box?
Soft bedding, softer bedding, softest bedding wins every time.
Wood shavings offer great absorbency, straw adds coziness, and natural fiber pads control moisture beautifully—keeping eggs clean, nests hygienic, and hens happily settled in for laying.
How often should I collect eggs daily?
Aim for twice-daily collection, morning and late afternoon, to keep eggs fresh. Bump it to three times during heat waves, since humidity speeds spoilage. Frequent checks also curb egg eating and let you catch broody hens early.
Can nesting boxes be added mid-season?
Yes—timing matters more than ideal. Add boxes before peak breeding, matching size to your breed, and place them near existing roosts.
Mid-season adoption rates climb fast when you monitor occupancy weekly and adjust placement for backyard chickens still settling into laying patterns.
Do hens share favorite boxes despite availability?
Absolutely, especially the darkest, most private spot. Dominant hen behavior often claims the favorite box first, pushing others aside.
Rotating box placement, changing bedding, and adding fake eggs encourage even use across boxes, easing hierarchy tension and boosting group nesting comfort.
How long until hens start using boxes?
Most pullets settle in near 18 to 22 weeks, right around their first laying cycle.
Some take days, others a few weeks—dark, quiet spots speed things up.
Watching hen behavior helps: early adopters often lead the rest toward regular box use.
Should nesting boxes be removed in winter?
Waste not, want not" applies here: leave boxes in place. Hens may skip laying in deep cold, but boxes still offer winter roosting benefits, shelter from drafts, and protection from moisture buildup that affects overall coop health.
Conclusion
A good nest box is a hen’s quiet corner of trust, and once she finds it, the guesswork ends.
Nesting boxes for beginners aren’t about fancy carpentry; they’re about size, placement, and comfort working together.
Get the height right, keep bedding fresh, and block those tempting floor spots. Your hens will settle in fast, and you’ll trade daily hunts for a simple morning basket full of clean eggs.
- https://www.wildlifedepartment.com/outdoorok/ooj/does-your-nest-box-have-what-it-takes-be-successful
- https://nestwatch.org/learn/all-about-birdhouses/nest-box-placement
- https://www.potomacriver.org/resources/get-involved/water/nest-box
- https://georgiawildlife.com/out-my-backdoor-whats-best-bluebird-box-design
- https://tpwd.texas.gov/huntwild/wild/birding/birdhouses