This site is supported by our readers. We may earn a commission, at no cost to you, if you purchase through links.
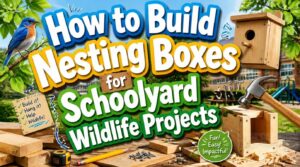
A bluebird pair can raise three broods in one season if the box fits right. Get the entrance hole a half-inch too big, and starlings move in instead. Your students won’t just watch birds outside the window anymore—they’ll build the homes those birds actually choose.
That’s the real payoff of nesting boxes for schoolyard wildlife projects: precise dimensions, smart placement, and steady monitoring turn a woodworking activity into genuine field science. Skip a detail, like predator baffles or proper ventilation, and the box sits empty all spring.
Here’s how to plan, build, and install boxes your local species will actually use.
Table Of Contents
Key Takeaways
- Match nest box dimensions—floor size, entrance hole diameter, and hole height—precisely to each target species, since even a half-inch error can invite the wrong occupant, like starlings instead of bluebirds.
- Build boxes from untreated wood with proper ventilation, drainage holes, rough interior walls for climbing, no perches, and galvanized screws to keep occupants safe and boxes durable.
- Install boxes at species-appropriate heights on predator-baffled poles, facing habitat rather than buildings, away from pesticide zones, and with clear flight paths to maximize survival and successful nesting.
- Maintain boxes responsibly through brief weekly checks, removal of invasive species’ nests, post-fledging cleaning, and accurate data logging to turn student observation into legitimate citizen science and habitat certification.
Plan Your Schoolyard Nest Box Project
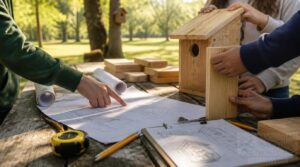
A good nest box project starts long before anyone picks up a hammer. Planning gives your students a clear purpose and keeps the whole project on track. Here’s what to sort out first.
Before building anything, walk the site with an eye toward sun exposure, predator access, and sightlines, or check this bird nesting box placement guide for pointers on choosing a spot birds will actually use.
Set Student Learning Goals
Grab your class before you grab your hammer. Start by writing a SMART goal—specific, measurable, attainable, realistic, time-bound—like "identify five native species by October."
Pull baseline data from a quick pre-assessment, then let students help set the target. Tie it to grade-level science standards. This ownership turns a simple build into real wildlife rescue work, not just a scout project.
Map Available Habitat Zones
Once your goal’s set, walk the schoolyard with fresh eyes. Identifying land cover comes first—spot forested edges, open grass, wetland margins.
Check for mapping riparian corridors, looking at elevation bands, and evaluating vegetation structure like shrub density or deadwood.
Don’t skip analyzing human buffers near playgrounds. This groundwork turns a simple scout project into real habitat restoration and wildlife management for backyard conservation.
Choose Native Target Species
With zones mapped, match birds to those spots. Pick species students can actually see and hear—distinctive vocalizations help with ID.
Look for:
- Predictable daily activity patterns
- Local biodiversity roles
- Nest box plans by species
- Regional conservation priorities
- Cavity-nesting habits matching your zones
This helps with species preservation and hands-on wildlife management for your class.
Check School Safety Rules
Before any boxes go up, loop in your school’s safety office. Building a nest box is a scout project-style build, but installation touches visitor access control and playground equipment inspections. Confirm mounting spots don’t block hallway movement rules, sit near emergency drill exit routes, or interfere with grounds crews. Get sign-off in writing, not just a nod.
Schedule Before Nesting Season
Timing makes or breaks the project. Set your installation deadlines four weeks before local birds start building — usually late winter for southern schools, mid-March up north.
Work backward from there for habitat assessment timing, student task assignments, and guest educator coordination. Add maintenance calendar planning for post-fledging cleanouts. Treat it like scout projects: clear steps, real deadlines, no scrambling once breeding season hits. It is also important to learn how to get ready for the upcoming nesting season.
Match Boxes to Bird Species
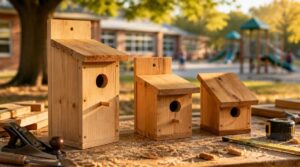
One-size-fits-all doesn’t work with nest boxes. Every species has its own floor size, hole diameter, and entrance height that decides who moves in. Here’s how those measurements break down bird by bird.
Getting these details right matters even more with sensitive species, since understanding why parakeets eat their eggs often traces back to poor box placement and stress.
Eastern Bluebird Box Dimensions
Get the measurements wrong and bluebirds simply won’t move in. Follow these specs:
- Floor Size: 5×5 inches
- Ideal Entrance Diameter: 1 1/2 inches
- Hole placement: 6-7 inches above floor
- Internal Height: 10-12 inches
These bird box dimensions keep predators out while giving fledglings room to grow. Precise nest box plans matter here — this species won’t compromise on nesting requirements.
Chickadee Box Dimensions
Small birds, exact needs. Chickadees need a 4×4 inch floor, keeping the cavity snug and safe.
Entrance Hole Sizing: 1 1/8 inches, placed 6-8 inches above the floor for proper Interior Height Placement.
Keep walls rough — fledglings need grip for climbing aids. These nest box dimensions matter: get them right, and chickadees move in fast.
Carolina Wren Box Dimensions
Carolina Wrens like it cozy. Give them a 4×4 inch floor and around 8 inches of interior height for nesting material.
Entrance hole sizing: 1 1/2 inches, placed 4-6 inches above the floor. External box height runs 9-10 inches — proportional, tidy, easy for students to install and monitor on nesting site walks.
Wood Duck Box Dimensions
Wood ducks need way more room than songbirds. Floor area should measure at least 8×8 inches, with ideal interior depth running 18-22 inches.
- Oval entrance: 4" wide, 3" high
- Placed 16-18" above floor
- Roof clearance aids sun and rain protection
- Moisture control design prevents pooling
Rough interior walls keep eggs from rolling in these nest boxes.
Northern Flicker Box Dimensions
Flickers dig their own space, so give them room to work. Interior floor area should be 7×7 inches, with cavity depth reaching 15-16 inches.
| Feature | Measurement |
|---|---|
| Entrance hole | 2 1/2" |
| Floor size | 7×7" |
| Mount height | 8-15 ft |
| Cavity depth | 15-16" |
| Exterior height | 24-31" |
Entrance hole size matters most for keeping predators out.
Build Safe, Durable Nesting Boxes
You’ve got your dimensions picked out. Now it’s time to build a box that actually keeps its residents safe and dry for years to come. Here’s what goes into solid, kid-friendly construction.
Use Untreated Natural Wood
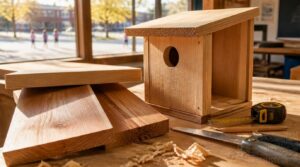
Grab cedar, cypress, redwood, or pine — skip anything treated. Chemical treatments and even cedar shavings can poison nest occupants, so untreated wood only.
Walls need to be 3/4 inch thick for insulation. Untreated wood shows natural grain and color, and it’ll weather and darken over time. That’s part of the charm for schoolyard nest boxes!
Add Ventilation and Drainage
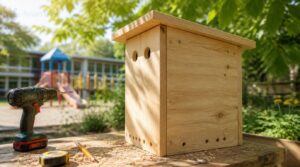
Wood alone won’t keep chicks safe — airflow and drainage matter just as much.
Good airflow starts with two 5/8 inch vent holes near the top, letting moist air escape without chilling nestlings.
For drainage design, drill 3/8 to 1/2 inch floor holes to prevent water pooling.
Quick checklist:
- Drill vents high on side walls
- Add floor drainage holes
- Keep openings unobstructed
- Inspect yearly for humidity management
Create Rough Interior Walls
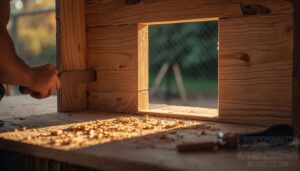
Smooth walls look tidy, but they’re a hazard once chicks try to leave.
Rough interior walls give fledglings grip for climbing out. Score the wood with a handsaw or leave rough-sanded natural wood unfinished — skip fine sanding on interior surfaces entirely.
This small detail improves interior wall safety and keeps your nest box plans functional, not just good-looking, for real backyard-bird success.
Skip Perches Completely
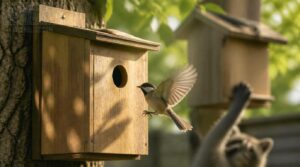
Perches seem helpful, but they mostly invite trouble.
Skip perches completely in your nest box plans. Birds rely on natural landing instincts, not hardware, to enter the hole. Perches raise predator access risks by giving raccoons and cats a foothold, and they attract roosting activity that spreads parasites. Keep entrances bare — it’s a small step that protects nesting site selection and boosts overall box longevity.
Skip perches entirely—they just give predators a foothold and invite parasite-spreading roosters
Use Galvanized Screws
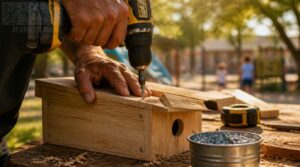
Skip nails — they loosen fast outdoors. Use galvanized screws instead; the zinc coating resists rust and won’t corrode nest structures over time.
Choose hot-dip over electrogalvanized for schoolyard boxes exposed to rain and sun. Match thread type to your wood, avoid mixing metals to prevent galvanic corrosion, and store extra screws somewhere dry until your next DIY animal shelter build.
Install Boxes in Ideal Locations
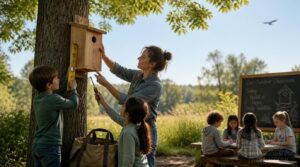
A well-built box still needs the right spot to succeed. Where you mount it matters just as much as how you built it. Here’s what to check before you hang a single box.
Mount Boxes at Proper Heights
Height makes or breaks a nesting box’s success. Most schoolyard boxes work best at 5 to 8 feet, balancing predator avoidance heights with easy maintenance access.
Bluebird and wren boxes suit 4 to 6 feet; flicker boxes need 8 to 10 feet. Over water, mount 4 to 6 feet, adjusting for water level fluctuations.
Always follow safety regulation compliance for utility lines.
Face Entrances Toward Habitat
Point every entrance toward trees, shrubs, or open habitat—never toward the school building or parking lot.
This orientation boosts foraging efficiency, giving parents a straight flight path to insects and food. It also improves predator visibility, since birds can spot threats approaching from open ground.
Vegetation nearby helps with microclimate regulation and keeps vegetation connectivity strong for nesting sites.
Avoid Pesticide-treated Areas
Chemicals and nesting sites don’t mix. Keep boxes far from lawns or gardens under treatment, and confirm safe application timing with maintenance staff.
Push for non-chemical pest control, spot treatments, and strict label instruction compliance to limit drift. A simple buffer zone with signage protects habitat, helps biodiversity, and keeps your avian conservation project on track for species protection.
Use Poles With Baffles
Raccoons and snakes are great climbers. A pole baffle stops them cold before they reach the box.
- Cone or stovepipe shape, 24–36 inches long
- Bottom edge 4.5+ feet up
- Smooth metal surface, no grip points
- Galvanized hardware for durability
- Wraparound fit, no gaps
Mount boxes on predator-proof poles, not trees. Trees give climbing access baffles can’t block.
Keep Flight Paths Clear
Picture a busy hallway during class change—birds need open corridors too. Trim branches for Vegetation Buffer Zones. Map flight paths with student teams. Shift routes each season; avoid bird crowding and reduce collision risk. Track bird use with Wildlife Activity Audits.
| Buffer Zone | Corridor Mapping Drill |
|---|---|
| Branches trimmed | Paths labeled |
| Clear sightlines | Emergency reroutes |
| Fewer obstacles | Student teamwork |
Monitor and Maintain Boxes Responsibly
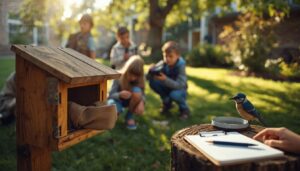
Building the boxes is only half the job. Now your students take on the caretaker role, checking in on their new neighbors all season long. Here’s how to keep that routine safe, simple, and useful for everyone involved.
Create Student Observation Teams
Grab four students and give each a job: captain, recorder, timekeeper, facilitator. Rotate roles monthly so everyone builds new skills.
Captains run meetings; recorders log data digitally; timekeepers keep things moving. Use a standardized observation checklist for consistency, and lean on mentor feedback each month to sharpen how your team watches over the nesting box and its wildlife habitat management goals.
Limit Weekly Nest Checks
Once your teams are set, keep visits short and infrequent. Check boxes every 3-4 days, tops once weekly, for under a minute each time.
Tap the box lightly first. Watch from a distance when you can. Skip handling eggs or chicks — noninvasive observation and remote cameras protect the nest while still giving your team solid data.
Remove Invasive Bird Nests
Some visitors don’t belong. House sparrows and European starlings are not protected under the MBTA, so removing their nests is legal where native species are the goal.
Check for eggs before touching anything. Confirm the species, then remove non-native nests by hand — bag materials, disinfect the box. You’re acting as nest box landlord, managing invasive competition to protect your native tenants.
Clean Boxes After Fledging
Once your fledglings leave, the box still needs you. Within two weeks, scrub it with mild soap, rinse well, and air dry in shade for 24 hours — this stops mold growth and knocks back ectoparasites before the next brood moves in.
- Brush away droppings and debris from walls
- Disinfect with diluted bleach (1:32) on tough spots
- Log the cleaning date, method, and any damage
Record Wildlife Certification Data
Turn observations into official records — this is where student work counts toward real science.
Data Validation Standards: log species, date, time, and location. Note verification status and observer contact info.
Submit through your local recording centre for Species Verification Methods and Recording Accuracy Audits.
Complete records support Certified Wildlife Habitat status and Citizen Science Recognition, helping track bird population decline nationwide!
Frequently Asked Questions (FAQs)
How many nest boxes should a schoolyard project start with?
Six to eight birdhouses is your sweet spot. That ideal box count covers habitat type distribution, keeps student rotations manageable, and builds in redundancy—so a few DIY animal shelters failing won’t derail your whole homes-for-wildlife project or data collection scale.
Can students legally handle eggs or baby birds?
Hands off is the golden rule here. Wildlife protection laws prohibit taking eggs or disturbing nestlings — leave rescue authorization to trained wildlife officials. Students should stick to observation only, protecting both the birds and your project’s legal standing.
What should happen to boxes during summer break?
Before break, run summer inspection protocols: check for damage, clean out scraps, and store unused boxes off the ground. Do mid-summer hardware checks for corrosion, watch for heat stress, and keep student maintenance logs current for fall review.
How do you deter squirrels from taking over boxes?
Squirrels aren’t predators, but they’ll still muscle in like they own the place. A predator baffle and correctly sized entrance size stop them cold. Skip perches, mount on smooth poles—squirrel behavior means they can’t grip what they can’t climb.
What permits are needed for a schoolyard wildlife certification?
District facility approvals, wildlife handling regulations, and environmental impact assessments often apply before installation. Check structural safety compliance and gather certification documentation requirements early.
Your certification program checklist can guide you through what’s needed for habitat projects supporting biodiversity and animal habitats on school grounds.
Conclusion
Empty boxes aren’t failures—they’re invitations still waiting to be accepted. Every measurement, every baffle, every angled entrance is a quiet promise to a bird you’ll probably never see arrive. That’s the heart of nesting boxes for schoolyard wildlife projects: patience dressed up as carpentry.
Your students learn that care isn’t loud. It’s a half-inch hole cut right, a pole cleaned of predators, a Tuesday spent checking instead of scrolling. Come spring, when wings finally settle in, that quiet work sings.