This site is supported by our readers. We may earn a commission, at no cost to you, if you purchase through links.

A hen that can’t find a quiet, private spot to lay will improvise—and her improvised choices are never yours. Floor eggs crack underfoot, get buried in shavings, and disappear into corners you forgot existed.
fix isn’t complicated, but the details matter more than most backyard flock keepers expect. Box dimensions, placement height, bedding depth, how many boxes per hen—each one nudges your flock toward consistent, predictable laying or away from it. Get this backyard nesting box setup right once, and your mornings shift from a daily egg hunt to a clean, reliable harvest.
Table Of Contents
- Key Takeaways
- Why Nesting Boxes Matter
- Choose The Right Nesting Box Size
- Calculate How Many Boxes You Need
- Pick The Best Coop Location
- Gather Materials and Bedding
- Add Comfort and Safety Features
- Install and Secure The Boxes
- Clean and Monitor Nesting Boxes
- Top 10 Nesting Box Products
- 1. Partners Brand Corrugated Shipping Box
- 2. Box USA Medium Corrugated Shipping Box
- 3. OEMVALATY White Gift Box
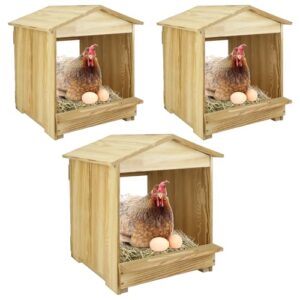
- 4. Wooden Chicken Nesting Box with Perches
- 5. Bavlesfuire Wooden Chicken Nesting Box
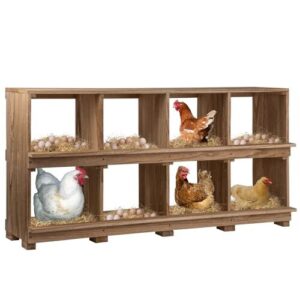
- 6. Neoaider Wooden Wall Mounted Nesting Box
- 7. Wood Smith Natural Pine Bedding
- 8. Kaytee Aspen Small Animal Bedding
- 9. BobbleT Natural Pine Coop Bedding
- 10. Pecking Order Aspen Nest Box Pads
- Frequently Asked Questions (FAQs)
- Conclusion
Key Takeaways
- A 12×12×12-inch box fits most standard breeds perfectly — go up to 14 inches square for heavy breeds like Orpingtons, and down to 9 inches for bantams.
- One nesting box per four to five hens is your baseline, but always provide at least two boxes even for the smallest flock to prevent floor laying and morning crowding.
- Tuck boxes in a quiet, shaded corner below the roost bars — privacy, low light, and distance from the entrance are what convince hens to use them consistently.
- Fresh bedding every one to two weeks, regular checks for rot and loose fasteners, and egg collection during peak laying hours (7–11 a.m.) keep the whole system running cleanly and reliably.
Why Nesting Boxes Matter

A good nesting box isn’t a luxury — it’s one of the simplest things you can do to keep your hens happy and your egg collection easy.
Whether you’re raising backyard hens or supporting wild birds, the right design makes all the difference — owl nesting box guides and tips show just how universal that principle really is.
Without one, hens lay wherever feels safe, which usually means broken eggs on the coop floor.
Here’s why getting this right changes everything for your flock.
Reduce Floor Eggs and Broken Eggs
Without the right setup, floor eggs are almost guaranteed — and they break easily and get eaten fast.
Proper placement and the right size box, combined with the correct nest box ratio (one box per four or five hens), dramatically cuts floor laying.
Egg collection frequency matters too: gather eggs during Morning Light Boost hours to reinforce nest habits and focus on preventing egg breakage and egg-eating before it starts.
Research shows that supplemental lighting reduces floor eggs can cut floor egg incidence by up to 80%.
Give Hens a Private Laying Space
Beyond cutting floor eggs, the right size box with proper placement does something equally important — it gives each hen a sense of security. Hens lay better in dark, enclosed spaces with privacy curtains, soft clean bedding, and sound dampening from flock noise.
Hens lay best in dark, snug spaces where privacy and quiet replace the chaos of the flock
Think of it as microclimate control: temperature regulation, predator shielding, and seasonal adjustments all reduce stress, which directly helps egg breakage prevention.
Improve Flock Comfort and Routine
Hens are creatures of habit, and a well-placed nesting box feeds right into that. When your nest box placement tips are spot‑on — quiet corner, correct ambient light levels, proper ventilation holes — hens develop a steady laying rhythm.
That consistency shapes hen social hierarchy at the boxes too, cutting morning squabbles. Follow size guidelines for nesting boxes, and your whole flock settles into a calmer, more predictable routine.
Support Cleaner, Easier Egg Collection
A calm routine also means cleaner eggs. When hens use a dedicated box with fresh, dry bedding, you’re not hunting for floor eggs or scrubbing cracked shells.
A simple hygienic bedding swap each week, combined with ventilation and drainage in nest boxes, keeps moisture out. Toss in a small egg collection basket, and your daily harvest becomes the easiest part of the morning.
Choose The Right Nesting Box Size

Getting the size right is the single most important decision you’ll make for your nesting boxes. Too big, and two hens will try to squeeze in together — causing broken eggs and squabbling.
Here’s what works for each type of bird in your flock.
Standard Box Size for Most Chickens
For most backyard flocks, the sweet spot is 12 inches deep by 12 inches wide by 12 inches tall. These dimension standards fit common breeds like ISA Browns and Leghorns without cramping.
Breed compatibility and space efficiency both land well here — enough room for a hen to settle and turn, but snug enough that two won’t pile in at once.
Larger Boxes for Heavy Breeds
If you’re keeping Orpingtons, Brahmas, or other large breeds, that standard 12 inches square won’t cut it. These birds need at least 14 inches square with 12 inches deep by 12 inches wide by 12 inches tall as your baseline minimum.
Factor in Heavy Breed Clearance, Weight‑Bearing Braces, and Reinforced Corner Brackets to keep boxes stable.
Solid Thermal Insulation Layers and a Predator‑Resistant Design round out smart size guidelines for nesting boxes.
Smaller Boxes for Bantams
Bantams are a different story altogether. These small birds don’t need the standard 12-inch box — a 9-by-9-inch interior with 9 inches of height accommodates them comfortably.
Good bantam box ergonomics also mean a compact lid mechanism for easy checks and ventilation slot spacing near the top back corners.
It’s one of the most budget-friendly nesting box options you’ll find.
Add Enough Bedding Depth
Think of bedding like a mattress — the right depth makes all the difference. Aim for 2 to 4 inches of pine shavings or straw for solid Material Absorption Rate and effective Bedding Moisture Management.
A Layered Bedding Strategy — soft material on top, denser base below — keeps eggs cushioned and helps mold prevention in nesting boxes.
Your Bedding Replacement Frequency and Depth Consistency Checks should run every 2 to 3 days.
Leave Room for One Hen Only
Size your boxes so only one hen fits at a time — that’s not accidental; it’s the whole point. Crowded nests trigger pecking, broken eggs, and stress.
Individual nest marking helps hens find their spot fast, reinforcing behavioral spacing and building routine.
Correct size for breed matters here: privacy and darkness for laying hens improve comfort signals dramatically.
One hen, one box, no drama.
Calculate How Many Boxes You Need

Getting the number of nesting boxes right makes a bigger difference than most people expect. Too few boxes, your hens will be lining up, skipping the nests altogether, and laying wherever they please.
Here’s what to keep in mind when figuring out the right count for your flock.
Follow The One-box-per-4-to-5-hens Rule
Start with the classic nest box ratio guideline: one nest for every four to five hens.
It’s a simple rule, but the box utilization metrics behind it are solid — a 2023–2025 study of 310 coops confirmed an average of 3.2 hens sharing each box.
Factor in breed-specific adjustments and the morning egg rush between 7 and 11 a.m., and that ratio keeps crowding manageable.
Keep at Least Two Boxes Minimum
Even if you’re only running two or three hens, don’t stop at one box. Two is your floor — no exceptions. That redundancy benefit is real: when one nest is occupied, your hens have a backup nesting option instead of dropping eggs on the floor. It also helps natural hen preference and egg distribution across both spots, reducing competition before it starts.
- One crowded nest means broken eggs and stressed hens
- A backup nesting site keeps the morning rush manageable
- Hens lay more reliably when they feel they’ve got a choice
- Two boxes naturally reduce box sharing conflicts
- Floor egg reduction starts the moment you add that second nest
Scale Box Count for Larger Flocks
Once your flock grows past six hens, two boxes won’t cut it anymore. Aim for one box per four to five birds — four boxes for seven to ten hens, five for up to fifteen hens.
Zonal Box Distribution across two coop walls prevents bottlenecks. Modular Box Design makes Flock Growth Forecasting easier — just add units as your flock expands.
| Flock Size | Boxes Needed | Placement Strategy |
|---|---|---|
| 4–6 hens | 2 boxes | Single wall, spaced 4 ft apart |
| 7–15 hens | 4–5 boxes | Two walls, zonal distribution |
| 16–25 hens | 6–7 boxes | Modular layout, two zones |
Reduce Morning Crowding and Competition
Most hens lay between 7 and 11 a.m. — that the peak laying time is real, and box sharing gets tense fast. Analyzing peak laying times and box crowding helps you spot the problem early.
A smart Entrance Queue Design, combined with Perch Placement Strategy and Feeder Proximity Management, spreads traffic naturally. Noise Dampening inside the coop and Staggered Laying Times reduce social stress before it starts.
Space Boxes Apart for Easier Access
Spacing is just as important as quantity. Keep 6 to 8 inches of hand access space between boxes so you’re not bumping knuckles during morning collection.
Maintain 12 inches of front clearance and stick to consistent row alignment along the wall.
Good box gap uniformity also improves aisle width, making daily checks faster and less awkward for both you and your hens.
Pick The Best Coop Location

Where you put your nesting boxes matters more than most people realize. Hens are creatures of habit, and the right spot can mean the difference between a box they love and one they ignore.
Here’s what to look for when choosing the best location in your coop.
Place Boxes in a Quiet Corner
Think of your nesting area as prime real estate — location is everything. Tuck your boxes into a low-traffic zone, ideally a draft-free corner with soft floor padding underneath.
Light-blocking curtains help signal "safe space" to your hens.
Noise-absorbing panels nearby dampen coop commotion. Good placement strategies for coop nests mean calmer birds and more eggs where you actually want them.
Keep Them Away From The Entrance
Your entrance is the busiest spot in the coop — keep nesting boxes at least 2 feet away from it. A dedicated aisle and entry buffer zone reduce disturbance during peak laying hours. Good scent management near the doorway also helps.
- Use visual barriers like partial screens to block sightlines
- Vary floor textures near the entrance to discourage lingering
- Add a privacy curtain for darkness and a secure feeling
Mount Boxes Below The Roosts
Position your nesting boxes directly below the roosting bars — never above them. This roosting bar height relative to nesting boxes setup discourages hens from sleeping where they should be laying.
Aim for about 18–20 inches off the floor, keeping roost clearance open so birds can enter without brushing the perch above.
| Placement Factor | Recommendation |
|---|---|
| Structural Reinforcement | Mount on solid frames to prevent wobble |
| Noise Dampening | Use soft bedding to reduce nighttime disruption |
External access nesting box designs make egg collection easier without disturbing roosting birds.
Avoid Direct Sun and Overheating
A sun-baked nesting box is a laying box no hen wants to use.
For shaded placement, tuck boxes into a north-facing or shaded corner and use reflective roofing to bounce radiant heat away.
Good cross ventilation with adjustable vents pulls hot air out without creating drafts.
Keep interior temperatures under 28°C — that’s the sweet spot for temperature regulation for layers.
Add a Perch or Landing Rail
small landing rail makes a bigger difference than you’d think.
Mount a 1- to 1.25-inch rounded-edge design perch about 6 to 8 inches out from the entry lip — that’s the right perch diameter to ease foot strain.
Angle it slightly inward for a natural rail angle, choose rust-resistant hardware, and sand every slip surface smooth.
Cedar or pine are solid picks for material selection in designing chicken nesting boxes.
Gather Materials and Bedding

Before you start cutting wood, it’s worth taking a few minutes to pull together the right materials. What you build with — and what you line the box with — makes a real difference in how well it holds up and how willingly your hens use it.
Here’s what you’ll need to get started.
Use Untreated Cedar, Pine, or Plywood
Your three best options for material selection for nesting boxes are untreated cedar, pine, or exterior-grade plywood.
Cedar’s natural oils give you built-in rot resistance and Cedar Aroma Benefits that actually deter insects — no chemicals needed.
Pine Workability makes it easy to cut and fasten for DIY woodworking for poultry projects on a budget.
Plywood Strength delivers flat, stable walls.
All three offer Natural Insulation and Sustainable Sourcing credentials worth considering.
Avoid Pressure-treated Wood
Once you’ve picked cedar or pine, keep pressure-treated wood completely off your list. Those copper preservative risks are real — the chemicals can leach into your hens’ environment, creating soil contamination concerns right beneath the box. Even modern formulations aren’t safe around food-producing animals.
Stick with natural wood alternatives or composite lumber options instead. Your hens — and your eggs will be better off for it.
Choose Exterior-grade Screws and Hardware
Your wood choice matters, but so does what holds it together.
For screw corrosion types, stainless steel 304 works well for most builds — 316 if you’re near the coast.
Follow fastener length guidelines of 1½–2½ inches, using coarse thread pitch matching for pine or cedar.
Pair exterior-grade deck screws with galvanized hinges and a stainless steel latch for weather-resistant mounting that actually lasts.
Drill Drainage and Ventilation Openings
Once your screws are set, it’s time to think about airflow and moisture control — two things that quietly make or break a nesting box.
Follow these ventilation best practices and drainage design for nests:
- Hole Diameter Selection: Drill drainage holes 6–12 mm wide, using the Beveled Edge Technique to smooth edges
- Vent Placement Strategy: Position vents high on rear walls so warm, damp air exits naturally
- Grommet Reinforcement: Fit lightweight grommets around openings — Weatherproof Vent Design that actually holds up season after season
Select Straw, Shavings, or Nest Pads
Now that your box breathes right, bedding is your next call. Your nesting material selection shapes egg cleanliness, hen comfort, and how much time you spend on cleanouts.
| Bedding Type | Key Trait |
|---|---|
| Straw | Nest box insulation, affordable |
| Pine shavings | Strong moisture absorption |
| Nest pads | Best ease of cleaning |
| Mixed bedding | Balanced dust levels |
| Nest pads | Helps egg sanitation methods |
Pine shavings win on cost comparison overall.
Add Comfort and Safety Features

Getting the structure right is only half the job — how you finish the box is what makes hens actually want to use it. A thoughtful touches can mean the difference between a busy nest and one your hens ignore.
what to add before you call it done.
Include a Sloped Roof
A sloped roof does more than look good — it’s your first line of defense against rain, snow, and moisture buildup. Build it at a 45° angle using a water shedding design with a 1–2 inch overhang on all sides.
This extended and sloped roof improves drainage hole performance and facilitates natural ventilation ridge airflow, keeping the interior dry and comfortable all year.
Add a Front Lip to Hold Bedding
Think of the front entry lip as your bedding’s best friend — it keeps straw and shavings right where they belong. Nail your Lip Height Selection at 4–6 inches, using untreated pine for Wood Type Durability.
Pre-drill before fastening for Screw Corrosion Resistance, and smooth the top edge using basic Edge Finishing Techniques.
Good Moisture Management here means less cleanup and fewer floor-laying incidents.
Create a Dark, Private Interior
Hens prefer dark enclosed spaces for the same reason you’d want a quiet room to focus — it feels safe. Line the walls with Light Blocking Panels and hang Curtain Fabric over the entry as a Quiet Entry Flap.
That sense of Privacy darkness triggers laying instincts fast.
- Use Non-Reflective Bedding to eliminate distracting glare
- Install a Ventilation Grille low on the back wall for airflow
- Keep the box Elevated Above Floor for a Secure Feeling
- Avoid shiny hardware inside — it breaks Hen Comfort instantly
- Block side light gaps with dark matte panels
Build a Lift-top or Easy-access Lid
A lift-top roof turns egg collection from a chore into a 30-second job. Hinge alignment tips matter here — misaligned hinges cause the lid to bind and warp bedding. Choose a counterbalance spring so one hand opens it smoothly. Add a soft-close stop design to prevent slamming, and install an anti-pinch guard along the hinge line.
| Feature | Purpose | Tip |
|---|---|---|
| Hinge Alignment | Keeps lid level | Pre-drill precisely |
| Counterbalance Spring Choice | Eases one-hand lifting | Match spring to lid weight |
| Soft-Close Stop Design | Prevents slamming | Use damped mechanical stop |
| Anti-Pinch Guard Installation | Protects fingers | Mount flush to frame edge |
Seal the lid edge with a snug lid seal design to keep drafts out.
Consider a Roll-away Egg Floor
A roll-away egg floor might be the single best upgrade you add to any nesting box. The slope angle sits between 5 and 15 degrees — gentle enough that eggs don’t crack, steep enough to keep moving.
The egg roll path guides each egg into a tray design lined with friction material so nothing bounces or breaks.
These rollaway nesting boxes with rollaway egg collection systems cut floor egg reduction dramatically, preventing egg breakage and egg-eating before it starts.
Keep your cleaning routine simple: pull the rollaway egg tray system out, wipe it down, done.
Install and Secure The Boxes
Getting the boxes up right makes all the difference between hens that actually use them and ones that lay wherever they please. A few simple steps will keep everything level, tight, and safe for both your flock and your back.
Here’s what to work through before your first hen steps inside.
Measure and Cut Pieces Accurately

Sloppy cuts add up fast — a 1/16-inch error on every piece throws off your entire DIY nesting box plans. Always align your square with a solid Reference Edge Alignment before marking, and use Precision Marking Tools like a sharp pencil or marking knife.
- Compensate for Blade Kerf Compensation by subtracting your saw blade’s thickness from each measurement
- Build a cut list before touching any wood
- Clamp every board firmly for Clamping for Stability during cuts
- Perform Square Cut Verification after each pass
- Double-check nest box height, entry lip, and landing rail dimensions against your plan
Pre-drill Holes to Prevent Splitting

Once your cut list is done and pieces are ready, don’t skip pre-drilling — it’s what keeps your wood from cracking. Pilot Hole Sizing matters: your bit should be slightly narrower than the screw’s core. For DIY woodworking for poultry projects using exterior-grade deck screws, Correct Bit Choice means a sharp brad-point bit.
| Step | Detail | Why It Matters |
|---|---|---|
| Pilot Hole Sizing | Slightly smaller than screw core | Prevents binding and splitting |
| Secure Clamping Technique | Two clamps, opposite sides | Stops rotation during drilling |
| Backing Material Support | Scrap wood behind workpiece | Reduces tear-out on exit side |
| Depth Control | Slightly shorter than screw length | Allows full seating |
| Correct Bit Choice | Brad-point for pine/cedar | Cleaner, straighter holes |
Use Secure Clamping Technique and Backing Material Support together — that combo eliminates most splintering. Keep Depth Control tight, and never use pressure-treated wood with standard wood screws.
Fasten Boxes So They Do Not Wobble

Pre-drilling sets you up perfectly for this next step. Once your holes are ready, anchor the box using Sturdy Base Anchors and a mounting bracket rated for outdoor use.
Add Cross Bracing Installation inside corners with Reinforced Corner Brackets, and use exterior grade deck screws throughout. Tight-Fit Panel Assembly with Adjustable Leveling Feet keeps everything square.
Weather resistant mounting and a predator guard finish the job right.
Mount Boxes at The Proper Height

With box anchored and steady, height is the next thing to get right. Mount the entrance 18–24 inches elevated above floor level — that’s the sweet spot for nest box height recommendations that most flocks respond well to.
Use a level for Uniform Box Elevation across all boxes. Height Benchmarking matters here: consistent mounting bracket placement, with Wall Expansion Compensation in mind, keeps everything accessible and dry year-round.
Check for Gaps, Sharp Edges, and Weak Joints

Once your boxes are mounted, give everything a slow once-over before your hens ever set foot inside.
Run a straightedge along every seam — joints should align within half a millimeter. Use Gap Measurement Tools to confirm no opening exceeds 2mm.
Apply Edge Sanding Techniques to smooth all cut surfaces to 240-grit.
Loose corners? That’s where Joint Reinforcement Methods earn their keep — add a second screw per edge and test for wobble.
Sealant Application Tips: run exterior-grade sealant along interior seams, keeping drainage holes clear.
Clean and Monitor Nesting Boxes

Once boxes are up and running, the real work is keeping them that way. A little routine care goes a long way toward healthy hens and clean eggs.
Here’s what you need to stay on top of.
Replace Bedding on a Regular Schedule
Swap out bedding every 1 to 2 weeks during peak laying season — that’s your baseline for Bedding Frequency Guidelines. Moisture Monitoring matters just as much as timing; damp or matted pine shavings invite mold fast.
Seasonal Bedding Adjustments keep your maintenance schedule for successful nesting on track: humid summers demand more frequent changes. Bedding Material Rotation every few weeks also reduces pest buildup substantially.
Clean With Mild Detergent and Rinse Well
Once a year — at minimum — pull those boxes completely and scrub them down.
Your Mild Detergent Choice matters: pick something solvent‑free and safe for outdoor wood. Apply with a soft brush, working corners where dirt hides. Thorough Rinse Technique means rinsing until the water runs clear, no suds. Avoiding Residue Build‑up protects your hens’ vents.
Then use the Air Drying Method — full air dry before restoring bedding.
Inspect for Rot, Cracks, and Loose Fasteners
While the wood is still damp from cleaning, run a quick Wood Softness Test — press your finger into the panels. Spongy spots mean rot has moved in.
Follow up with Moisture Sensor Readings above 15% to confirm.
Your Fastener Corrosion Check covers every screw for rust or spin.
Crack Pattern Identification catches splits before they widen.
That’s your Structural Integrity Review done right.
Disinfect After Heavy Use or Parasites
Heavy use and parasites demand more than a quick wipe-down. Start with a pre-cleaning detergent scrub — dirt and feces block disinfectants from reaching the surface.
Rinse thoroughly, then apply your chosen product.
For red mite control, a hydrogen peroxide soak of around 20 minutes outperforms most alternatives. Bleach dilution works too — just respect the contact time.
Finish with ventilation drying before adding fresh bedding.
Track Box Use and Laying Patterns
Keep a simple log — note which boxes get used, when, and how often.
About 80–90% of eggs drop during morning traffic flow, so check for laying time spikes between 7 and 11 a.m.
The 310 Coop Survey tracked NESTING BOX USAGE DATA across 2,480 hens and found, analyzing peak laying times and box crowding helps cut floor eggs substantially.
Flock age impact and seasonal daylight shift change patterns too.
Top 10 Nesting Box Products
Once you’ve got the setup dialed in, the right product makes all the difference between daily frustration and a smooth routine. Whether you’re building from scratch or just upgrading your bedding, these picks cover the essentials.
Here are ten options worth a closer look.
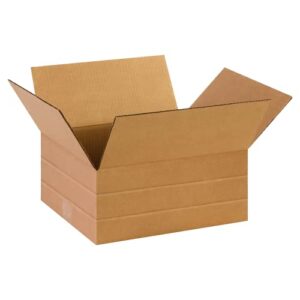
1. Partners Brand Corrugated Shipping Box
Not every backyard keeper has a carpentry shop, and that’s okay.
The Partners Brand Corrugated Shipping Box offers a practical short-term or backup nesting option — each box measures 14 × 12 × 6 inches and holds up to 65 pounds.
Its multi-depth design lets you score and trim the sides down without special tools, so you can customize depth for your hens.
They ship flat in cases of 25, store easily, and they’re fully recyclable when you’re ready to upgrade to something permanent.
| Best For | Backyard chicken keepers who need a quick, affordable nesting box without any carpentry skills or permanent setup. |
|---|---|
| Material | Corrugated cardboard |
| Primary Use | Moving and storage |
| Eco-Friendly | 100% recyclable |
| Country of Origin | USA |
| Quantity per Pack | 25 boxes |
| Price Range | Bulk/low cost |
| Additional Features |
|
- Holds up to 65 lbs and trims down to custom depths with no special tools needed
- Ships flat in packs of 25, so storage is easy and costs stay low
- Fully recyclable and reusable — great if you’re still figuring out your setup
- Single-wall construction isn’t built for long-term outdoor use or rough conditions
- Fixed 14 × 12 footprint won’t work for larger or oddly shaped coops
- No branding or protective coating, so you’ll need to label and monitor for wear
2. Box USA Medium Corrugated Shipping Box
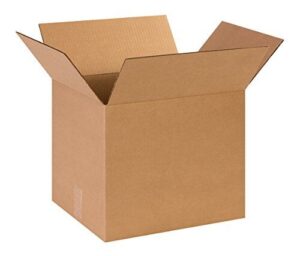
Another solid option for temporary or backup nesting is the Box USA Medium Corrugated Shipping Box. At 14 × 12 × 12 inches inside, it actually matches the recommended dimensions for standard breeds — no trimming needed.
Each box supports up to 65 pounds and arrives flat in bundles of 25, so storage is easy until you’re ready to set them up. They’re 100% recyclable, made in the USA, and sturdy enough to hold bedding without collapsing underfoot.
| Best For | Pet owners who need a reliable, no-fuss nesting box that fits standard breeds right out of the bundle — no cutting or adjusting required. |
|---|---|
| Material | Corrugated cardboard |
| Primary Use | Moving and shipping |
| Eco-Friendly | 100% recyclable |
| Country of Origin | USA |
| Quantity per Pack | 25 boxes |
| Price Range | Bulk/low cost |
| Additional Features |
|
- Fits standard breed hens perfectly at 14 × 12 × 12 inches — no modifications needed
- Holds up to 65 lbs and arrives flat in 25-count bundles, making storage a breeze
- Made in the USA, 100% recyclable, and sturdy enough to handle daily use without buckling
- Single-wall construction may not hold up long-term in high-traffic or heavy-use coops
- Unprinted surface means you’ll need to label everything yourself
- Weight capacity drops fast if bedding or contents aren’t evenly distributed
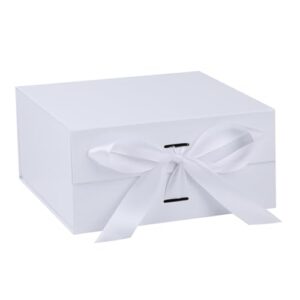
3. OEMVALATY White Gift Box
Sometimes you need something different — cleaner, more polished look for a display coop or a gift-themed setup.
The OEMVALATY White Gift Box measures 14 × 12 × 5 inches, built from premium hard cardboard with a smooth matte finish that resists minor scuffs.
It opens flat for easy storage and snaps shut with a secure magnetic closure.
That said, at just 5 inches tall, it’s better suited as a novelty or decorative nest than a full-time laying box.
| Best For | Anyone who wants a gift-ready box that looks polished without the hassle of wrapping paper or extra supplies. |
|---|---|
| Material | Hard cardboard |
| Primary Use | Gift presentation |
| Eco-Friendly | Reusable cardboard |
| Country of Origin | Not specified |
| Quantity per Pack | 1 box |
| Price Range | $15.99 |
| Additional Features |
|
- Magnetic closure keeps the lid secure and gives it a clean, finished look right out of the box
- Stores flat when not in use, so it doesn’t take up much space
- Reusable over and over — great for gifts, keepsakes, or decorative storage
- Ships flat and needs to be assembled; the adhesive can loosen after a few uses
- The ribbon may arrive a little rough around the edges and need some fixing
- Corner seams can separate over time, and the price is a step up from basic gift boxes
4. Wooden Chicken Nesting Box with Perches
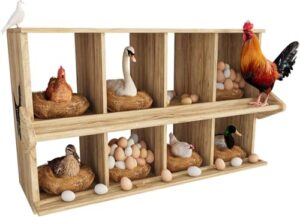
Ready to step up from decorative to functional? This wooden nesting box packs eight separate compartments into a 48.79 × 17.3 × 22.8-inch frame — plenty of room for a mid-sized flock.
Each slot comes with its own perch and egg-collection tray, so hens land, settle, and lay without crowding.
At 23.25 lb and $99.99, it’s wall-mountable or freestanding.
Just note: larger breeds may find a few compartments tight, and the wood benefits from an extra sealant coat outdoors.
| Best For | Backyard flock owners with small to medium-sized birds who want a simple, organized setup for egg collection. |
|---|---|
| Material | Solid wood |
| Primary Use | Poultry nesting |
| Eco-Friendly | Natural wood |
| Country of Origin | Not specified |
| Quantity per Pack | 1 unit (8 compartments) |
| Price Range | $99.99 |
| Additional Features |
|
- Eight compartments with built-in perches and trays keep eggs secure and easy to collect.
- Works wall-mounted or freestanding, so it fits just about any coop layout.
- Solid wood construction with ventilation keeps hens comfortable year-round.
- Larger breeds may find some compartments too tight, cutting down on usable space.
- Assembly takes a while and goes smoother with a second pair of hands.
- Wood quality is on the lower end, so an extra sealant coat is a good idea for outdoor use.
5. Bavlesfuire Wooden Chicken Nesting Box
If eight compartments feel like more than your flock needs, the Bavlesfuire steps things down nicely.
It’s a three-compartment pine box — 14 in wide, 14 in tall, 16 in deep per slot — built for standard laying hens.
The hinged front panel swings open for quick egg collection, no coop-entry required.
A removable plastic liner makes cleanup fast.
At $54.99, it’s practical and straightforward.
Just seal the wood before mounting it outdoors, or moisture will shorten its lifespan.
| Best For | Small to mid-sized flocks with standard laying breeds who want a simple, affordable nesting box that’s easy to clean and reposition. |
|---|---|
| Material | Pine wood |
| Primary Use | Poultry nesting |
| Eco-Friendly | Natural pine wood |
| Country of Origin | Not specified |
| Quantity per Pack | 1 unit (3 compartments) |
| Price Range | $54.99 |
| Additional Features |
|
- Pine wood insulates better than metal, keeping hens comfortable in both hot and cold weather
- Perches and straw baffles cut down on broken eggs and make collection a breeze
- Lightweight at just under 15 lb, so moving or remounting it is no hassle
- Interior size can be tight for larger breeds like Rhode Island Reds
- Untreated wood needs sealing before outdoor use or it’ll degrade fast
- The instructions have labeling errors and the included screwdriver likely won’t cut it — grab a power drill
6. Neoaider Wooden Wall Mounted Nesting Box
If your coop wall is begging for better use of space, the Neoaider delivers. This solid wood unit holds eight compartments — each roughly 11.8 inches wide — across a 50.2-inch frame that mounts flush against the wall.
Pre-drilled holes line up with standard stud spacing, so installation is straightforward.
Front and rear ventilation slats keep air moving without creating drafts.
At $109.99, it fits mid-size to larger flocks well.
One heads-up: reinforce any loose joints with wood glue during assembly.
| Best For | Backyard flock owners with medium to large flocks who want to save floor space and give their hens a clean, well-ventilated place to lay. |
|---|---|
| Material | Solid wood |
| Primary Use | Poultry nesting |
| Eco-Friendly | Natural solid wood |
| Country of Origin | Not specified |
| Quantity per Pack | 1 unit (8 compartments) |
| Price Range | $109.99 |
| Additional Features |
|
- Eight roomy compartments mean less competition between hens and fewer broken eggs
- Solid wood construction keeps temps stable — warmer in winter, cooler in summer
- Wall-mount design with pre-drilled holes makes installation pretty painless
- Joints can come loose out of the box, so keep wood glue handy during assembly
- Wood quality isn’t always consistent — occasional splinters or softer panels aren’t unheard of
- Not weather-sealed, so outdoor use needs extra protection from rain and humidity
7. Wood Smith Natural Pine Bedding
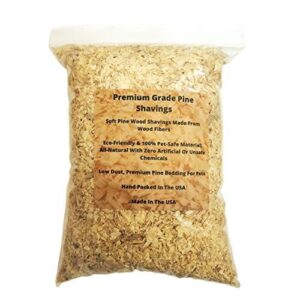
When bedding matters as much as the box itself, Wood Smith Natural Pine Bedding earns a spot in your setup.
Made from 100% kiln-dried pine shavings, it’s nearly dust-free and absorbs moisture up to twice its dry weight — keeping nest interiors dry between cleanings.
No added chemicals, dyes, or aromatic oils mean it’s gentle on hens with sensitive lungs.
One small bag covers a few boxes, and when you’re done, it goes straight into the compost pile.
| Best For | Small-pet owners — rabbits, hamsters, guinea pigs, and backyard chickens — who want a natural, chemical-free bedding that’s easy on sensitive lungs and skin. |
|---|---|
| Material | Pine wood shavings |
| Primary Use | Small animal bedding |
| Eco-Friendly | Compostable and biodegradable |
| Country of Origin | USA |
| Quantity per Pack | 1 bag |
| Price Range | Low cost |
| Additional Features |
|
- Nearly dust-free and free of dyes, phenols, or added oils — safe for animals with respiratory sensitivities
- Absorbs up to twice its dry weight, keeping cages dry and odor under control longer
- Compostable after use, so it pulls double duty in the garden
- The 4-quart bag is pretty small — not enough for larger enclosures without buying multiple bags
- Some buyers report getting less volume than the listing suggests, which stings on value
- Even with the "dust-free" label, very sensitive animals might still react to trace amounts of pine dust
8. Kaytee Aspen Small Animal Bedding
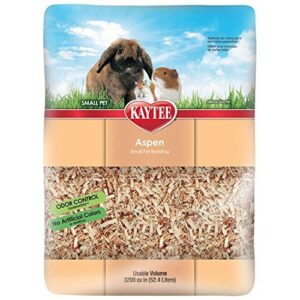
If your hens have sensitive airways, Kaytee Aspen Small Animal Bedding is worth keeping on your radar. Processed to be 99.9% dust-free, it’s made from 100% natural aspen hardwood with no aromatic oils or chemical additives — so you’re not trading respiratory irritation for odor control. It absorbs well, stays dry between cleanings, and encourages natural nesting behavior.
One 52.4-liter bag runs about $10.99. Occasionally sift out any larger wood pieces before adding it to your boxes.
| Best For | Small pet owners who want a clean, natural bedding option that’s easy on sensitive respiratory systems. |
|---|---|
| Material | Aspen wood shavings |
| Primary Use | Small animal bedding |
| Eco-Friendly | Biodegradable |
| Country of Origin | Not specified |
| Quantity per Pack | 1 bag |
| Price Range | $10.99 |
| Additional Features |
|
- 99.9% dust-free, so it won’t irritate your animals’ airways
- No oils or chemical additives — just straight natural aspen wood
- High absorbency keeps cages dry and cuts down on odor for weeks at a time
- A bit pricier than your typical generic wood shavings
- You may need to sift out the occasional larger stick or chunk
- Rare reports of mite contamination, so inspect each bag when you open it
9. BobbleT Natural Pine Coop Bedding

BobbleT Natural Pine Coop Bedding earns its spot here through sheer practicality. It’s made from 100% natural Radiata pine sourced from New Zealand — no additives, no synthetic fragrances.
The high-temperature drying and triple-sifting process keeps dust genuinely low, which matters when your birds are breathing that air all day.
It absorbs over three times its weight in moisture and arrives vacuum-packed, so it stays fresh until you need it. At 5 lbs, it’s best suited for small flocks or regular top-ups between full cleanings.
| Best For | Small flock owners and backyard chicken keepers who want a clean, low-dust bedding option for coops, brooders, and nesting boxes. |
|---|---|
| Material | Radiata pine shavings |
| Primary Use | Poultry and pet bedding |
| Eco-Friendly | Natural, no additives |
| Country of Origin | New Zealand (pine source) |
| Quantity per Pack | 1 bag |
| Price Range | Mid-range |
| Additional Features |
|
- Absorbs over three times its weight in moisture, keeping things dry and reducing health risks for your birds.
- Ultra-low dust thanks to high-temp drying and triple-sifting — easier on little lungs, especially for chicks.
- Natural pine oils handle odor without any synthetic fragrances added.
- The 5 lb bag costs more per volume than bulk bales you’d grab at a farm store.
- Needs frequent replacing in busy, high-traffic areas of the coop.
- Can get a bit dusty around water-loving birds like ducks, so it’s not the best fit there.
10. Pecking Order Aspen Nest Box Pads
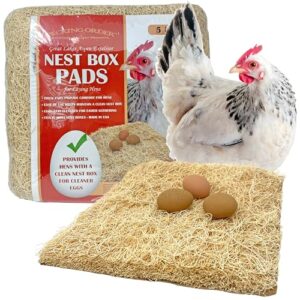
Pecking Order Aspen Nest Box Pads solve one of the most frustrating nesting box problems: hens kicking loose bedding everywhere.
Made from Great Lakes Aspen excelsior fibers bonded to a Kraft paper backing, each 13×13-inch pad stays put and wicks moisture away from eggs.
Droppings settle through the fibers instead of pooling on top. When a pad gets soiled, you pull it out and drop in a fresh one.
Five pads run $16.99 — a fair trade for cleaner eggs and less weekly maintenance.
| Best For | Backyard chicken keepers who are tired of hens kicking loose bedding out of nest boxes and want cleaner eggs with less daily hassle. |
|---|---|
| Material | Aspen excelsior fibers |
| Primary Use | Chicken nesting boxes |
| Eco-Friendly | Sustainably sourced |
| Country of Origin | Great Lakes region |
| Quantity per Pack | 5 pads |
| Price Range | $16.99 |
| Additional Features |
|
- Droppings settle through the fibers, so eggs stay cleaner and collection is quicker
- Fits standard 13×13 nest boxes and stays in place — no rearranging after every hen visit
- Way less frequent bedding swaps compared to straw or shavings
- Heavy-use pads can start tearing after a few months, especially with rowdy hens
- A broken egg or wet pad needs to come out fast or mold sets in quickly
- Higher upfront cost than basic straw or pine shavings
Frequently Asked Questions (FAQs)
Can hens lay eggs without any nesting boxes?
Sure, hens can lay eggs without nesting boxes — they’ll happily deposit them on the floor, in corners, or wherever feels right for them.
But you’ll spend more time hunting eggs and dealing with breakage.
How do I stop hens from sleeping in boxes?
Close boxes at dusk using removable panels or covers. Mount roost bars higher than the boxes — hens naturally sleep at the highest spot available. Consistent routines reinforce the habit fast.
What age do pullets start using nesting boxes?
Pullets usually start showing interest in nesting boxes around 16 weeks old. Most begin laying consistently between 18 and 22 weeks.
You’ll often notice them exploring and perching on boxes before the first egg arrives.
How do I discourage egg-eating behavior in hens?
Collect eggs often — especially between 7 and 11 a.m. Place ceramic dummy eggs in the nest to discourage pecking. Keep bedding clean and make sure hens get enough calcium daily.
Conclusion
A well-designed nest is half the harvest. Your backyard nesting box setup guide doesn’t end when the last screw is driven—it lives in every clean egg you collect without a morning search.
Get the dimensions right, give hens privacy, keep bedding fresh, and the boxes do the rest.
Hens are creatures of habit, and good habits start with a setup that earns their trust.
Build it right once, and your flock will show you exactly what consistency looks like.