This site is supported by our readers. We may earn a commission, at no cost to you, if you purchase through links.

The first time a cedar waxwing lands on a waterfall, you built yourself, you’ll understand why wildlife habitat designers talk about moving water the way birders talk about a rare sighting—with the kind of quiet reverence that’s hard to explain to anyone who hasn’t seen it.
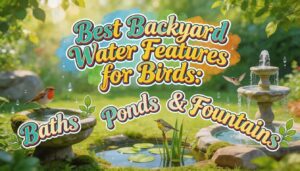
Moving water draws wildlife in ways that a static birdbath never will: the sound travels, the surface stays fresh, and smaller creatures can drink without exposing themselves to the open.
A backyard waterfall for wildlife isn’t a decorative feature with ecological benefits tacked on—it’s a functional habitat element that works around the clock.
Building one right, though, means thinking like the animals you’re hoping to attract before you ever break ground.
Table Of Contents
- Key Takeaways
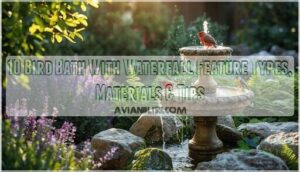
- Choose The Best Location
- Plan a Wildlife-Safe Waterfall
- Gather Materials and Essential Tools
- Build The Reservoir and Splash Zone
- Install The Pump and Rockwork
- Add Native Plants and Habitat Cover
- Maintain a Healthy Wildlife Waterfall
- Frequently Asked Questions (FAQs)
- How much does a small backyard waterfall cost?
- Can you build a waterfall in your backyard?
- How to make a water feature for wildlife?
- Is it legal to build a pond in your backyard?
- Can wildlife waterfalls attract unwanted invasive species?
- How do you winterize a pondless waterfall completely?
- What permits are required for backyard water features?
- How much does a wildlife waterfall typically cost?
- Can a waterfall work in a small urban yard?
- Conclusion
Key Takeaways
- A pondless waterfall beats a static birdbath every time because the hidden reservoir keeps water aerated, moving and mosquito‑free — which is exactly what birds, frogs, and insects are actually looking for.
- Where you place your waterfall matters as much as how you build it — keep it 10–30 feet from feeders, within 2–5 feet of escape shrubs, and away from predator hiding spots to make wildlife feel genuinely safe.
- The design details that seem small — a 2–4‑inch splash zone depth, rounded rock edges, gentle flow under 1.5 feet per second — are what determine whether wildlife visits once or moves in for good.
- Once it’s built, consistent weekly maintenance (debris removal, filter rinses, flow checks) and seasonal adjustments are what keep your waterfall a thriving habitat rather than just a pretty garden feature.
Choose The Best Location

Where you place your waterfall matters more than most people realize. The right spot makes wildlife feel safe enough to actually use it — the wrong one turns it into an expensive garden decoration.
A few key factors will guide you to the perfect location.
From budget and climate to yard size, these decisions get easier once you’ve brushed up on bird bath placement and algae prevention tips that keep your setup low-maintenance long-term.
Sun, Shade, and Water Temperature Balance
Where you place your pondless waterfall determines how well it maintains wildlife habitat year-round.
Direct afternoon sun can raise shallow water 2–4°F per hour, stressing tadpoles and reducing oxygen.
Seasonal shade from nearby trees or shade cloth cuts peak heat by up to 70%, while thermal lag keeps temperatures stable after sunset.
Use a submersible heater in winter, a solar heater in summer, and a simple probe for temperature monitoring.
Safe Distance From Feeders and Foot Traffic
Temperature control sets the stage, but spacing seals the deal. Keep your waterfall 10–30 feet from bird feeding stations to maintain clear disease prevention zones and reduce crowding stress.
Your viewing path buffer should sit at least 15 feet from the water’s edge, guiding human traffic flow naturally away from wildlife.
Smart feeder spacing and predator guard placement keep this habitat genuinely safe.
Escape Cover Near Shrubs or Low Branches
Position your waterfall within 2–5 feet of dense shrubs—shrub density matters more than most people realize. Branches with 2–4 inch gap sizes give birds quick escape routes without trapping them.
Leaf litter cover and 6–12 inches of ground mulch depth beneath nearby shrubs add layered predator protection. Rock perches and seasonal pruning keep these habitat enhancement features functional year‑round.
Consider adding dense shrubbery offers shelter to improve turtle protection.
Avoiding Cat Hiding Spots and Predator Traps
Keep your waterfall at least 10–15 feet from dense shrubs, wood piles, or stacked clutter where cats crouch undetected.
A Clear Perimeter Fence, Trimmed Sightlines, and Ground Cover Mulch reduce hidden approach routes substantially.
Add Motion Sensor Lighting and Angled Hardscape along borders, and use rock perches as habitat enhancement using rocks, logs, and artificial shelters — these predator deterrents double as wildlife habitat features.
Checking Slope, Drainage, and Runoff Patterns
Before you dig a single shovelful, walk your yard during or right after heavy rain and watch where water actually goes. Runoff mapping shows you which slopes collect flow and where erosion begins.
- Slopes above 6% need erosion control like swales or terracing
- Test soil infiltration with a simple trench to assess drainage speed
- Align swale design with natural contours for safe stormwater management
Plan a Wildlife-Safe Waterfall

Getting the location right is only half the picture — now it’s time to think through the actual design.
A wildlife-safe waterfall comes down to a handful of specific choices that determine which creatures feel comfortable enough to visit, drink, and stick around.
Here’s what to get right before you start digging.
Why a Pondless Waterfall Works for Wildlife
A pondless waterfall is one of the smartest decisions you can make for backyard wildlife. Because the reservoir stays hidden underground, there’s no deep standing water — just constant, aerated water movement that birds, amphibians, and insects actually prefer. It’s low maintenance, naturally facilitates microhabitat creation, and doubles as a noise buffer from street traffic.
A pondless waterfall hides its reservoir underground, trading stagnant risk for constant aerated movement that wildlife actually prefers
| Wildlife Benefit | How It Helps |
|---|---|
| Aerated Water | Facilitates amphibian breathing and discourages mosquito larvae |
| Predator-Free Zone | No exposed pond edge for cats or raccoons to lurk |
| Microhabitat Creation | Rocks and crevices shelter beetles, salamanders, and frogs |
| Temperature Regulation | Shaded flow keeps water cool and usable in summer |
| Noise Buffer | Cascading sound masks human activity, calming shy wildlife |
Ideal Depth for The Splash Zone
Your splash zone should start at 2 to 4 inches at the entry edge — shallow enough for bird landing without hesitation — then slope gradually to 6 to 12 inches within 3 feet.
This depth gradient gives amphibian access at every level while supporting sediment control and water movement.
Rounded rocks along the rim make your pondless waterfall’s shallow basins feel safe, not startling, for wildlife.
Gentle Water Flow for Birds and Amphibians
Fast water startles wildlife — think of it less as a waterfall and more as a gentle invitation.
- Micro-eddy distribution spreads movement across the basin, so no single current overwhelms a bathing bird or resting frog.
- Gradual slope design and surface tension management keep shallow riffles steady for amphibians without sweeping them off their feet.
- Seasonal flow adjustment, ambient sound tuning, and misting devices support bird bathing year-round while water movement techniques discourage mosquito breeding naturally.
Rock Edges That Allow Easy Access
Think of rock edges as a welcome mat — one that actually works. Flat ledges spaced 6 to 12 inches apart give birds and small mammals a reliable foothold around your cascading waterfall or bubbling boulder.
Gentle slopes ease amphibians in and out without stress. Crevice gaps over 2 inches, rounded edges, and soil pockets complete the habitat enhancement, turning a simple water feature into a genuinely wildlife friendly space.
Creating Sound Without Excessive Splash
A wide, smooth waterfall spillway naturally produces a gentler sheet of water than a narrow pinch point, which forces the flow out hard and loud.
Acoustic rock placement — large framing stones angled toward your seating area — channels the soothing sounds of running water where you want them.
Combine flow rate tuning with a skewed spillway angle, and your recirculating waterfall delivers a babbling brook effect without spraying wildlife right out of the basin.
Gather Materials and Essential Tools

Before you break ground, it helps to have everything lined up and ready to go.
right materials make the difference between a waterfall that thrives as a wildlife hub and one that’s constantly fighting you.
what you’ll need to pull it all together.
Submersible Pump and Tubing Choices
For a small backyard feature, a submersible circulating pump delivering 200–800 liters per hour does the job well; larger builds need 2,000–5,000 liters per hour.
Choose an energy efficient pump drawing 40–150 watts, pair it with UV-resistant tubing at ½-inch diameter to keep pump flow rate steady, and add check valve integration at the outlet so your water recirculation doesn’t drain back when the pump rests.
Underground Reservoir Components
Once your pump is chosen, the in‑ground reservoir becomes the beating heart of the whole system. This hidden tank stores and recirculates water continuously, so every component inside it matters.
- Access hatch – lets you inspect and clean without digging
- Venting system – prevents airlocks as the tank fills
- Overflow pipe – routes excess water safely away
- Sediment sump – collects debris at the bottom for easy removal
Line it with a durable EPDM pond liner, plan your capacity layout carefully, and your circulating pump and filtration system will stay protected year‑round.
Spillway, Liner, and Underlayment Basics
With your reservoir in place, three components work together to shape how water actually moves: the spillway, liner, and underlayment.
Spillway Placement matters — set it on compacted, level ground so the water sheet stays even.
Use a flexible EPDM liner or PVC liner with 30–40 cm of Liner Overlap at the rim.
Underlayment Cushioning goes underneath, protecting against punctures.
Seal every joint carefully before rockwork begins.
Natural Rocks, Gravel, and Edging Stones
Once your liner is sealed, rockwork brings everything to life. Rock texture choice matters more than most people expect — rough, irregular surfaces give birds and frogs a reliable grip, while smooth river rocks work best as anchor pieces along the spillway edge.
Gravel layer of 2–3 inches to lock gaps, hide tubing, and create crevices for insects throughout your pondless waterfall.
Filters, UV Clarifiers, and Optional Solar Upgrades
A good recirculation system depends on three things working together: your water filter, UV clarifier, and power source.
Match your filter media selection and flow rate matching carefully — the UV lamp wavelength peaks at 254 nanometers, so only pre-filtered water should reach it.
Solar options with battery backup management keep things energy efficient year-round, but size your solar power sizing to cover pump draw on cloudy days too.
Build The Reservoir and Splash Zone

This is where your waterfall starts to take real shape. Getting the reservoir and splash zone right sets the foundation for everything that comes after — the rockwork, the pump, the wildlife that’ll eventually find it.
Here’s how to build it step by step.
Marking The Layout and Digging Safely
Before you dig a single inch, take time to mark your layout with care. Use utility flagging and color-coded boundaries to define your excavation buffer zones clearly.
Verify site marks against a utility locating service — hand digging protocols apply within 0.6 meters of any line.
This small step protects your backyard water feature and the wildlife depending on it.
Installing The Hidden Reservoir Below Grade
Once your hole is ready, the inground reservoir takes shape through five key steps:
- Set reinforced concrete or high-strength liner for Vault Structural Reinforcement against soil pressure.
- Apply a multi-layer Waterproof Membrane Installation with crystalline additives to self-seal micro-cracks.
- Surround the exterior with a gravel Drainage Blanket Placement for moisture control.
- Install Ventilation Vent Design openings to relieve trapped gases.
- Complete Backfill Compaction Techniques in layers, reaching 90% standard proctor density.
This underground engine quietly powers your entire pondless waterfall.
Setting Liner and Protective Base Layers
Think of the liner as your waterfall’s skin — it has to flex, seal, and hold without complaint.
Heavy-duty EPDM is your best Liner Material Choice here, backed by a 2–4‑inch compacted Base Layer Thickness of rounded pea gravel.
Lay felted or foam Underlayment Types beneath your pond liner before applying Sealing Tape Application along every seam.
Finish edges cleanly to prevent tearing.
Forming a Shallow, Wildlife-friendly Basin
Your basin should welcome visitors, not intimidate them. Use a Shallow Gradient Design with outer edges sitting just 2–3 inches deep, deepening gradually toward the center — no sudden drop-offs.
Layer coarse gravel and natural stone as Invertebrate Landing Pads along the rim, and finish with an Edge Mulch Layer to soften transitions.
Balancing shallow and deep water zones, combined with a Sunlight Filtering Canopy overhead, keeps conditions stable for birds, amphibians, and insects alike.
Install The Pump and Rockwork
With the reservoir set and the splash zone shaped, it’s time to bring the whole thing to life. This stage is where function meets form — getting the pump connected and the rocks arranged in a way that feels natural rather than constructed.
Here’s how to work through each part of the installation.
Connecting Pump, Tubing, and Spillway

Start at the pump: slip your UV‑resistant tubing onto the outlet using a barbed fitting sized 0.5–1.0 mm larger than the tubing ID, then clamp it tight.
Route the line up to your spillway inlet, anchor the spillway firmly to prevent shifting under flow, and position a debris screen just upstream.
Hiding Plumbing With Natural Stone Placement

Once the tubing runs from the pump to your spillway, the real craft begins — hiding it all.
Use Stone Vein Concealment: stack flat field stones over horizontal runs, keeping joints under 1/4 inch. Rock Pile Integration does the rest — layer larger stones outside, smaller rubble inside, leaving irregular gaps.
A geotextile underlayment underneath discourages weeds while keeping everything maintenance-friendly and naturalistic.
Building Crevices for Insects and Small Animals

Those hidden rock gaps you just created aren’t just aesthetic — they’re real estate for beetles, solitary bees, and frogs.
Vary your Crevice Depth Variation intentionally: shallow pockets for dragonflies warming at dawn, and deeper recesses for salamanders needing Moisture Retention Strategies.
Material Texture Selection matters too — rough-faced stones support Predator Shielding Design and Microclimate Temperature Control, turning your rockwork into a layered microhabitat for genuine pollinator support and insect habitat.
Shaping a Gentle Drip Edge

Once your crevices are set, the drip edge becomes where wildlife actually meets water. A well-shaped lip — extending at least 1 inch beyond the spillway face — controls flow so birds get a gentle curtain, not a splash wall.
- Choose aluminum for Corrosion Resistance and cold-weather flexibility
- Maintain Edge Overlap of 2 inches at every joint
- Space fasteners every 8–10 inches for Fastener Spacing stability
- Match your Lip Profile to your pondless waterfall’s stone height
- Use a dripper or slow-release nozzle for softer water movement techniques
Running a Test Flow and Adjusting Circulation

With the drip edge set, run your pump at low speed first — about 10 percent increments — while watching the splash zone. Flow Rate Validation means confirming steady output within 0.5 gpm for two minutes.
Pressure Monitoring catches blockages early. Keep splash-zone velocity under 1.5 feet per second for Wildlife Velocity Limits.
Tubing Friction Checks and Pump Speed Tuning together guarantee smooth, mosquito-discouraging circulation.
Add Native Plants and Habitat Cover

Once the water’s flowing and the rocks are set, it’s time to bring the whole space to life with plants and natural cover. What you add around the waterfall determines how many creatures actually stay, not just visit.
Here’s what to plant and place to turn that feature into a real backyard habitat.
Planting Around The Waterfall for Shelter
Plants are the waterfall’s quiet bodyguards. Tuck Fern Shade Cover varieties and Azalea Layered Habitat shrubs along the splash zone to create year‑round refuge. Moss Humidity Mats on nearby rocks hold moisture and shelter tiny invertebrates. Use Sedge Soil Stabilizers and Water Mint Border plantings at the margin, weaving in native aquatic and wetland plants, logs, and rocks for rich habitat enhancement.
- Ferns thrive in moist shade, softening the waterfall edge while sheltering amphibians.
- Sedges and rushes stabilize soil and create low refuges for insects.
- Moss-covered rocks retain humidity, forming microhabitats for small critters.
- Water mint forms an aromatic, pest‑deterring border along the waterline.
Best Native Shrubs for Bird Protection
Shrubs are your birds’ first line of defense.
Serviceberry and elderberry offer Berry Timing that bridges late summer gaps, while viburnum and hawthorn create Dense Thickets for nesting cover.
Juniper provides Evergreen Cover and a reliable Predator Shield year-round.
These native plants bring Drought Resilience to habitat enhancement around wildlife water features and Backyard Pondless Waterfalls, weaving natural protection right into your design.
Marginal Plants for Amphibians and Insects
Along the waterfall’s edge, marginal plants do quiet, essential work. Native iris and sedge act as Egg Shielding Plants, sheltering amphibian breeding zones in shallow margins.
Dense emergent grasses become Tadpole Hideouts, while Sediment Stabilizing Grasses reduce erosion. Marsh marigold and pickerelweed create Nectar Rich Margins for insect predator control, and hollow stems form Microhabitat Structures that support your frog habitat year‑round.
Berry Plants and Seed Sources Nearby
Berries are basically a free bird feeder that also feeds pollinators. Local berry varieties like raspberries, gooseberries, and blueberries (which need soil acidity around pH 4.5–5.5) thrive in Saxony gardens.
Seed sourcing tips: check local garden centers in early spring or join community seed swaps.
Planted as pollinator hedgerows near your waterfall, these native plants create a genuinely wildlife-friendly yard with minimal upkeep.
Using Logs, Grasses, and Stones for Microhabitats
Think of logs, grasses, and stones as the furniture your wildlife guests actually need. Arrange them with intention — not just aesthetics.
- Log Decay Stages matter: mix fresh and rotting pieces to support beetle larvae, fungi, and small mammals tunneling through soft wood.
- Stone Thermal Mosaics — flat stones in sun, stacked edges in shade — create basking spots for lizards and cool refuges for amphibians.
- Grass Bunch Density near log-stone crevices builds grass edge shelter that native birds and insects rely on daily.
Maintain a Healthy Wildlife Waterfall

Building it was the hard part — keeping it healthy is where the real magic happens.
A few simple habits will protect your water quality, support the wildlife that depends on it, and keep your pump running strong season after season.
Here’s what to stay on top of.
Weekly Cleaning and Debris Removal
A little weekly effort keeps your waterfall working for wildlife — not against it.
Stick to a Leaf Rake Routine every seven days, clear Rock Crevice areas, and run Filter Media Rinse cycles to protect water quality.
Debris Net Maintenance and Skimmer Cleaning Schedule checks prevent pump strain before it starts.
| Task | Frequency |
|---|---|
| Debris Net Maintenance | Weekly |
| Skimmer Cleaning Schedule | Every 7 days |
| Filter Media Rinse | Weekly or as needed |
| Rock Crevice Clearing | Weekly |
Preventing Algae and Stagnant Water
Algae doesn’t announce itself — it just quietly takes over.
Combat it with these four water quality management strategies:
- Run Circulation Boosters at 1–2x your water volume per hour to keep flow consistent.
- Shade Management — 40–60% canopy cover slows photosynthesis considerably.
- Nutrient Buffering with native marginal plants to intercept garden runoff.
- Pair a pond filter with UV Clarification and Biological Filtration for a balanced recirculating water system.
Mosquito Control With Moving Water
Moving water is your simplest mosquito defense. Consistent Surface Turbulence from Flow Rate Tuning — even 2–3 gallons per minute — creates enough agitation to disrupt Larval Disruption cycles, reducing emergence by up to 70 percent.
Solar Power Consistency keeps your Pondless Waterfall running through warm afternoons when mosquitoes are most active.
| Water Movement Technique | Pump Speed Adjustment | Mosquito Control Effect |
|---|---|---|
| Gentle waterfall cascade | 2–3 GPM | Disrupts egg-laying surface |
| Bubbling splash zone | 3–5 GPM | Prevents larval development |
| Continuous recirculation | Variable/solar | Eliminates stagnant pockets |
| Drip edge spill | 1–2 GPM | Reduces warm breeding zones |
Pair Pump Speed Adjustment with water feature maintenance — weekly filter checks keep flow uninterrupted, which is exactly what makes your water feature inhospitable to breeding mosquitoes all season long.
Seasonal Care for Summer and Winter
Your waterfall needs different things in July than it does in January. Summer Flow Adjustment means running the pump during peak heat hours and checking filters every three to four days — Heat Stress Mitigation keeps wildlife coming back safely.
Come winter, Freeze‑Proof Pumping and Seasonal Filter Maintenance protect your investment. Winterizing ponds and bird baths with insulated tubing and submersible heaters ensure year-round access.
Monitoring Pump Performance and Water Quality
Beyond seasonal care, keeping tabs on your pump and water quality is what separates a thriving habitat from a failing one.
Check flow rate alerts monthly — a 10% drop from your pump installation baseline signals impeller wear.
Dissolved oxygen tracking, pH trend analysis, and turbidity monitoring catch problems early.
Calibrate sensors quarterly, and inspect your mechanical filter and biological filter every two weeks.
Frequently Asked Questions (FAQs)
How much does a small backyard waterfall cost?
A small pondless waterfall generally costs $1,800–$8,000 installed, depending on equipment pricing, labor expenses, and site complexity. DIY savings can cut that by 30–60%, while permit fees rarely exceed $
Can you build a waterfall in your backyard?
Yes, you can.
pondless waterfall is a manageable DIY water feature for most yards—no major DIY permits, minimal water conservation concerns, and flexible budget planning make it genuinely achievable for dedicated homeowners.
How to make a water feature for wildlife?
Building a wildlife-friendly water feature starts with a pondless waterfall design — hidden reservoir, gentle flow, shallow splash zone — paired with native plants, smart placement, and consistent wildlife monitoring to keep the habitat thriving year-round.
Is it legal to build a pond in your backyard?
Permit requirements and zoning regulations vary by location — like a patchwork quilt, no two municipalities stitch the rules the same way.
Check with your local authority before designing and building a wildlife pond.
Can wildlife waterfalls attract unwanted invasive species?
A pondless waterfall can attract invasive species through seed dispersal pathways, algae bloom refuges, and aquatic invertebrate invasion risks.
Using native aquatic plants, barrier filtration systems, and monitoring water quality minimizes habitat connectivity risks and invasive plant screening gaps.
How do you winterize a pondless waterfall completely?
Winterizing a pondless waterfall is like tucking a garden to sleep — done right, it wakes up healthy.
Focus on pump drainage, frost-free storage, and a snug winter cover to protect everything cleanly.
What permits are required for backyard water features?
Most small backyard water features don’t require permits, but a Water Law Permit, Building Authority Approval, or Municipal Permit Process may apply depending on size, groundwater impact, or Protected Area Restrictions in your location.
How much does a wildlife waterfall typically cost?
A well-built wildlife waterfall costs less than years of regret from skipping it. Expect material expenses and labor fees to range from $7,000 to $80,000+, depending on size and complexity.
Can a waterfall work in a small urban yard?
Yes — even a narrow side yard or patio corner can host a pondless waterfall.
Smart space optimization, thoughtful aesthetic integration, and low-maintenance water features turn tight urban lots into a thriving urban wildlife oasis.
Conclusion
A stone dropped in still water changes everything it touches—rings spreading outward long after the splash. Your backyard waterfall for wildlife works the same way.
The moving water draws the first bird; that bird signals safety to others, and slowly, your yard becomes part of something larger than a landscaping project.
Build it carefully, plant it thoughtfully, and maintain it consistently.
What arrives next—the waxwing, the tree frog, the dragonfly—will be worth every hour.