This site is supported by our readers. We may earn a commission, at no cost to you, if you purchase through links.

A bluebird can raise three broods in a single season—but only if it finds a safe place to nest. That’s a lot riding on a simple wooden box.
Most beginners assume birdhouse building demands serious woodworking skills, but the truth surprises them: a first birdhouse takes about an afternoon, a few basic tools, and one good board. The birds don’t care about perfect corners. They care about the right hole size, dry interior, and a perch-free entrance that keeps predators guessing. Get those details right, and you’ve built something genuinely useful.
This guide walks you through every step—wood selection, design, tools, and assembly—so your first build becomes a home worth moving into.
Table Of Contents
- Key Takeaways
- Choosing Safe Wood for Bird Houses
- Designing Bird Houses for Success
- Essential Tools and Supplies for Building
- Top 8 Tools and Materials for Bird House Building
- 1. IRWIN Quick Grip One Handed Mini Bar Clamp
- 2. DEWALT 15 Amp Portable Table Saw
- 3. HYCHIKA Bi Metal Hole Saw Kit
- 4. DEWALT 20V Max Cordless Drill Driver Set
- 5. DEWALT Titanium Nitride Speed Tip Drill Bits
- 6. Jorgensen 24in One Hand Clamp Spreader
- 7. Titebond II Premium Wood Glue
- 8. 3M General Purpose Sandpaper Assorted Grits
- Step-by-Step Guide to Building Your First Bird House
- Frequently Asked Questions (FAQs)
- Conclusion
Key Takeaways
- Untreated cedar or pine is the safest wood choice—it resists rot, regulates moisture, and won’t expose nestlings to harmful chemicals.
- The entrance hole size is the single most critical design detail, as each species needs an exact diameter to move in and keep predators out.
- You only need a handful of basic tools—a drill, hand saw, clamps, and exterior screws—to build a functional birdhouse in a single afternoon.
- Mount your finished box 5–15 feet high on a metal pole, facing east, and clean it out each fall to keep birds coming back season after season.
Choosing Safe Wood for Bird Houses
The wood you choose makes or breaks your birdhouse before you drive a single nail.
Rot-resistant cedar or pine gives your build a fighting chance, especially when you’re using birdhouse mounting methods that protect trees from damage.
Some options hold up beautifully outdoors, while others can actually harm the birds you’re trying to attract.
Here are the best wood types to start with.
Best Wood Types for Beginners
few wood types make all the difference when you’re just starting out.
Western red cedar tops the list — it resists rot naturally and cuts easily. Standard pine is everywhere and affordable, perfect for first builds.
Cypress performs in humid climates well. Redwood stays solid outdoors but costs more.
Spruce works fine too. Smart wood selection sets your whole project up for success.
Why Untreated Wood is Essential
Picking cedar or pine is just step one. What really keeps your birds safe is leaving that wood untreated.
Here’s why it matters:
- Chemical‑free environment means no copper or synthetic preservatives touching bare nestling skin
- Natural insulation from breathable humidity helps regulate moisture inside the box
- Untreated wood weathers to soft gray, giving you built‑in predator camouflage
Safe wood works quietly — and that’s exactly what your birds need.
Sourcing Affordable and Eco-Friendly Materials
Good news: untreated wood doesn’t have to cost much.
Local lumber yards often carry cedar and pine offcuts for next to nothing.
Community material swaps and ReStores sell reclaimed wood at 25–75 percent below retail.
Even HT-stamped pallet boards work great.
When finishing, stick to low-VOC finishes on exterior surfaces only.
Certified sustainable timber usually costs just 5–15 percent more than standard boards.
Common Wood Mistakes to Avoid
Even affordable or reclaimed wood can backfire if you pick the wrong kind. Pressure-treated lumber leaches chemicals that irritate birds’ skin. Green wood shrinks and cracks as it dries, leaving drafts and gaps.
Incorrect thickness makes walls flex and split outdoors.
Always sand entrance holes smooth — sharp entrances scrape feathers daily. Skip toxic finishes and improper sealing, and your birdhouse will last for seasons.
Designing Bird Houses for Success

Getting the design right makes all the difference between a birdhouse that sits empty and one that birds actually use.
A few key details — like hole size, airflow, and predator guards — can turn a simple wood box into a real home.
Here’s what every beginner should know before picking up a saw.
Correct Entrance Hole Sizes by Species
The right entrance hole size is the single most important decision in your birdhouse design and planning. Species-specific diameters matter more than most beginners expect. Chickadees need just 1⅛ inches, bluebirds need exactly 1½ inches, and wood ducks need a 3×4-inch oval.
Drill the wrong entrance hole and no bird will ever call your birdhouse home
Proper entrance hole sizing also manages predator exclusion naturally — starlings can’t squeeze through anything under 1⁹⁄₁₆ inches. Measure twice, drill once.
Ventilation and Drainage Features
Without proper ventilation and drainage, even a beautifully built birdhouse becomes a soggy trap. For DIY birdhouse construction, these four features make all the difference:
- Roof Vent Gaps of 0.25–0.5 inches let hot air escape naturally
- Side Wall Vents on opposite walls create steady moisture airflow balance
- Floor Drainage Holes near corners keep nests dry after rain
- Sloped Roof Overhang directs water away from birdhouse ventilation openings
Drill your drainage holes from underneath before assembly — cleaner cuts, no splinters inside.
Predator Protection Tips
undo all your hard work fast. Smart Entrance Placement — hole positioned 1–2 inches above the floor — stops raccoon paws cold.
Skip decorative perches too; predators use them as grab grip points.
| Feature | Baffle Options | Guard Materials |
|---|---|---|
| Mounting Height | 5–10 ft pole | Galvanized steel |
| Pole Style | Smooth metal | Hardware cloth |
| Yard Management | Clear 6–10 ft radius | Rust-resistant screws |
Simple Beginner-Friendly Designs
The simplest DIY birdhouse plans start with a rectangular box — six flat panels, straight cuts, no fancy angles. Use standard boards (1×6 lumber works perfectly) and a sloped roof that sheds rain naturally.
- Easy cleanout panel swings open with two screws
- Mounting design uses an extended back board with predrilled holes
- Simple designs fit together with basic carpentry tools in an afternoon
Essential Tools and Supplies for Building

Before you make a single cut, it helps to have the right tools within arm’s reach. You don’t need a full workshop — just a handful of essentials that’ll carry you through this build and many more.
Here’s what every beginner should have on hand.
Basic Tools Every Beginner Needs
You don’t need a full workshop to get started. A few basic carpentry tools go a long way.
For marking tools, grab a carpenter’s pencil and a speed square. Saw types matter too — a simple crosscut hand saw works well with pine and cedar just fine. Add a cordless drill with spade drill bits, clamps for your workbench setup, and basic safety gear. That’s your beginner woodworking toolkit sorted.
Choosing The Right Fasteners and Glue
Getting fasteners wrong can let a bird house fall apart in one wet season. Here’s what works:
- Use exterior-rated screws — #8 deck screws in 1¼–1⅝ inch lengths grip ¾-inch boards perfectly.
- Galvanized fasteners resist rust through years of rain.
- Stainless steel screws are best near coastal areas.
- PVA glue types like Titebond II are safe, non‑toxic wood glue once cured.
- Combine waterproof joint design with non‑toxic adhesive options — glue every seam, screw every joint, but skip glue on clean‑out doors so you can open them later.
Safety Tips for New Woodworkers
Once your fasteners are set, protect yourself before the sawdust flies.
Grab safety glasses rated ANSI Z87.1 — your eyes will thank you.
An N95 mask deals with fine dust, and 20-30 dB hearing protection covers noise reduction during long cuts.
Unplug tools before swapping bits.
Crack a window for workshop ventilation.
Safe finishing practices mean letting painted pieces off‑gas 24‑48 hours before outdoor use.
Top 8 Tools and Materials for Bird House Building
Having the right tools makes this project so much easier.
You don’t need a full workshop — just a solid set of basics to cut, drill, and assemble with confidence.
Here are the eight tools and materials that’ll get you there.
1. IRWIN Quick Grip One Handed Mini Bar Clamp
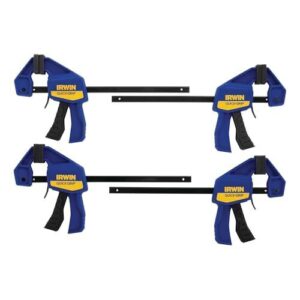
The IRWIN Quick-Grip One-Handed Mini Bar Clamp is a small tool that makes a big difference. It delivers up to 140 lbs of clamping force through a simple pistol-grip trigger, so you can hold panels in place while your other hand drives screws.
The non-marring pads protect soft cedar and pine from dents and scratches.
At roughly 10.5 inches long and under a quarter pound, it fits easily on a small workbench.
A solid starter pick for any beginner’s toolbox.
| Best For | Beginners, hobbyists, and DIYers who need a lightweight, easy-to-use clamp for woodworking, small repairs, or household projects. |
|---|---|
| Brand | IRWIN |
| Material | Reinforced Resin, Hardened Steel |
| Weight | 1 pound |
| Color | Blue |
| Primary Use | Clamping workpieces |
| Skill Level | Beginner to intermediate |
| Additional Features |
|
- One-handed pistol grip makes it super easy to clamp and adjust without putting down your tools
- Non-marring pads keep your workpiece scratch-free, great for softer woods like cedar and pine
- Compact and lightweight, so it fits comfortably on a small workbench or in a tight workspace
- Some users feel the build quality feels a bit cheap compared to other brands
- Not built for heavy-duty or high-tolerance work — it’s a light-duty tool
- 140 lbs of clamping force may not cut it for more demanding projects
2. DEWALT 15 Amp Portable Table Saw
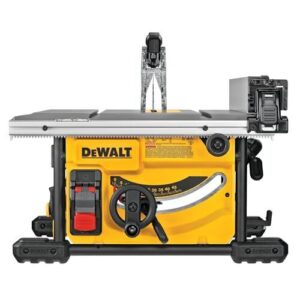
Once you’ve got your pieces held tight, you need clean, accurate cuts to make them worth clamping.
That’s where the DEWALT 15 Amp Portable Table Saw earns its place.
Its 5,800 RPM motor rips through cedar and pine without bogging down.
The rack and pinion fence adjusts smoothly, so your panels come out consistent every time.
At 54 lbs with a metal roll cage, it’s sturdy enough for a workbench but easy to store when you’re done.
| Best For | Finish carpenters and contractors who need a reliable, portable table saw that handles sheet goods and hardwood on the job site or in a small shop. |
|---|---|
| Brand | DEWALT |
| Material | Blend |
| Weight | 54 lbs |
| Color | Yellow |
| Primary Use | Cutting wood |
| Skill Level | Intermediate to advanced |
| Additional Features |
|
- Rack and pinion fence makes adjustments fast and accurate, so your cuts stay consistent
- At 54 lbs with a metal roll cage, it’s tough enough for job sites but still easy to move and store
- 5,800 RPM motor powers through cedar, pine, and hardwood without slowing down
- At 8-1/4 in., the blade size is smaller than a full cabinet saw, which limits some cut depths
- 54 lbs is manageable, but not exactly one-hand carry — you’ll want help hauling it up stairs
- No mention of a dado blade compatibility, which can be a dealbreaker for more advanced joinery work
3. HYCHIKA Bi Metal Hole Saw Kit
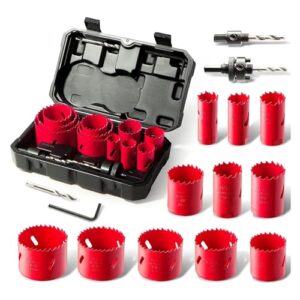
Once your wood is cut cleanly, you need the right hole for your bird’s front door.
The HYCHIKA Bi Metal Hole Saw Kit gives you 11 blade sizes, from 3/4 inch up to 2‑1/2 inches. That range covers nearly every cavity‑nesting species you’d want to attract.
The bi‑metal build works with pine and cedar without wobbling or overheating. Each blade seats into one of two included mandrels, so swapping sizes takes seconds.
It’s one kit that does real work.
| Best For | DIY enthusiasts and hobbyists who need a versatile hole saw kit for home projects like birdhouses, PVC work, or light woodworking. |
|---|---|
| Brand | Generic |
| Material | High Speed Steel |
| Weight | 3.3 pounds |
| Color | Red |
| Primary Use | Hole cutting |
| Skill Level | Beginner to professional |
| Additional Features |
|
- 11 blade sizes (3/4″ to 2-1/2″) cover a wide range of cuts in one kit
- Bi-metal build handles wood, plastic, and soft metal without overheating
- Comes in a sturdy storage box — easy to grab and go
- The large mandrel may not fit a standard 3/8″ drill chuck, so you might need a bigger drill
- Not ideal for heavy-duty metal cutting or professional-grade applications
- 17-piece kit could feel like overkill if you only need one or two sizes
4. DEWALT 20V Max Cordless Drill Driver Set

After you’ve cut your entrance hole, you still need to drill pilot holes and drive screws — and that’s where the DEWALT 20V Max Drill Driver (DCD771C2) earns its place on your workbench.
It weighs just 3.6 pounds and delivers 300 watts of power, enough to handle pine and cedar without splitting edges. The two-speed transmission gives you control on tight joints.
Two 1.3Ah batteries keep you building without stops. It’s a solid first drill for any beginner.
| Best For | Beginners, DIYers, and homeowners tackling everyday projects like hanging shelves, assembling furniture, or light construction work. |
|---|---|
| Brand | DEWALT |
| Material | Metal |
| Weight | 3.64 pounds |
| Color | Yellow |
| Primary Use | Drilling and screwdriving |
| Skill Level | Beginner to intermediate |
| Additional Features |
|
- Lightweight at 3.6 lbs — easy to use for long stretches without your arm giving out
- Two batteries included means you’re rarely waiting on a charge
- 2-speed transmission gives you real control, whether you’re driving screws or drilling pilot holes
- Skip it if you need to drill into concrete or masonry — it’s just not built for that
- The plastic chuck can struggle to hold bits securely over time
- Not a fit for heavy-duty or industrial job site demands
5. DEWALT Titanium Nitride Speed Tip Drill Bits
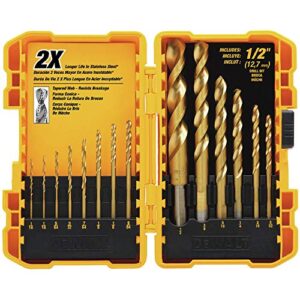
Drill bits might seem like an afterthought, but the wrong ones will split your cedar panels before you even finish the frame. DEWALT’s Titanium Nitride Speed Tip set (DW1341 G) fixes that.
The 135-degree split point bites right away, so your bit won’t wander across the wood. Sizes run from 1/16 to 1/2 inch, covering every pilot hole and drainage hole you’ll need.
The titanium nitride coating also keeps edges sharper longer — fewer trips to replace worn-out bits mid‑build.
| Best For | DIYers and pros who need a reliable, versatile drill bit set for metal, wood, and plastic — whether it’s a weekend home project or a commercial job. |
|---|---|
| Brand | DEWALT |
| Material | Titanium Nitride Coating |
| Weight | 15.2 ounces |
| Color | Multi |
| Primary Use | Drilling various materials |
| Skill Level | Beginner to professional |
| Additional Features |
|
- The Speed Tip design stops the bit from wandering so you get clean, accurate holes right away
- Titanium nitride coating keeps the bits sharp longer, so you’re not swapping them out mid-project
- Comes with a solid case that keeps everything organized and easy to grab
- The no-spin shank feature is only on the larger bits — smaller ones have a standard round end that can slip
- 14 bits is a decent range, but power users may still find gaps in sizing for specialty work
- Shipping delays have been reported, so don’t wait until the last minute to order
6. Jorgensen 24in One Hand Clamp Spreader
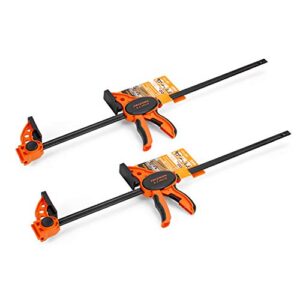
Gluing up a birdhouse solo is tricky — one panel slips and your whole box goes crooked. That’s where the Jorgensen 24-inch One-Hand Clamp Spreader earns its spot on your workbench.
You squeeze the trigger with one hand while the other holds your cedar panels in place. Its padded jaws won’t dent soft wood, and the quick-release lever repositions it in seconds. With a 300-pound clamping limit, it manages every glue joint your birdhouse needs.
| Best For | Hobbyists, woodworkers, and DIYers who need a reliable one-handed clamp for solo projects like birdhouses, furniture, and craft builds. |
|---|---|
| Brand | Generic |
| Material | Glass Filled Nylon, High Carbon Steel |
| Weight | 5.72 pounds |
| Color | Not specified |
| Primary Use | Clamping and spreading |
| Skill Level | Beginner to intermediate |
| Additional Features |
|
- One-handed operation makes solo glue-ups way easier — hold your piece with one hand, clamp with the other
- Soft plastic pads protect delicate or soft woods from dents and marks
- Doubles as a spreader, so you get two tools in one
- At 5.72 pounds, it’s a bit hefty for extended use or smaller hands
- The 24-inch max opening may be too limiting for larger panels or wide furniture pieces
- Plastic components like the glass-filled nylon handle may wear faster than all-metal alternatives under heavy daily use
7. Titebond II Premium Wood Glue
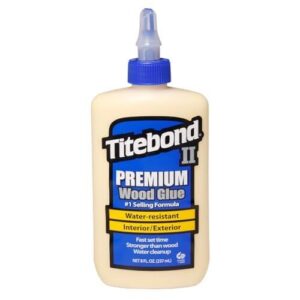
Every birdhouse joint needs glue that can take a rainstorm without giving up. Titebond II Premium Wood Glue is built for exactly that.
It meets ANSI Type II water resistance standards, so seasonal rain and humidity won’t break your cedar panels apart.
You’ve got a 3 to 5 minute open window to position your pieces, then clamp for 30 minutes.
It’s non-toxic, sands cleanly, and won’t harm curious birds pecking at interior surfaces once it’s fully cured.
| Best For | Woodworkers and DIYers tackling outdoor projects like birdhouses, planters, and patio furniture that need to hold up against rain and humidity. |
|---|---|
| Brand | Titebond |
| Material | Polyvinyl Acetate (PVA) |
| Weight | 8 ounces |
| Color | Honey Cream |
| Primary Use | Wood bonding |
| Skill Level | Beginner to professional |
| Additional Features |
|
- Strong water resistance that meets ANSI Type II standards, so your outdoor builds won’t fall apart when the weather turns
- Non-toxic and safe once cured — no worries about birds or kids coming into contact with it
- Sands cleanly and bonds fast, making it easy to work with on tighter timelines
- Can leave a yellowish tint when dry, which might bug you on lighter-colored woods
- Not rated for underwater or fully submerged use
- Takes at least an hour to fully set at room temperature, so patience is required
8. 3M General Purpose Sandpaper Assorted Grits
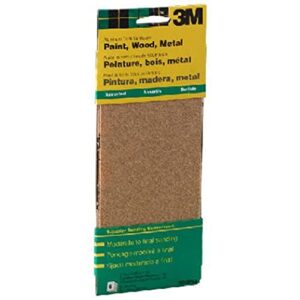
Rough edges and splinters don’t belong on a birdhouse — and this is where 3M’s General Purpose Sandpaper Assorted Grits earns its place. The pack includes 60, 100, and 150 grit sheets, so you can knock down saw marks first, then finish smooth.
Wrap a sheet around a scrap wood block for flatter results on cedar or pine panels. Use 150 grit around the entrance hole rim, where birds land and step.
Six sheets per pack is plenty for your first build.
| Best For | DIYers and hobbyists who need a reliable, no-fuss sandpaper set for wood, metal, or paint projects — from birdhouses to furniture flips. |
|---|---|
| Brand | 3M |
| Material | Aluminum Oxide |
| Weight | 0.8 ounces |
| Color | Not specified |
| Primary Use | Surface sanding |
| Skill Level | Beginner to professional |
| Additional Features |
|
- Comes with three grits (60, 100, 150) so you can move through the whole sanding process without buying multiple packs
- Works on wood, metal, and paint — genuinely versatile for craft and home projects
- Easy to use, even if you’ve never sanded anything before
- A bit thin for heavy-duty work — not the best pick if you’re tackling rough, large surfaces
- Six sheets may not be enough for bigger projects, so stock up if you’ve got a lot of ground to cover
- Durability is average, so you might burn through sheets faster than expected
Step-by-Step Guide to Building Your First Bird House
Building your first birdhouse is easier than you think. You just need to follow the right steps in the right order.
Here’s exactly how to get it done, from the first cut to the final coat.
Measuring and Cutting Wood Pieces

Good measurements are the foundation of a birdhouse that actually fits together. Use a locking tape measure for tape measure accuracy, and always mark cut lines with square marking techniques using a combination square.
Plan your kerf compensation — that’s the 2–3 mm your saw blade removes — before you cut. Choose a fine hand saw or drill bit carefully, and follow cutting tolerance guidelines so every piece lands correctly.
Assembling The Bird House Safely

Once your pieces are cut, it’s time to put them together. Clamp usage is your best friend here — hold panels steady before driving any screws.
Fastener placement, stay 10–15mm from board edges to avoid splits.
Always wear eye protection while drilling.
If kids are helping, assign them simple jobs and keep power tools in a designated grown-up zone.
Finishing Touches and Non-Toxic Sealing

Your bird house is built — now let’s protect it. Sand all outside edges smooth using Edge Sanding Techniques before sealing. Stick to Low VOC Paints or Natural Oil Sealers like raw linseed oil for eco‑friendly bird house materials. Water‑Based Coats work great too.
Leave inside walls bare. Let everything cure for at least a week — Dry Curing Times matter more than you’d think.
Best Placement and Maintenance Tips

Once your finish has cured, placement makes all the difference.
Mount small boxes 5 to 15 feet high in the best locations with good Sun Orientation—face the hole east to catch morning warmth.
Follow smart Spacing Strategies by keeping bluebird boxes 100 feet apart.
For Predator Deterrence, use metal poles.
Seasonal Cleaning each fall keeps your birdhouse maintenance and cleaning routine simple and effective.
Frequently Asked Questions (FAQs)
Which bird species are easiest to attract first?
Around 85 bird species nest in cavities across the US.
House wren, Eastern bluebird, Black‑capped chickadee, and Tree swallow top the list — all quick to claim nesting boxes in most backyards.
How do I clean a birdhouse between seasons?
Clean once in late summer after fledglings leave, then again before winter.
Tap gently, wear gloves, scrub out old nesting material, and rinse with a diluted bleach solution.
Let it dry completely before rehanging.
When is the best time to put up birdhouses?
Late winter is sweet spot — aim for late February through March. Regional Climate Timing matters, so adjust based on where you live.
Early Installation Benefits are real: birds scout weeks before nesting.
Can birdhouses attract unwanted pests or animals?
Yes, they can. A birdhouse is like an open invitation — birds aren’t the only ones who RSVP.
Invasive Bird Species, rodents, wasps, nest parasites, and predators can all show up uninvited.
How long does a wooden birdhouse typically last?
A well-built cedar birdhouse lasts 8 to 10 years. Pine generally gives you 2 to 4 years unsealed. Climate impact, structural thickness, and your maintenance schedule make all the difference.
Conclusion
There’s a theory that beginner projects need to be simple to matter. Building wooden bird houses for beginners proves the opposite.
A well-placed box with the right entrance hole doesn’t just give birds shelter—it gives you proof that your hands can create something alive with purpose.
By next season, a bluebird family might raise three broods inside your build. That’s not a small thing. That’s a home you made from scratch.