This site is supported by our readers. We may earn a commission, at no cost to you, if you purchase through links.

Old-growth forests offer something modern woodlands rarely can: enough dead and dying trees to fill every cavity-nesting bird’s housing needs. Cut down that standing deadwood, and you’ve cut the nursery supply for chickadees, screech-owls, and dozens of species that can’t excavate their own holes.
That’s the gap nesting boxes fill. A well-built box mimics what a woodpecker-carved cavity once provided, right down to the wall thickness and drainage.
Get the details wrong, though, and you’ll attract predators instead of parents. Nesting boxes for woodland habitats work only when species-specific dimensions, placement, and materials line up—and that’s exactly what separates a box birds use from one they avoid entirely.
Table Of Contents
- Key Takeaways
- Choose Woodland Cavity-Nesting Species
- Build Safe Woodland Nesting Boxes
- Size Entrances Correctly
- Place Boxes in Woodland Habitats
- Protect and Maintain Nesting Boxes
- Frequently Asked Questions (FAQs)
- What can I use instead of a nesting box?
- Do wild birds actually use birdhouses?
- What are the disadvantages of nest boxes?
- How far off the ground should nesting boxes be?
- When should I take down nesting boxes seasonally?
- Why did birds abandon my nesting box suddenly?
- Should I add nesting material inside the box?
- How long do nesting boxes typically last outdoors?
- Conclusion
Key Takeaways
- Match entrance hole size and box dimensions precisely to your target species, since even a quarter-inch difference determines whether chickadees, bluebirds, or starlings move in.
- Build boxes from untreated cedar or pine with ¾-inch walls, drainage holes, rough interior walls, and a 12-24 inch overhang to protect nestlings from toxins, weather, and predators.
- Place boxes at sheltered woodland edges facing east to southeast, mounted 2-4 meters up with predator baffles and metal entrance plates to maximize safety and occupancy.
- Maintain boxes through weekly breeding-season checks and annual fall cleaning, while removing invasive nests to protect native cavity-nesting species long-term.
Choose Woodland Cavity-Nesting Species
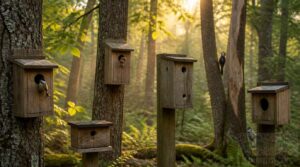
Every woodland cavity-nester has its own idea of the perfect home, and your box needs to match that vision. Size, shape, and entrance hole all matter differently depending on who you’re hoping to welcome. Here’s a look at five common species groups and what each one needs from you.
If you’re hoping to attract chickadees, wrens, or other petite tenants, this guide to choosing the best birdhouse for small birds breaks down the exact hole size and box dimensions they favor.
Chickadees and Titmice
Watch a chickadee flit through your woods, and you’ll likely spot a titmouse close behind—these Paridae relatives forage together in mixed species flocks all winter. Both cache food obsessively, hiding thousands of seeds across their territory to recall later.
When building nest boxes, line interiors with rough wood; chickadees favor moss and hair for nesting material, while titmice construct hierarchies at your feeder, too.
These birds are specialized perching birds that thrive in various forest environments.
Nuthatches and Wrens
Nuthatches move headfirst down bark, gripping tight while wrens stay low, working through brush and leaf litter—two completely different habitat vertical layers in the same woodland.
Nuthatches wedge seeds into bark crevices, hammering them open, while wrens glean insects from tangled undergrowth. Both defend cavity nests fiercely.
For nesting boxes, give nuthatches 1-inch entrances; wrens need 1.125 to 1.25 inches.
Blue Tits and Great Tits
Blue Tits flash a bright blue cap over white cheeks; Great Tits carry a bold black head stripe down yellow underparts. Size gives it away too—Great Tits run 14 cm against the Blue Tit’s 12 cm.
Both nest readily in boxes, but foraging habitat partitioning keeps them apart: Great Tits work thick branches, Blue Tits favor finer twigs, easing competition.
Screech-owls and Wood Ducks
Screech-owls and Wood Ducks share tree cavities and boxes more than you’d expect, and Wood Ducks share tree cavities and boxes more than you’d expect, sometimes leading to interspecific incubation where owls hatch duck eggs. Wetland habitat proximity matters here—Wood Ducks need water within 30-100 feet.
Hatching differs slightly: owls take 26-28 days, ducks 28 days. This overlap creates species competition risks worth understanding before you build.
Match Box to Species
Before grabbing lumber, sketch out which species you’re building for—entrance size, cavity depth, and habitat all shift depending on the tenant. Match the box to the bird, not the other way around.
Educational nest box kits often group species by habitat theme, pairing woodland cavity nesters with artwork hinting at family traits. That same logic works for your backyard planning, too.
Build Safe Woodland Nesting Boxes
Once you’ve picked the right species to build for, the real work starts with the box itself. A well-built nesting box protects fledglings from weather, predators, and temperature swings that can spell disaster in the first weeks of life.
Here’s what you need to get the construction right, from the wood you choose to the shape of the roof.
Use Untreated Natural Wood
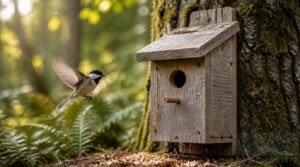
Untreated cedar, pine, or fir keeps toxic fumes away from nesting chicks. Skip paints and stains entirely.
- Moisture causes swelling, but woods age gracefully
- Cedar resists decay better than pine
- Patina develops naturally, adding rustic charm
Weathering grays the surface over time — that’s fine. Your birds care about safety, not curb appeal.
Choose Proper Wall Thickness
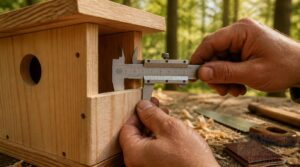
Aim for walls at least ¾ inch thick, the sweet spot for thermal insulation without adding needless weight. Softer woods like pine need this extra bulk; denser hardwoods can run slightly thinner.
Consistent thickness around every side strengthens joints, resists cracking, and buffers eggs against sudden temperature swings — giving nestlings a stable, weatherproof home from the inside out.
Add Drainage and Ventilation
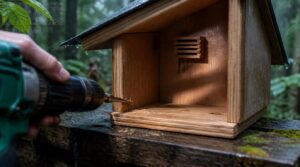
Water and stagnant air are a nest box’s worst enemies. Drill 3/8-inch drainage holes in the floor corners, angled outward so pooling never touches nesting material.
Add cross-ventilation near the roofline—small, shielded vents on opposite walls—to keep humidity managed without drafts.
Together, this drainage path design and airflow strategy prevent mold growth and keep eggs dry through soggy woodland weather.
Create Rough Interior Walls
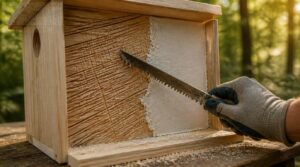
Ever tried climbing a wall with nothing to grip? That’s exactly the problem smooth interior walls pose for fledglings ready to leave the nest.
Smooth interior walls leave fledglings nothing to grip when it’s time to climb out and fly
- Score wood with a saw before assembly
- Apply a thin joint compound coat for grip
- Let texture cure fully before use
- Skip glossy finishes—they resist adhesion
Rough interior walls give young birds the traction they need to climb out safely on fledging day.
Extend Rain-shedding Roofs
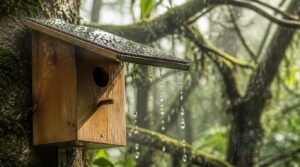
A roof that barely covers the box invites trouble. Extend the overhang 12 to 24 inches so rain sheds away from the entrance instead of streaking the face.
Add a drip edge or small gutter to redirect runoff, and seal joints with weatherproof sealant. Orient the overhang against prevailing wind for extra wind resistance—smart nesting box construction anticipates weather before it becomes a problem for residents.
Size Entrances Correctly
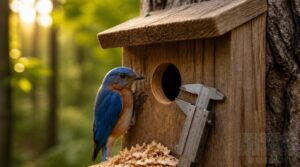
The entrance hole is the single most important measurement on your box, deciding which species move in and which get turned away. A quarter-inch difference can mean the difference between a nesting bluebird and an empty box. Here’s how to size that opening correctly for the birds you’re hoping to attract.
Small Songbird Hole Sizes
A quarter-inch makes all the difference: chickadees need just 1 1/8 inches, while wrens and nuthatches use 1 1/8 to 1 1/4 inches.
This perfect hole size keeps house sparrows out while giving nestlings safe clearance to fledge. Round holes protect delicate wings during exit, and matching hole size to your target species remains the single best defense against unwanted competitors raiding the cavity.
Bluebird Entrance Dimensions
Bluebirds need more room than chickadees: a 1.5-inch round hole fits Eastern species, while Western and Mountain Bluebirds often require 1.625 inches.
Round beats oval here, discouraging larger competitors:
- Diameter: 1.5–1.625 inches
- Height above floor: 6–8 inches
- Shape: round only
- Edges: beveled for easier fledging
This entrance hole size balances easy access with reliable starling exclusion.
Tit Species Measurements
European species need their own spec: 25–28 mm for Blue Tits, 28–32 mm for Great Tits, reflecting real sexual size dimorphism between the two.
Great tits’ broader wing loading and faster nestling growth demand roomier nest box design. Beak development in hatchlings—jumping from 5 to 8 mm within a week—means feeding traffic is heavy, so keep entrance hole size generous but starling-proof.
Owl and Duck Openings
Once you move past songbirds, entrance size jumps dramatically. Screech-owls need a 3-inch round opening, while Wood ducks require a 4-by-3-inch horizontal oval for proper waterfowl nesting access.
- 3-inch round: Eastern screech-owls
- 4×3-inch oval: Wood ducks
- Place near riparian habitat pairing
- Mount 30-100 feet from water
These large openings suit bigger cavity nesters but demand extra predator vigilance around your nest box design.
Exclude Invasive Starlings
European starlings will muscle out native species fast, so keep entrance hole size at 1.5 inches or smaller—Entrance Hole Sizing is your first line of defense.
Add starling deterrent plates around the opening to block gnawing and enlargement.
Pair this with habitat food management, reducing spilled grain nearby, plus seasonal monitoring protocols to catch invasive birds early, before they outcompete your target species.
Place Boxes in Woodland Habitats
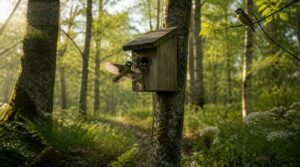
A well-built box only works if it lands in the right spot. Placement decides whether birds actually find your box and feel safe raising young inside it. Here’s what to keep in mind before you mount anything to a post or tree.
Select Sheltered Woodland Edges
Where woodland meets open field, you’ll find the sweet spot for nesting box placement. These edge areas offer shelter from wind while keeping food sources close.
Follow the land’s natural contours instead of straight lines—topography alignment reduces windthrow risk and creates native shrub mosaics that boost habitat restoration. Well-designed edges maintain wildlife corridor connectivity, linking your woodland to surrounding habitats birds already use.
Face Entrances Eastward
Point your entrance holes east, southeast, or northeast whenever possible—this simple choice pays off for cavity nesters across your woodland site.
- Morning warmth dries damp cavity walls
- Sunrise energy alignment matches early bird activity
- Moisture evaporation speeds up naturally
- Early insect activity feeds hungry fledglings
- Predator visibility tradeoffs favor dawn detection
That said, watch for glare exposing entrances to sharp-eyed hawks nearby.
Mount Above Predator Reach
Ground predators can climb higher than you’d think, so mount boxes at least 2 meters up, anchored with corrosion resistant hardware into sturdy trees or posts.
Use adjustable straps for tree growth accommodation, and add predator guard installation—baffles cut climbing access by up to 90%.
Keep a detachable ladder handy for maintenance access without disturbing the nest.
Space Boxes by Species
Different birds need different amounts of elbow room, so size your interior volume to match roosting volume requirements for your target wildlife species. Chickadees need 15–25 cubic inches per bird, nuthatches want 300–500, and owls require 500–900.
Interior chamber counts and heat loss minimization both affect occupancy rate stability, so building generic boxes for every species backfires quickly.
Position Near Water Sources
Water pulls life toward it, and your nesting boxes should follow. Placing boxes 10–50 meters from shorelines boosts aquatic foraging access while supporting shoreline microclimates that cool boxes naturally.
- Mount on sturdy trunks or poles
- Lift them up for flood protection
- Add predator baffles against wetland predation
- Make sure there is ventilation for humidity management
- Face entrances away from prevailing winds
Smart nesting site placement here strengthens wildlife habitat conservation and simplifies nest box maintenance.
Protect and Maintain Nesting Boxes
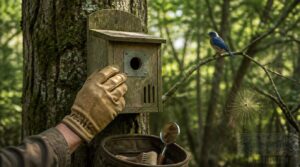
Once your boxes are up and occupied, the real work of protecting those tenants begins. Predators, parasites, and pushy invasive species can undo months of careful planning in a single season. Here’s how you keep your woodland nesting boxes safe and productive year after year.
Install Predator Baffles
Slip a predator baffle onto the mounting pole, sized to match its 1 to 1.5-inch diameter, and secure it roughly five feet up.
Choose galvanized metal or UV-resistant plastic, since cone shapes widen outward and prevent grip holds. Position the flared rim just above the box eaves, facing away from brush, cutting climbing-predator access by up to 90 percent.
Add Metal Entrance Plates
Baffles handle climbers, but squirrels and woodpeckers still gnaw at entrance holes directly. Metal entrance plates stop that cold. Choose galvanized steel or corrosion resistant finishes so the plate outlasts the wood itself.
Many artificial nest boxes benefit from durable material choices here, since gnawed openings widen fast, inviting starlings past your size limits and undoing every predator guard you’ve installed elsewhere on the box.
Monitor During Breeding Season
Once your entrance plate is fitted, your real work shifts to watching, not building.
Check boxes weekly during the breeding season, keeping visits under one minute to avoid stressing nestlings. Tap lightly before opening.
Track hatching success, feeding frequencies, and fledgling development—this minimizes disturbance while giving you a clear record of what’s working across your nesting boxes.
Clean Boxes Annually
Once breeding season winds down, empty each nesting box and scrub the interior with mild soap and warm water to cut down on mites and old debris. Rinse well, then let the wood dry completely before closing it back up—trapped moisture invites rot.
Sand rough spots gently, note any repairs, and reinstall hardware securely. Documenting each cleaning helps you track box condition year over year.
Remove Invasive Bird Nests
House sparrows and starlings will muscle into a nesting box built for chickadees or wrens, crowding out the native species you’re trying to help.
Check boxes regularly during the season and remove invasive nests if legal in your area—rules vary, so confirm with local wildlife authorities first.
Keeping entrance holes small and monitoring often protects nesting site availability for your target birds.
Frequently Asked Questions (FAQs)
What can I use instead of a nesting box?
Dead standing trees, snags, and natural tree hollows work well. Preserve dense shrub clusters and fallen logs, too, since decaying wood forms natural cavities that boost nesting site availability without any construction required.
Do wild birds actually use birdhouses?
Yes — cavity nesters readily use artificial nest boxes when habitat degradation limits natural cavities.
Nesting success improves with proper placement, since urban bird adaptation and reduced natural cavity competition boost occupancy across breeding and seasonal roosting periods.
What are the disadvantages of nest boxes?
Is a good deed ever entirely without cost? Boxes bring microclimate swings, predator concentration, and invasive competitors like sparrows, plus real maintenance labor—cleaning, monitoring, and guard upkeep—needed to protect nesting success and outweigh visual landscape impact.
How far off the ground should nesting boxes be?
Most cavity nesters do best 2 to 4 meters up, balancing predator avoidance with safe cleaning access. Chickadees prefer 5–5m; screech-owls favor 4–6m. Windy sites call for the lower end; dense canopy woodlands support higher mounting.
When should I take down nesting boxes seasonally?
Wondering when it’s safe to clean without disrupting a nest? Wait until September through November, after fledging ends, respecting local wildlife laws—leave boxes untouched for winter roosting protection until the next breeding cycle begins.
Why did birds abandon my nesting box suddenly?
Sudden abandonment usually traces to predator scent trails, frequent human monitoring disturbance, or temperature and humidity swings.
Poor placement, food scarcity, or nesting site competition can also push parents away, so check guards, reduce visits, and reassess your box’s location.
Should I add nesting material inside the box?
Skip it. Leave the interior empty—natural fiber risks mold, moisture buildup, and nest entanglement. Chickadees and titmice build their own cups. If you want to help, scatter material outside the box near the entrance instead.
How long do nesting boxes typically last outdoors?
Cedar boxes last 15 to 25 years with basic upkeep, while untreated pine breaks down in 5 to Weather exposure, sealant reapplication every 3-5 years, and annual cleaning all factor into durability.
Conclusion
A hollow snag once stood where your box now hangs—proof that decay can still nurture life. Every measured hole, every rough-cut wall, becomes a small act of restoration.
Nesting boxes for woodland habitats don’t just house birds; they replace what logging and time have taken away. Check them each spring, clean them each fall, and you’re not just a landlord. You’re rebuilding a forest’s missing rings, one cavity at a time.