
This site is supported by our readers. We may earn a commission, at no cost to you, if you purchase through links.

Ninety-degree heat spoils sunflower seed and ferments nectar within hours—your feeder location matters as much as what’s inside it. A spot that works in April turns into a liability by July, when spoiled food drives birds away and predators find easier angles of attack.
Best summer feeder locations balance three things: shade timing, airflow, and sightlines. Get the placement right, and you’ll watch chickadees and finches settle into a predictable rhythm at your feeders. Get it wrong, and you’re refilling seed nobody eats.
Six placement strategies below, each grounded in specific measurements you can apply this weekend.
Table Of Contents
- Key Takeaways
- High-Canopy Shade With Open Sightlines
- North or East-Facing Yard Areas
- Open Lawn Poles Away From Structures
- Quiet Garden Edges Near Escape Cover
- Window-Safe Spots Within Three Feet
- Feeding Stations Beyond Thirty Feet
- Frequently Asked Questions (FAQs)
- What is the 5 7 9 rule for bird feeders?
- Should you put out bird feeders in the summer?
- Where not to place a bird feeder outside?
- Why should you sprinkle coffee grounds around your bird feeder?
- How often should nectar feeders be cleaned in summer?
- What signs indicate spoiled birdseed or suet?
- How can I prevent rodents around feeder areas?
- Should platform feeders be mounted at a specific height?
- How does regular cleaning reduce bird disease transmission?
- Conclusion
Key Takeaways
- Shade timing matters most: aim for 3-5 hours of dappled light under canopy, or shift feeders into shade between 10 a.m. and 4 p.m. to stop seed and nectar from spoiling in the heat.
- Distance is your best defense against predators—keep feeders 7 feet from branches and other launch points, with clear sightlines on all sides so birds can spot danger before it strikes.
- Window placement follows a simple rule: put feeders within 3 feet of glass or beyond 30 feet, since the 3-to-10-foot range is where birds hit full speed and collisions turn dangerous.
- Heat speeds up spoilage and disease, so clean nectar feeders every 1-2 days above 90°F and stick to a regular hygiene routine for seed and suet feeders too.
High-Canopy Shade With Open Sightlines

Canopy cover does double duty: it keeps food fresh and gives birds a safe vantage point to spot trouble coming. Getting the balance right takes more than picking any shady tree in your yard. Here’s what to check before you hang that feeder.
Once feeder placement is sorted, keeping up with consistent bird feeding habits is what actually turns occasional visitors into regulars.
Three to Five Sun Hours
Three to five hours of dappled light is the sweet spot beneath a canopy—enough for birds to forage, not enough to spoil seed. These sunlit canopy pockets shift with leaf density and season, so:
- Late morning often peaks
- Overcast days shorten the window
- Winter leaf-drop extends it
Track your yard’s light exposure timing before committing to a spot.
Shade From Ten to Four
Ten to four is when the sun hits hardest, so aim feeders into shade during that window for real peak heat protection. This cuts nectar spoilage and keeps ground conditions cooler underfoot.
Changing shade patterns from shifting branches still support stable foraging times. Set feeders 10 to 15 feet from trunks, in a quiet corner, for shade optimization without sacrificing open shaded feeding areas.
Seven Feet From Branches
Seven feet is the magic number between feeder and branch. Any closer, and low limbs turn into launch pads for raccoons and cats stalking an easy meal.
That gap also opens an unobstructed flight lane, letting birds scan for threats before committing to landing—clear sightlines, fewer ambushes, safer feeding.
Cooling Airflow Around Feeders
That branch buffer does double duty: it also lets air move. Perimeter gaps of 2–3 inches along canopy edges pull cooler air downward while heat rises out—a mini chimney effect.
Leeward placement and a porous windbreak buffer gusts without trapping stagnant heat, keeping seed and suet cooler under that dappled, blue-white canopy light.
Clear Predator Viewing Cones
Give birds a lookout, not just lunch.
Viewing cone angles of 90–120 degrees, paired with UV-resistant, non-reflective housings, reveal predator escape cover without glare tipping off a hawk.
Mount shields at feeder height, angled away from harsh sun, within open sightlines.
Clean monthly—wipe grime that blurs the view, and your quiet corner stays safe, not just scenic.
North or East-Facing Yard Areas

Orientation matters as much as distance when you’re picking a feeder spot. A north or east-facing patch of yard works with the sun’s path instead of against it, and that changes everything about comfort and food safety. Here’s what makes these areas worth claiming for your feeders.
Morning Sun, Afternoon Shade
East-facing exposure gives you the best of both worlds. Morning light warms feeders gradually for two to four hours, while afternoon shade cuts heat stress during peak hours.
Position tube feeders at 5 feet, 10 to 15 feet from trees. This thermal comfort balance keeps nectar and seed fresh longer than full-sun sites ever could.
Protection From Summer Heat
Heat waves test even well-placed feeders. Ground temperatures drop 10-15°F under canopy shade, which protects seed and nectar from spoiling fast.
Positioning feeders beneath that natural shade also makes it easier to follow smart bird feeder placement and height guidelines that keep both food and visiting birds safe from heat stress.
Try heat-reflective feeders or thermal covers for extra insurance. Shade cloth cooling and evaporative misters help, too.
Clean feeders every few days—hygiene matters more when heat accelerates bacterial growth. Some hosts add nighttime feeding options during brutal stretches.
Shelter From Prevailing Winds
Wind steals warmth and energy fast—leeward placement matters as much as shade does.
- Wind shadow: 4–8 ft behind layered shrubs and evergreens
- Speed cut: pine/spruce screens reduce gusts 20–40%
- Corner setup: two windbreaks can halve exposure
- Ground buffer: mulch dampens wind and stabilizes soil
Grade your yard gently toward the shelter zone. Sheltered spots keep nectar fresher hours longer.
Dry, Well-drained Ground
Mud underfoot spoils the whole feeding scene fast. Run a soil drainage test: pour water into a shallow hole and time the soak—quick disappearance means healthy ground.
Favor loam or sandy soil over clay, and add a gentle slope grading away from the station.
Mulch balances moisture, aeration loosens compacted dirt, and a gravel buffer or French drain experiences stubborn wet spots.
Easy Cleaning and Refilling
Placement means nothing if refilling turns into a chore. Pick spots with easy access refill—room to kneel, room to pour.
- Wide mouth openings for quick rinsing
- Quick detach reservoirs for fast swaps
- Marked fill lines to avoid overfill
Reusable containers and integrated pour spouts cut spillage. Stick to a feeder maintenance schedule, and store extra seed airtight nearby.
Open Lawn Poles Away From Structures

Open lawns give you something trees and fence lines can’t: total control over the approach. No overhanging branches, no structures for predators to launch from—just you, a pole, and open sky. Here’s what to nail down before you sink that pole into the ground.
Seven-foot Squirrel Buffer
Seven feet: your magic number for squirrel jump deterrence. Anything closer, and a determined rodent treats your pole like a launchpad.
That distance blocks structural launch points from fences and trees alike, forcing squirrels onto open ground—right where predator sightlines and your line of sight work in the birds’ favor.
Squirrel proofing starts with geometry, not gadgets.
Their physical capabilities and adaptations include jumping up to six feet vertically and eight feet horizontally, making strategic feeder placement essential for effective deterrence.
Stable Poles and Baffles
That seven-foot buffer only works if the pole itself doesn’t wobble. Steel poles resist bending for 20+ years; concrete ballast holds firm in 25 mph gusts.
Pair that with a 12 to 14 inch baffle—metal-plastic layered ones resist chewing best. Weatherproof coatings and detachable designs mean easy winter storage without sacrificing squirrel-proofing.
Clear Bird Approach Paths
A wobble-free pole means nothing if brush or fencing chokes the runway leading to it. Open flight zones on all sides let birds bank in from multiple angles, giving them true direct access routes instead of one cramped lane.
Keep a 360-degree buffer clear. Unobstructed approach lanes double as escape routes when a hawk shows up uninvited.
Three-foot Ground Clearance
Height matters underfoot too. Three-foot ground clearance on your pole keeps the underbody roughly 36 inches up—clear of low debris while staying reachable for maintenance.
That measurement isn’t random: it balances airflow, drainage, and easy refilling at any bird feeding station. Clearance benefits stack up fast, especially for feeder placement stability outdoors.
Reduced Predator Ambush Cover
Out on the open lawn, cats and hawks lose their cover. Open sightlines replace ambush spots, especially with dense shrub layering pruned back seasonally.
- Moderate brush height near, not under, the pole
- Clear bird approach paths on all sides
- Ground litter cleared within the strike radius
- Quiet corner privacy just beyond feeder range
Quiet Garden Edges Near Escape Cover

Not every good feeder spot sits out in the open. Garden edges offer birds something poles on a lawn can’t: quick cover when danger shows up. Here’s what makes these quieter corners work.
Low Foot Traffic
Birds keep bankers’ hours in the quiet corners of your yard. Low foot traffic areas see steadier dawn visits and predictable visiting times, since reduced human disturbance lets wary species settle into calm morning activity zones with clear bird approach paths.
| Zone Type | Traffic Level | Visit Pattern |
|---|---|---|
| High-traffic path | Frequent | Sporadic |
| Garden edge | Low | Predictable |
| Hedge border | Minimal | Dawn-focused |
Away From Noisy Equipment
Since lawnmowers and AC units run on their own schedule, keep feeders well clear of them. Noise buffer distance of 20+ feet from compressors preserves silent feeding zones.
- Startled flight, wasted energy
- Abandoned feeding sites
- Fewer return visits
Distant machinery placement and vibration-free setup protect quiet corner privacy, keeping calm morning activity zones intact.
Nearby Shrubs for Refuge
A feeder without a bailout route is just bait. Dense evergreen cover—juniper or yew—within a few yards gives birds a fast lane to safety.
Thicket forming species like sumac add multi-layer hedges and low understory shrubs, so quiet corner privacy and hedgerow movement routes stay intact even with brush pile cover nearby.
Open Space Around Feeders
Clutter kills the escape plan. Clear landing zones of at least three feet around the feeder keep panic-flights from ending in a collision.
Skip stacked branches or leaning tools nearby—escape routes unobstructed and predator visibility wide matter more than décor. Open sightlines give you perfect viewing distances, too, so you catch the action without crowding it.
Calm Morning Activity Zones
Dawn belongs to the cautious feeder. Gentle dawn feeding thrives in morning quiet corners, 6 to 10 meters from foot traffic, where a bird feeding station stays hushed enough for real predator surveillance.
Soft light zones cut glare, so open sightlines stay sharp. These peaceful bird nooks reward smart feeder placement—calm early hours mean longer visits, steadier feeding, less wasted energy scanning for threats.
Window-Safe Spots Within Three Feet
Placing a feeder within 3 feet of glass isn’t a compromise—it’s a deliberate strategy that works with bird flight physics, not against them. At this distance, birds simply can’t build up enough speed to turn a startled flutter into a serious injury.
Within three feet of glass, birds fly too slow to build the speed a serious collision requires
Here’s what makes this close-range setup actually safe for your backyard visitors.
Short Flights Reduce Impact
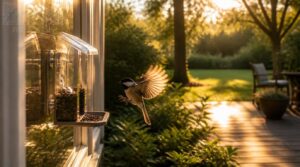
Physics favors you here. Placing feeders within 3 feet of glass keeps birds at low speed—takeoff energy hasn’t converted to cruising velocity yet, so strikes stay survivable.
- Slower launch = softer impact
- Mimics short-haul flight efficiency
- Helps smart feeder height optimization
- Builds safer bird approach lanes
- Aids predator surveillance near cover
Think local travel lightly: short hops, minimal damage, efficient routing built right into your yard.
Avoid Danger-zone Distances

The 3-to-10-foot range is the real threat zone—birds hit full cruising speed before recognizing glass. That’s your Safe Distance Buffer gap.
Place Feeders Safely Near Windows by staying within 3 feet or beyond 30 feet. Window Collision Avoidance also means checking 10 to 15 feet from trees, where launch trajectories intersect glass at dangerous velocity.
Add Closely Spaced Markers
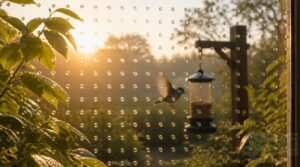
Once you’ve picked your safe zone, give the glass some visual teeth.
Marker spacing of 5 to 8 inches apart creates the visual cue density birds need to register glass as solid. Use weather-resistant decals rated for summer heat, mounted at bird eye-level.
Dense, consistent spacing beats a single sticker every time—birds read patterns, not isolated dots.
Reduce Glass Reflections

Markers only do half the job—glass itself needs to lie less.
Antireflective coatings cut external glare to roughly 1.3%, versus 8% on untreated panes. Etched glass diffusion scatters light instead of mirroring branches back at incoming birds.
Tinted glazing, polarized filters, and indirect lighting placement all help further. Even sheer diffusion screens soften that deceptive "open sky" look birds mistake for clear flight.
Keep Approaches Unobstructed
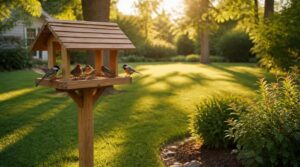
Close glass doesn’t mean cluttered glass. Keep a direct access route to the feeder—no shrubs, no brush pile, no dense cover blocking the final approach.
Predator-free approaches matter even at three feet: open landing areas and clear viewing angles let birds spot trouble before committing. Landing zone visibility beats proximity every time.
Feeding Stations Beyond Thirty Feet
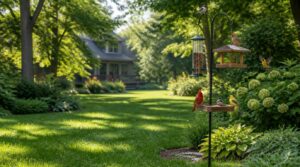
Thirty feet: that’s the distance where glass stops reading as a threat and starts reading as sky. Birds get the reaction time they need to spot a reflection and adjust course before impact. Here’s how to dial in feeder type and height once you’ve cleared that range.
Ample Collision Reaction Time
Thirty feet: that’s the magic number for reaction time. Beyond this distance, birds read glazing tint and reflections clearly, adjusting flight paths before commitment.
- Extended sightlines improve early hazard detection
- Unobstructed approaches support clear viewing angles
- Distance boosts landing zone visibility
- Fewer surprise reflections mean safer course corrections
That buffer zone turns a risky glance into ample collision reaction time—giving wings the room they need.
Hummingbird Feeders Four-to-six Feet
Sweet-feeding specialists have their own sweet spot: four to six feet, matching natural foraging height and quick predator retreat. Five feet suits most yards—easy refills, clear viewing angles, calm sightlines. Pair with morning sun, afternoon shade for nectar freshness.
| Height | Benefit | Note |
|---|---|---|
| 4 ft | Easy access | Ground risk |
| 5 ft | Balanced | Most common |
| 6 ft | Safer retreat | Harder reach |
Tube Feeders Five Feet
Five feet is the sweet spot for tube feeders—high enough to deter ground moisture, low enough for easy refills. Pick the right feeder height, then strengthen it:
- Metal ports resist chewing
- Predator guards block climbers
- Polycarbonate tubes show seed levels
Clean weekly, avoid predator and squirrel access, and balance trees, shrubs, and cover for sightlines.
Suet Feeders Five-to-seven Feet
Woodpeckers need real estate for support. Mount suet cages five to seven feet up, with a tail prop for bracing during feeding.
Squirrel-resistant mesh and weatherproof roofs keep cakes fresh; hinged fronts make easy cleaning access simple. Pick the right feeder height, match cage size to standard suet cakes, and fold cleaning into your regular feeder maintenance schedule.
Adjust Locations as Temperatures Change
Summer isn’t static, so your feeder map shouldn’t be either. When highs push past 30°C, shift it seasonally: relocate to Thermal Shade Placement near dense canopy, favor Heat-Resistant Feeders, and apply a Morning Cooling Strategy with early refills.
Combine Seasonal Height Adjustment with Elevated Airflow Zones for proper temperature regulation—that’s how smart bird feeder seasonal adjustments protect both food and flock.
Frequently Asked Questions (FAQs)
What is the 5 7 9 rule for bird feeders?
A single yard can host over a dozen bird species when placement follows this pattern. The 5-7-9 rule pairs feeder height, structural distance, and branch clearance: 5 feet up, 7 feet from structures, 9 feet below branches—cutting predator ambush odds by a lot.
Should you put out bird feeders in the summer?
Yes, put feeders out—natural food abundance doesn’t erase every gap. Choose shaded feeder placement, match locations to bird species, watch pest attraction risks, keep water sources filled, and stick to strict feeder hygiene to prevent spoilage and deter predators.
Where not to place a bird feeder outside?
Dodgy danger zones matter: skip dense shrubbery edges and predator ambush paths, overly shaded spots, pet zones, windows within 3–10 feet, and noisy equipment. These invite disease, ambush, and collisions—balance trees, shrubs, cover, sun, and shade instead.
Why should you sprinkle coffee grounds around your bird feeder?
A light dusting acts as a pest deterrent barrier—ants and slugs lose their scent trails. Keep grounds dry, perimeter-only, away from ports for effective natural pest control and modest soil enrichment boost, without risking mold inhibition failures.
How often should nectar feeders be cleaned in summer?
Heat hastens hazards for hummingbird feeders. Change nectar every 1–2 days above 90°F to stop fermentation. Watch for mold, cloudiness, or sour odors—when humidity climbs, clean sooner rather than sticking to a fixed schedule.
What signs indicate spoiled birdseed or suet?
Fuzzy mold, sour odor, or slimy texture on seed and suet signal spoilage fast. Watch for clumping, discoloration, or birds pecking hesitantly then abandoning the feeder—that hesitation often means the food’s gone bad.
How can I prevent rodents around feeder areas?
Install metal baffles on smooth poles, add a ground mesh skirt, and skip dense shrubs nearby. Clean spilled seed daily, use catch trays, and store extra feed in rodent-proof metal containers away from feeding stations.
Should platform feeders be mounted at a specific height?
Like a well-set table, platform feeders need the right height to work: mount them at an ideal height range of 5–6 feet for predator deterrence, easy refill convenience, and steady bird comfort.
How does regular cleaning reduce bird disease transmission?
Weekly scrubbing breaks the pathogen life cycle, strips protective biofilm, and prevents cross-contamination between visits.
Combine feeder sanitation with waste area cleanup and dedicated tools—your feeder hygiene routine, plus smart feeder relocation, keeps disease pressure low all summer.
Conclusion
Shade, sightlines, and smart spacing separate thriving feeders from abandoned ones. You don’t need a perfect yard—you need deliberate placement that respects heat, wind, and predator paths.
The best summer feeder locations reward patience: watch where birds actually land, not where you assume they should. Adjust as July turns to August. Small shifts in distance or shade can transform a quiet feeder into a bustling hub.
Get the fundamentals right, and the birds will find you.