This site is supported by our readers. We may earn a commission, at no cost to you, if you purchase through links.
A screw through bark seems harmless. It isn’t.
Trees heal wounds slowly, and every screw hole becomes an open door for insects and rot. That small birdhouse you’re excited to hang could end up costing the tree years of stress, or worse, a slow decline.
Here’s the good news: learning how to attach a bird house to a tree the right way takes just a few smart tools and a bit of patience. Wide straps, rubber padding, and the right mounting board protect bark while keeping your birdhouse steady through wind and weather. Grab your gear, and let’s get that birdhouse up safely.
Table Of Contents
- Key Takeaways
- Choose The Right Birdhouse
- Select a Safe Tree Location
- Gather Tree-Friendly Mounting Supplies
- Attach The Birdhouse Step-by-Step
- Maintain Birdhouse and Tree Safety
- Frequently Asked Questions (FAQs)
- How do you attach something to a tree without harming the tree?
- Can I screw a bird box to a tree?
- Can you drill a bird house into a tree?
- Can I mount a birdhouse on a pole instead?
- How often should I relocate the birdhouse?
- Whats the best time of year to install it?
- Will strapping a birdhouse harm the tree over time?
- Should I remove the birdhouse during winter months?
- Conclusion
Key Takeaways
- Skip nails and screws entirely, since drilling into bark opens the door to rot and pests that can slowly harm your tree.
- Use wide nylon straps with rubber padding to mount the birdhouse, spreading pressure evenly and letting the trunk keep growing safely.
- Hang the birdhouse 6 to 9 feet high, facing north or northeast, to keep predators guessing and shield it from sun and wind.
- Check your straps every 90 days and adjust for tree growth, since a little regular upkeep keeps both the birdhouse and tree healthy for years.
Choose The Right Birdhouse
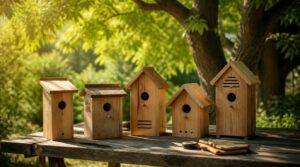
Before you grab a hammer, start with the birdhouse itself. Not every design is safe or comfortable for birds. Here’s what to look for.
For a deeper dive into entrance hole sizes, ventilation, and drainage, this step-by-step birdhouse building guide walks you through choosing a design that actually keeps birds safe.
Bird-Safe Wood Materials
Cedar is the best choice. It resists rot naturally, so your birdhouse skips harmful chemicals altogether.
- Choose cedar, redwood, or cypress
- Use untreated lumber only, never plywood
- Sand rough edges smooth
- Skip paint or varnish
- Source local, sustainable wood
Weathered wood actually feels softer over time. Why fight nature when it’s already doing the work? For guidance on selecting appropriate materials, refer to safe bird house materials.
Species-Specific Entrance Holes
Once your wood’s picked, the hole size decides who moves in. Entrance hole size matters more than most folks think.
| Species | Hole Size |
|---|---|
| Chickadee | 1.25" |
| Bluebird | 1.5" round or slit |
| Wren | 1" |
| Woodpecker | 1.5"+ |
Round holes invite sparrows. Slits favor bluebirds and add a predator-proof entrance naturally.
Ventilation and Drainage
Getting the hole size right means nothing if birds bake inside. Airflow management keeps the cavity livable.
- Add top vents near the roof for warm air escape
- Cut a bottom drain hole for moisture control
- Space vents 2-3mm to avoid drafts
Good vent placement and drainage design prevent condensation buildup, keeping nestlings dry and comfortable all season.
Removable Cleaning Panel
Airflow keeps nestlings comfy, but sooner or later, you’ll need to get inside and scrub.
Look for a removable cleaning panel with a sealing gasket and low-friction slide. It should pop out tool-free, open a real cleaning chamber, and ideally sit above a small debris tray. Choose durable, UV-treated plastic or metal. It’ll outlast cheap panels through years of regular checks and birdhouse maintenance.
Perch-Free Design
Skip any birdhouse with a little wooden perch out front. That ledge looks charming, but it’s really a welcome mat for squirrels and other climbers.
For sturdier protection, mount a predator-resistant robin birdhouse on a wall or eave instead, well away from tree trunks and jumpable branches.
Go with a no perch design instead. A smooth interior gives predators nothing to grip, and proper entrance sizing keeps out anything bigger than your target bird. Add a weather-resistant finish, and you’ve got a solid predator deterrent built right in.
Select a Safe Tree Location
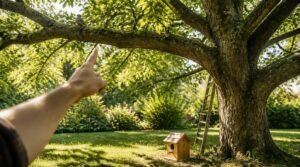
Not every tree makes a good home for a birdhouse. The right spot keeps your birds safe and your tree healthy for years to come. Here’s what to look for before you pick a place.
Healthy Mature Tree
Not every tree makes a good host. Pick one with trunk stability, dense crown, and steady growth vigor.
Look for full, even foliage and no dead limbs up top. Bark should be intact, roots strong, with no girdling. Skip trees showing decay, cracks, or fungal growth. A healthy oak or maple, at least 4 inches thick, gives your birdhouse a solid, lasting home.
Recommended Mounting Height
Six to nine feet works for most nest boxes. That range keeps predators guessing while still giving you view clarity for quick check-ins.
Snow country? Push up to nine or eleven feet for snow clearance. Just remember the recommended minimum height is 5 feet, with room for tree growth accommodation as your trunk thickens over the years.
Entrance Hole Direction
Which way should the hole face? Aim for north or northeast, away from harsh sun and wind.
- Blocks direct afternoon heat
- Cuts prevailing wind exposure
- Angles rain away from the nest
- Aligns with natural flight paths
- Keeps entrance shaded but visible
A slight downward tilt sheds rain fast, keeping nesting material dry through summer storms.
Nearby Protective Cover
Rain and sun beat down harder than you’d think. Pick a shaded area shielded from wind direction, with a small overhang or nearby branch cover.
A weatherproof cover design with ventilated cover material stops mold while blocking storms. For a predator barrier cover, choose a removable seasonal cover with trunk-compatible cover fit—snug, breathable, and easy to pull off for cleaning without harming tree health.
Feeder and Bath Distance
Too close, and you’ll spook the very birds you’re hosting. Keep feeders and baths 10 meters from the nest, on opposite tree sides.
- Reduces nest disturbance during feeding
- Improves visibility safety for approaching birds
- Helps hygiene maintenance near the brood
- Allows seasonal distance adjustments as needs shift
- Protects tree health through noninvasive installation
Gather Tree-Friendly Mounting Supplies
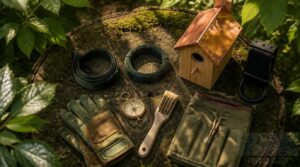
You’ve picked the spot. Now it’s time to grab the right gear. Here’s what you’ll need before you head out to that tree.
Wide Nylon Tree Straps
Skip nylon rope. Grab wide nylon tree straps instead, at least 2 inches across, so weight spreads out instead of digging in.
Look for tensile strength built to handle -20°C to 60°C without fading or fraying. Choose adjustable tree straps that fit trunks from young saplings to old oaks, and pair them with tree-friendly hardware and mounting brackets for a secure, bark-safe hold.
Protective Rubber Padding
Straps alone aren’t enough. Add rubber padding, or slide on rubber hose sections, wherever the strap touches bark.
Padding matters because it:
- Cushions bark from compression
- Cuts vibration on windy days
- Spreads weight evenly
- Grips rough bark without marring
- Allows easy reattachment later
This small step protects the tree and keeps your mounting system tree-friendly for years.
Corrosion-Resistant Hardware
Screws and bolts matter as much as straps. Choose stainless steel screws (316 grade) or hot-dip galvanized options for true rustproof hardware.
Zinc nickel coatings work well for smaller fasteners. Aluminum alloy brackets stay lightweight yet strong.
Why fuss over metal? Cheap screws corrode, weaken, and fail. Quality corrosion-resistant hardware keeps your tree-friendly fastening solid for years, not seasons.
Birdhouse Mounting Board
Good hardware needs a good board to grip. Pick cedar for a mounting board, since it resists rot for 5-7 years outdoors.
Go 3/4 inch thick for rigidity, or 1 inch if wind hits hard. Round the edges, drill mounting holes, and seal with water-based sealant. Choose a cleat-style board for quick removal off straps.
Ladder and Safety Gear
Before you climb, gear up right. Use a ladder safety gear with fall protection gear, plus a helmet, gloves, and non-slip shoes.
Add ladder stabilization devices for uneven ground near the tree. Tie off with fall protection accessories at a rated anchor point.
Check rungs and locks before mounting. Regular checks keep every climb safe.
Attach The Birdhouse Step-by-Step
You’ve got your supplies ready. Now comes the fun part. Follow these five steps to get that birdhouse mounted safe and sound.
Clean and Inspect Birdhouse
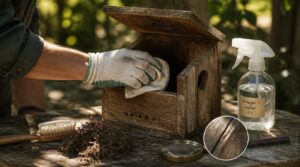
Before you mount anything, give that birdhouse a once-over. Pull out old nest material, then wipe it down with a vinegar-water solution (1 part vinegar to 9 parts water).
Check ventilation holes and drainage holes for blockages. Let it dry 24 hours in the shade. Inspect the wood for rot or loose joints—this keeps its structural integrity solid before tree-friendly fastening begins.
Secure The Mounting Board
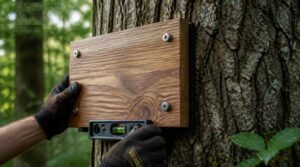
With the birdhouse clean and dry, it’s time to build a solid base. Cut a rot-resistant mounting board, at least 1 inch thick, and seal it with weather-resistant sealant. Add rubber padding for bark protection.
Trunk mounting works best for stability. Use corrosion-resistant hardware to attach the board, keeping it level and properly aligned before strapping begins.
Wrap Straps Around Trunk
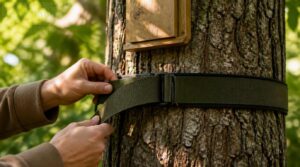
Now for the trunk. Loop your wide nylon straps around a healthy section, above ground moisture, snug against the mounting board.
This tree-friendly fastening skips nails entirely, protecting long-term tree health. Rubber padding sits between strap and bark every time.
Even tension matters. Pull smooth and gradual, leaving slack for growth. You’ll adjust this later during quarterly strap checks.
Level and Tighten Birdhouse
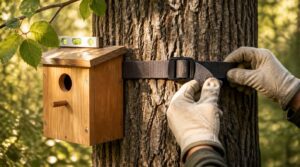
A crooked birdhouse bugs birds more than you’d think.
A crooked birdhouse bothers birds more than most people ever realize
Check level before you tighten. Ensuring horizontal alignment now saves headaches later.
- Tighten straps evenly, alternating sides
- Test for movement with a gentle shake
- Re-torque after 24 hours as straps settle
Snug beats crushing. Use tree-friendly hardware and stop once it holds firm without denting bark.
Test Stability and Clearance
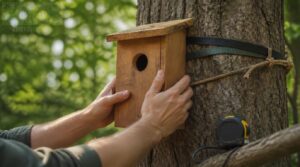
Give it a good shake. Real wind load testing means grabbing the house and pushing gently in several directions.
Check strap tension—less than 1/4 inch shift is your target. Measure entrance clearance (6 inches) and vertical clearance below the hole (18 inches).
Confirm the flight path stays open. Loose or crowded? Adjust before you climb down.
Maintain Birdhouse and Tree Safety
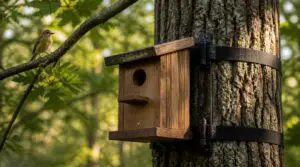
Hanging the birdhouse is only half the job. Trees grow, seasons change, and predators get creative, so a little upkeep goes a long way. Here’s what to check on a regular basis to keep both your birdhouse and your tree happy.
Avoid Nails and Screws
Skip the hardware store hammer. Nails and screws punch holes straight through bark, letting disease and pests sneak in.
Stick with nylon rope or wide straps instead. Slide rubber hose sections over the rope for bark protection, add a mounting board, and use corrosion-free hardware. Skip zip ties alone; they bite in fast.
Adjust Straps Quarterly
Trees grow, and straps need to grow with them. Every 90 days, check your strap tension adjustment for signs of a seasonal tree growth spurt.
Loosen straps, slide the birdhouse, and check for bark irritation. Inspect for wear, then retighten with a small gap. If you used zip ties anywhere, check the zip ties regularly too.
Install Predator Protection
Raccoons and snakes are patient climbers, so a predator baffle installation below the birdhouse stops them cold.
Add an entrance hole guard or deterrent mesh with quarter-inch openings for extra defense.
- Use galvanized chain for tree-friendly hardware
- Keep 6-8 inches of branch clearance
- Choose non-toxic, ethical protection design
- Do regular guard inspection every few months
Never let a guard trap birds inside. Wear safety gear when reaching high branches.
Clean After Nesting Season
With guards installed, autumn cleaning keeps the box healthy year-round. Once fledglings leave, remove old nesting with a gloved hand or brush. Scrub the interior with mild soap, rinse well, and dry completely to stop mold. Wipe droppings with a bleach solution (1:10). Dispose of nest waste away from the tree, and sanitize your tools before storing them.
Check Rot and Damage
A weathered birdhouse tells a story, if you know how to read it. Press the wood with your thumb near the entrance and roof seams. Soft spots, dark stains, or crumbly edges mean active rot.
Check the tree too, look for girdling from old straps. Swap worn tree-friendly hardware, and replace any section that’s more than a quarter compromised.
Frequently Asked Questions (FAQs)
How do you attach something to a tree without harming the tree?
Padding, padding, padding—that’s the secret. Use wide straps with rubber padding instead of nails or wire. Distribute weight evenly, mount on the trunk, and check tension seasonally so bark can breathe and grow.
Can I screw a bird box to a tree?
Yes, but use corrosion-resistant fasteners and pre-drilled pilot holes. Loosen screws yearly for tree growth accommodation, and skip nails entirely if the trunk shows decay or major damage.
Can you drill a bird house into a tree?
A tree is like living skin, not a wall stud. Skip the drill. Drilling risks tree health, inviting disease. Instead, use tree-friendly fastening like adjustable straps or a mounting board, keeping the trunk untouched and healthy for years.
Can I mount a birdhouse on a pole instead?
Choose a sturdy pole instead, set 6 to 8 feet high with a mounting bracket, predator baffle, and clear ground access. This tree-adjacent option skips tree-friendly fastening altogether and makes birdhouse installation simpler.
How often should I relocate the birdhouse?
Nobody’s out there moving houses every weekend just to feel productive, so relax. Relocate every 1 to 3 years, only after fledging, ideally late summer to protect nesting birds and tree health.
Whats the best time of year to install it?
Aim for late winter to early spring, about 4 to 6 weeks before nesting season starts. Cooler weather means less wildlife disturbance, dry soil for footing, and time for hardware to settle before birds move in.
Will strapping a birdhouse harm the tree over time?
Only if you set it and forget it. Wide nylon straps with padding won’t harm the tree, but skipping quarterly checks lets bark get pinched. Loosen straps as the trunk grows, and moisture won’t stand a chance either.
Should I remove the birdhouse during winter months?
Not necessarily. In harsh climates, leaving it up offers winter roosting shelter from cold and wind. Just clean it out each fall and check that snow hasn’t blocked the entrance.
Conclusion
Funny thing: the same straps that spare tree bark also spare you a ladder trip every spring, since nothing rusts or snaps loose.
That’s the real payoff of learning how to attach a bird house to a tree the right way.
Your tree keeps growing strong. Your birds keep coming back.
Check those straps each season, and this small wooden box becomes a lasting home, not a wound waiting to happen.